Wiring continues! Most of the time it takes is making sure that the routing will work for the circuits concerned, keeping it tidy and labelling the wires. Hopefully I’ll be finishing the landing lights, nav lights and pitot circuits if my delivery of wire arrives today. but most of its done now.
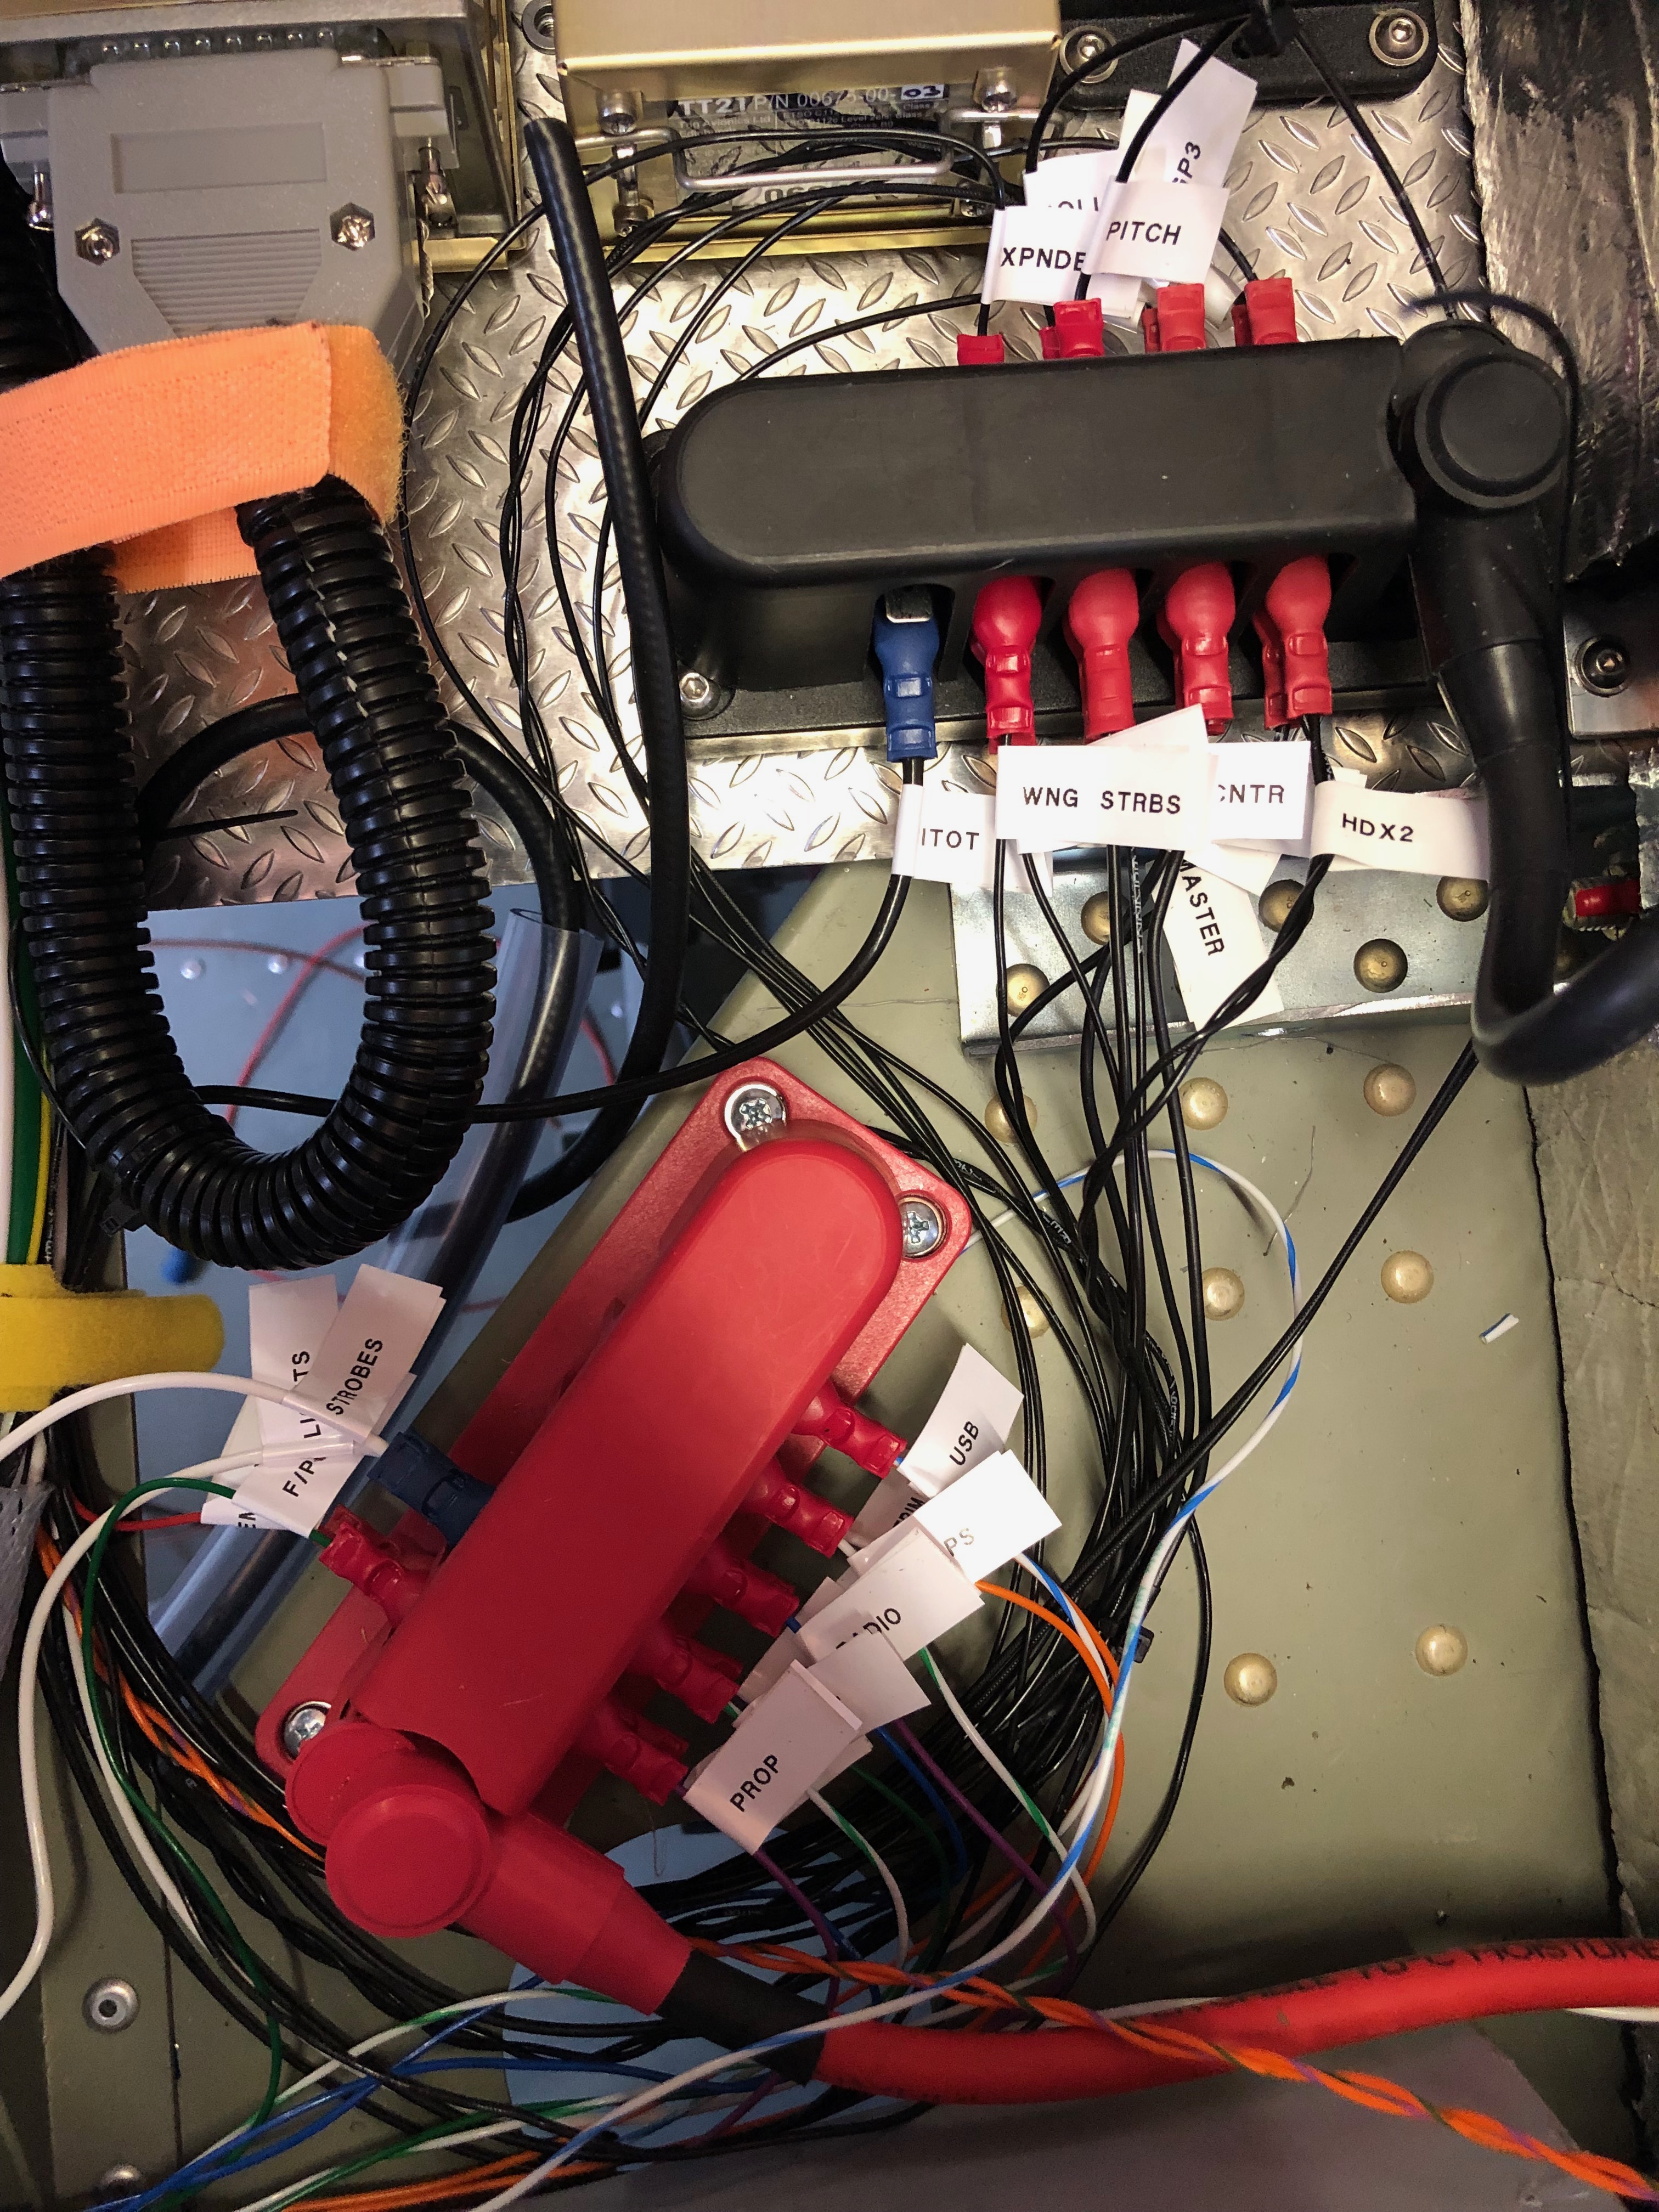
The documentation that came with the Rotax engines didn’t have the information on the soft start module. Luckily I’ve found some information on a web site that gives me the information that I needed. Unfortunately I haven’t received the wire that I’d ordered so I diverted on other tasks.I I’ve had a proactive day, completing all the tasks that I’d set myself. The lack of photos is because there’s only so many pictures of wires you can take!The power and ground distribution units are filling up nicely! and all the switches apart from the Alternator switch have been wire. Work resumes on Monday after a day instructing tomorrow and a rest day Sunday!
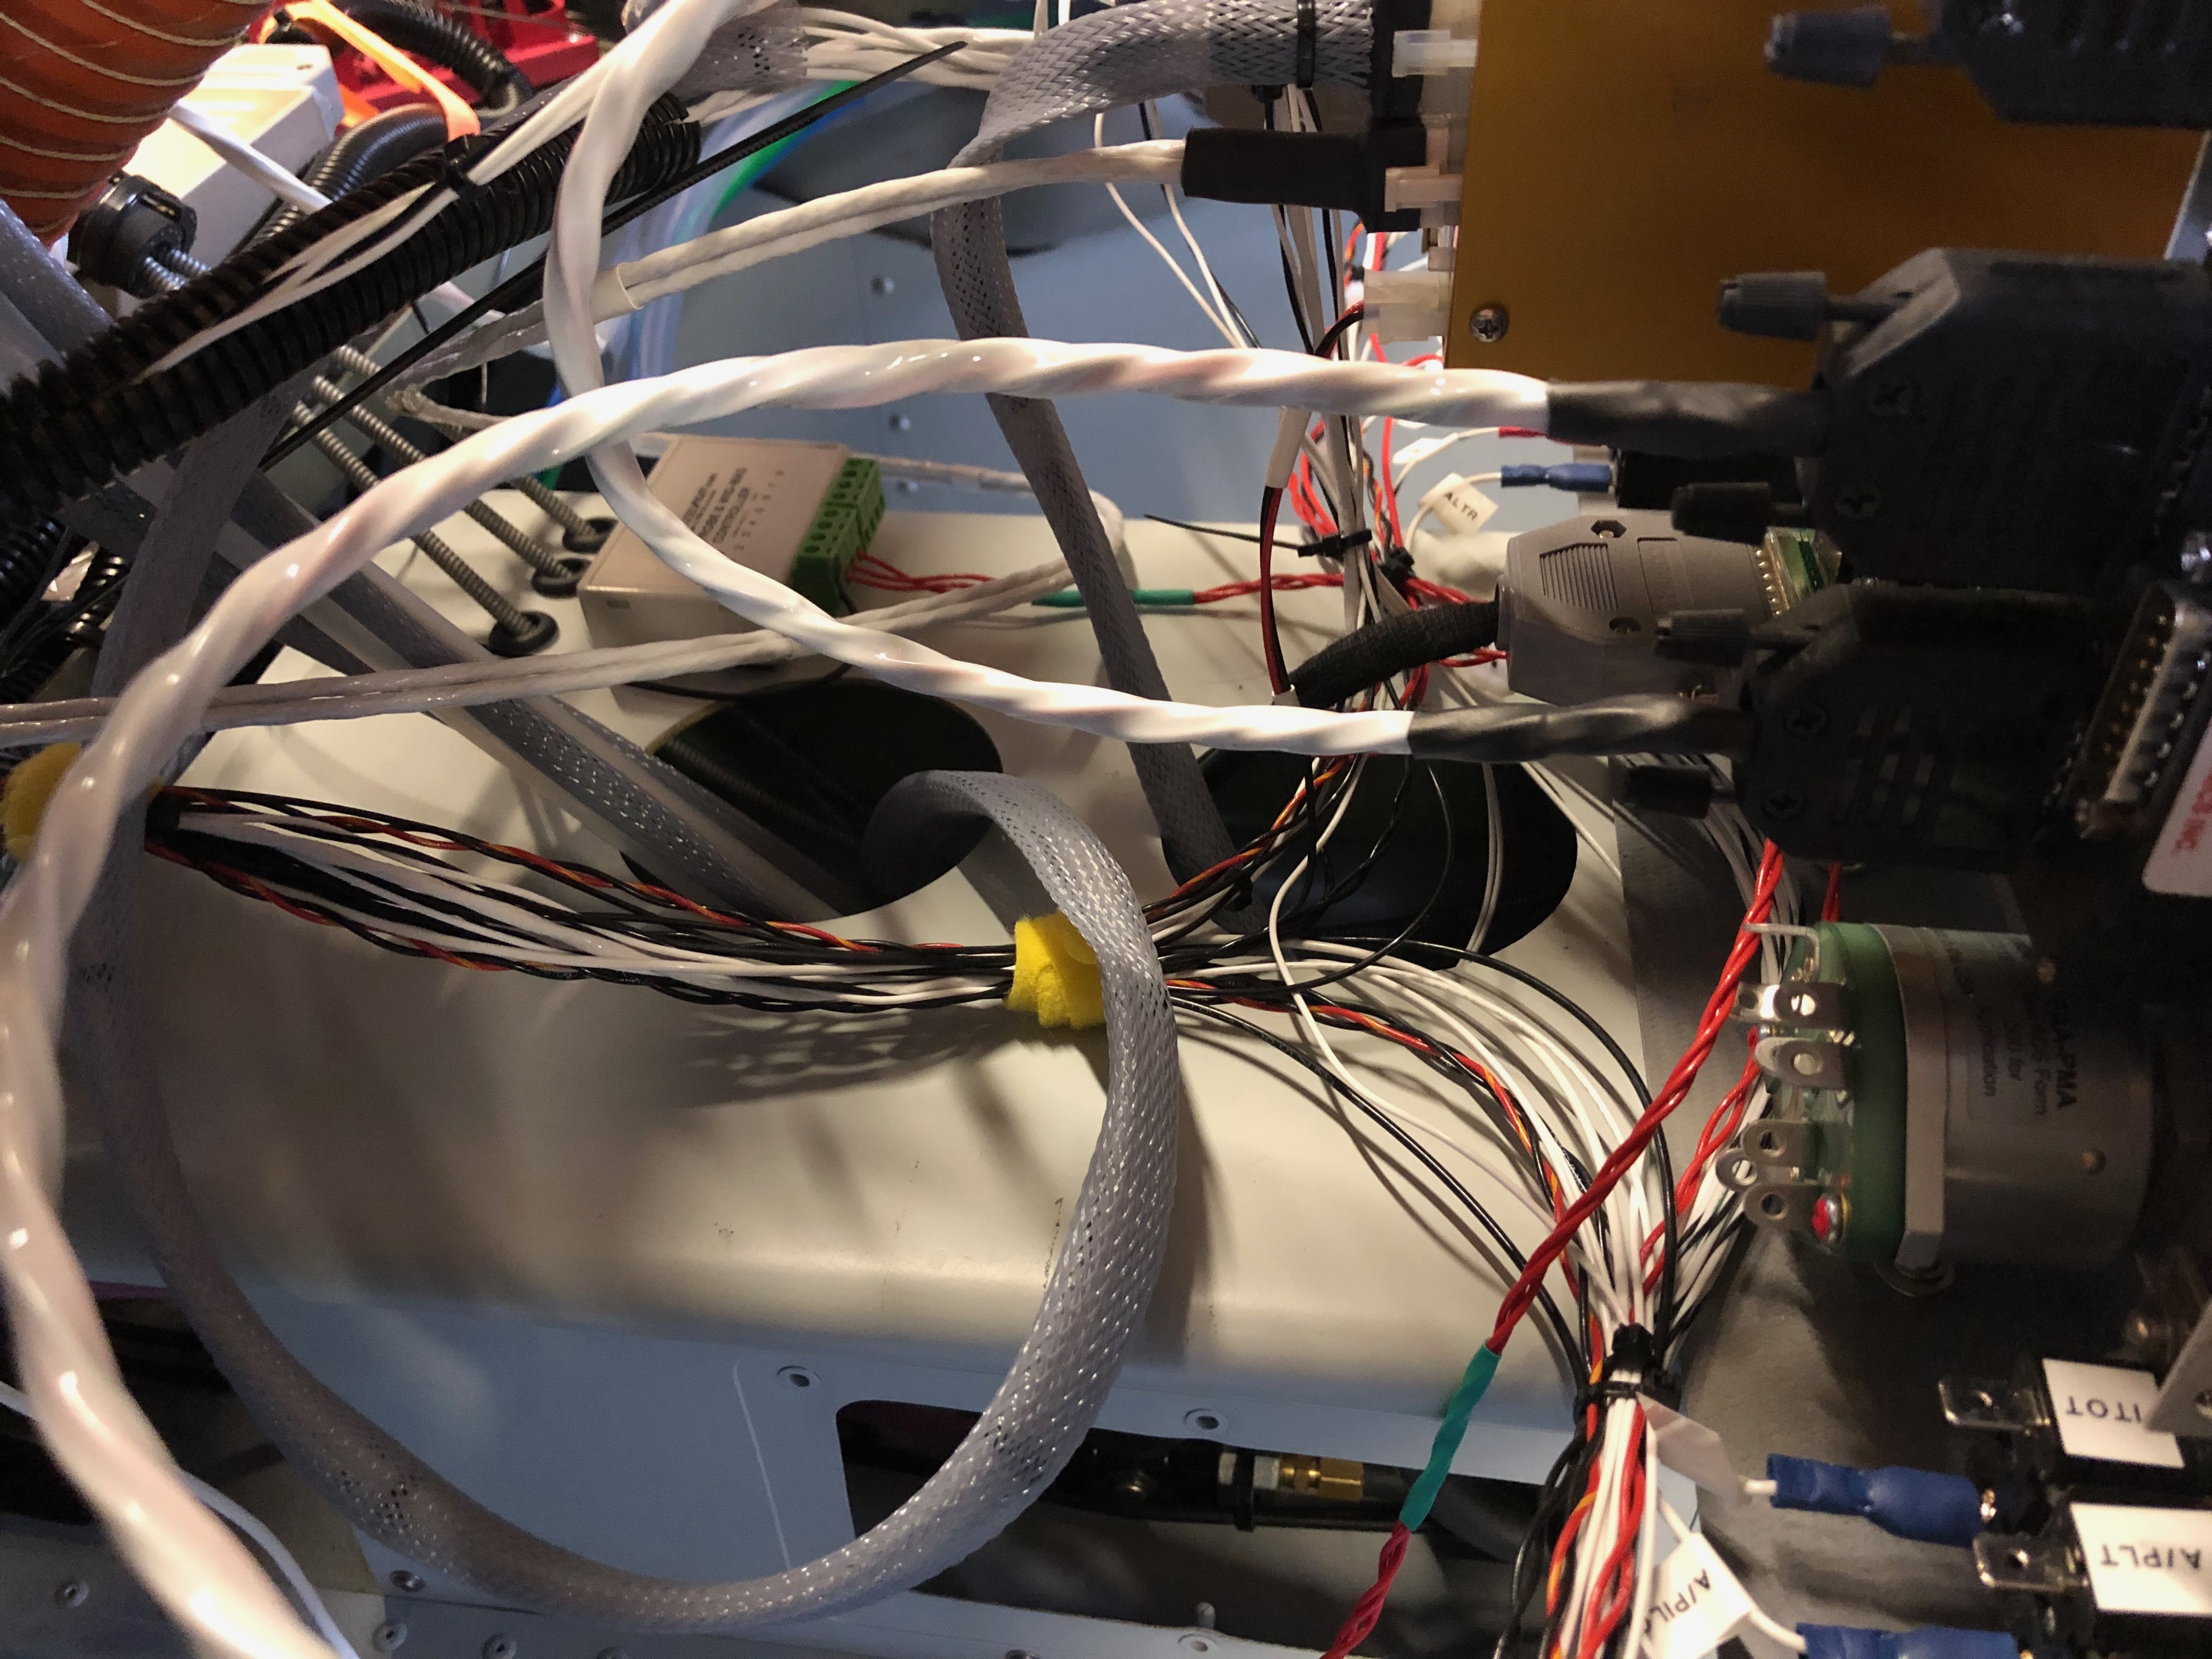
Work continues on the wiring today (and no doubt for a few days more but got quite a lot done today having completed the Master, Fuel Pump, HDX 1, & 2, G5 and Radio circuits.
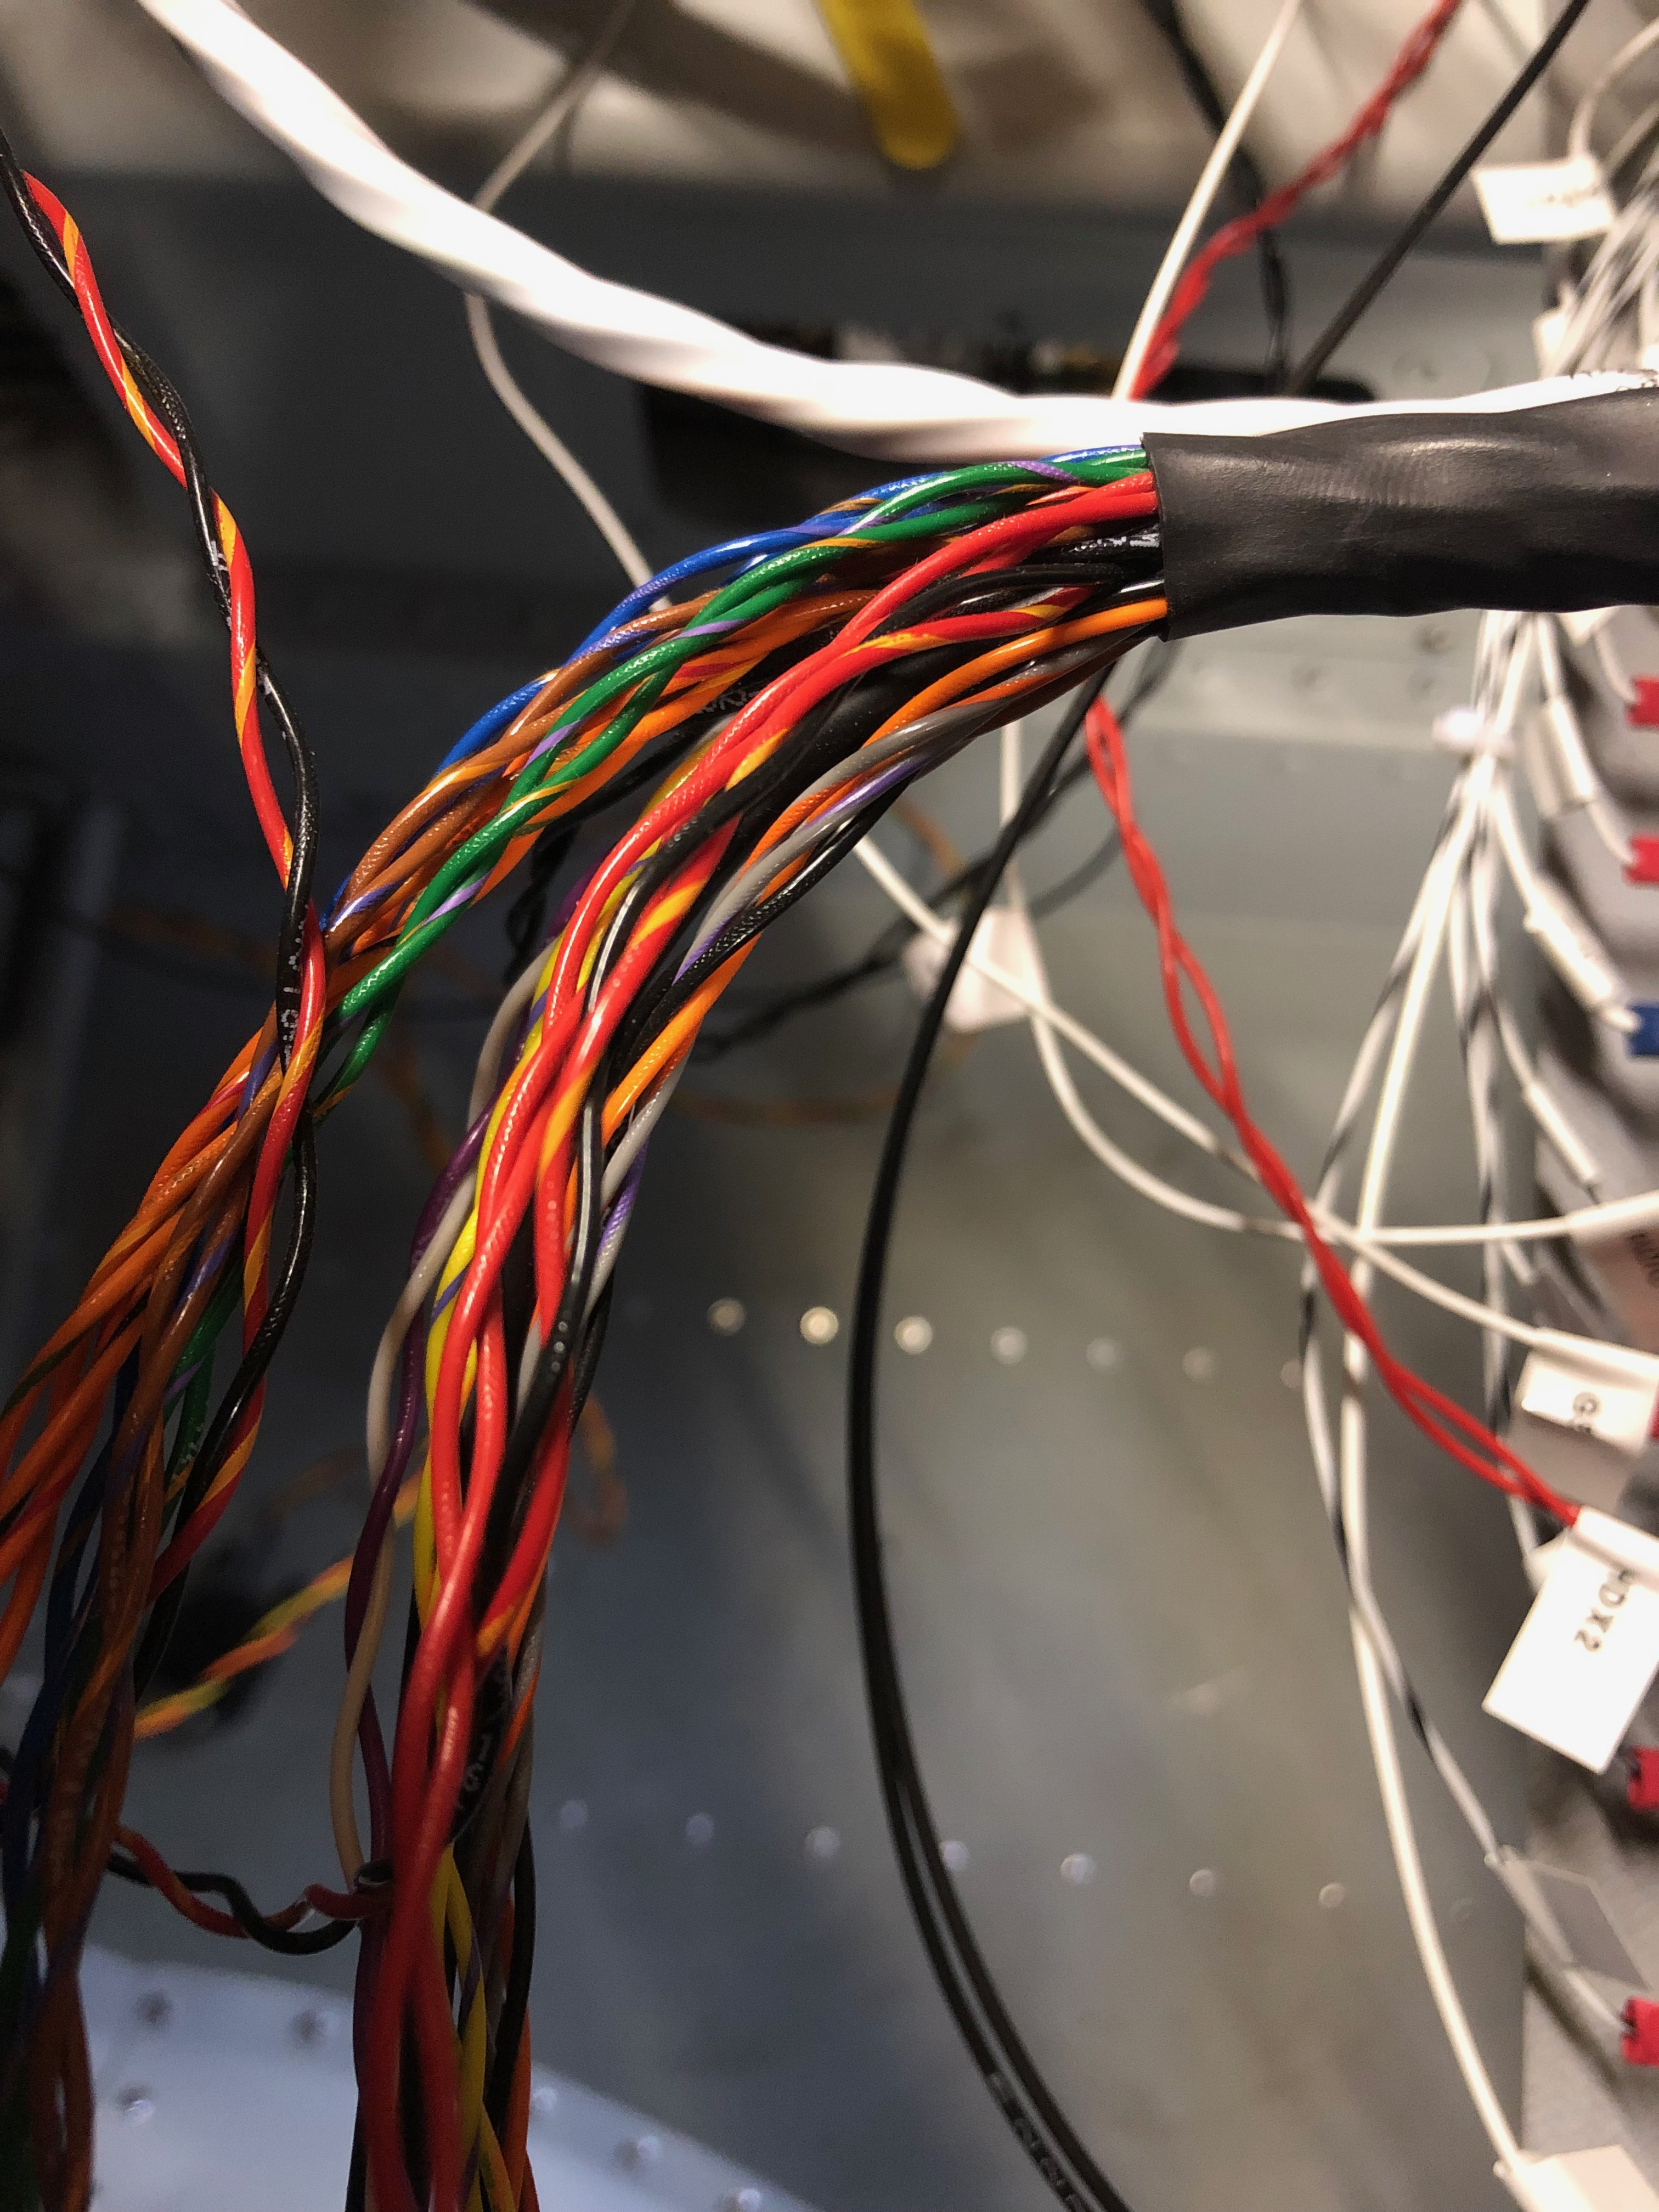
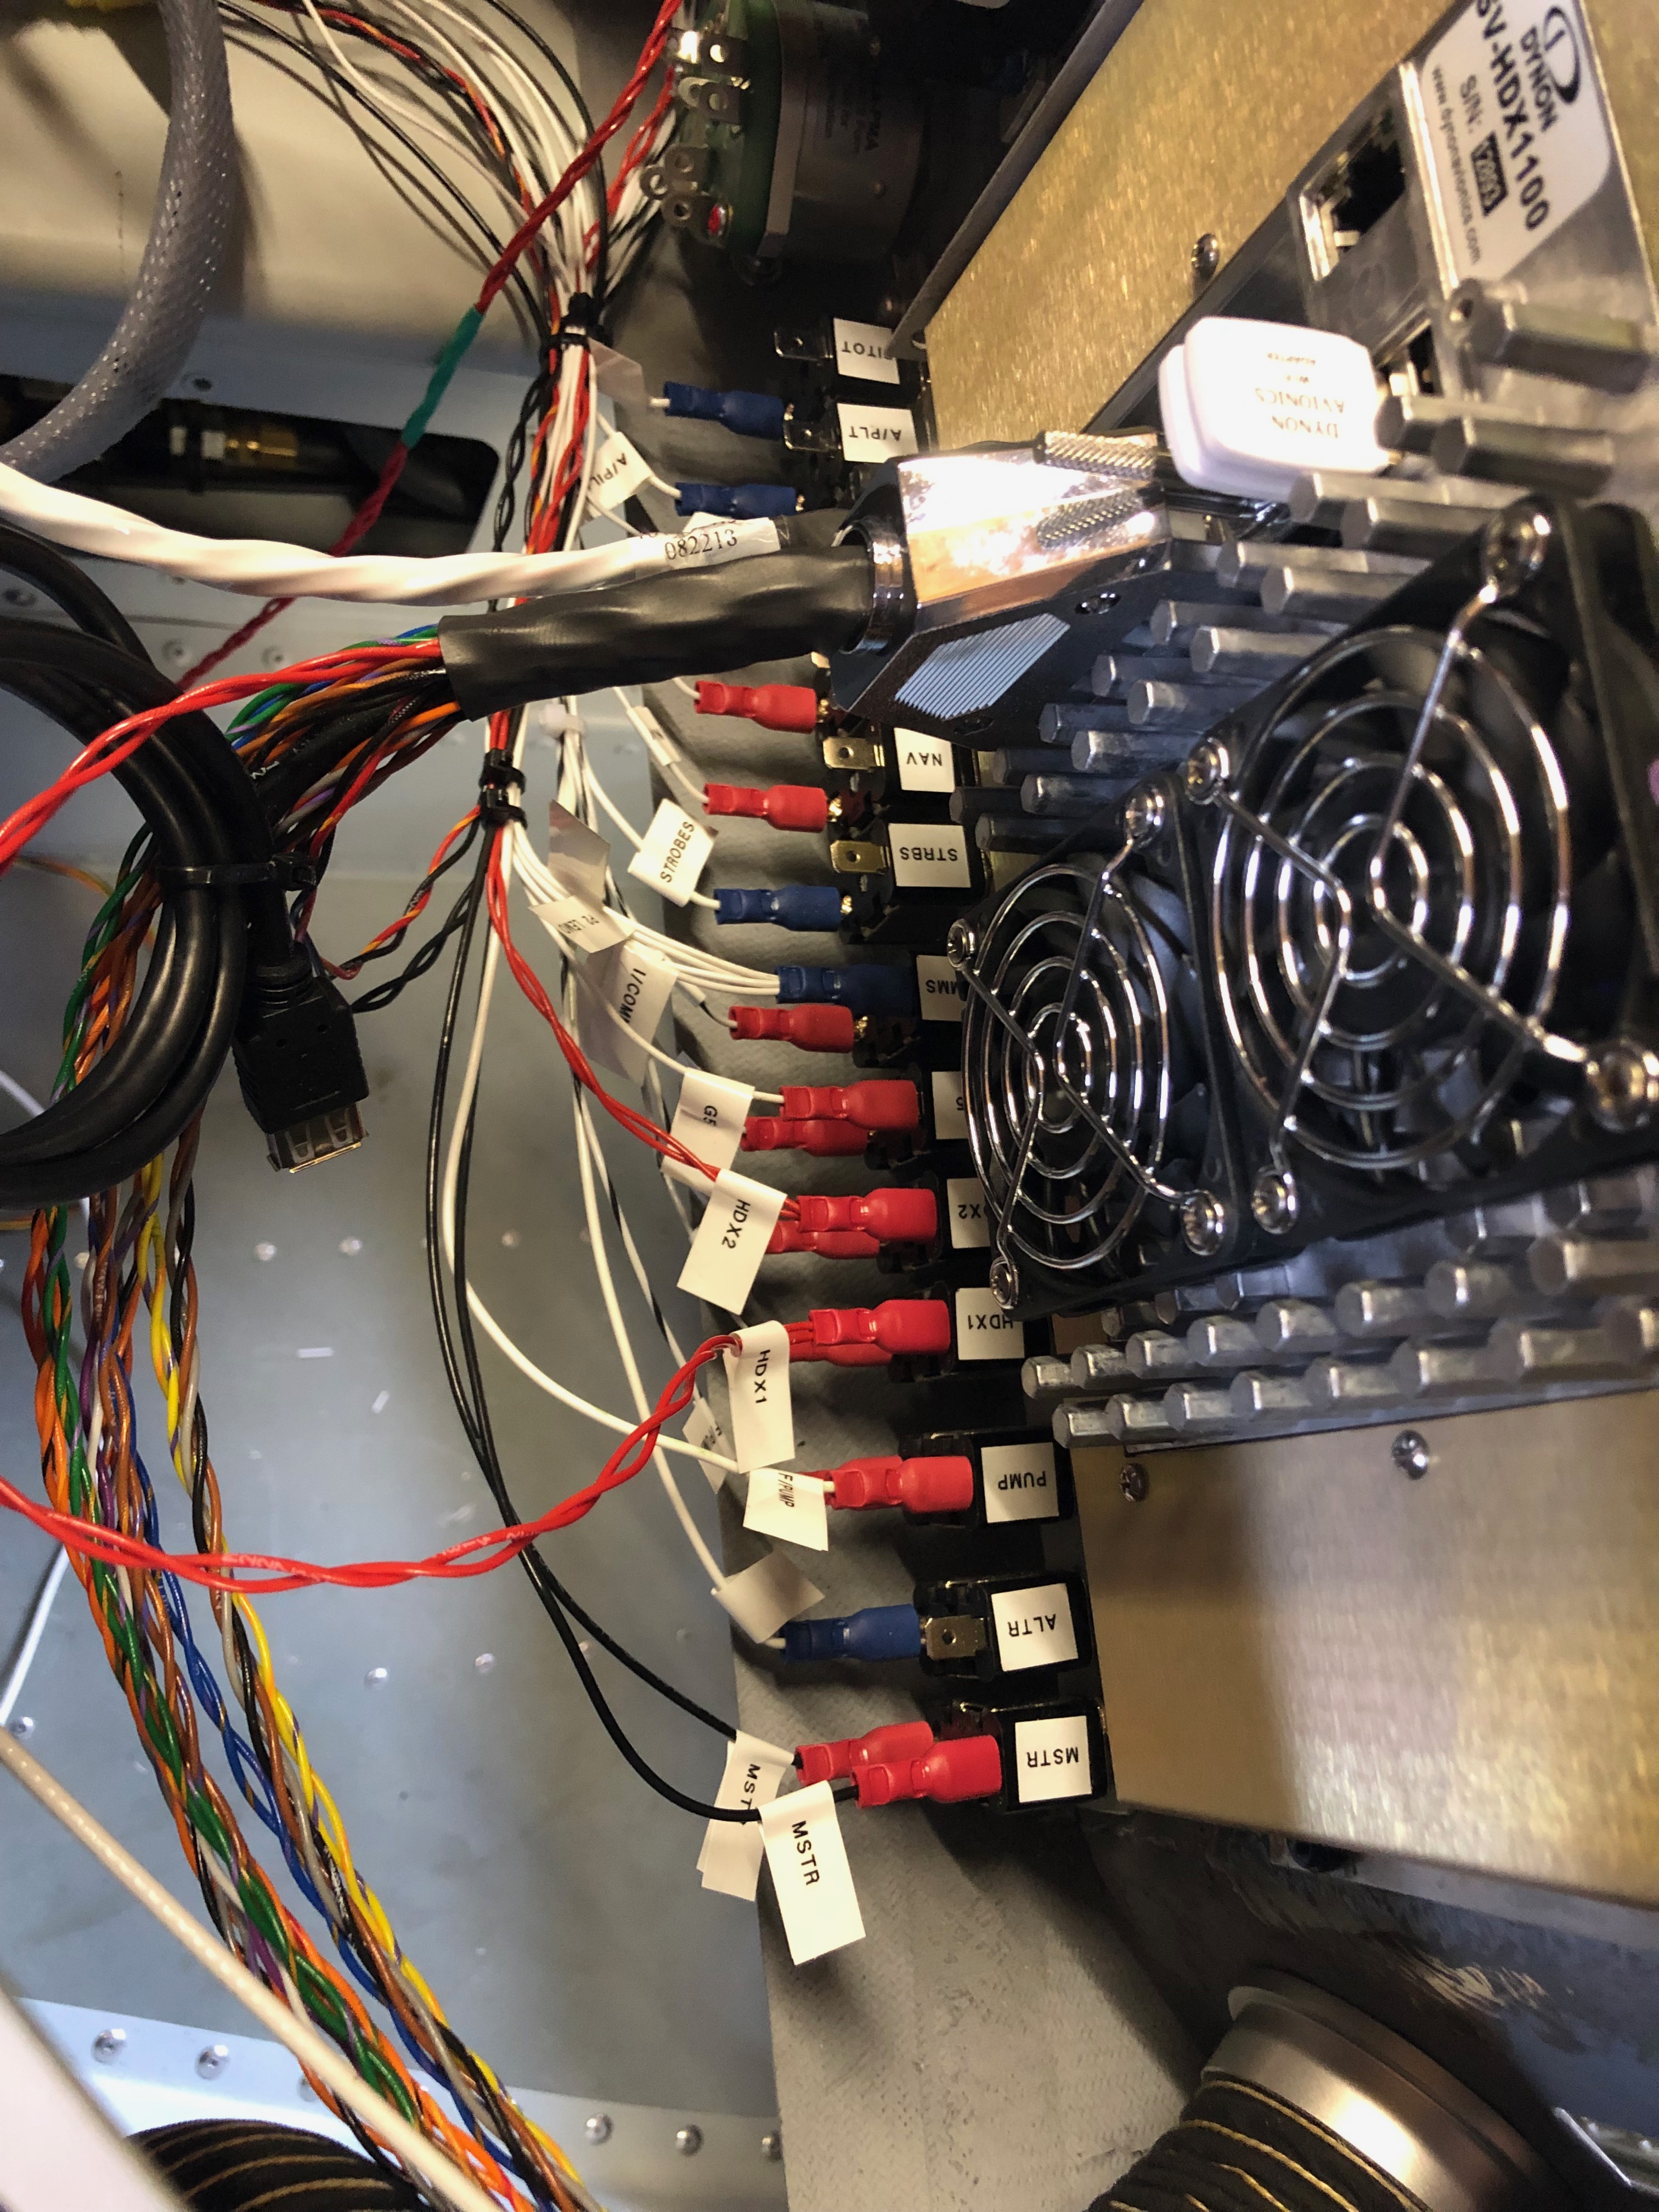
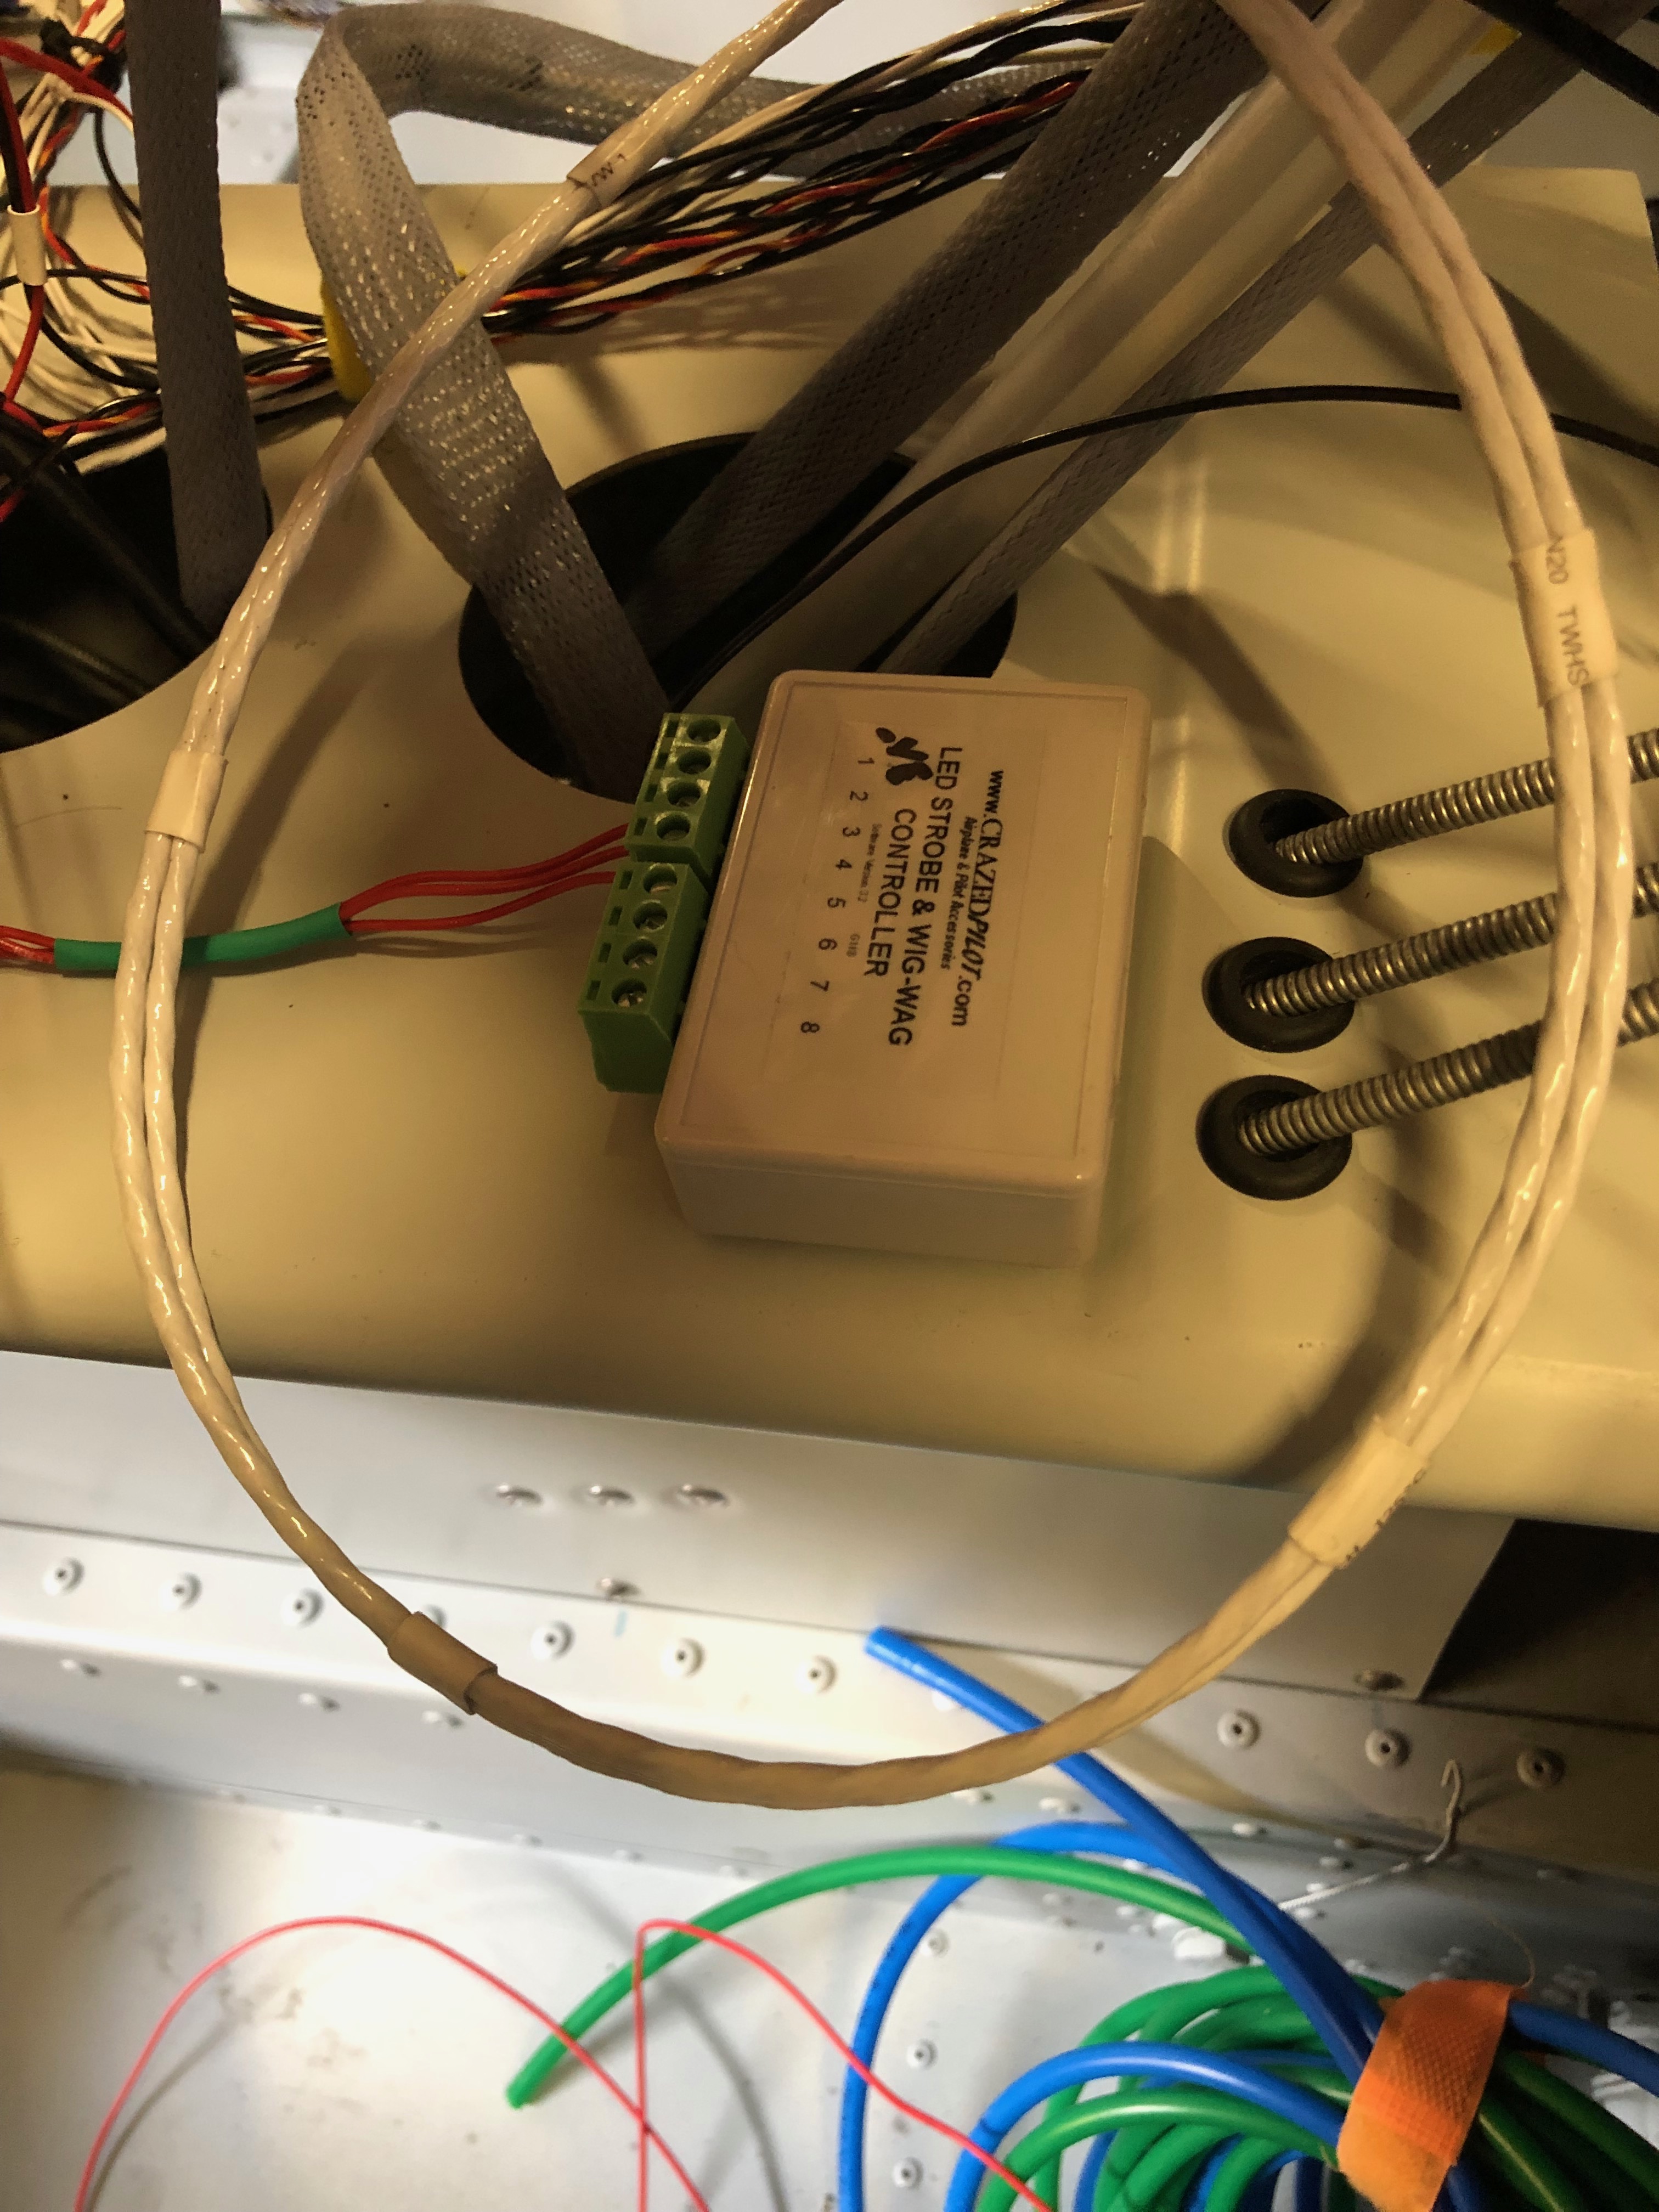
This is the loom for just one of the SkyView HDX screens. It looks intimidating on first looks but they all do something and you just have to work out where they go!The difficult bit was designing the electrical circuit to power all the devices. As I’d fitted the circuit breakers and switches and fitted the interconnecting wires it makes it quite easy to complete the circuit. It’s getting quite busy…so I’m starting to arrange the wire bundles in an orderly fashion as planned.This is the Wig / Wag controller that I bought from the states to give better visibility whilst flying. It allows the landing lights to be steady, flash alternately or flash like a strobe. Just hope it works as promoted!
Today I completed the installation of the right wing landing lights and strobe light and as it was quite warm today I decided to seal the canopy plexiglass with the silicone sealer.
The landing lights covers have to be a flush fit so countersunk M4 rivnuts are used to facilitate this.
When installing the rivnut it’s important to ensure that it’s not installed at an angle.
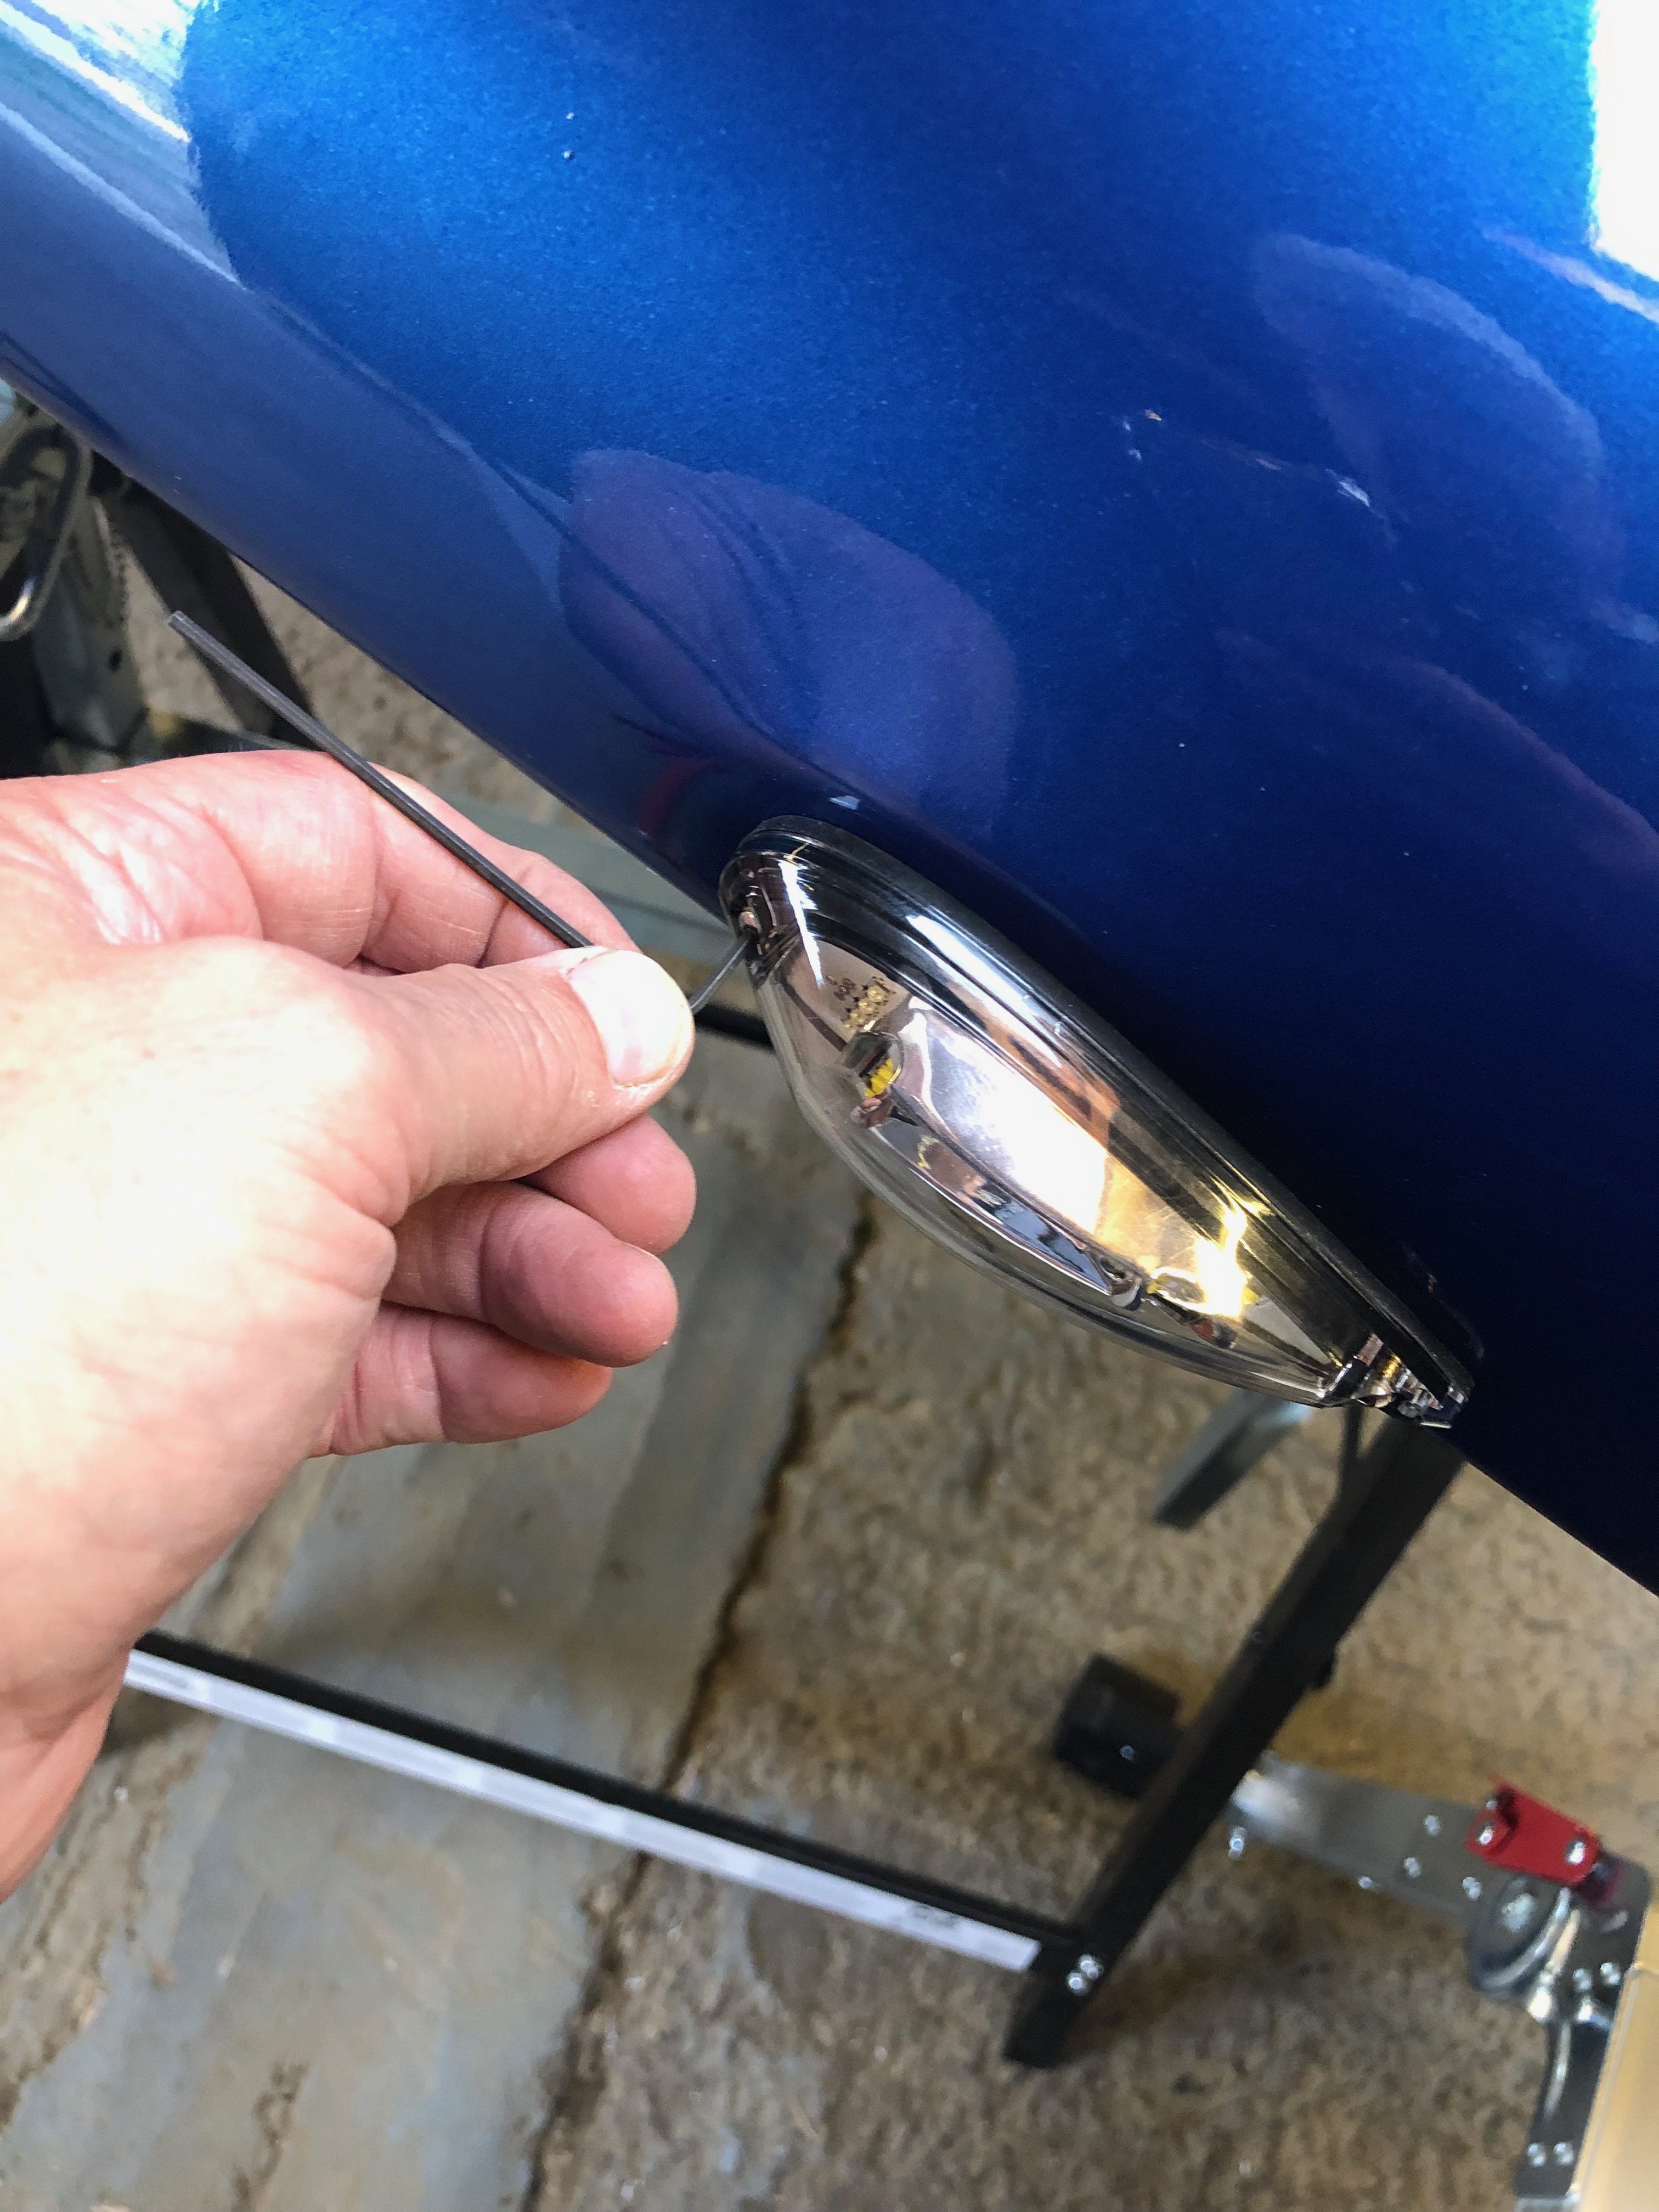
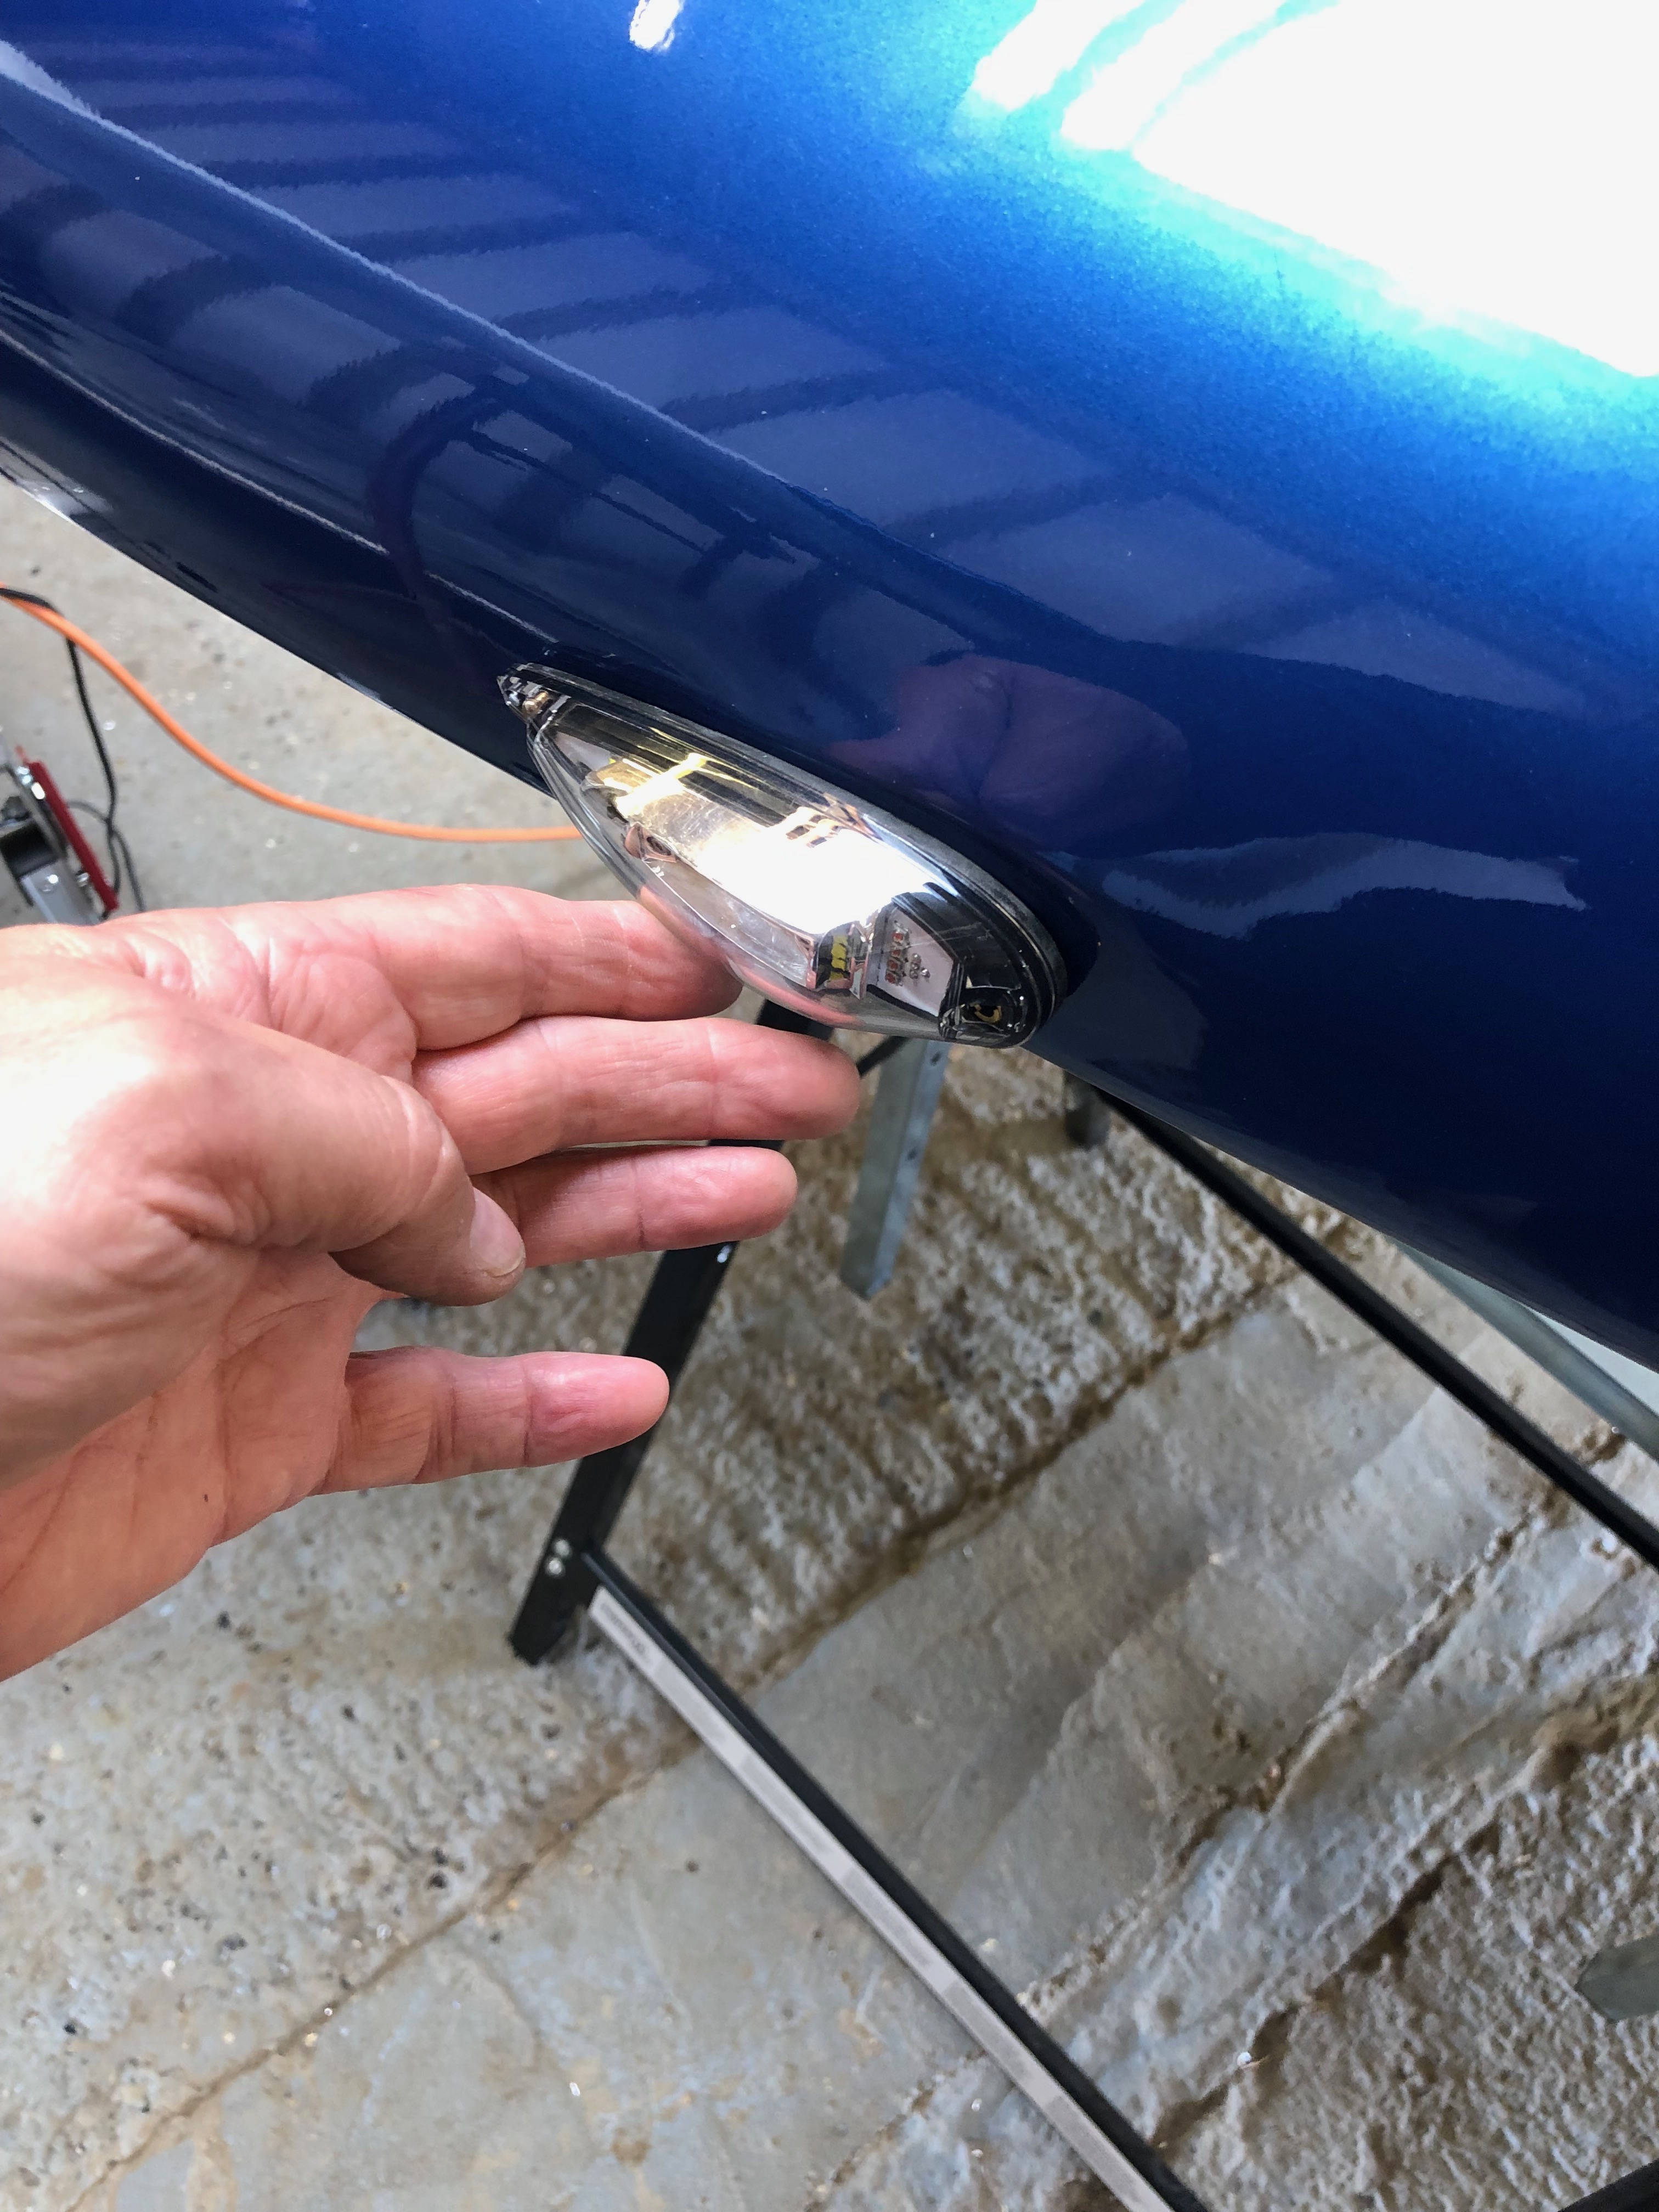
The starboard landing light and cover complete.
As it’s been a warm day I thought it would be a good time to seal the plexiglass. It has already had a first fit at the factory but needs sealing with silicone before it can be used in service.
The channel is filled in a similar way to sealing around a bath!
Once the channel is filled it needs to be smoothed. It’s suggested that the back of a spoon is used. If pressed hard enough it will leave two lines either side of the filled channel. This allows the waste material to be removed when it’s set in a couple of days.
The finished canopy. The waste material will be removed on Monday or Tuesday.
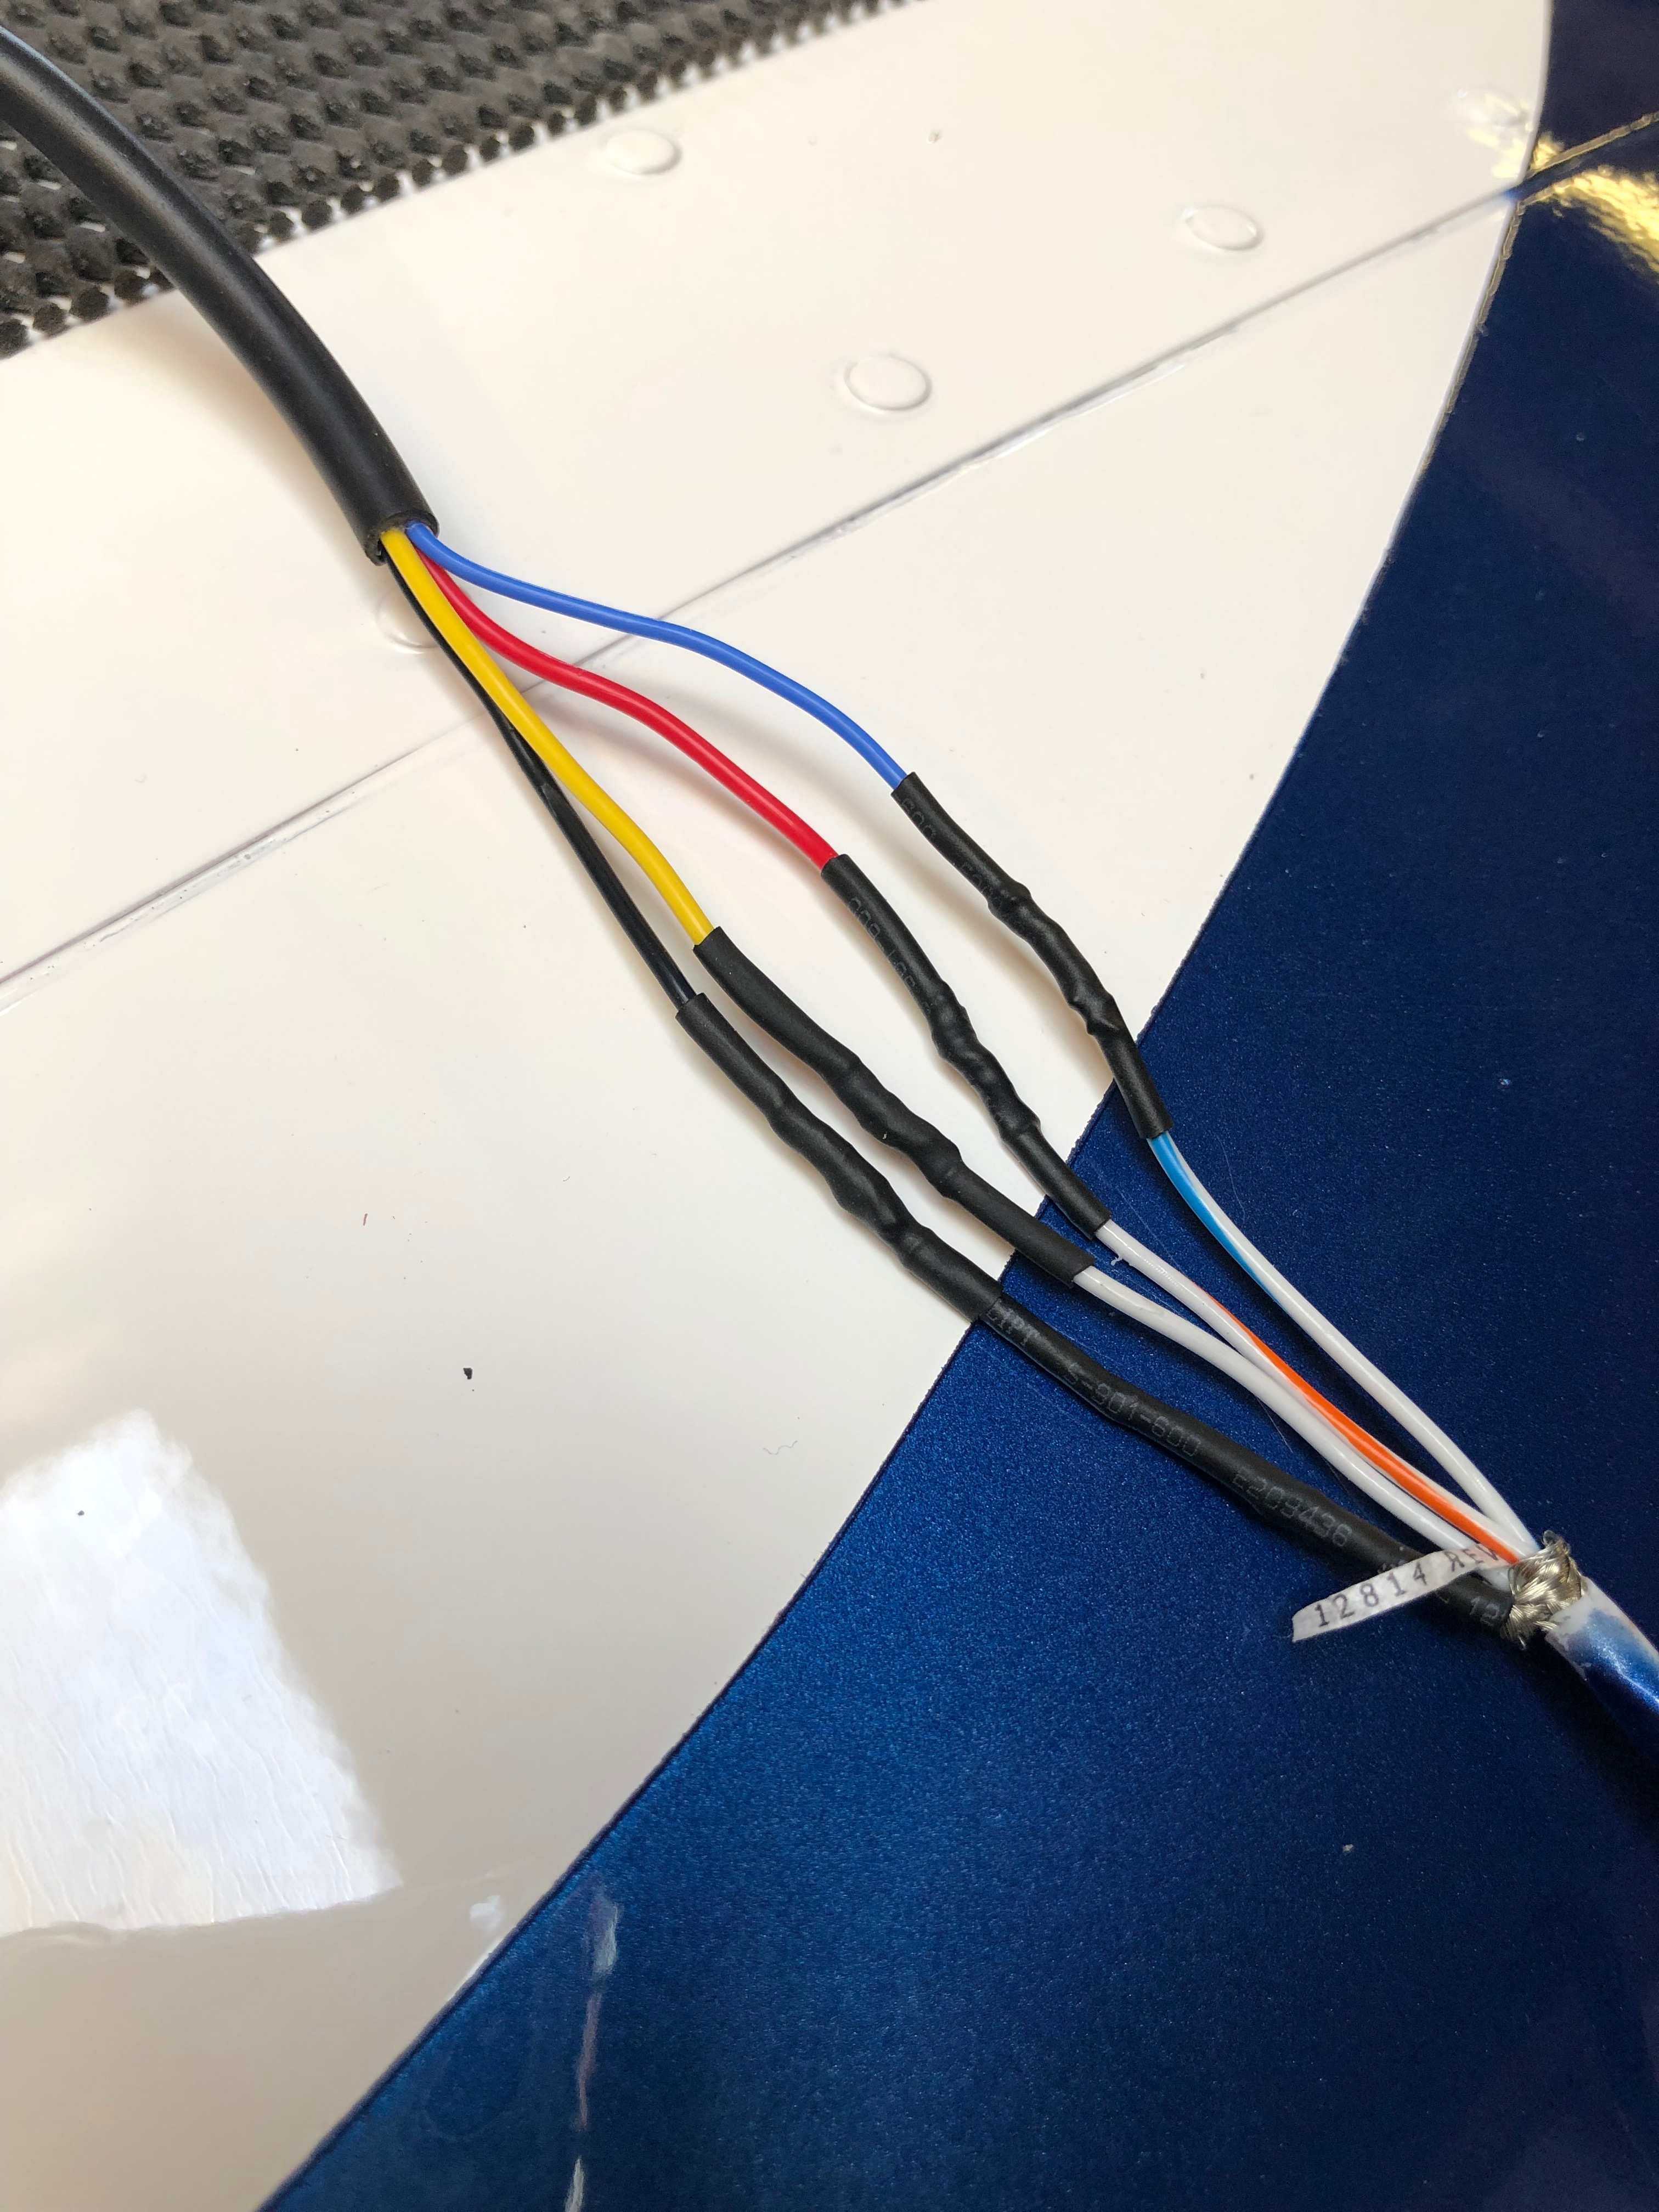
Next is to fit the starboard strobe. The cable need to be soldered and as with the port wing the wire colours are different so a record needs to be kept for the wiring records.
There is a flat section for the strobe but no definite location is marked so the strobe needs to be positioned to what looks ‘right’.
The holes are drilled and M3 countersunk rivnuts that I purchased this morning from DJ Invicta Supplies are installed and the light is secured with M3 stainless steel button head screws.
The starboard lights complete I’ll leave the wing on the stand ready to install the Pitot on Monday once I get the pitot mount from Farry.
Today was spent mainly wiring up the aileron trim motor, installing the port strobe before starting on the starboard wing landing light.
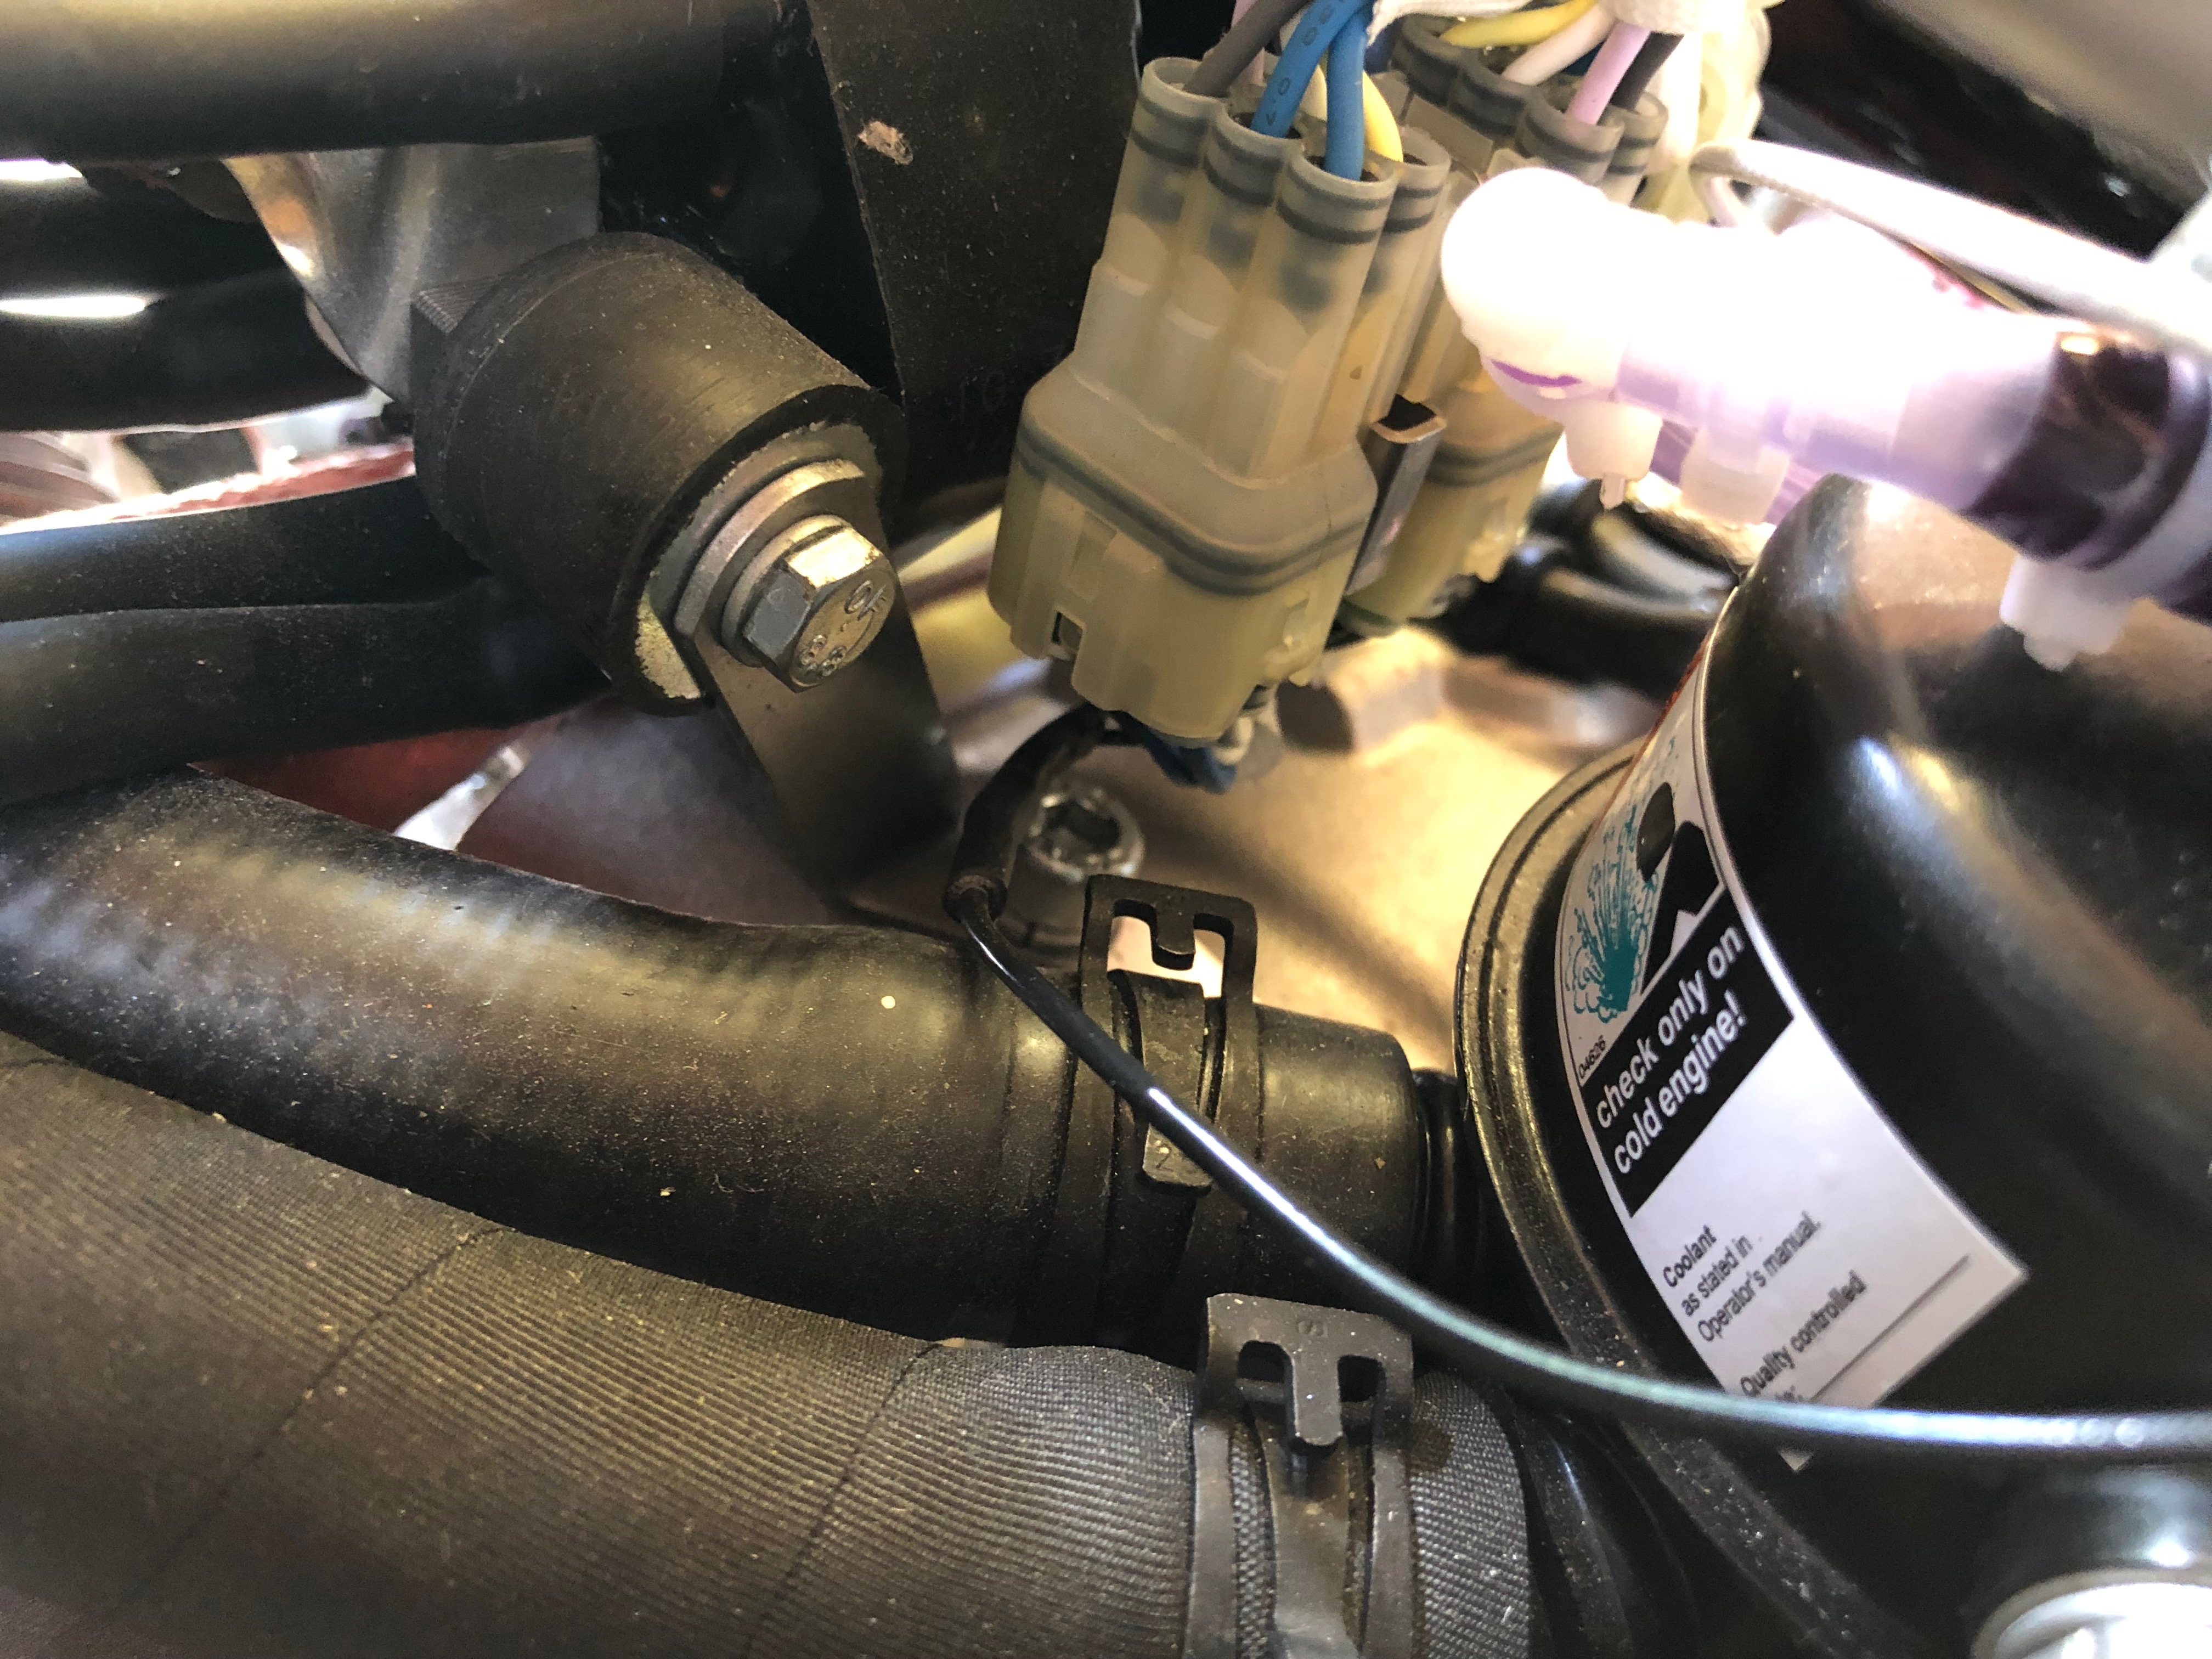
One little job to do today was to install an overflow pipe from the water expansion tank to the water bottle mounted on the firewall.
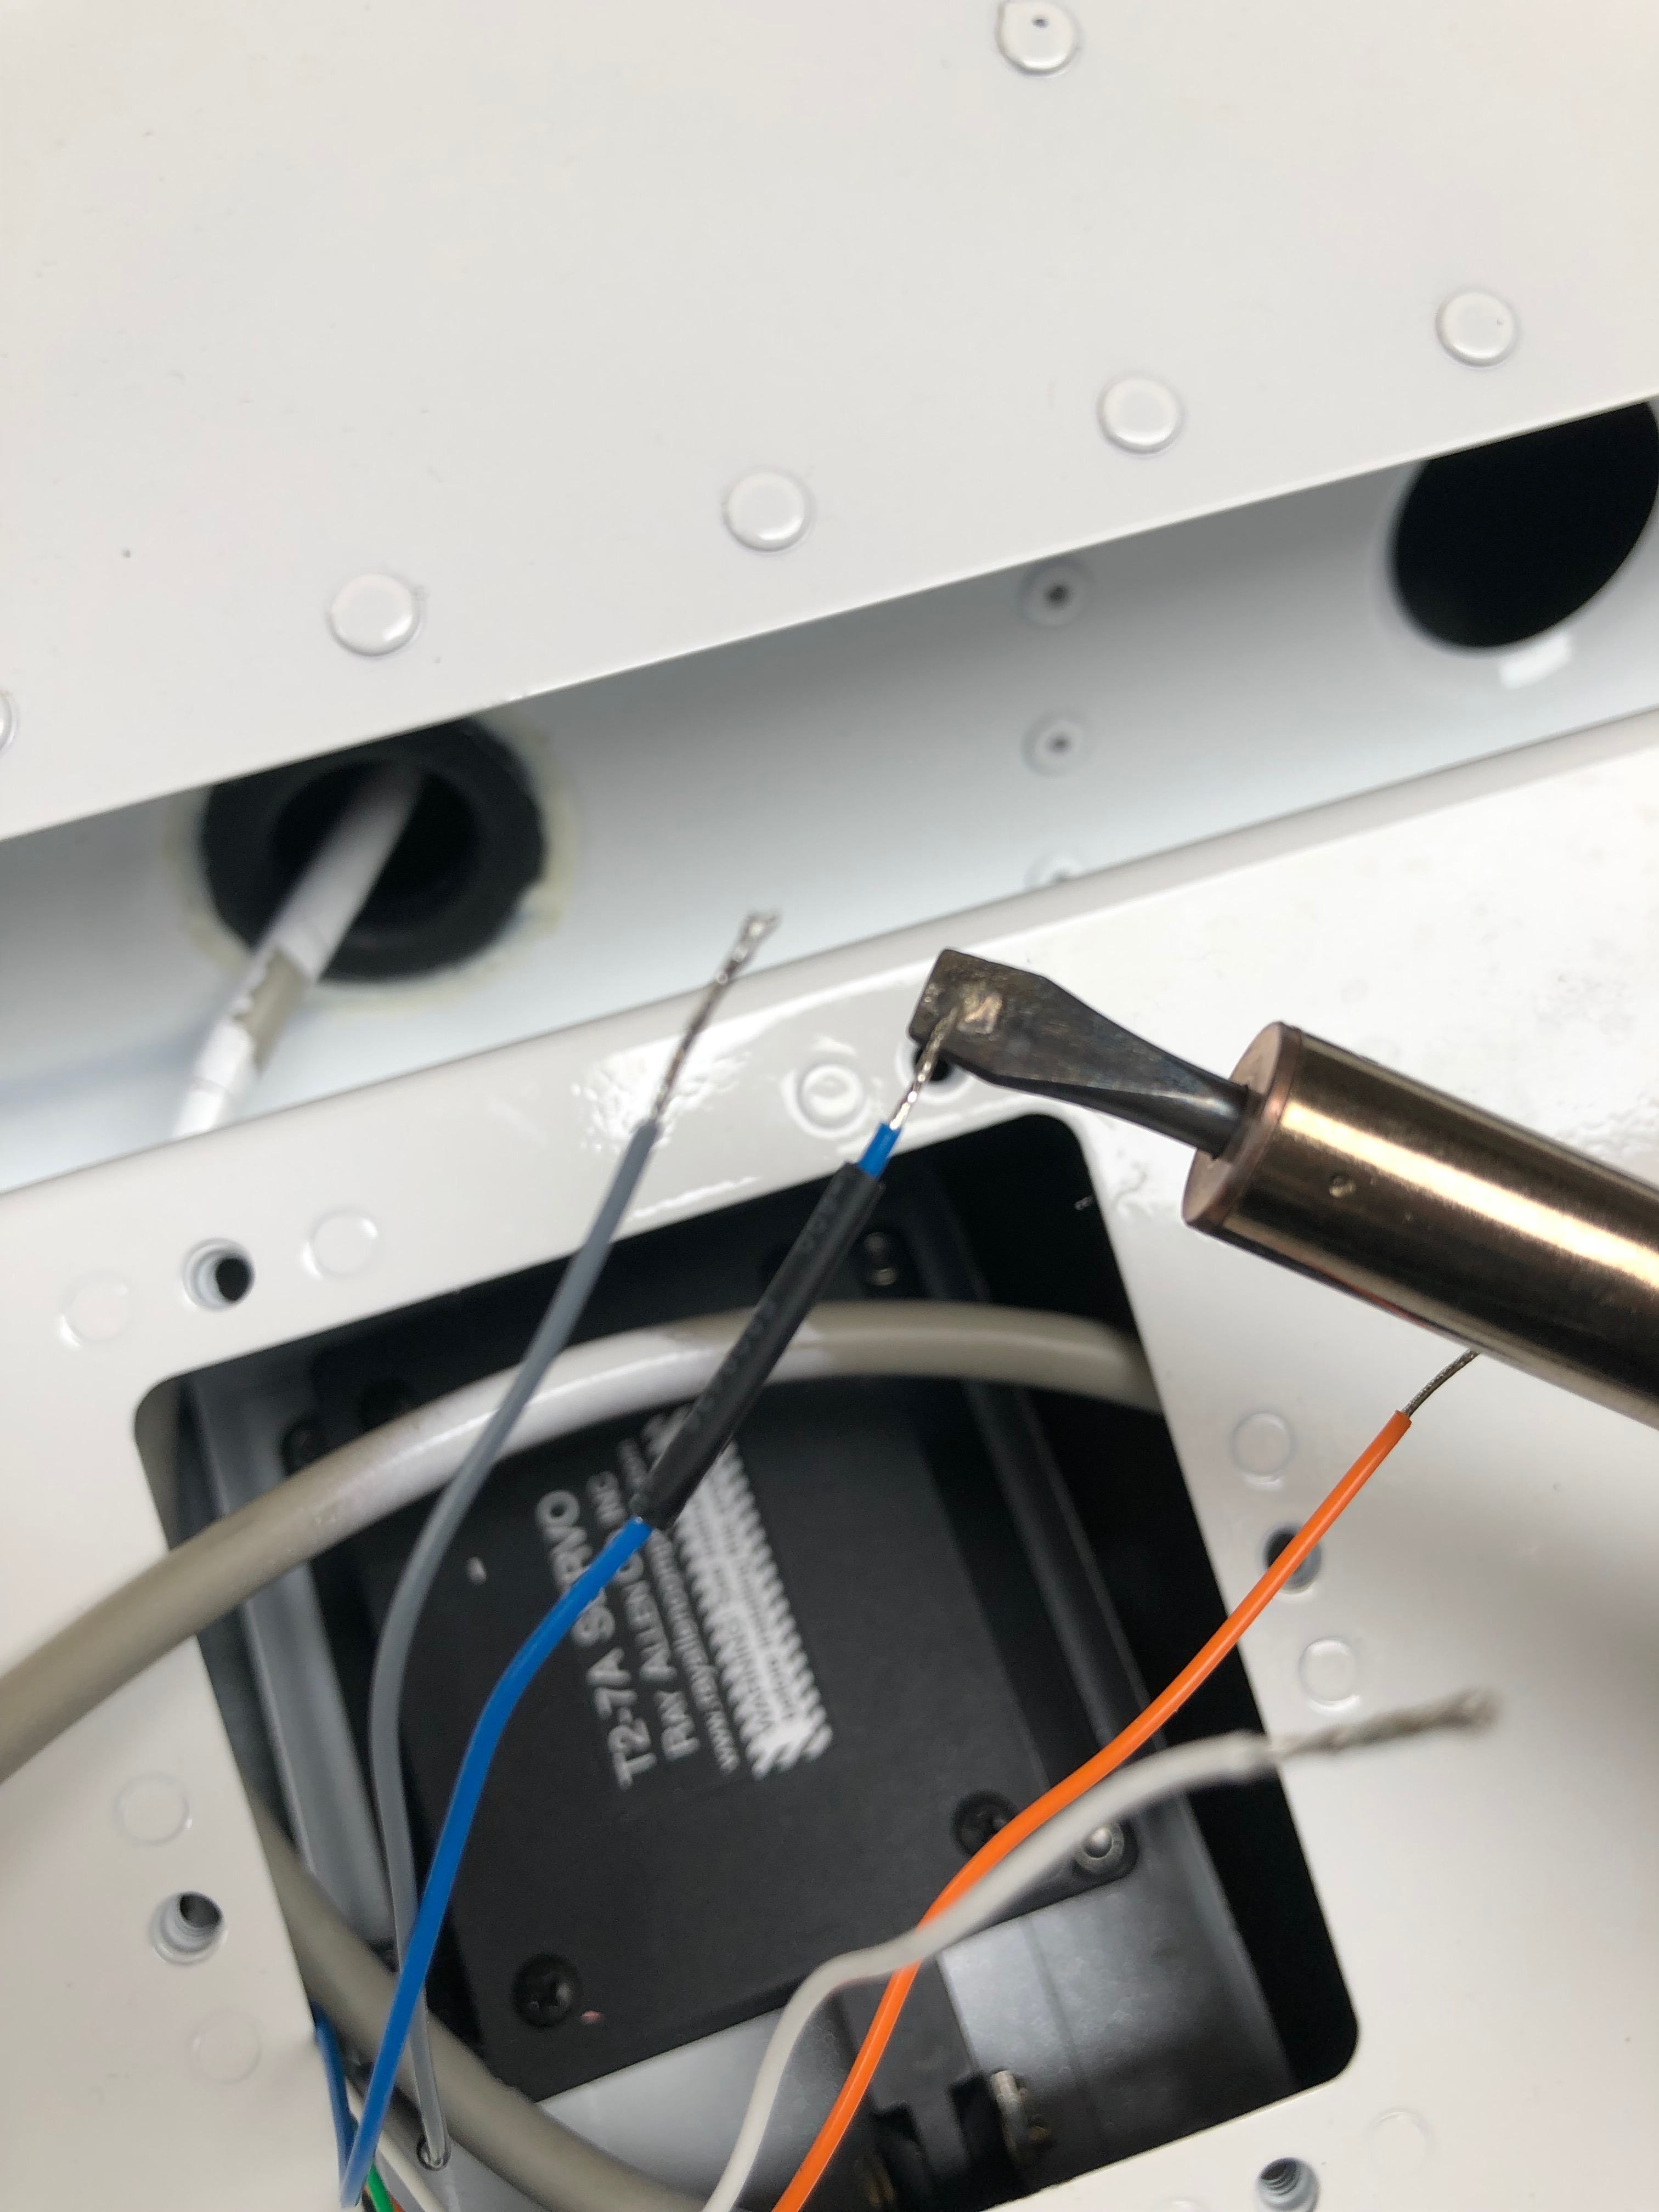
The aileron trim motor is connected to the wire installed in the wing. The ends are stripped and tinned.
Heat shrink tube is slid onto the wires before the soldering is done to make sure that they are well insulated.
The colours don’t match between the trim motor and the wing wire so that will have to be documented in the aircraft wiring diagram.
A heat gun is used to shrink the tube over the wires and then a bigger piece (yellow tubing in picture) is slid over all the connections.
The wire is kept in place to stop it moving in operation with a spot of glue.
The strobes are next . Very important to mount the correct one on the correct side. Red is being installed on the left wing.
The same method is used to solder and secure the wire joints.
The strobe position is not marked so it’s important to get the right angle. I haven’t got any M3 rivnuts so will have to get some and do this tomorrow.
So the right wing is put on stands and I can now start on the landing lights and strobes for this wing. The pitot/AOA probe is installed on this wing but I don’t have the mount as it’s with Farry. So a 5 hour trip is required on Monday to get that and the most of the rest of the outstanding items.
The spade connectors are crimped and inserted into the connector block.
The landing light is installed. It’s upside down as the wing is upside down!
The installed landing light ready for the cover which I’ll do tomorrow now as I’ve run out of time.
A few smaller jobs, including exhaust wrapping, sensor fitting and cable oiling ahead of fitting the water thermostat that I finally received today.
The landing lights come with a couple of spade connectors that need to be crimped on…
and then slipped into the connector block. I’ll need to do the same thing when I come to install the LEDs into the wing.
The MAP sensor is fitted to the firewall in a suitable position making sure that the plug don’t foul one another.
The space between the water bottle and regulator seems to work well.
The front exhaust pipes covered in exhaust wrap and secured in place with stainless steel ties.
There’s several cables that need to be installed later in the build. Unlike the throttle cables these aren’t lined so require some lubrication.
Received at last! Good ol’ Parcel Force have had this since the 5th March but never left a card. It’s lucky I asked for an update on delivery from Silent Hektik otherwise I’d still be waiting. This is the 3rd time Parcel Force have completely screwed up on a delivery to me – I will never use them again!
Following the build of my Bristell NG5 Kit No. 382 Registration G-MLSY