Category Archives: Registration

Monday 22nd July 2019

Music: None today – Concentrating!!

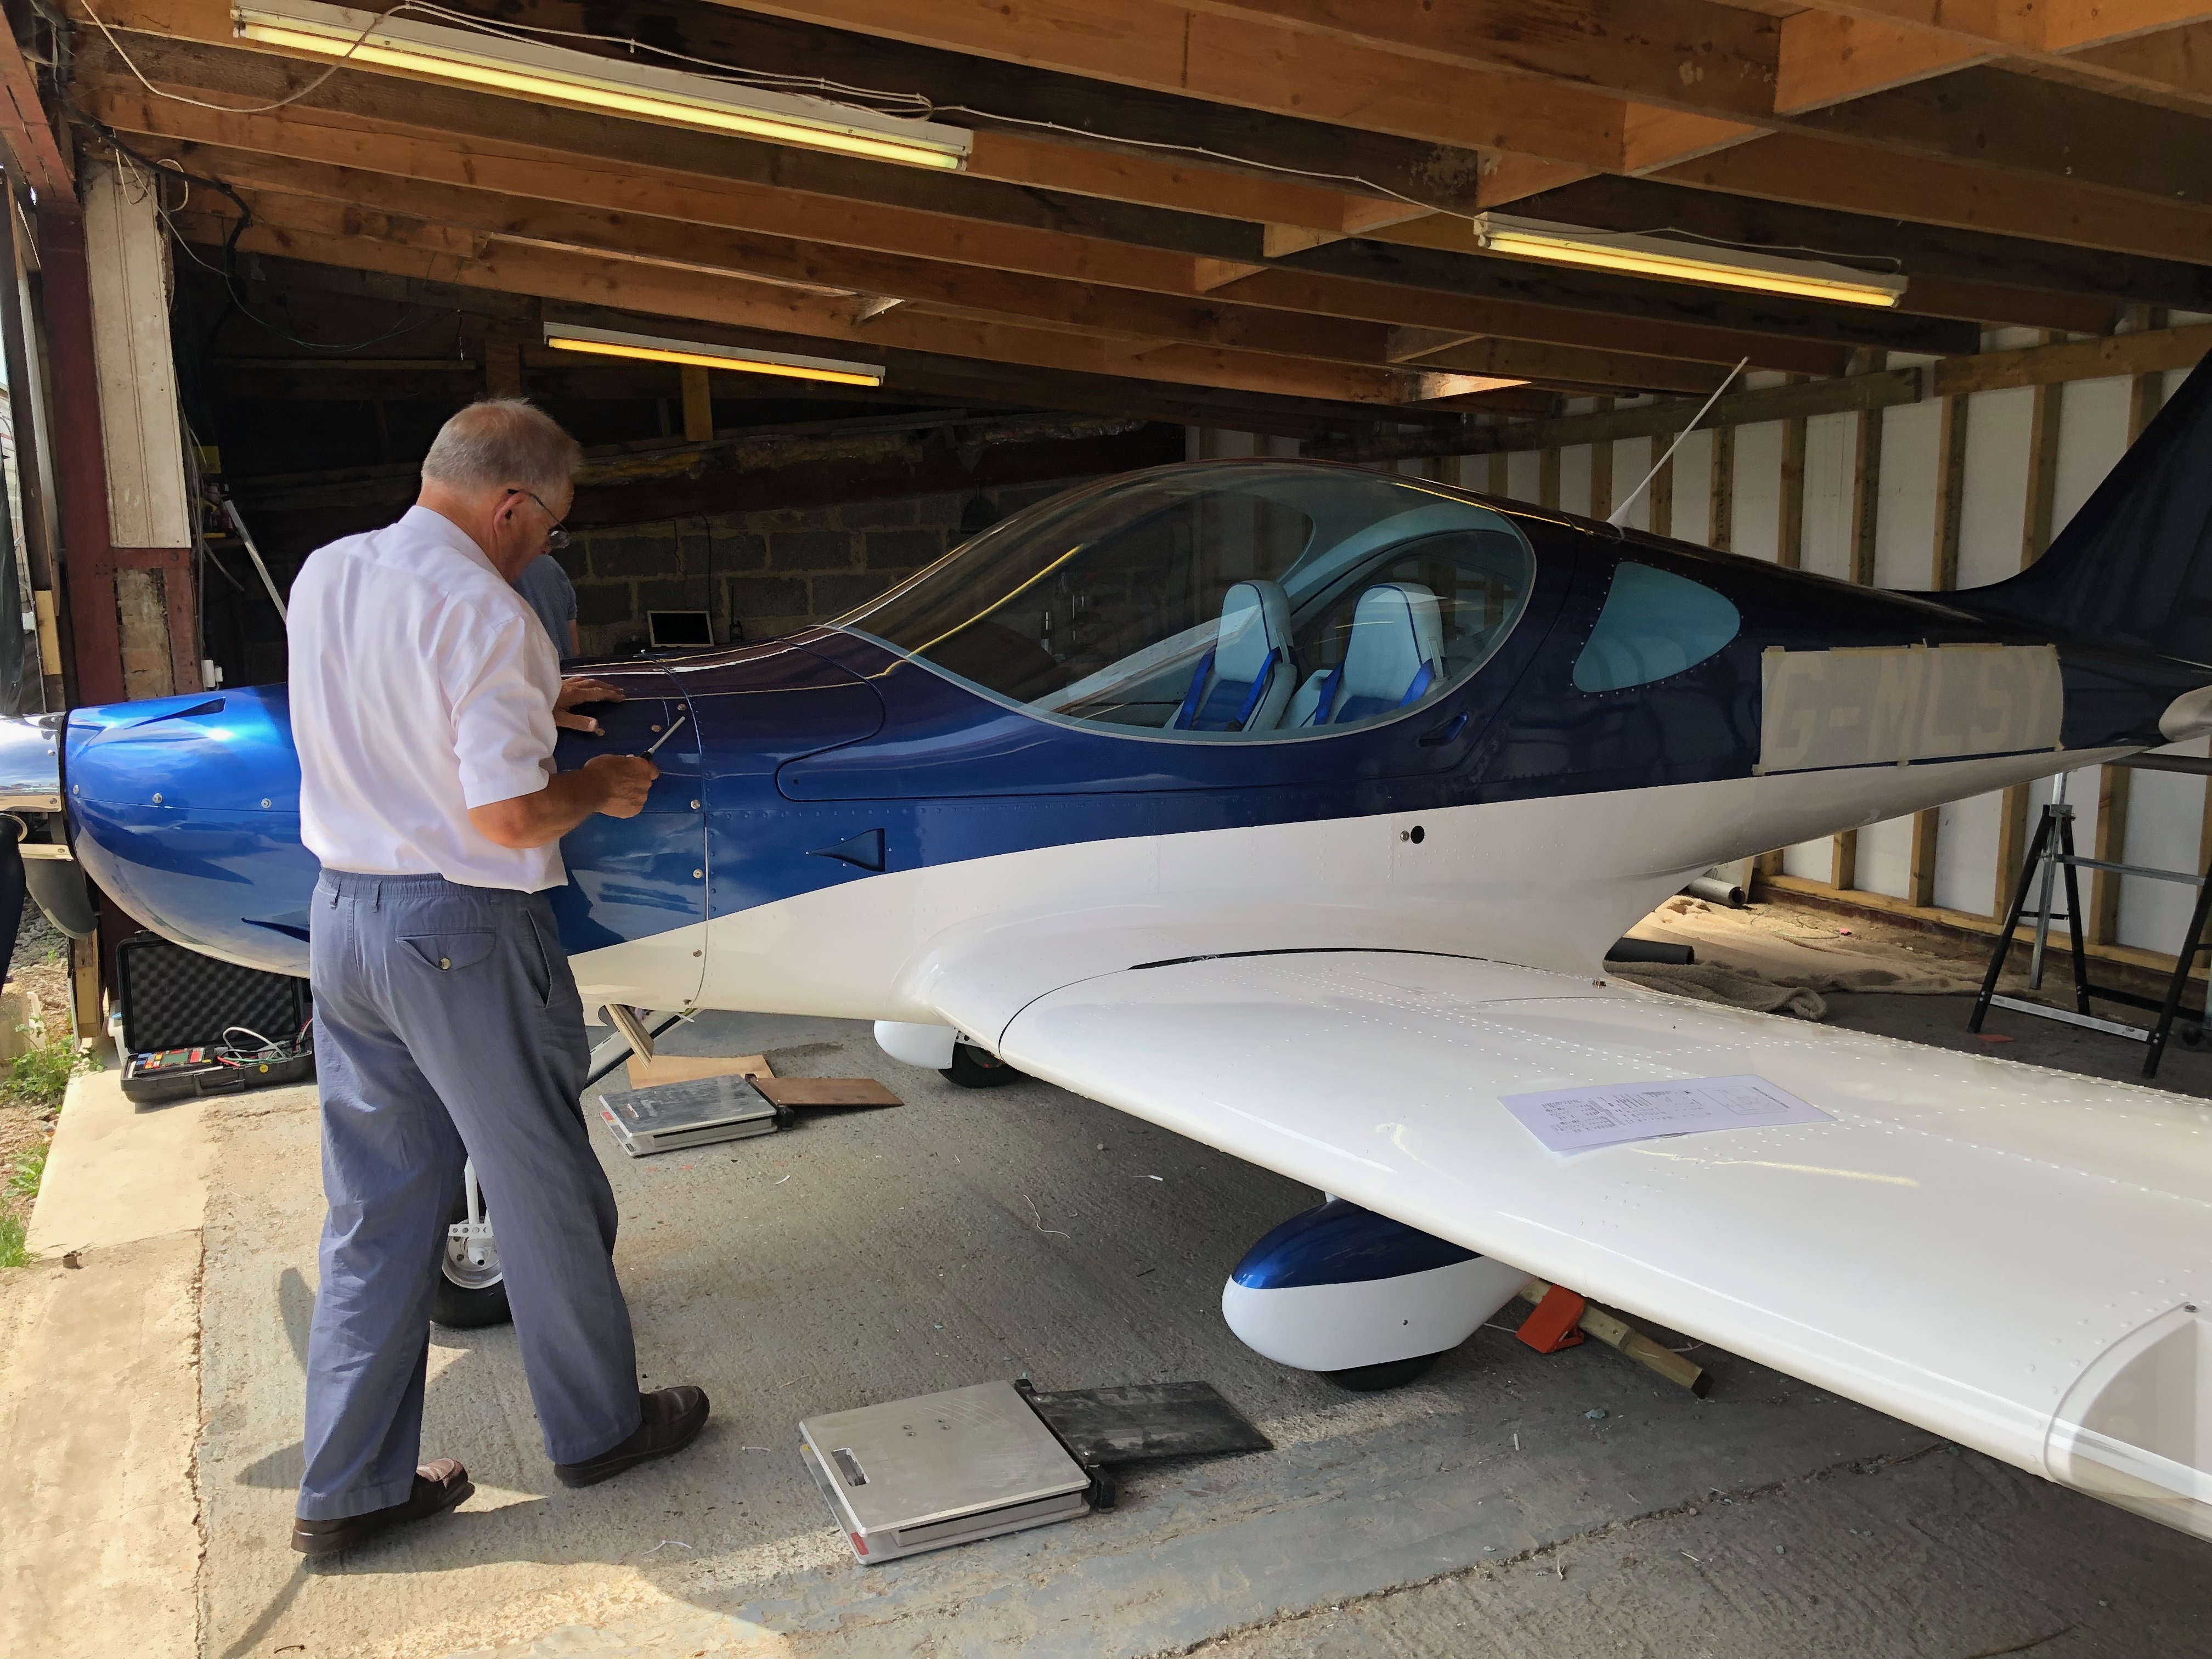
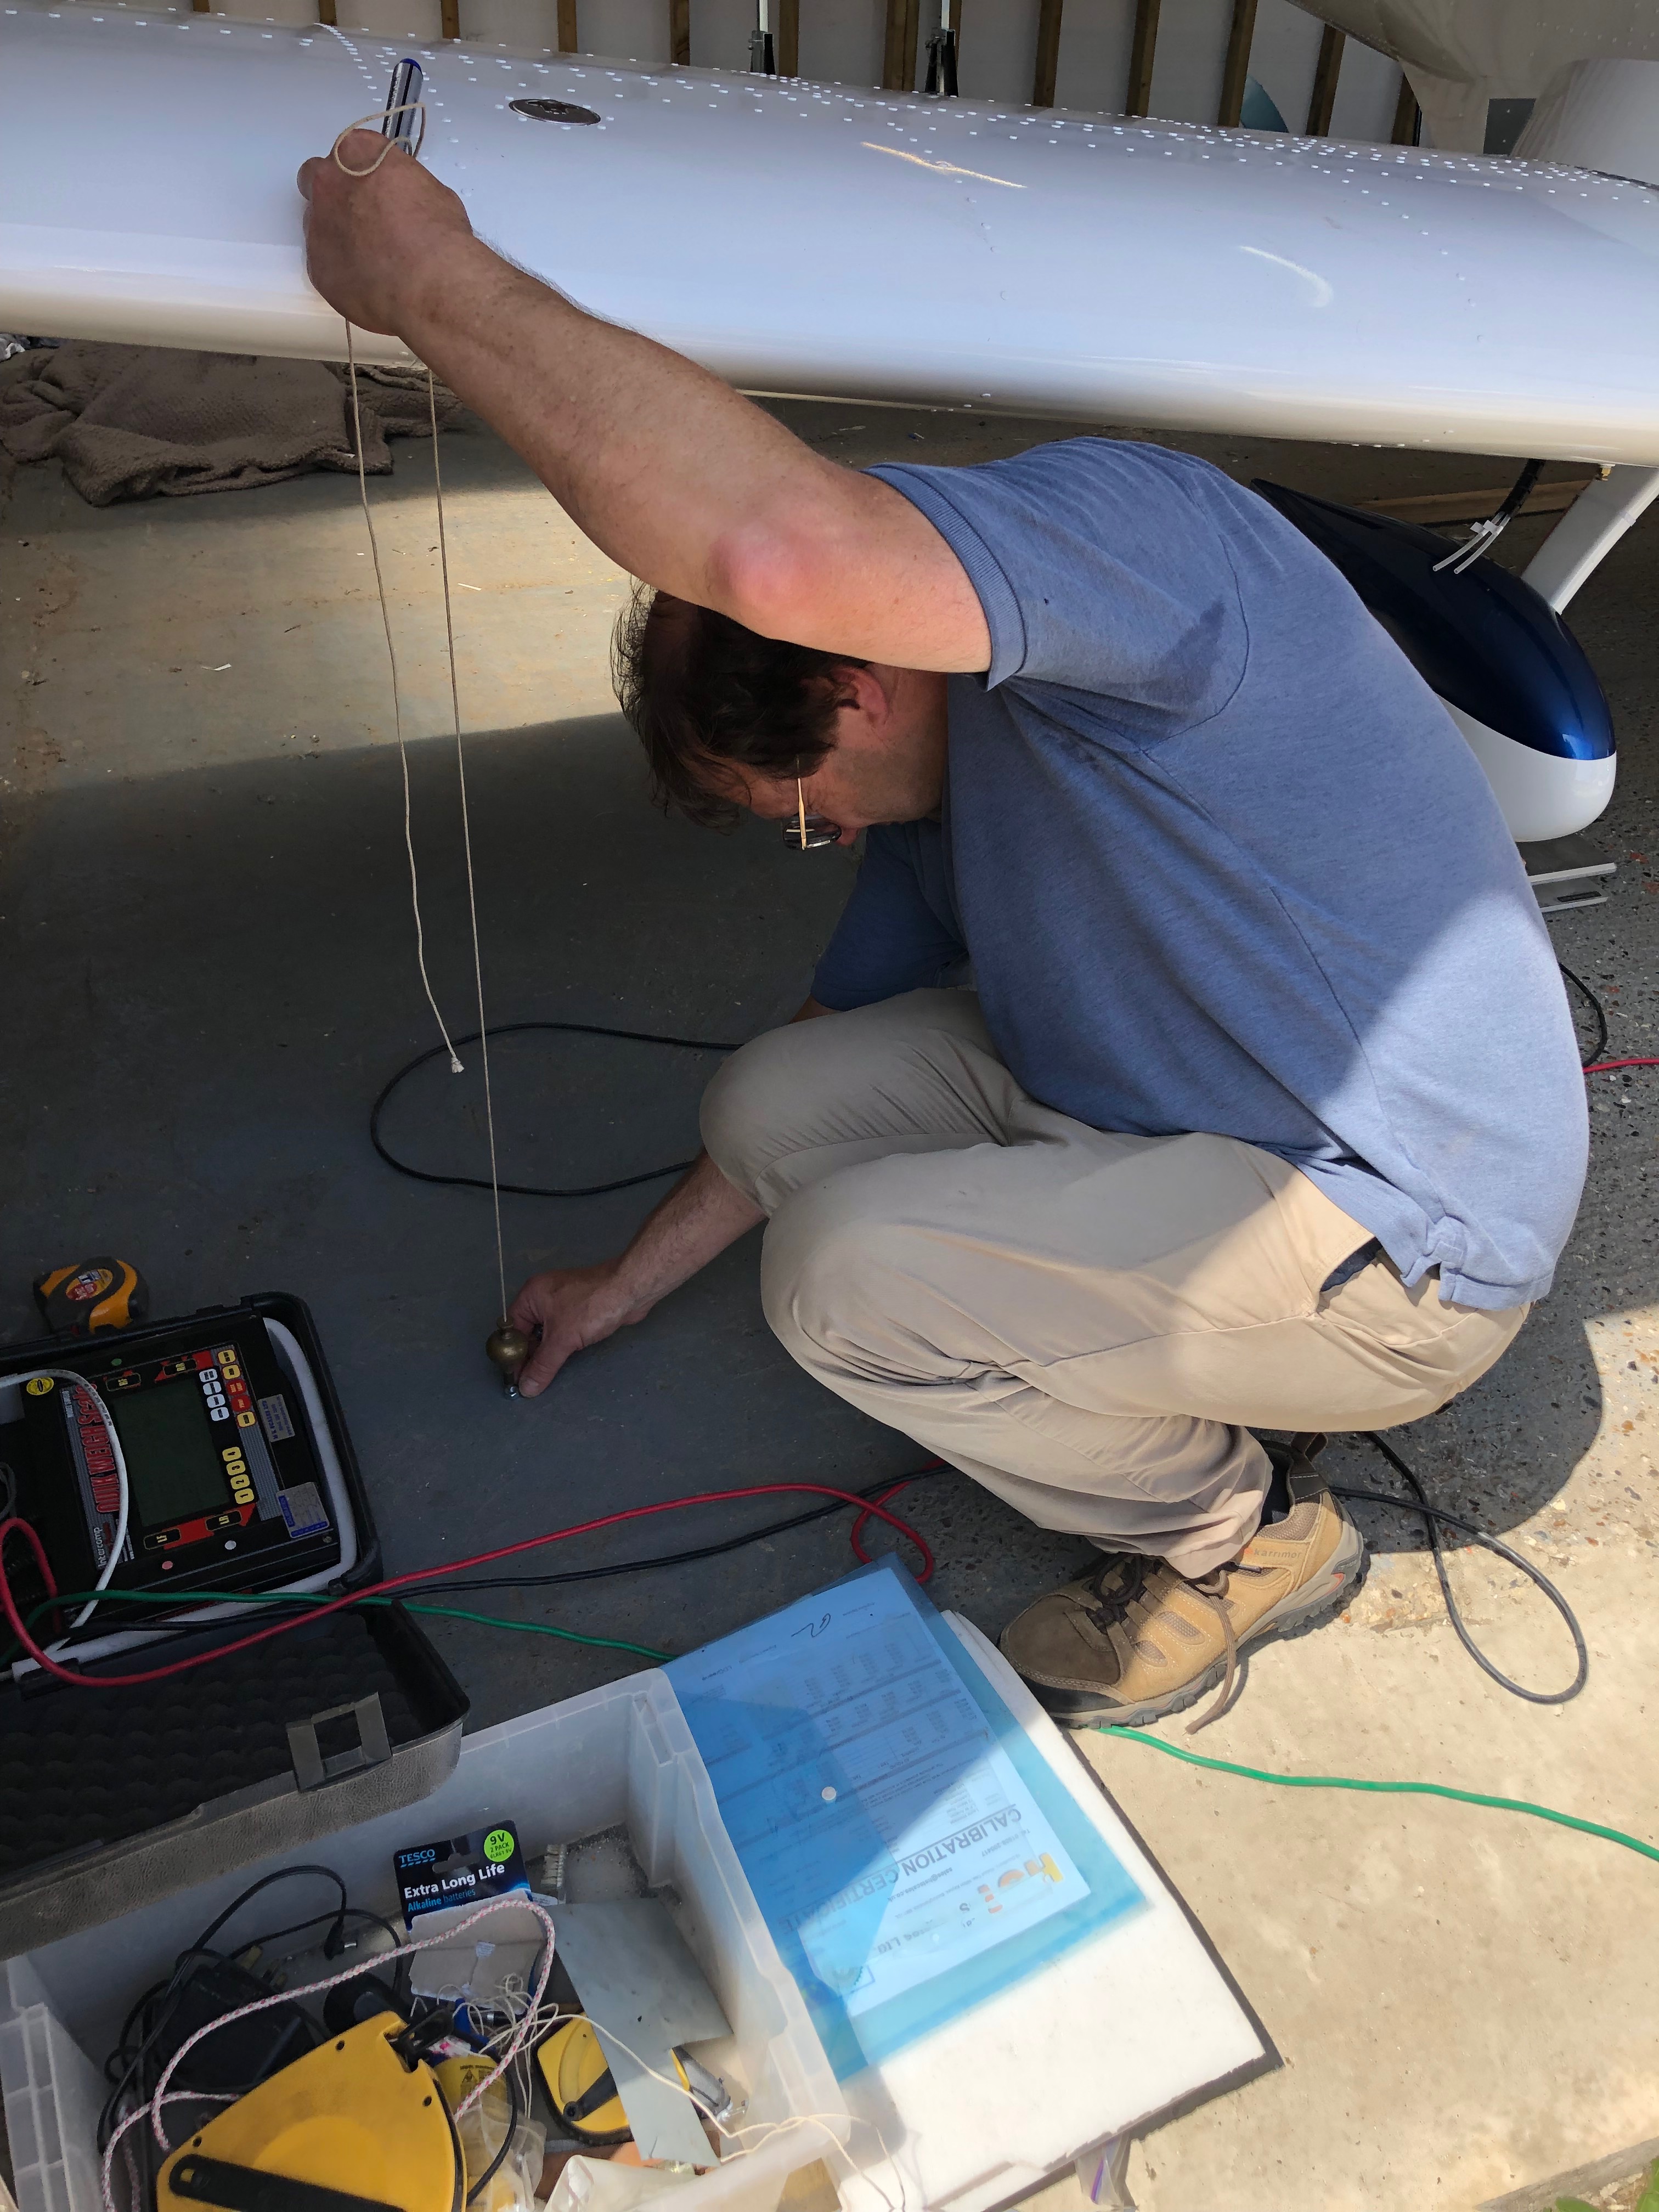
Weighing day today! Pete Thomas a good friend from the London Gliding Club offered to come down to weigh G-MLSY and today’s the day!

Everything needs to be fitted for the weighing. So the spinner is first and the canopy is lifted on but is won’t be secured yet.
Ian as my LAA inspector is overseeing the process to make sure it’s down to the LAA standard.
Pete starts the process of laying out the pressure pads.
The aircraft has to be exactly level for this so a spirit level is placed across the cockpit and on the cockpit edge and adjustments are made as appropriate.
With the aircraft sitting on the pads and levelled both lat and lon weighing can begin.
The datum marks have to be calculated so a plumb line is dropped from the reference points and a position marked on the floor. These marks will be used later in the calculations.
Pete in action marking the front datum.
All done now but a quick pic with everything on before we start to take it off again for the final set of inspections.
I’ve done the wing and starboard side registrations but didn’t get chance to go the port side. It’s amazing how quick I did this side compared with the other. At least twice as quick no I know what I’m doing!
Now a pick from the left. Looks quite nice.
The end of another day. Please with the process so far and not long now to the first engine runs and flight.

Saturday 20th July 2019

Music: None today

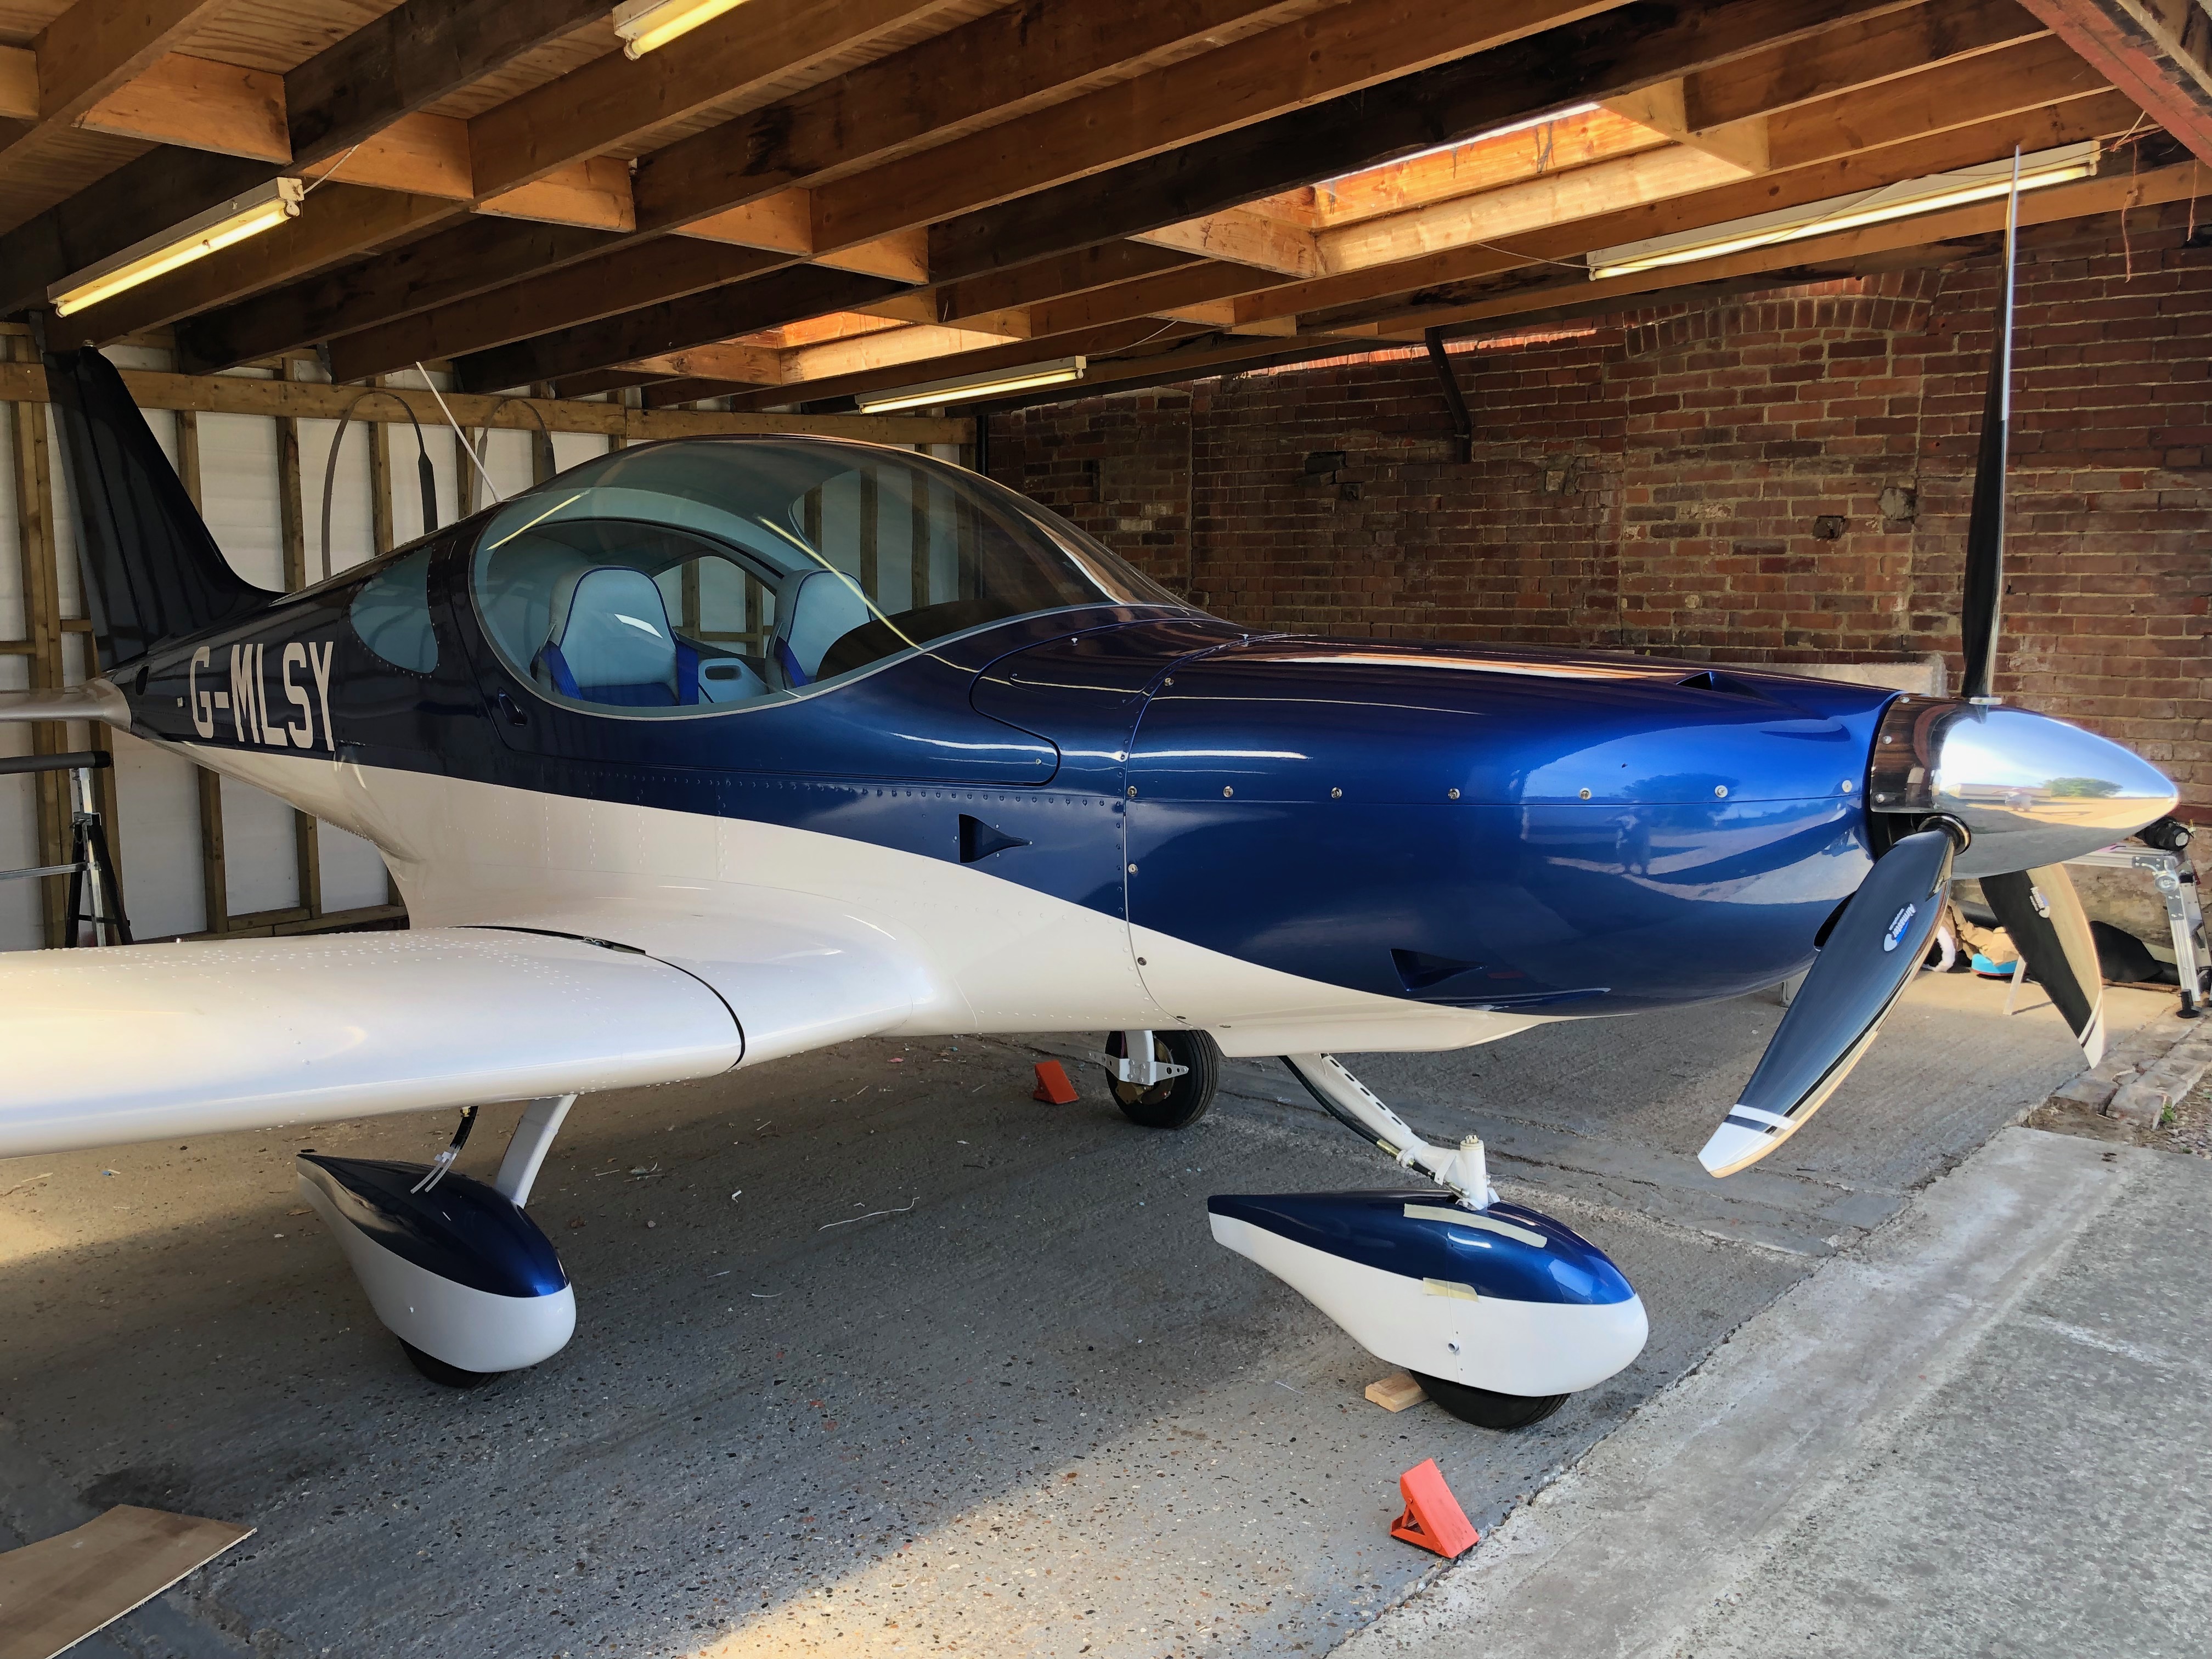
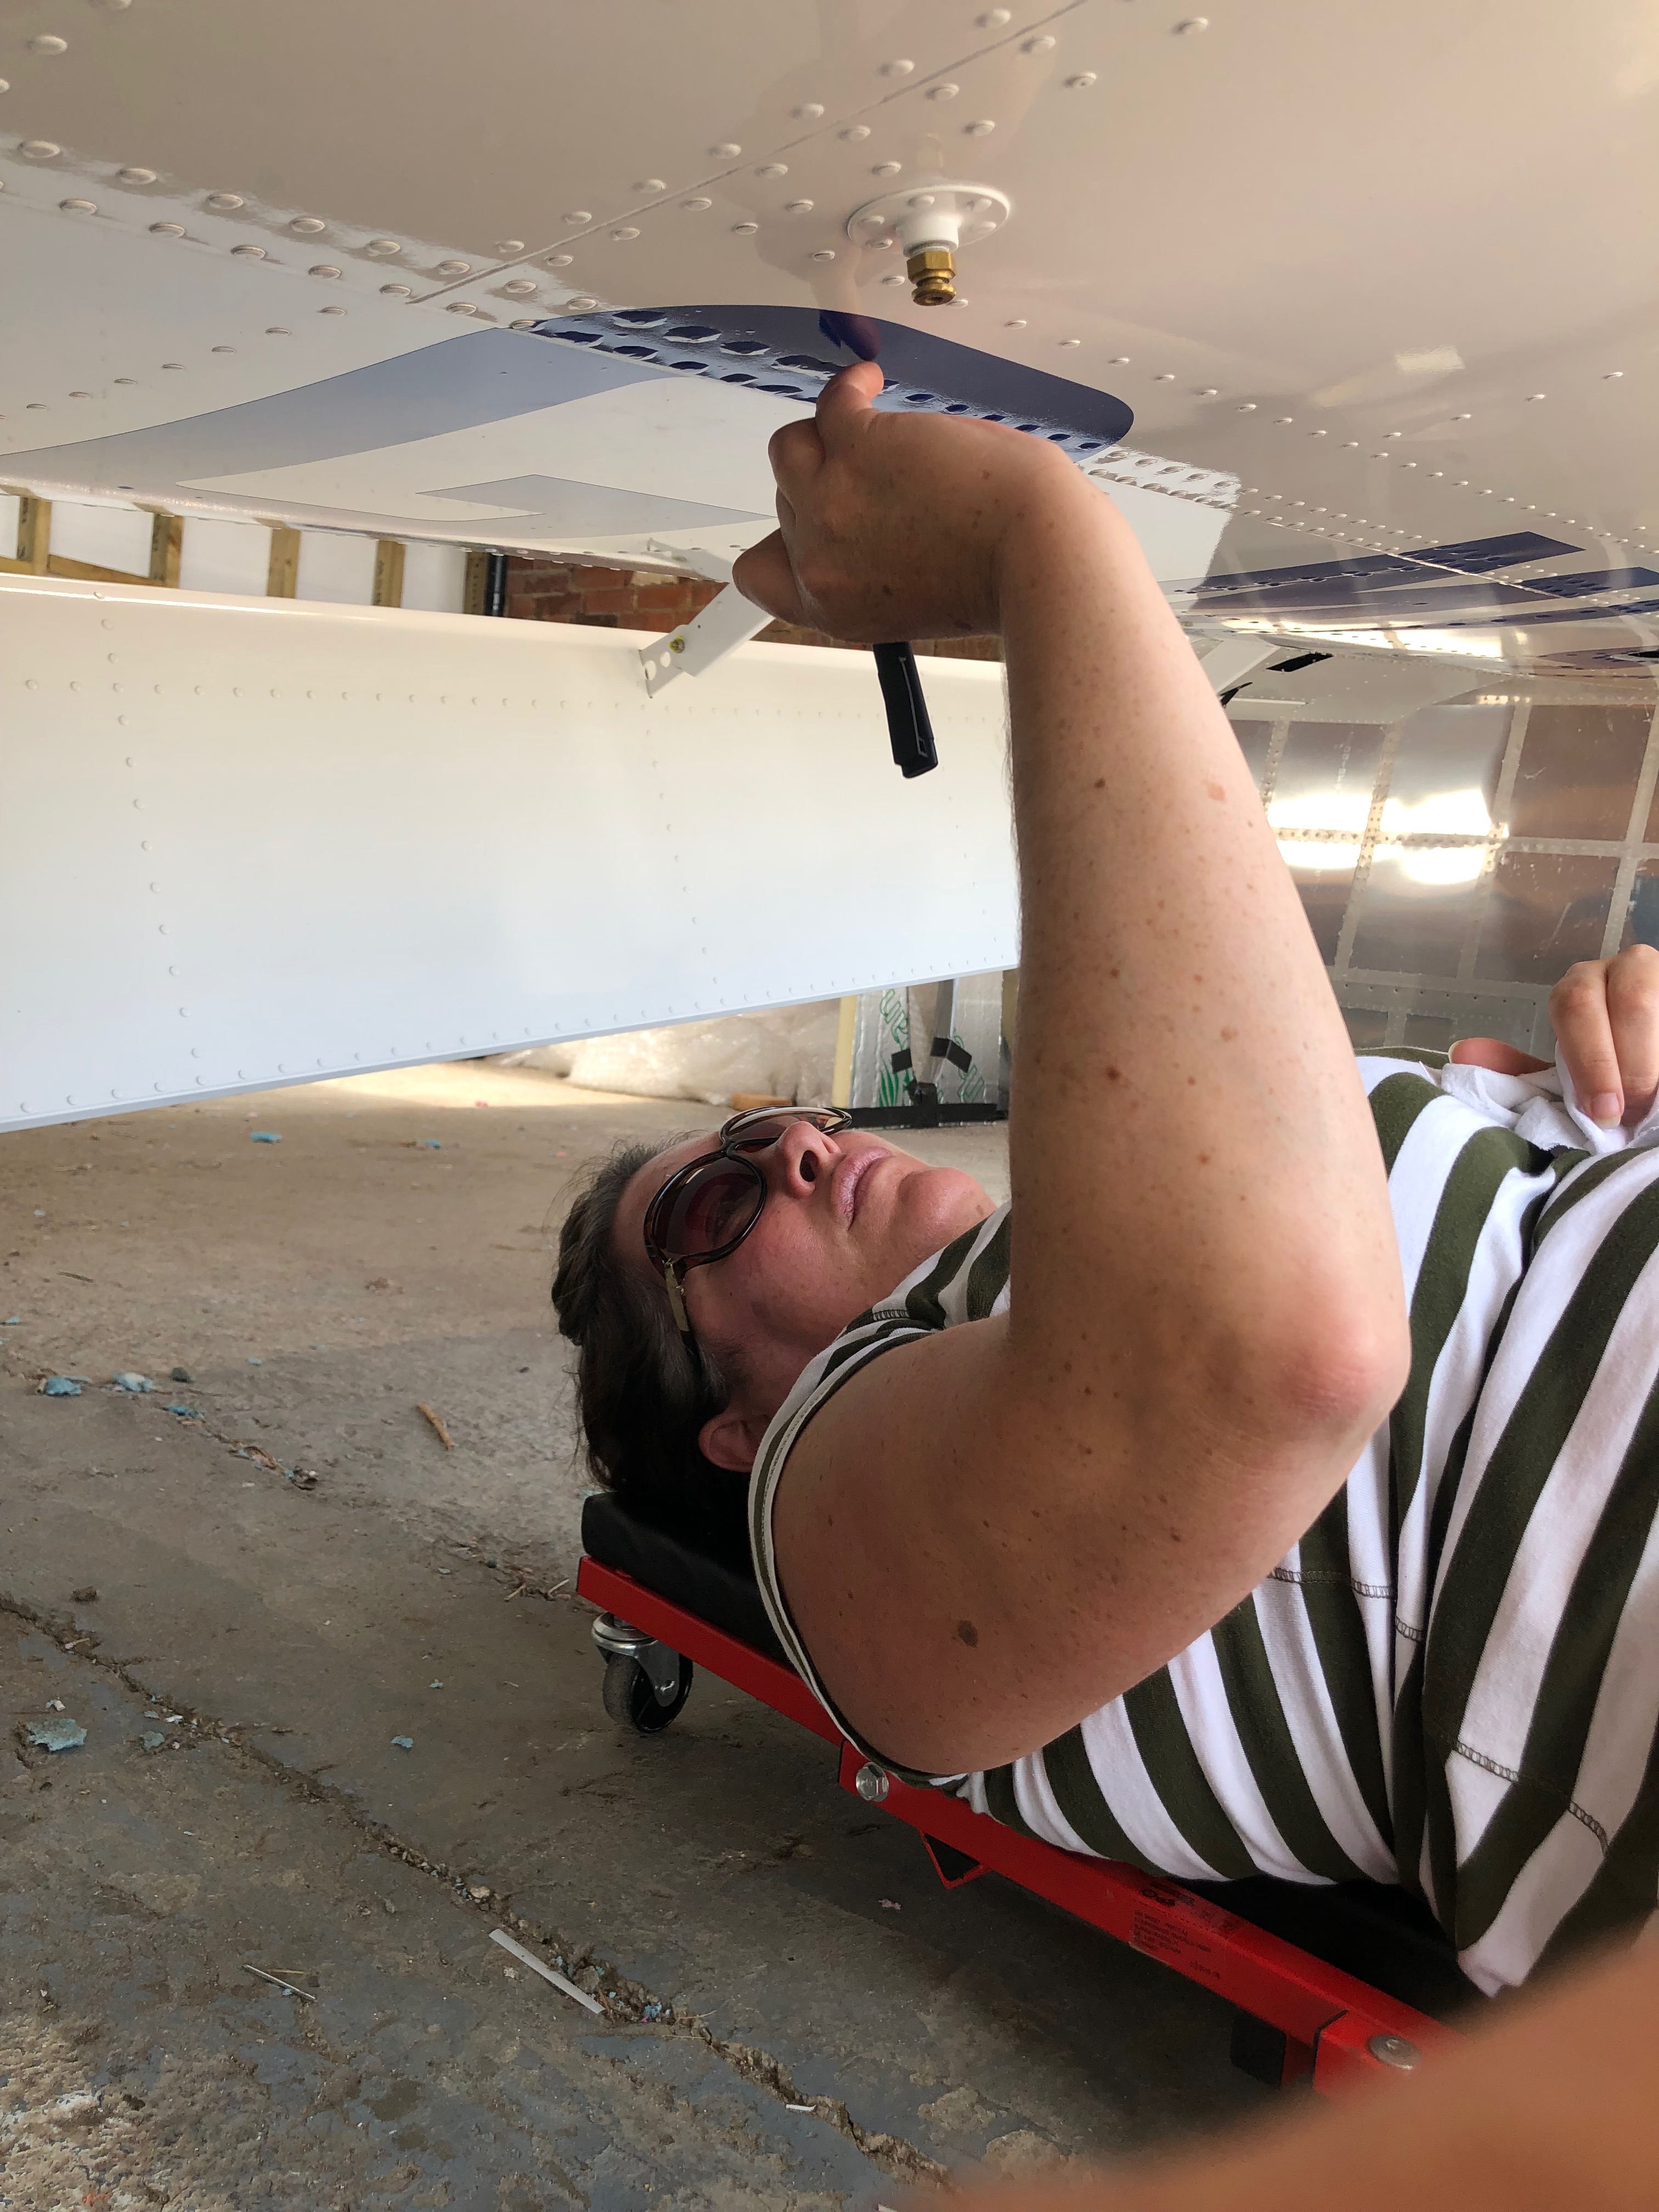
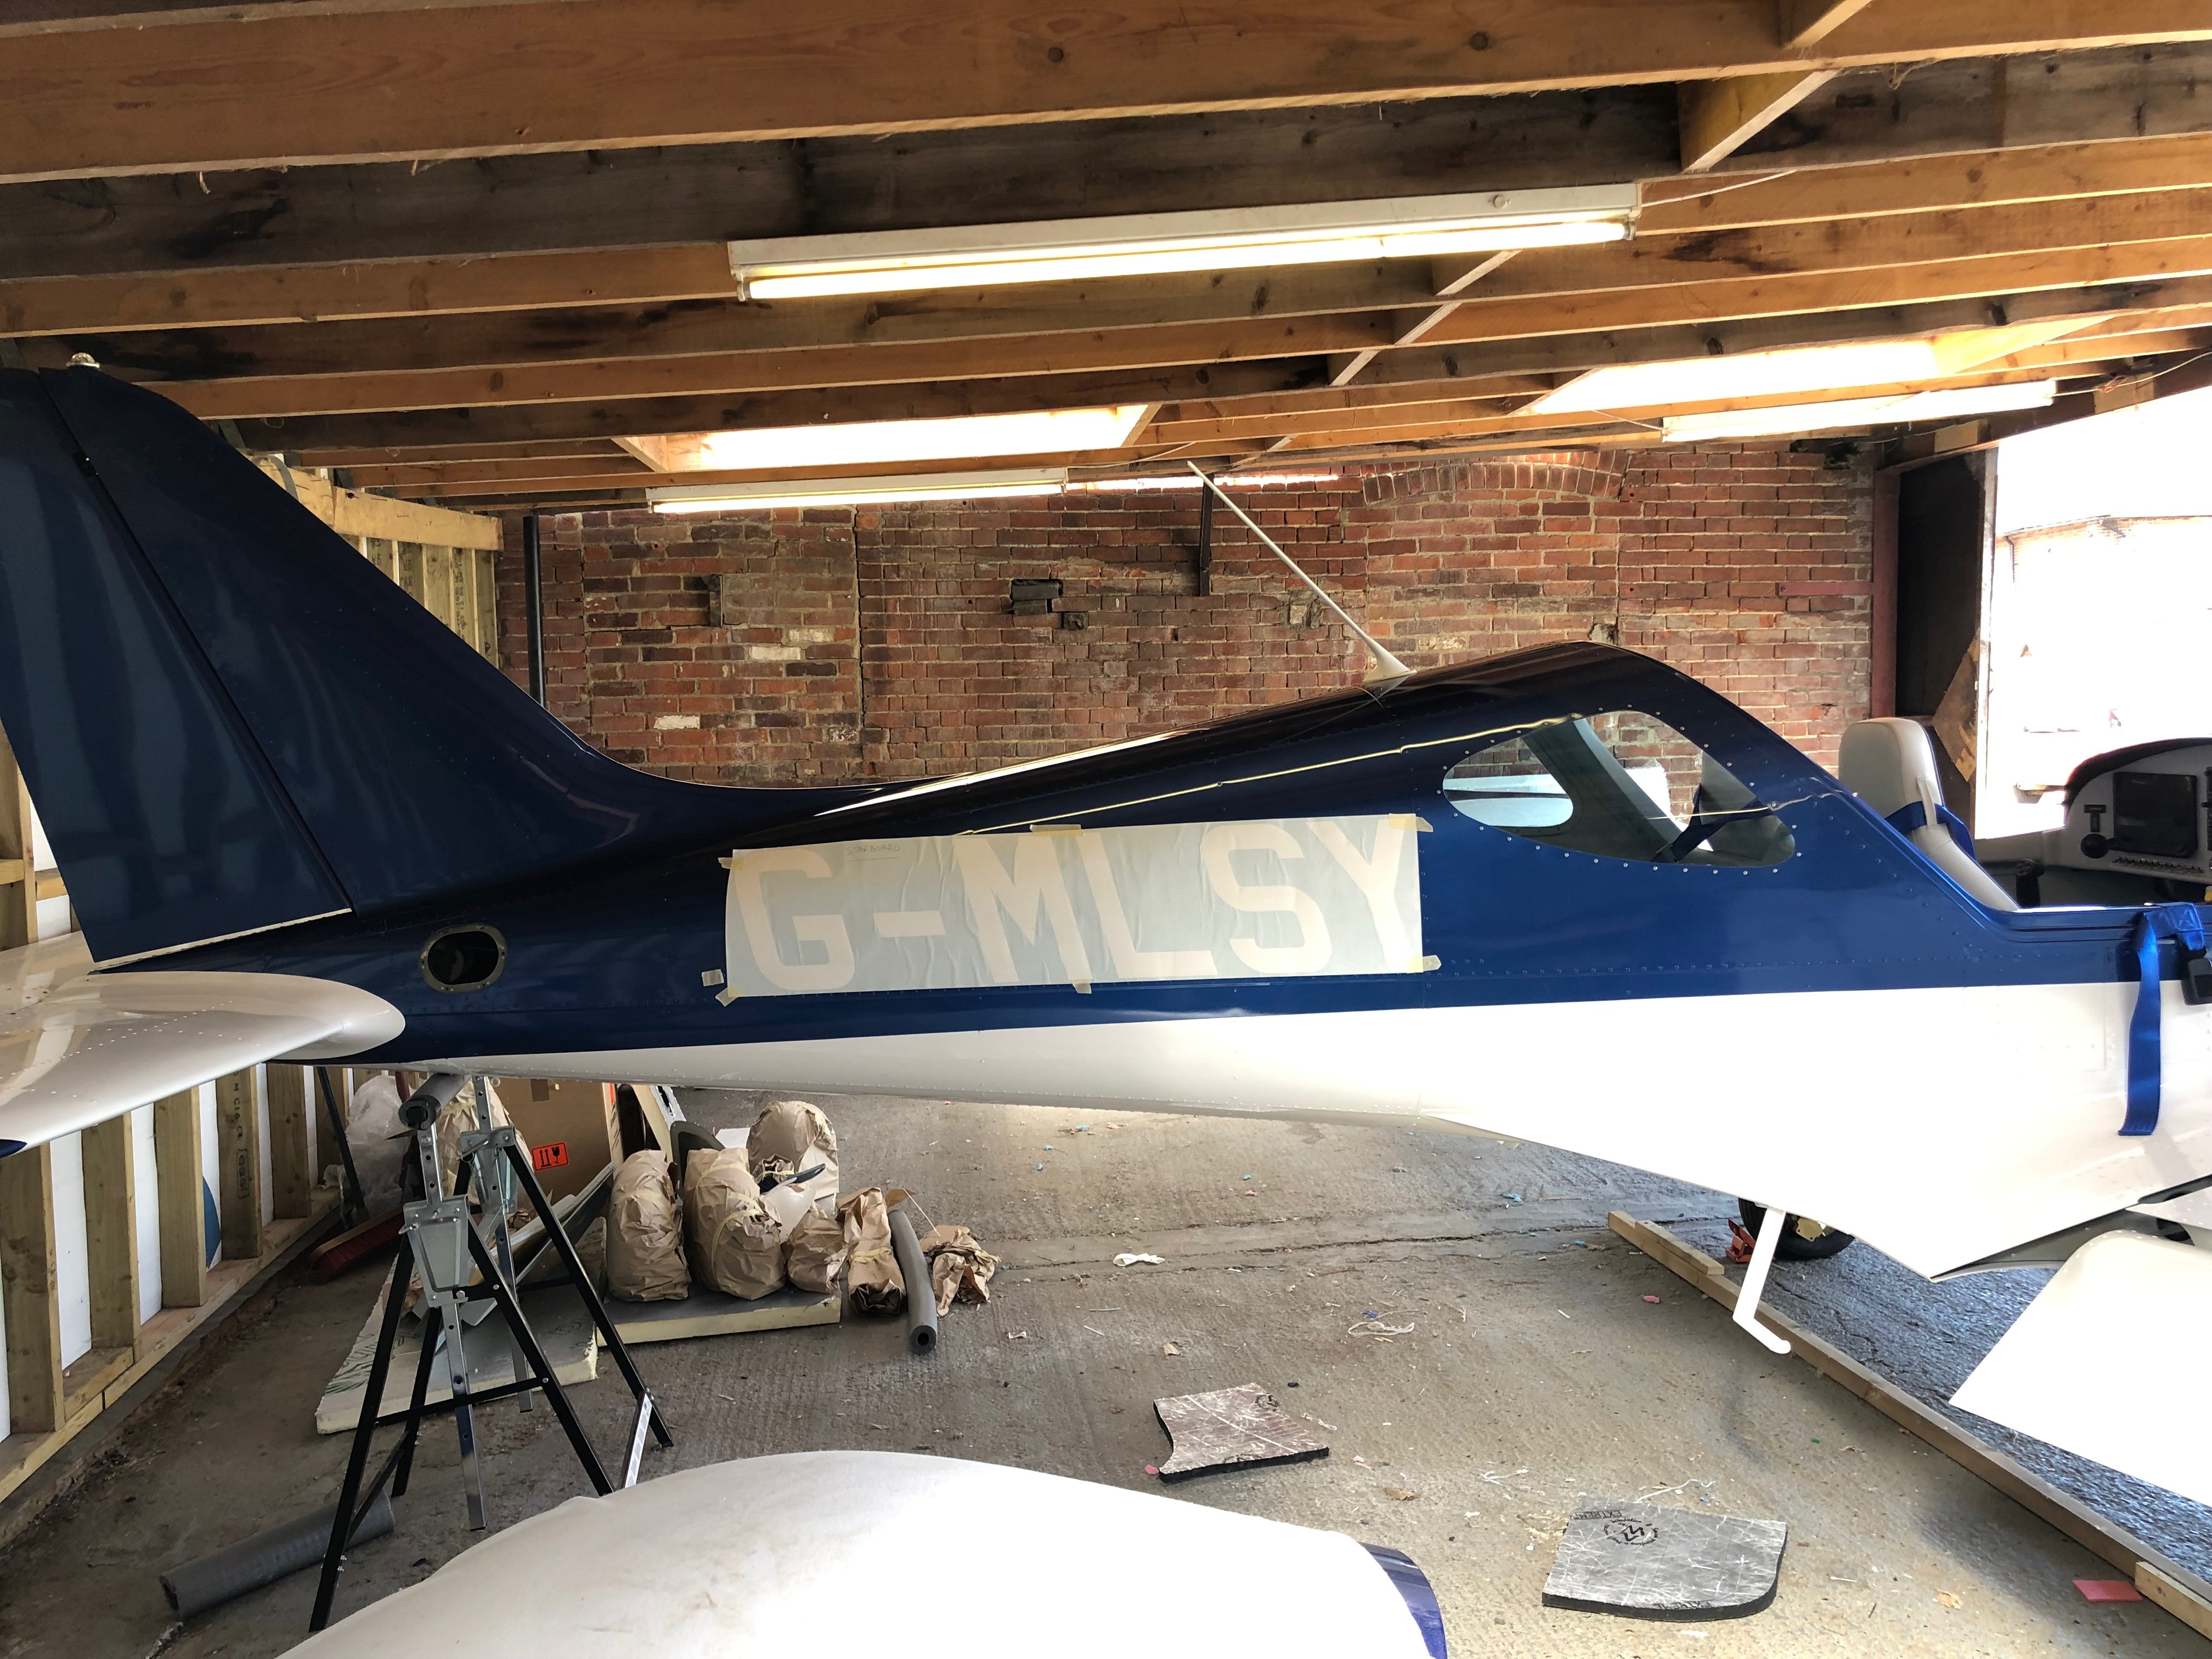
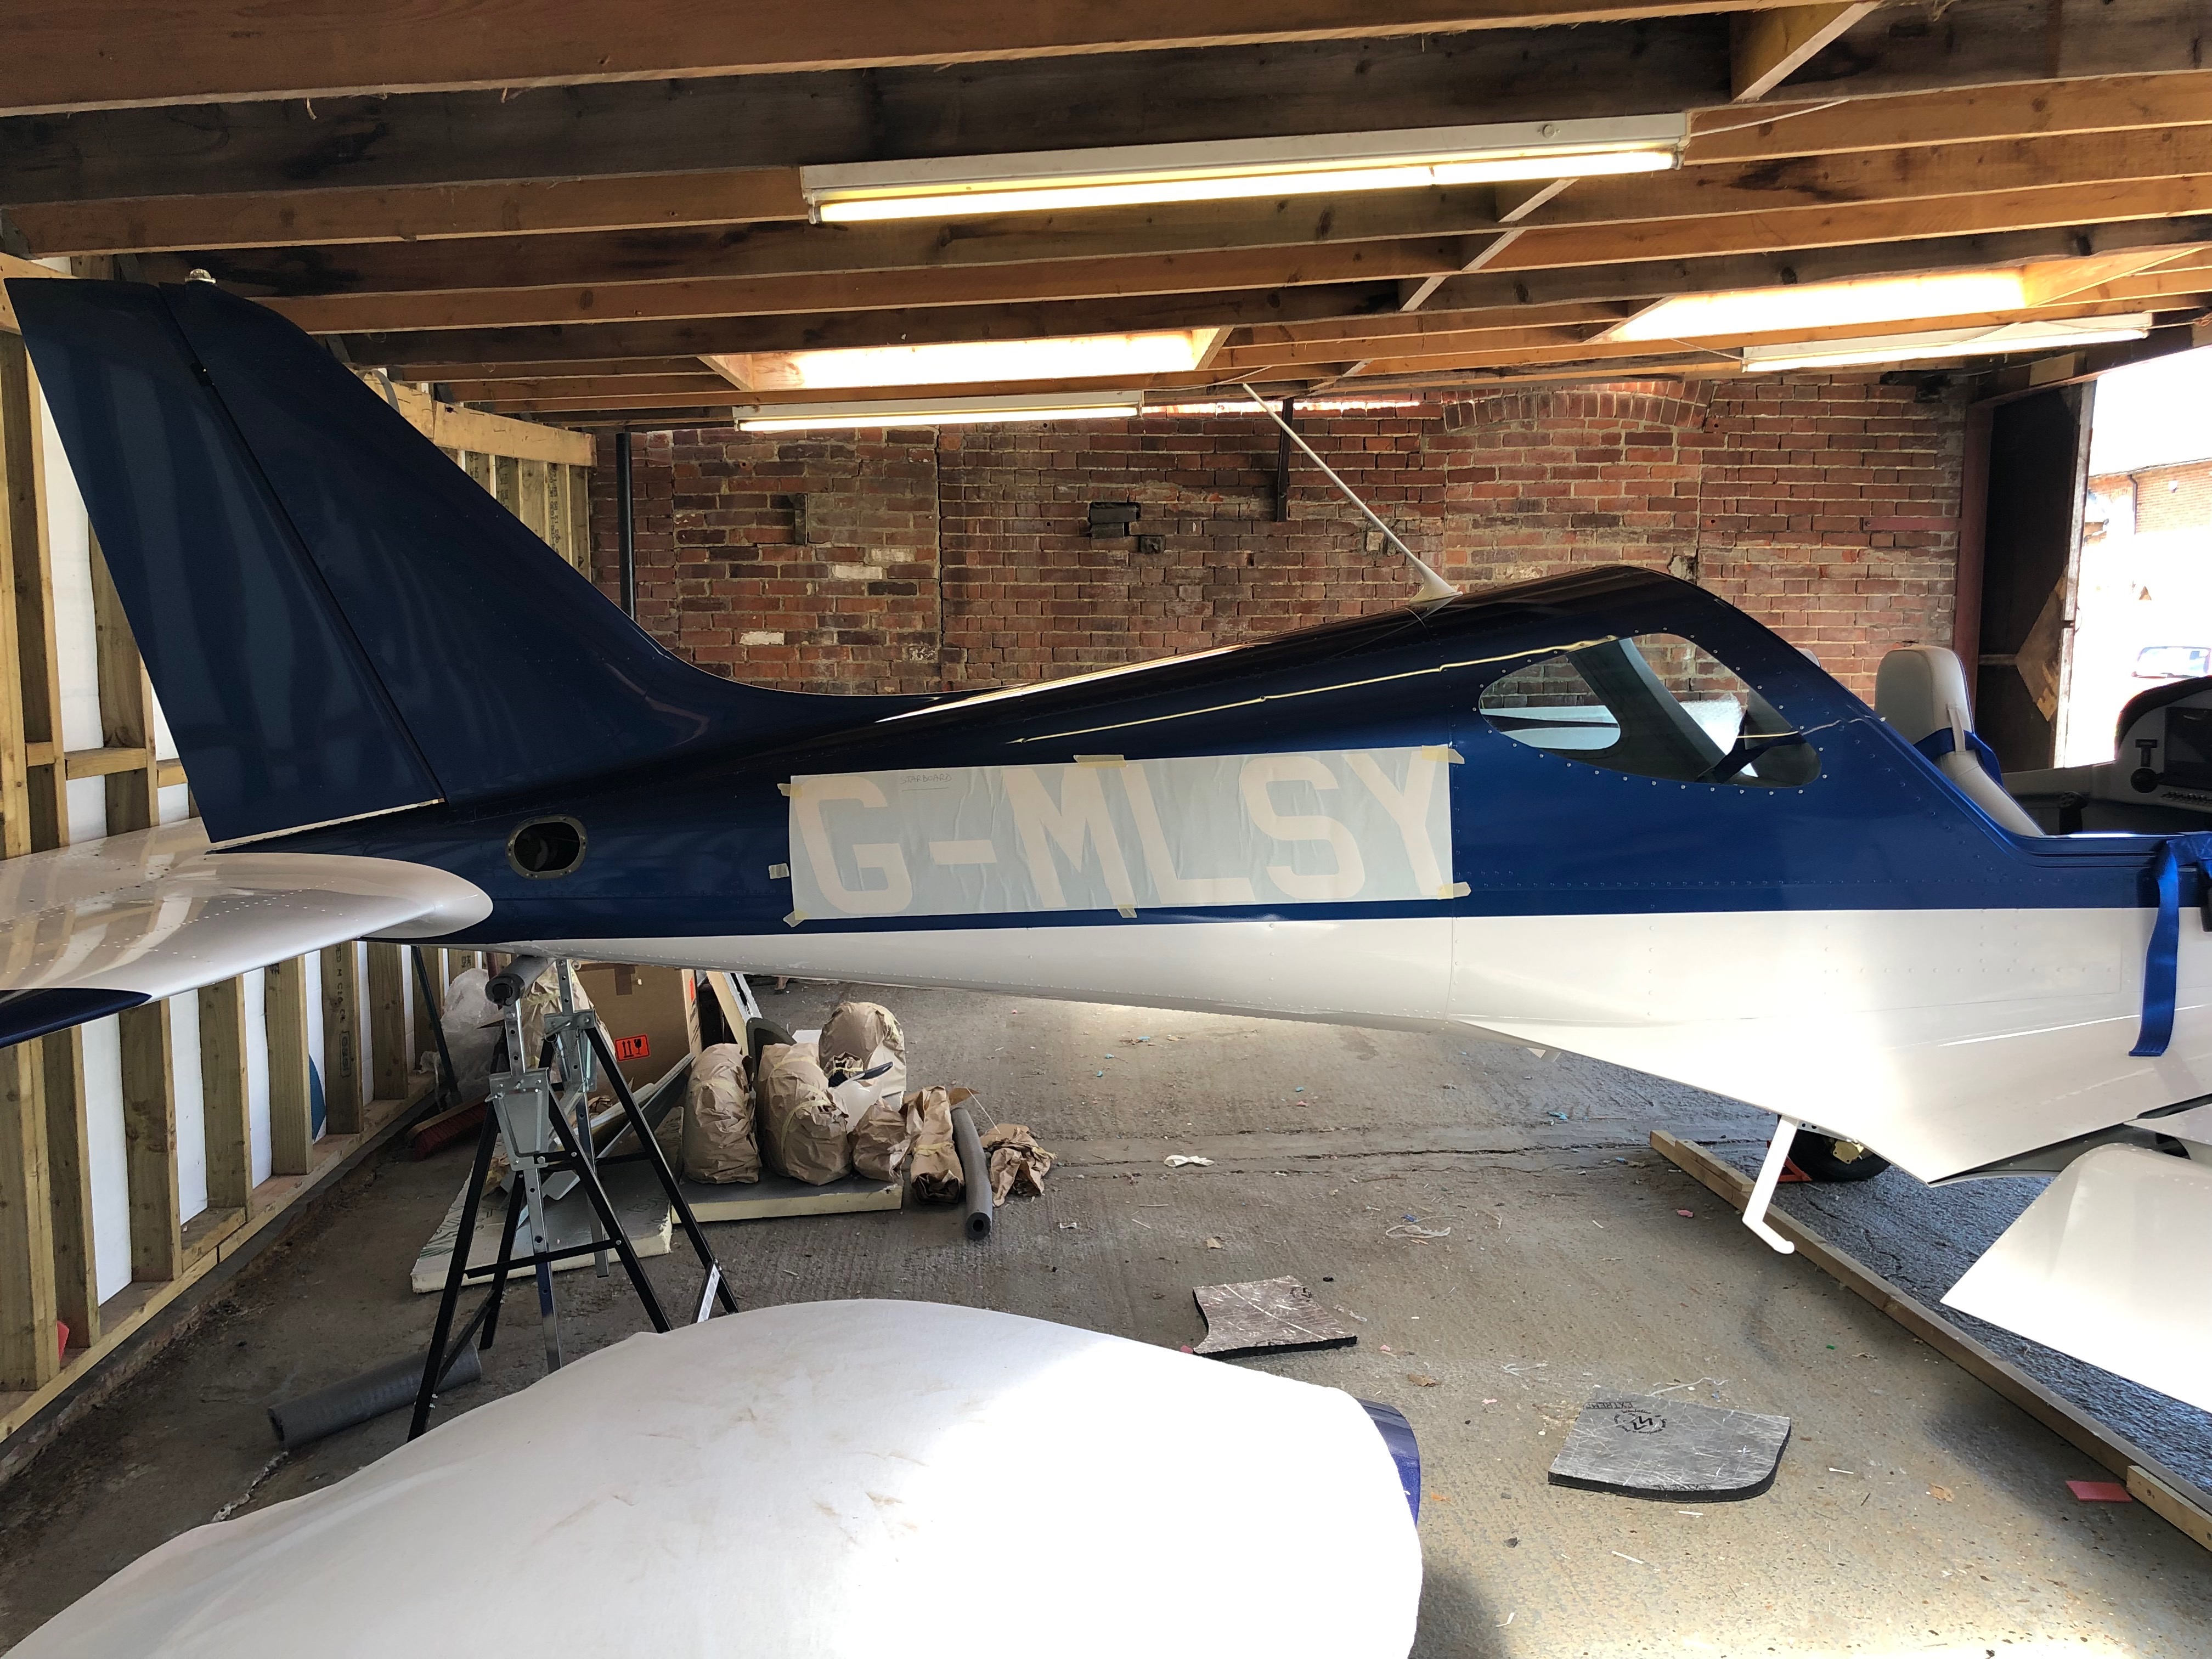
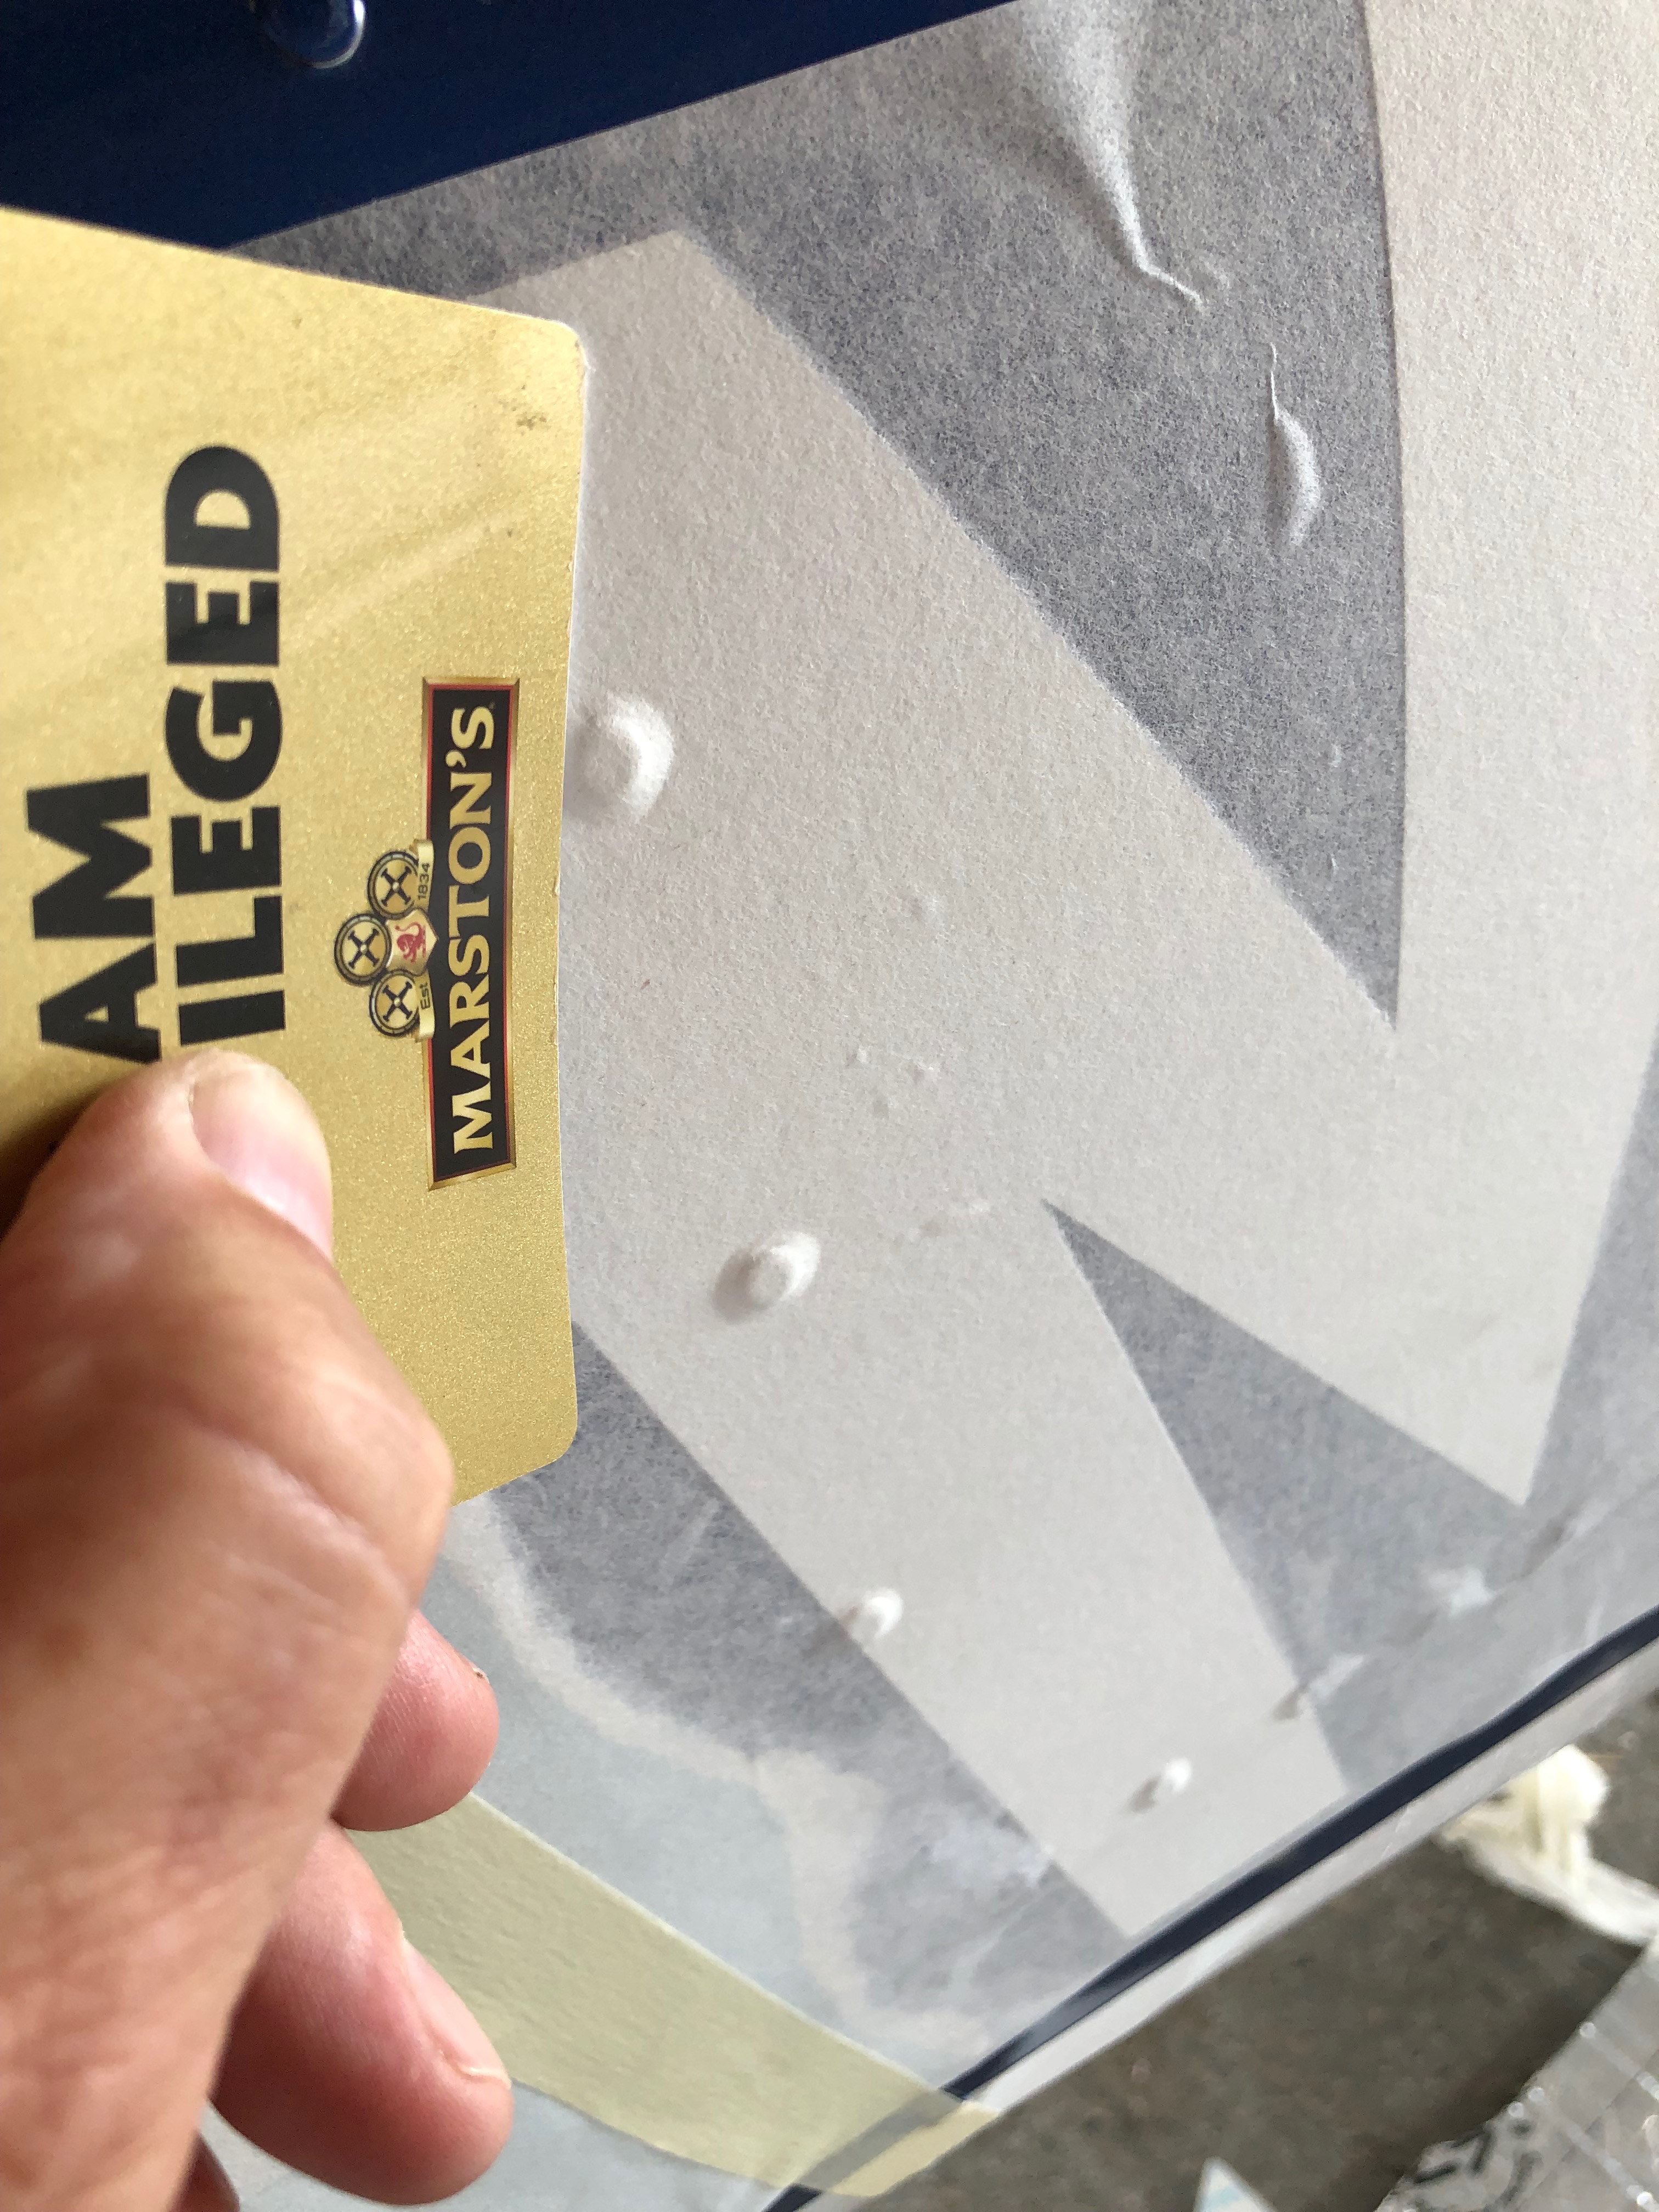
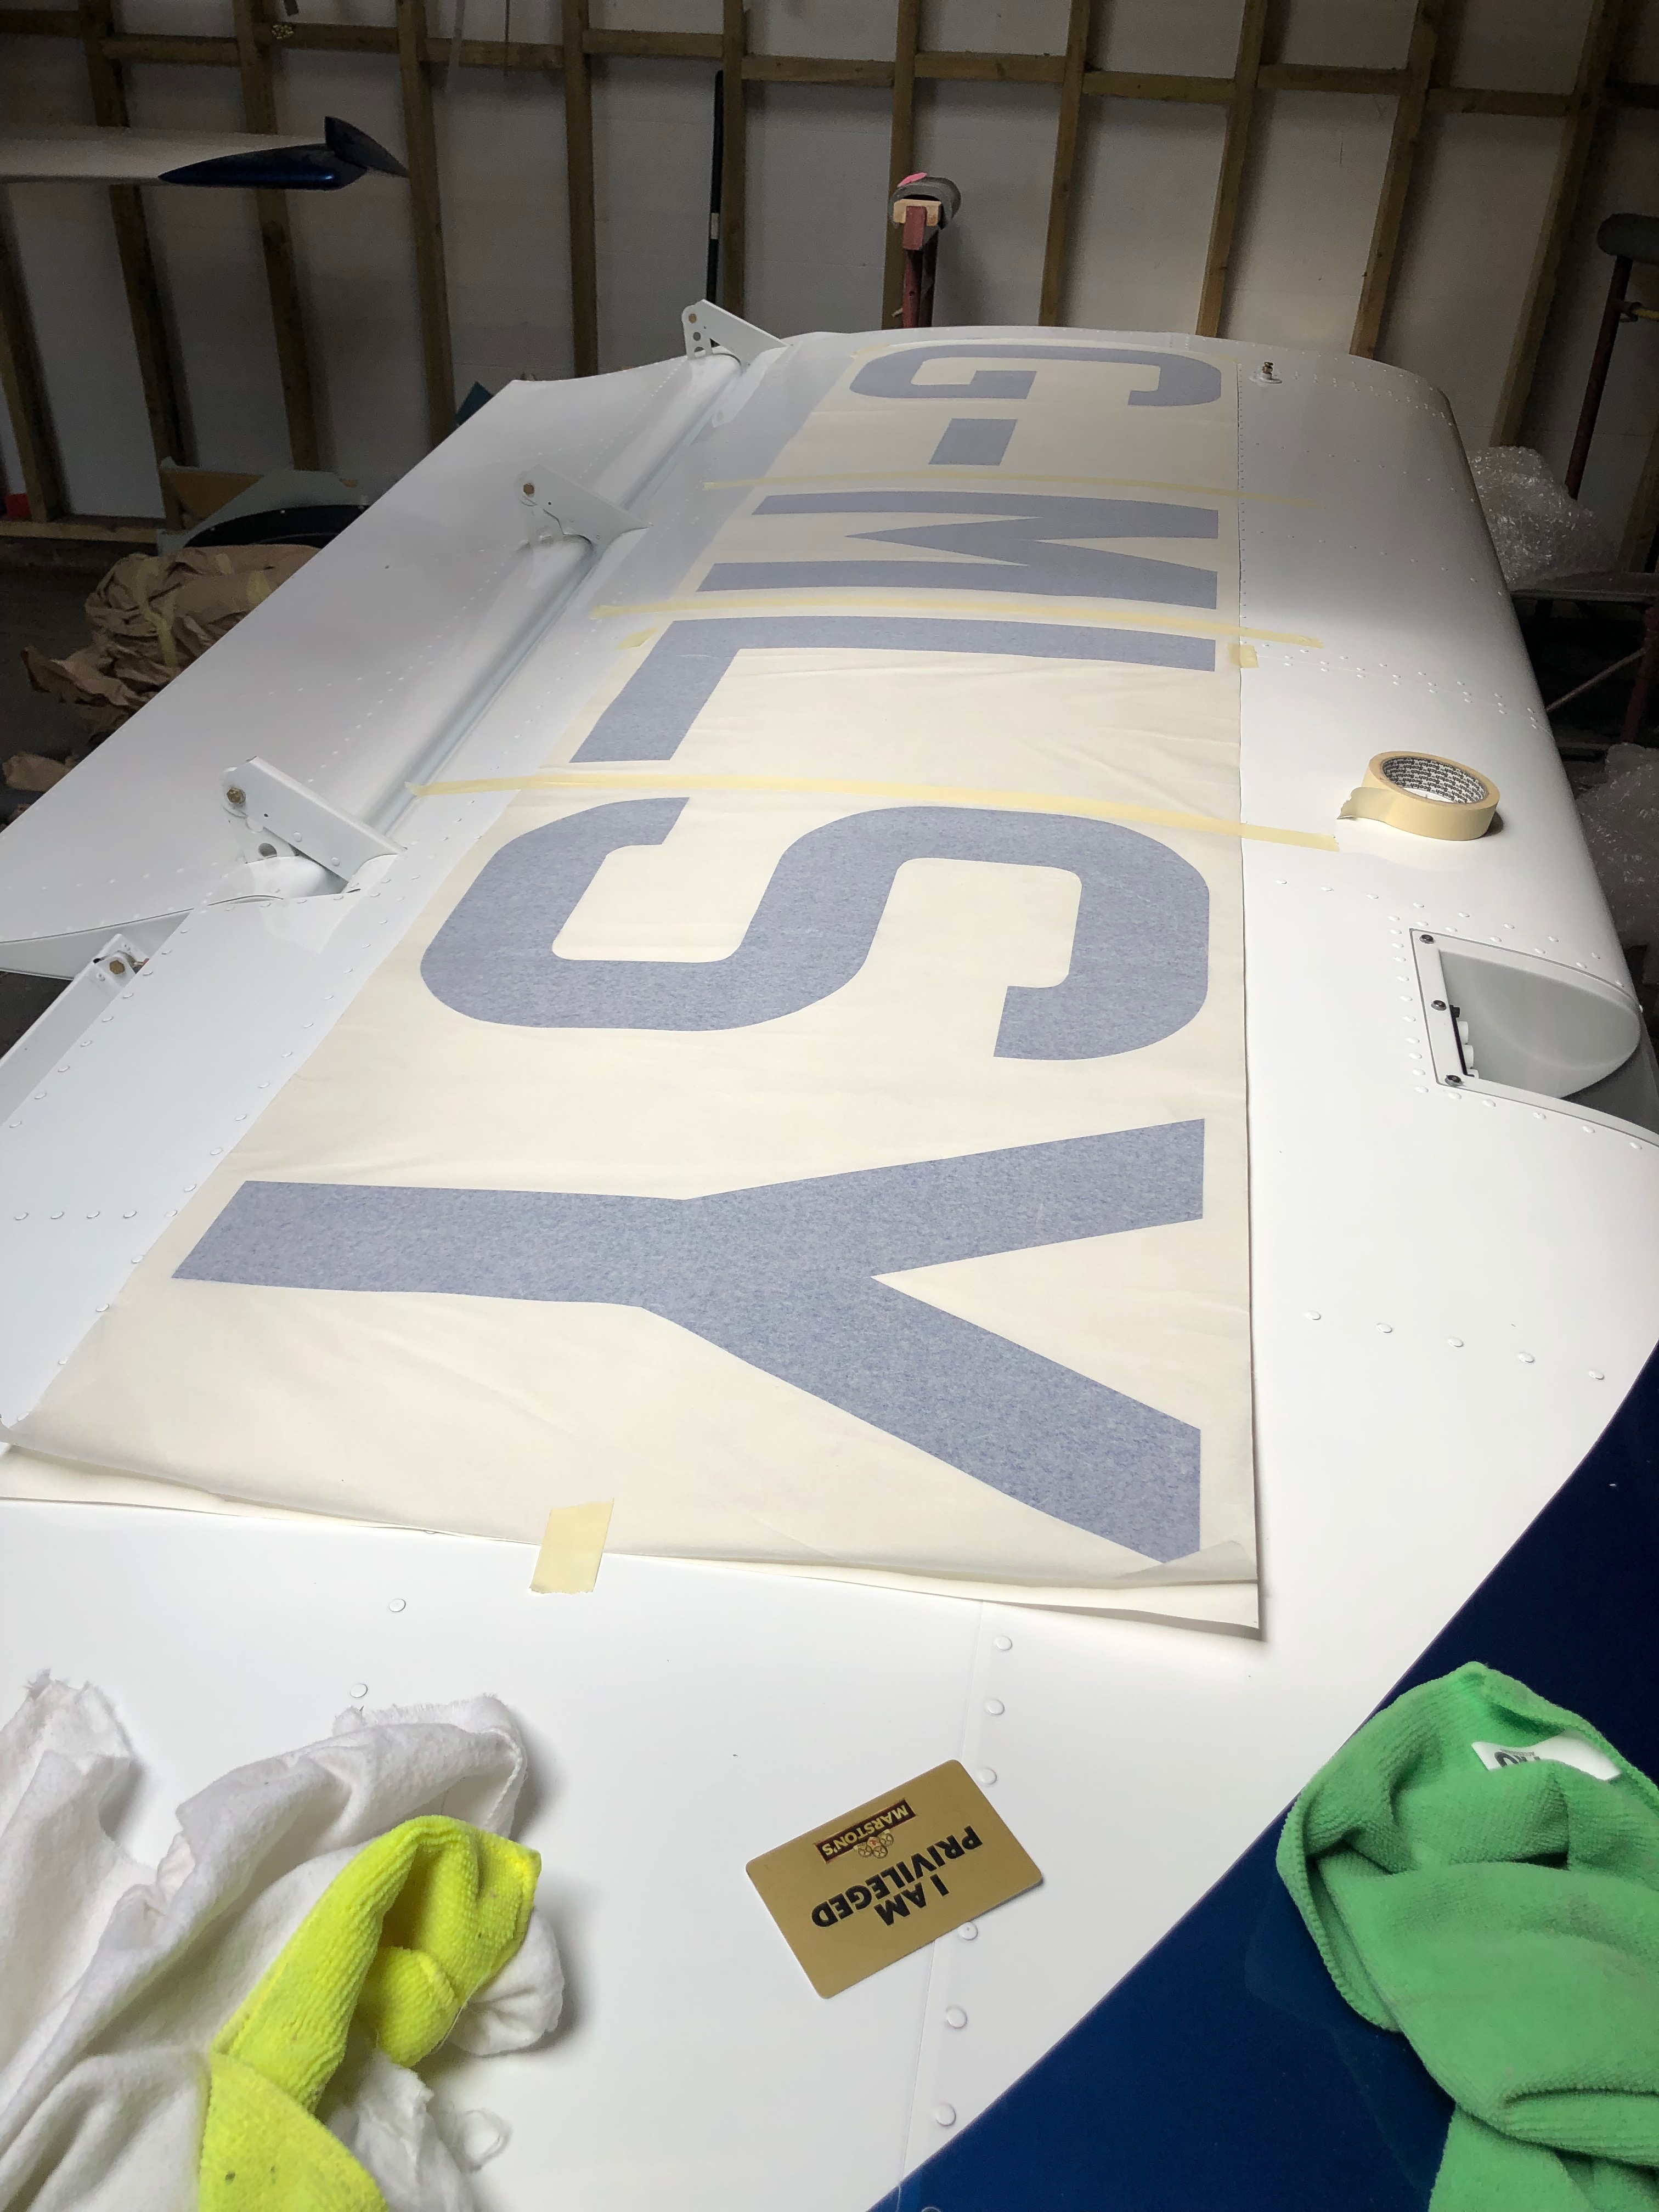
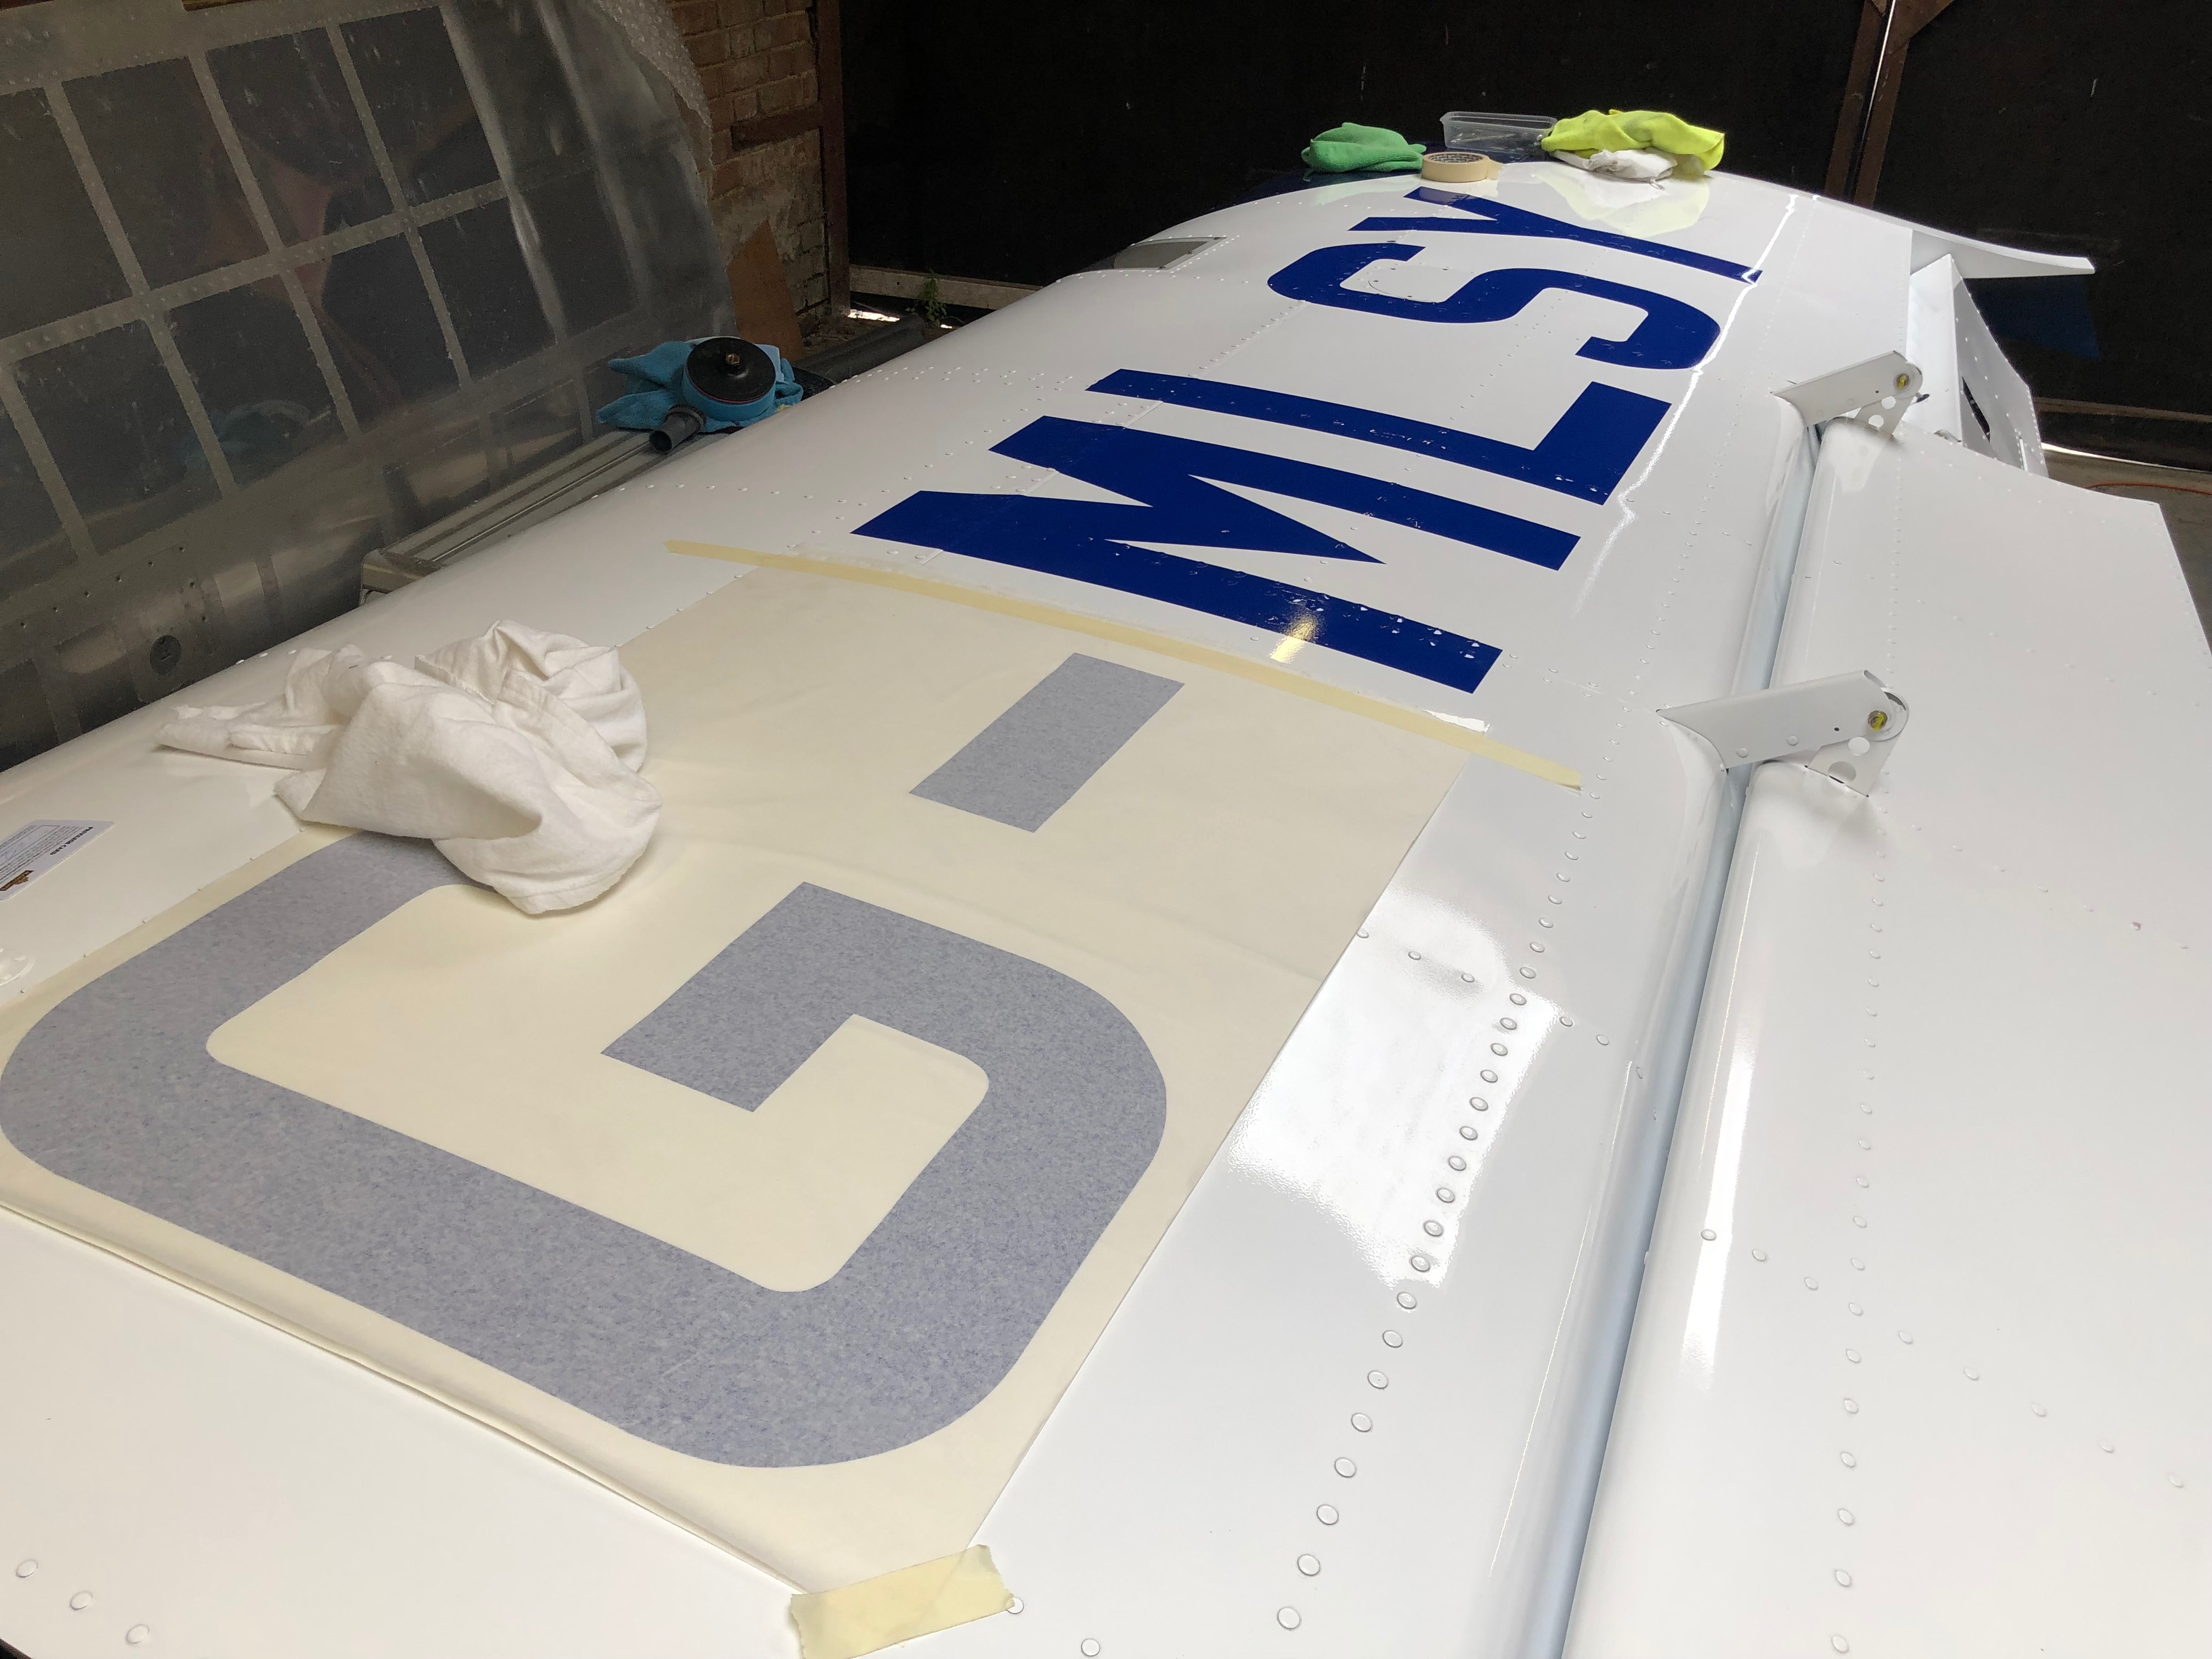
Karen came to the airfield today to help get rid of the little air bubbles around each of the rivets on the wing, did a sterling job as well. We tried several positions for the side registration to see which would look better. Pete Thomas, a friend from the London Gliding Club is coming down on Monday to do the weight and balance so I started to add all the bits and pieces that need to be on the aircraft from the weighing.

The vinyl registration doesn’t sit well around each rivet that it covers. A little air bubble is present on nearly every one of them. Karen used a fine point to pierce the vinyl and then gently pressed out the air. The result was fantastic and a big thanks to Karen giving up some her weekend to help me.
Which looks better? aligning with the rivet line or …
…the paint line. We both decided that the paint line was a better option so the decision is made.
The spats need to go on as does the spinner and cowlings ready for weighing on Monday.
Application of the registration starts. Not many pictures here on how to do it as I was worried about mucking it up.
Part way though and it’s looking good. The next bit is to take a little of the spacing out between the ‘G’, ‘-‘ and the ‘M’ as it’ll look a bit better. I should have asked Pete from Mirage Signs to do that for me but I forgot!
The final look. Very pleased with the result.
A picture shows the inside of G-MLSY with all the seats and trim in place and a very happy me!

Friday 19th July 2019

Music: Gerry Cinnamon

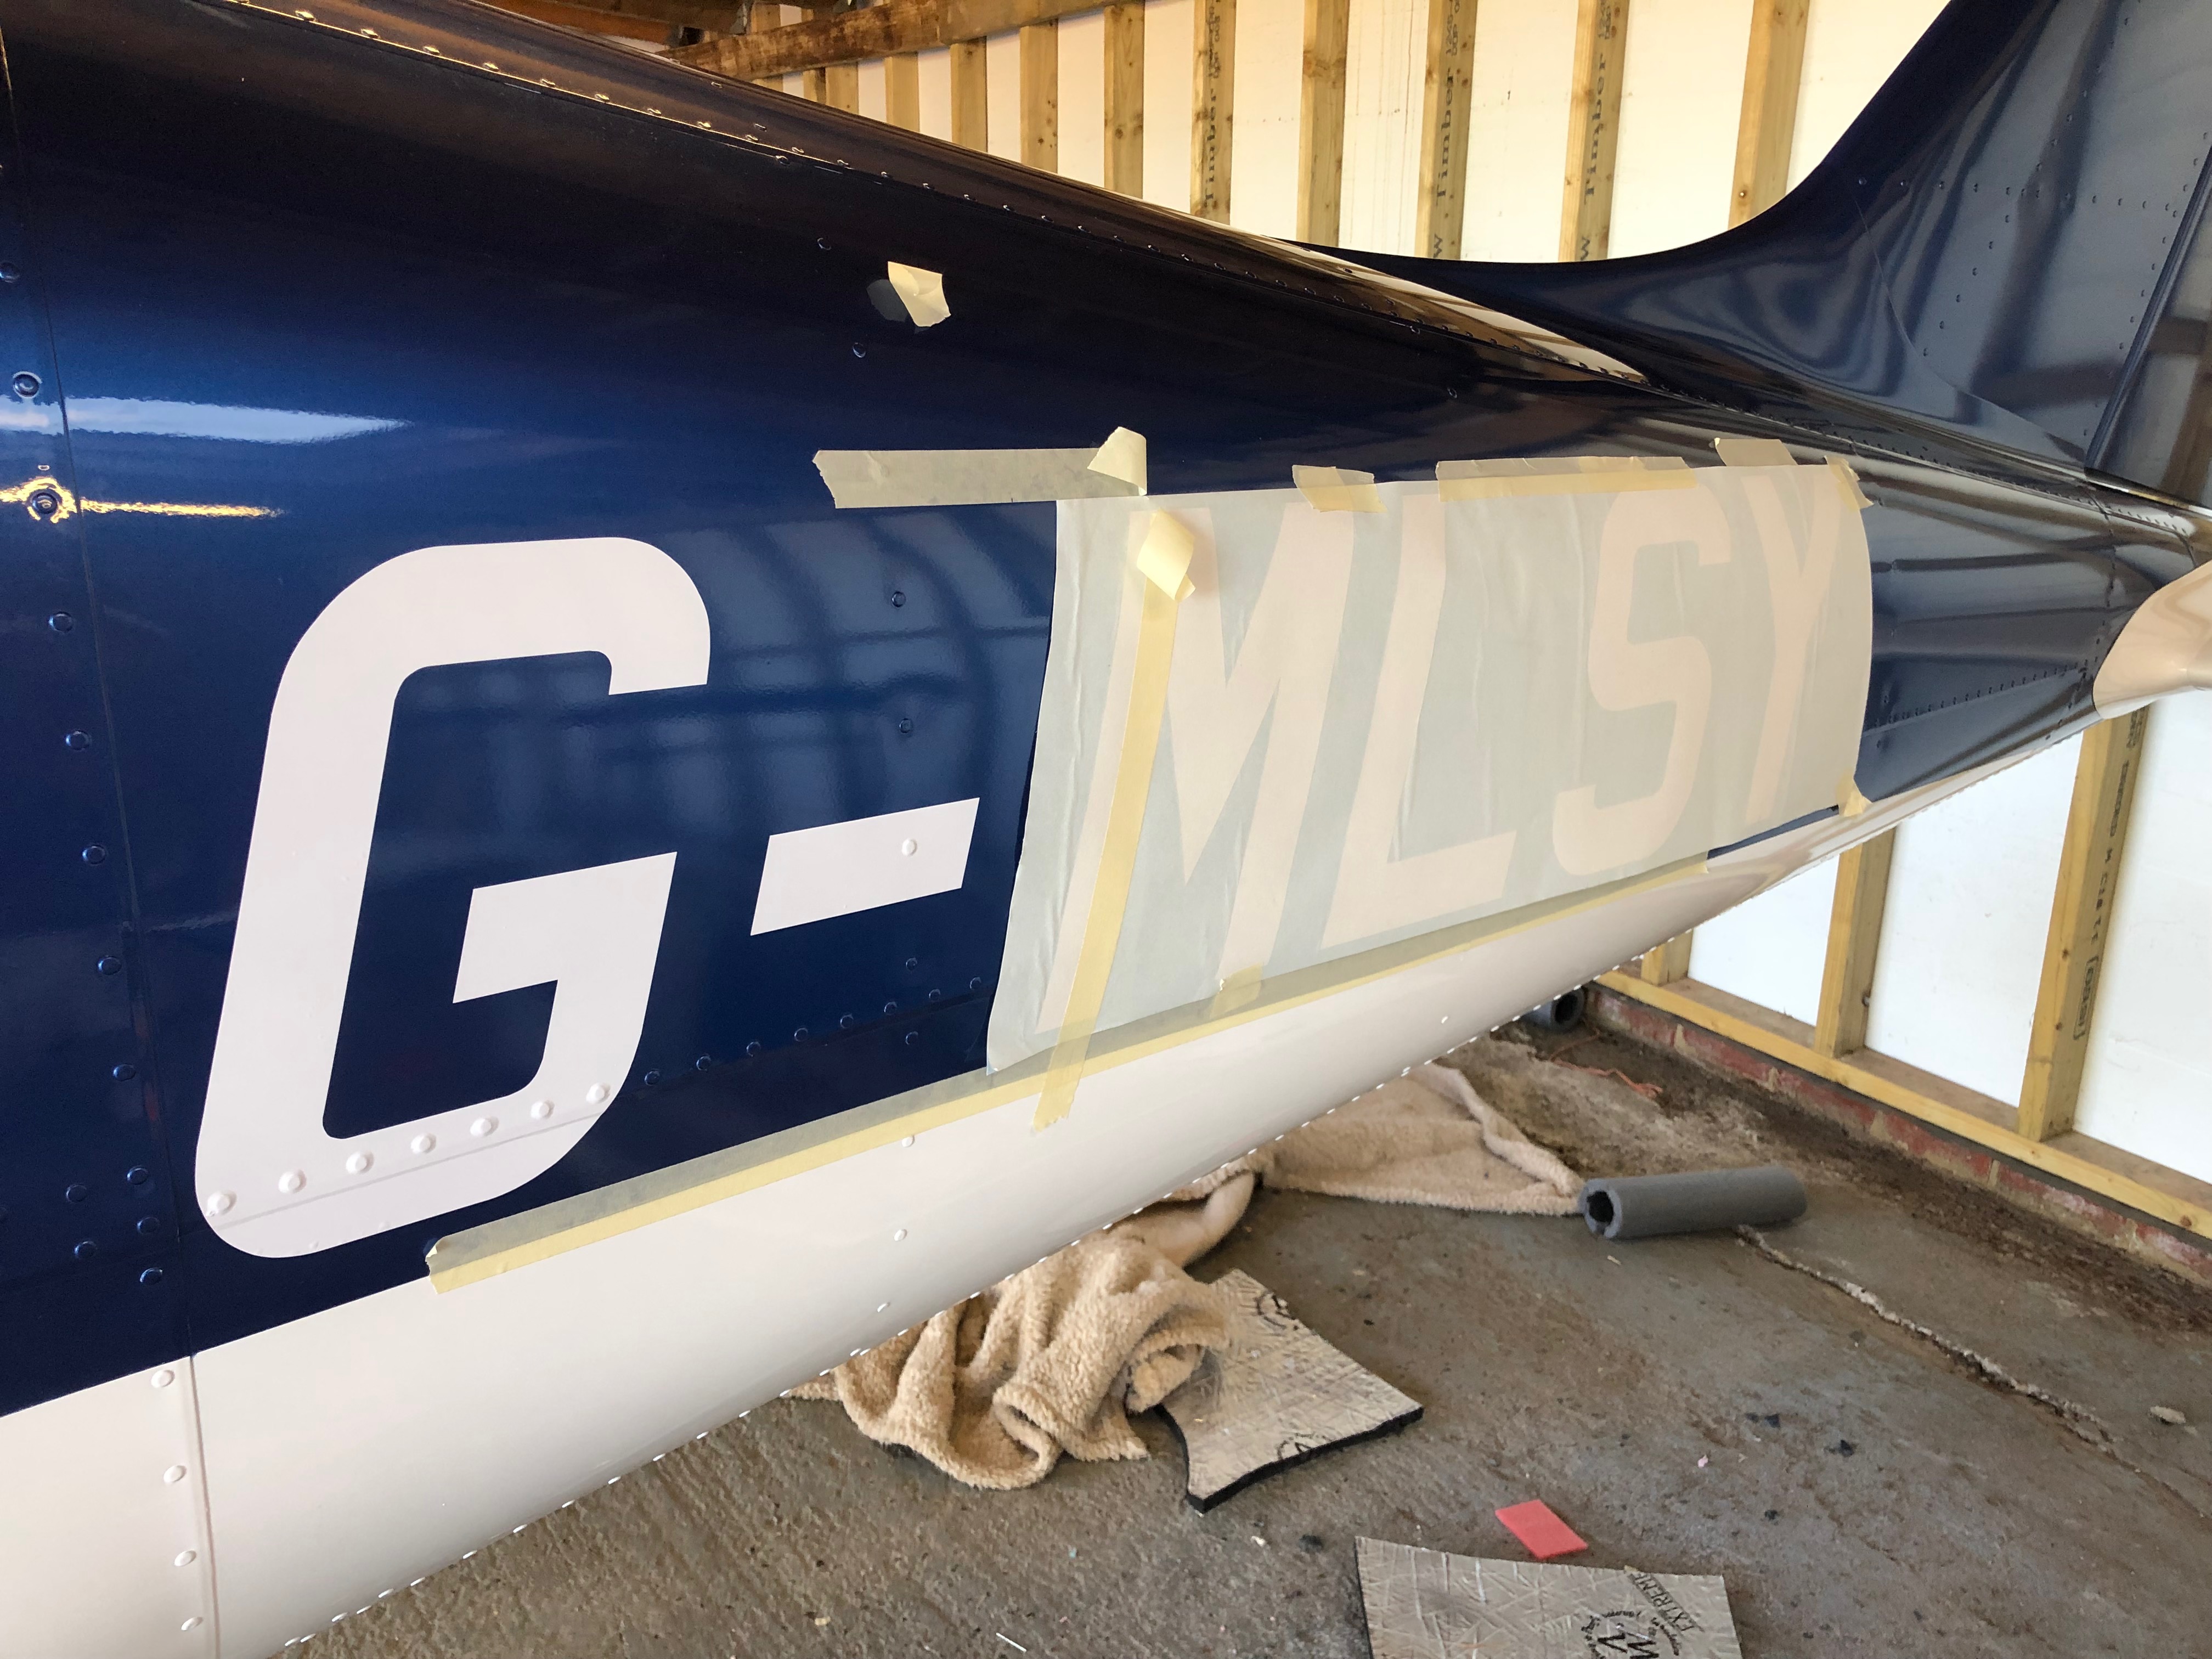
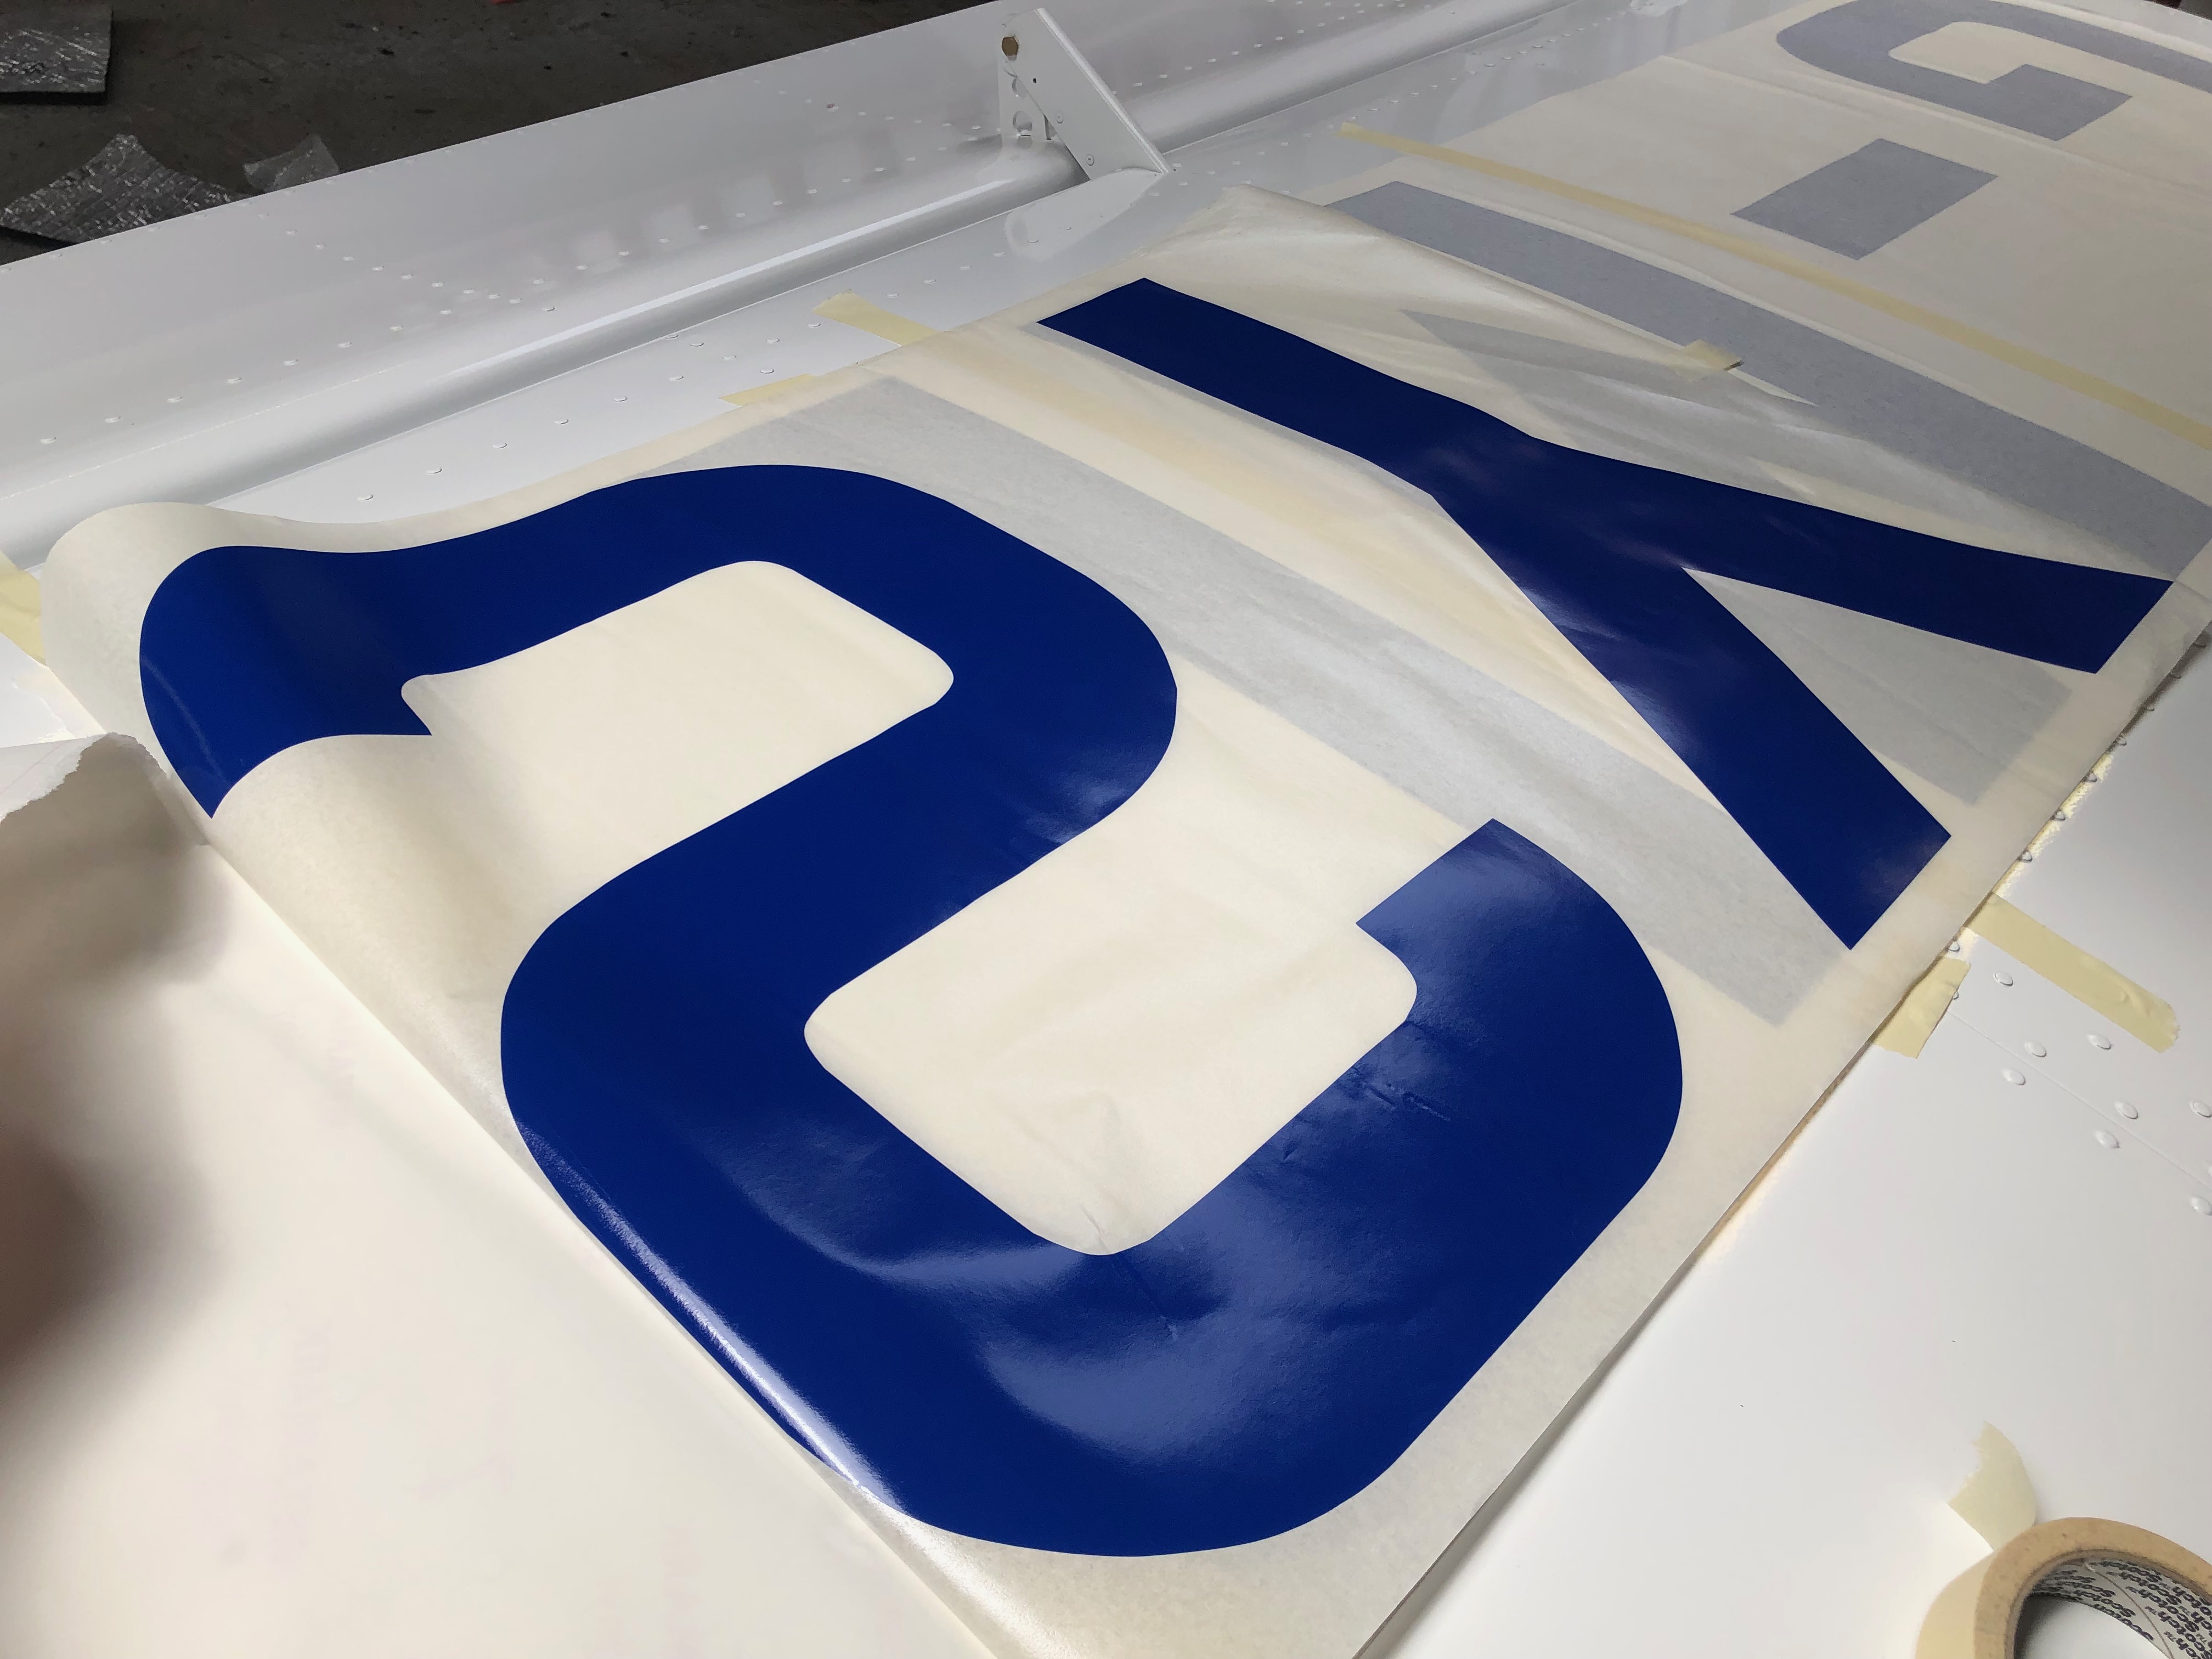
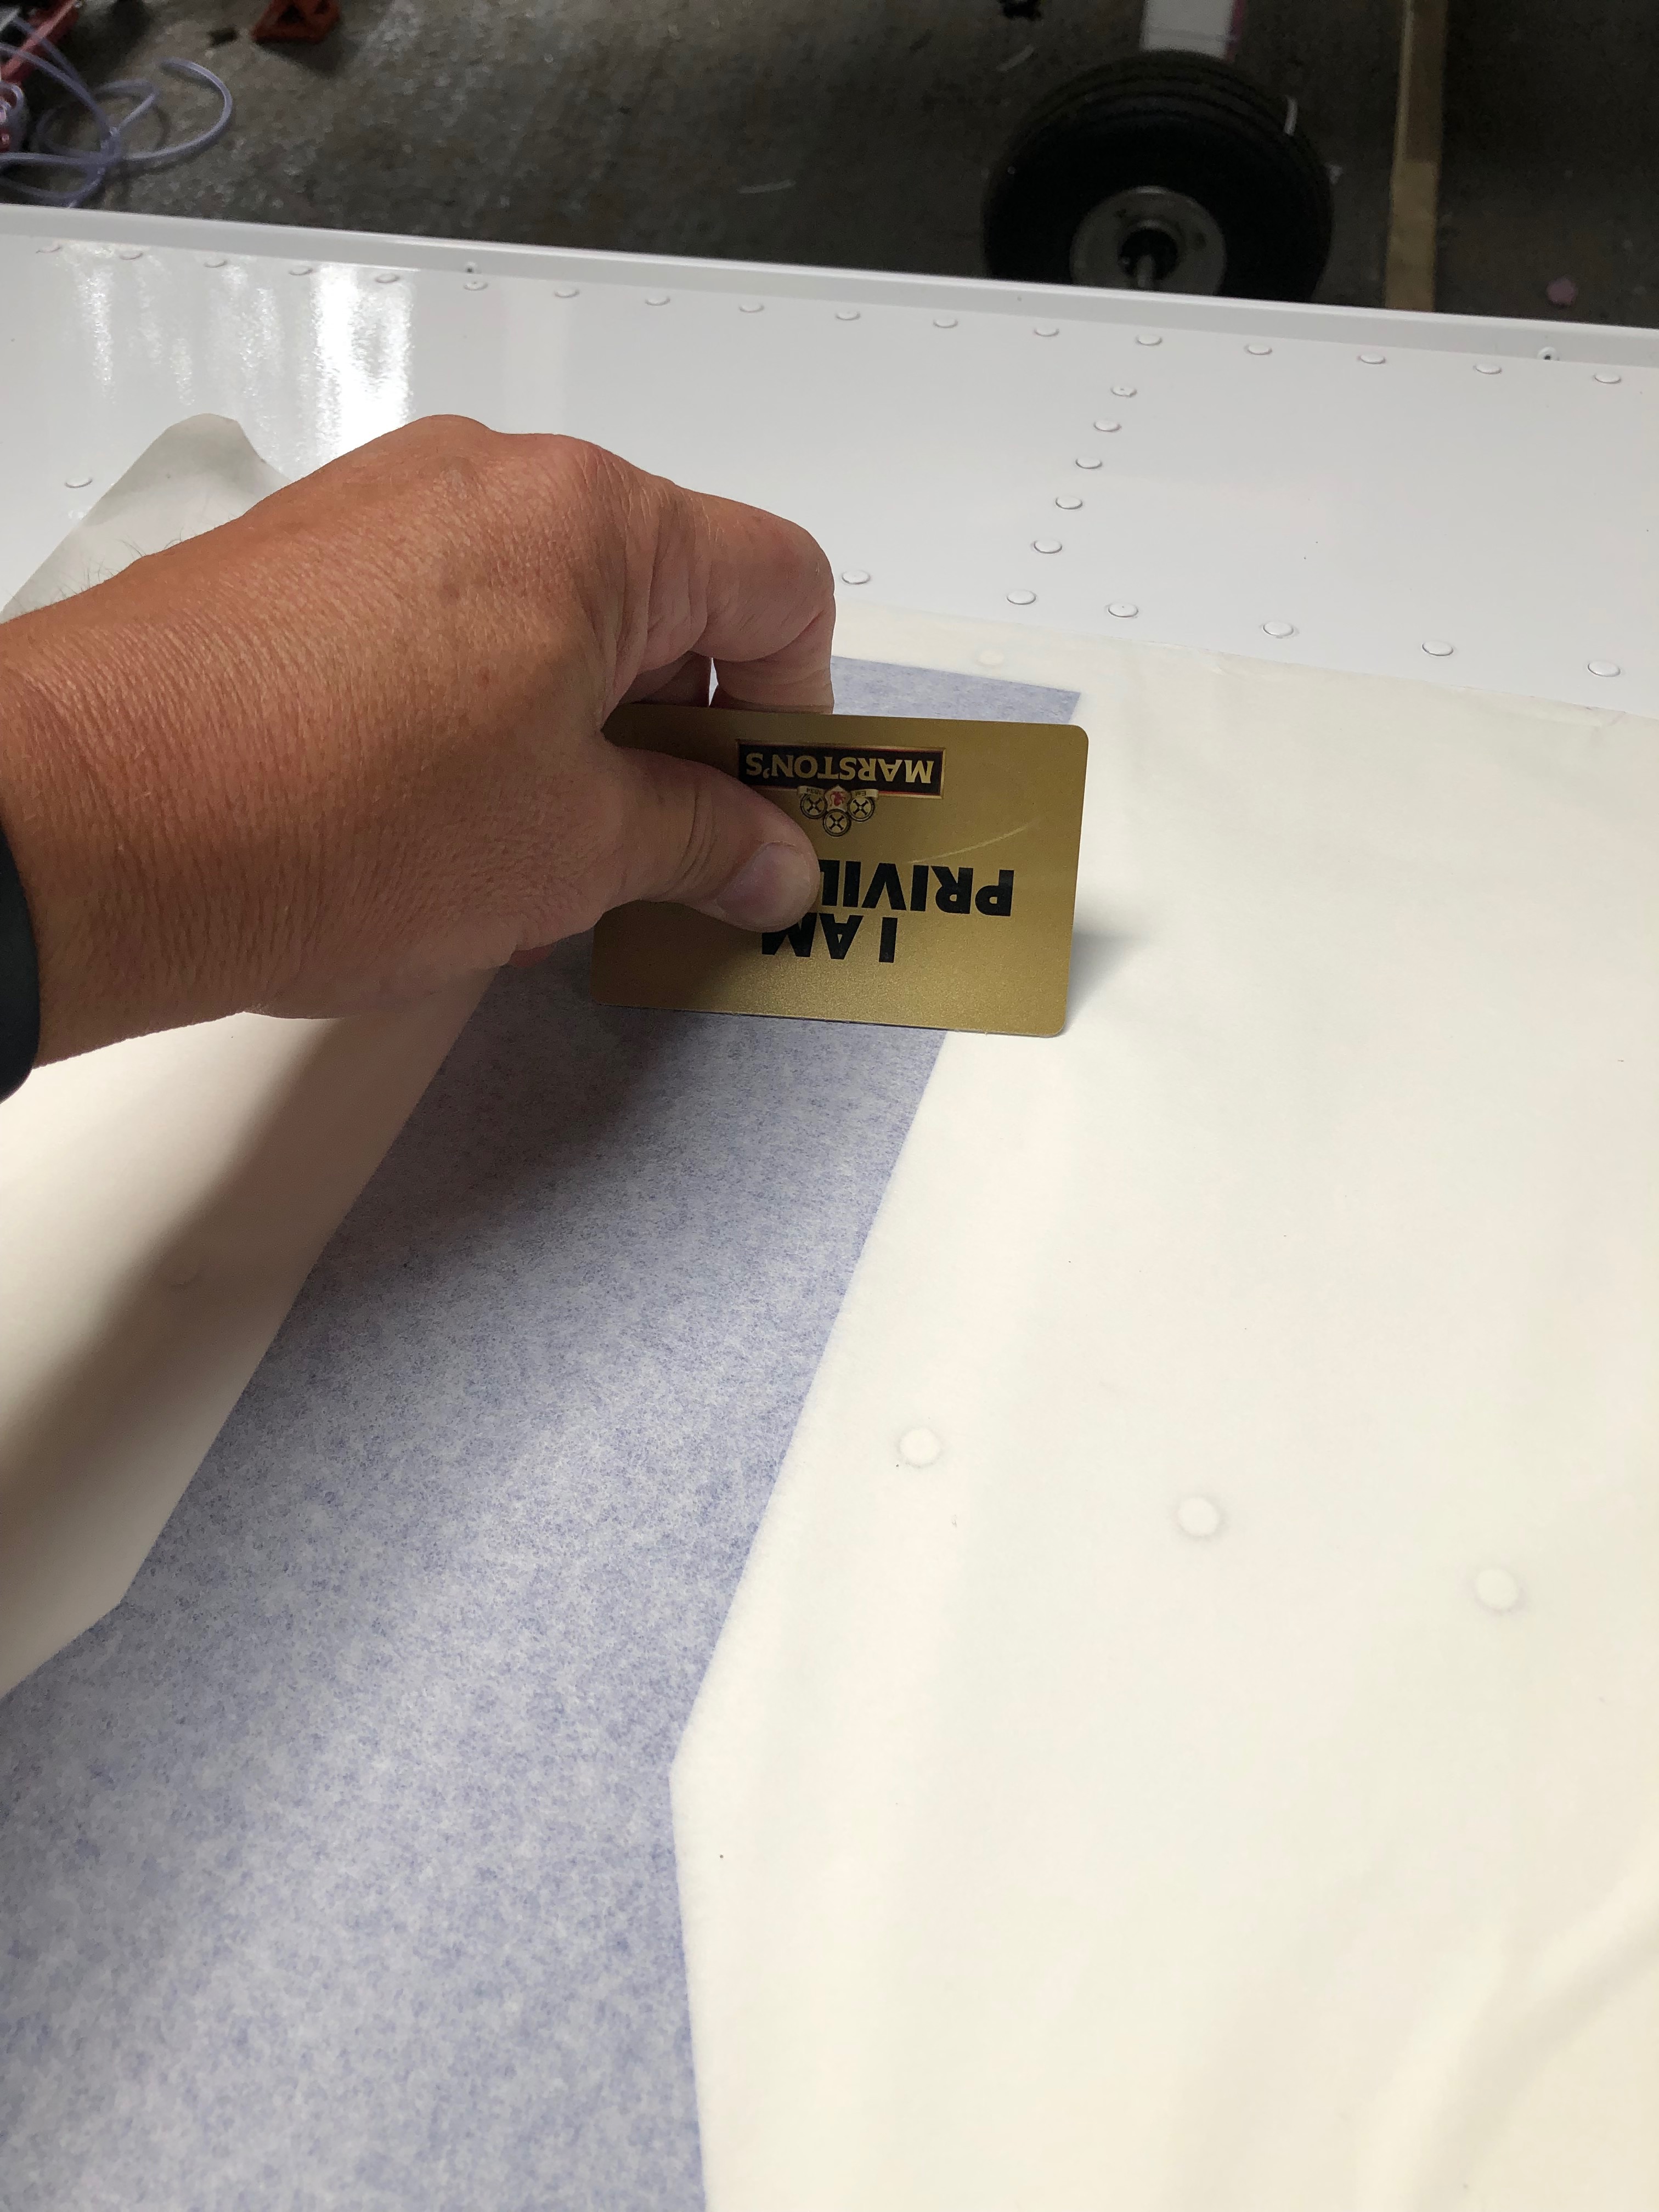
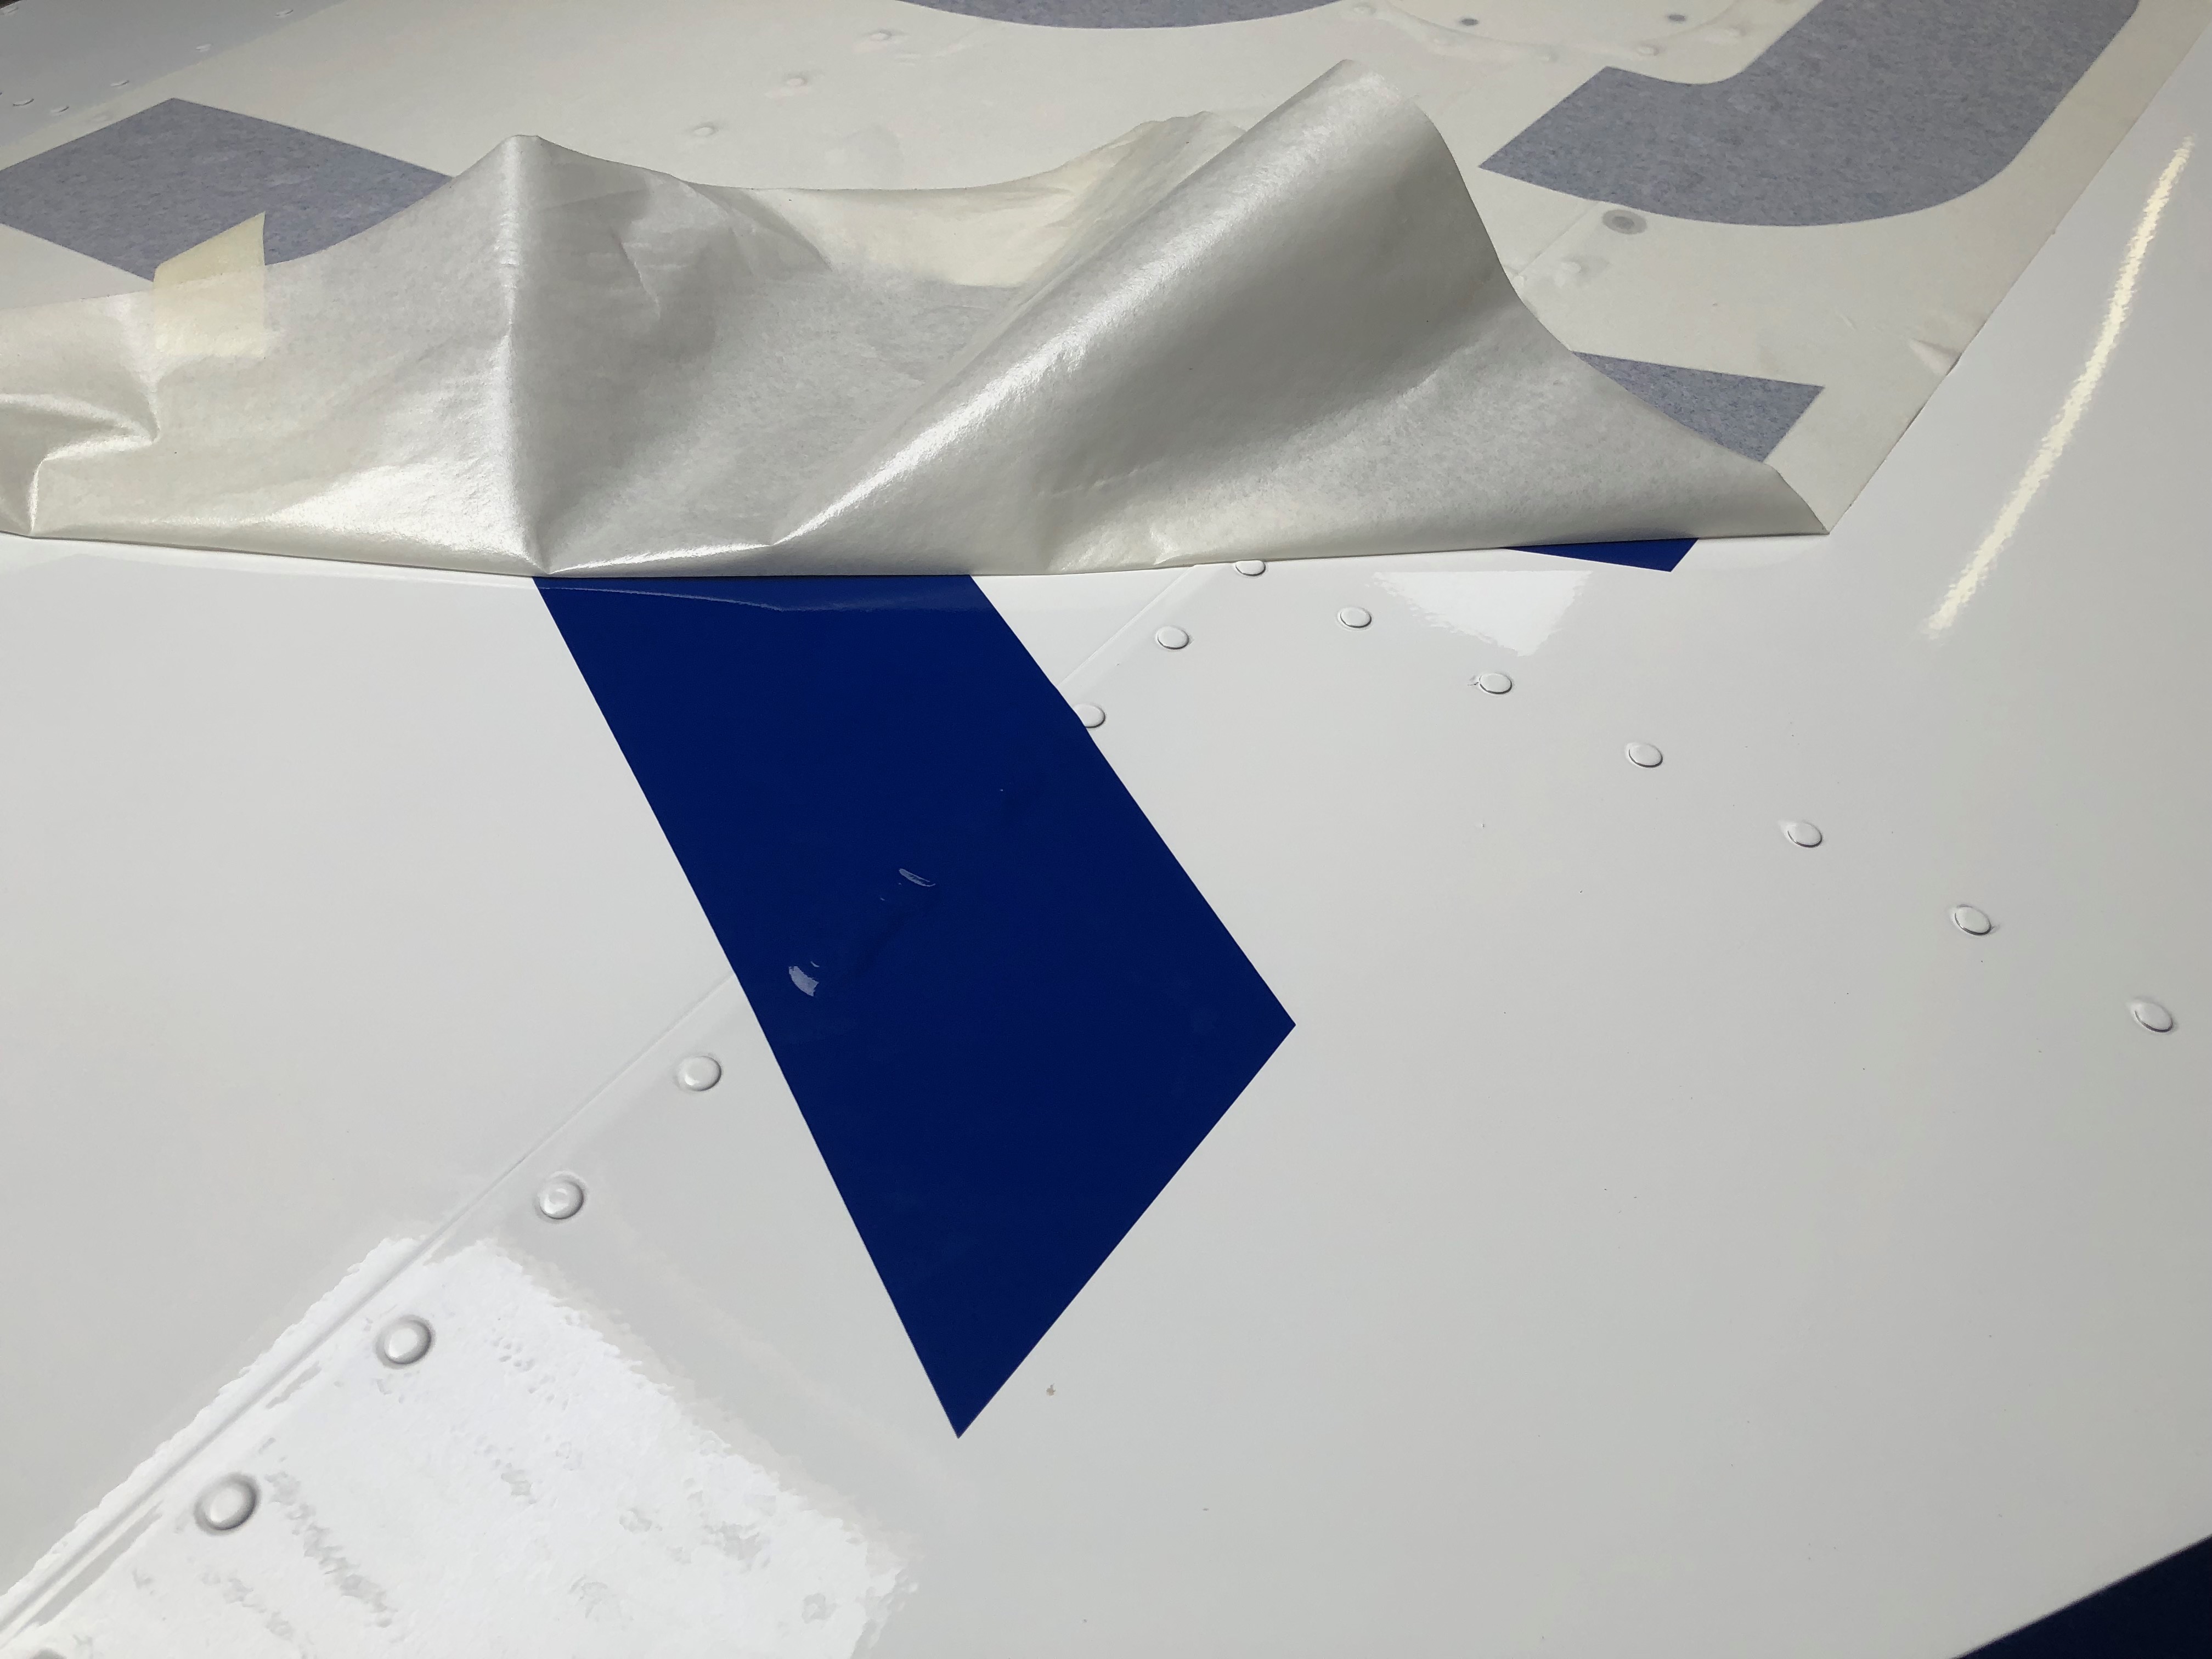
Applying the registration marks looks to be quite simple but like so many of the jobs I’ve done during this project it’s something I’ve not done before so it needs a bit of thinking about before I attempt it. I’ve watched a couple of Youtube videos that has helped.

The registration has been cut and is already spaced but Ian noticed that the hyphen spacing was much bigger than it needed to be so I needed to re-space the G, -, and M which will make it a little more difficult.

One of the first things that needs to be done is to polish the surface and degrease it will Panel wipe. During the polishing I found a number of flaws with the paint. Noticeably runs, areas where the paint is quite thin, a slight wobble in the paint line and some orange peeling. There’s not a lot of it but it’s a bit disappointing when you pay so much for a ‘professional’.
After the polishing and degreasing the surface the registration is laid out on the wing, aligned and taped down.
The paper is lifted to reveal the registration and the backing paper is cut away. It’s then laid back on the wing and…
… pressed down. I used a plastic card to press the letters into place and remove any air bubbles.
Once the adhesive has been given a bit of time to set the top backing paper is carefully removed.
Now the MLSY part has been done I need to re-space the Hyphen and the G to eliminate the extra space.
Job done. It looks quite good. What you can’t see from this picture is that there are air bubbles around each of the rivets so I’ll need to deal with them at a later date. Now I can refit the wings for the final time, I hope!

Tuesday 16th July 2019

Music: Gerry Cinnamon, Doves, George Ezra

Getting close to finishing now so some small outstanding jobs to do including wiring starter solenoid protection, a stuck starter indicator connection and external level button on each stick top hat. I also trial fitted the registration and polished the fuselage ready to apply it.

I received the registration vinyls on Friday so today I need to ready the fuselage for them to be applied. Just a case to working out the best placing for them. Along the line of paintwork line or along the rivet line? that’s the question!
I’ve bought a polishing machine to make the job easier with some G6 cutting liquid cutting compound. It takes a bit of getting used to using it but it makes a good job it. The paintwork needs to be de-greased before I can apply the registration letters.
When I sent the aircraft for spraying they noticed that one rivet hadn’t been squeezed on the trailing edge of the wing. So Ian brought his rivet squeezers in with a special head for this type of rivet.
A little more wiring to do. A diode is placed from the starter solenoid to earth to kill any spikes caused from the contacts releasing when starting the engine. Also I’ve wired up a contact on the Dynon screens to that will show a ‘stuck starter’ situation. I was a little worried that a higher voltage may find it’s way back to the EFIS so I’ve protected the connection with a diode to prevent spikes and a 1 amp fuse.