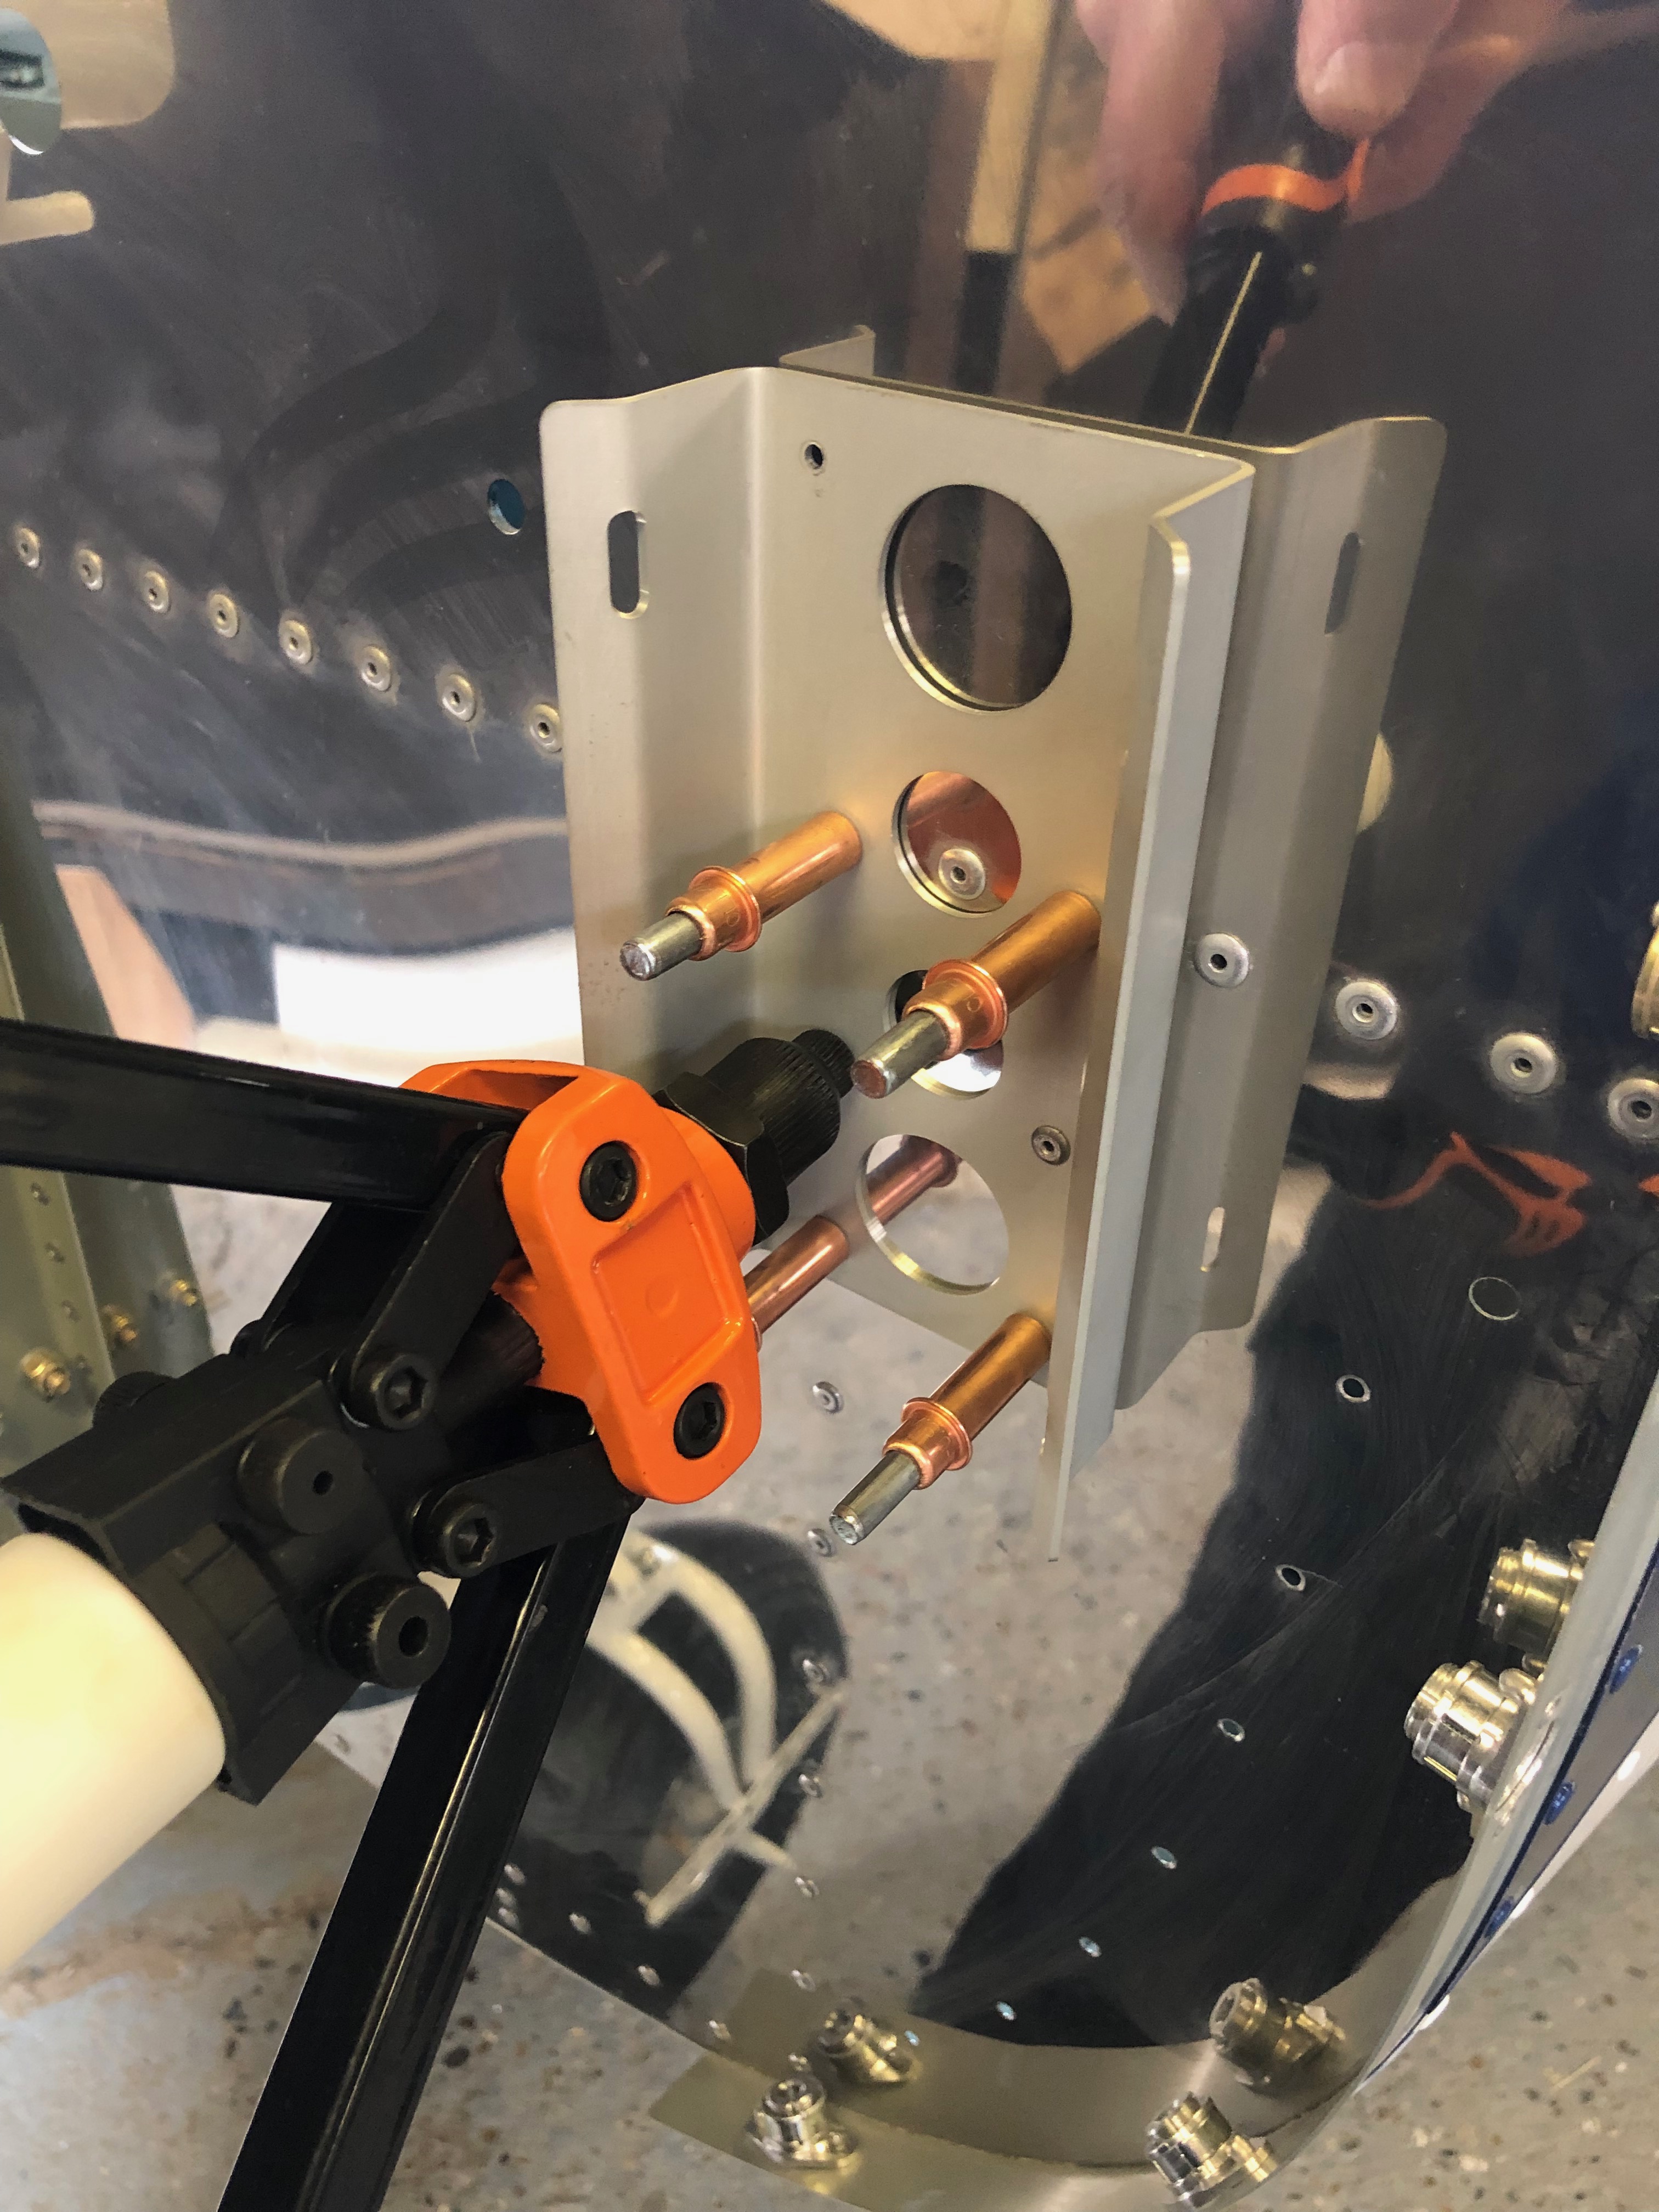
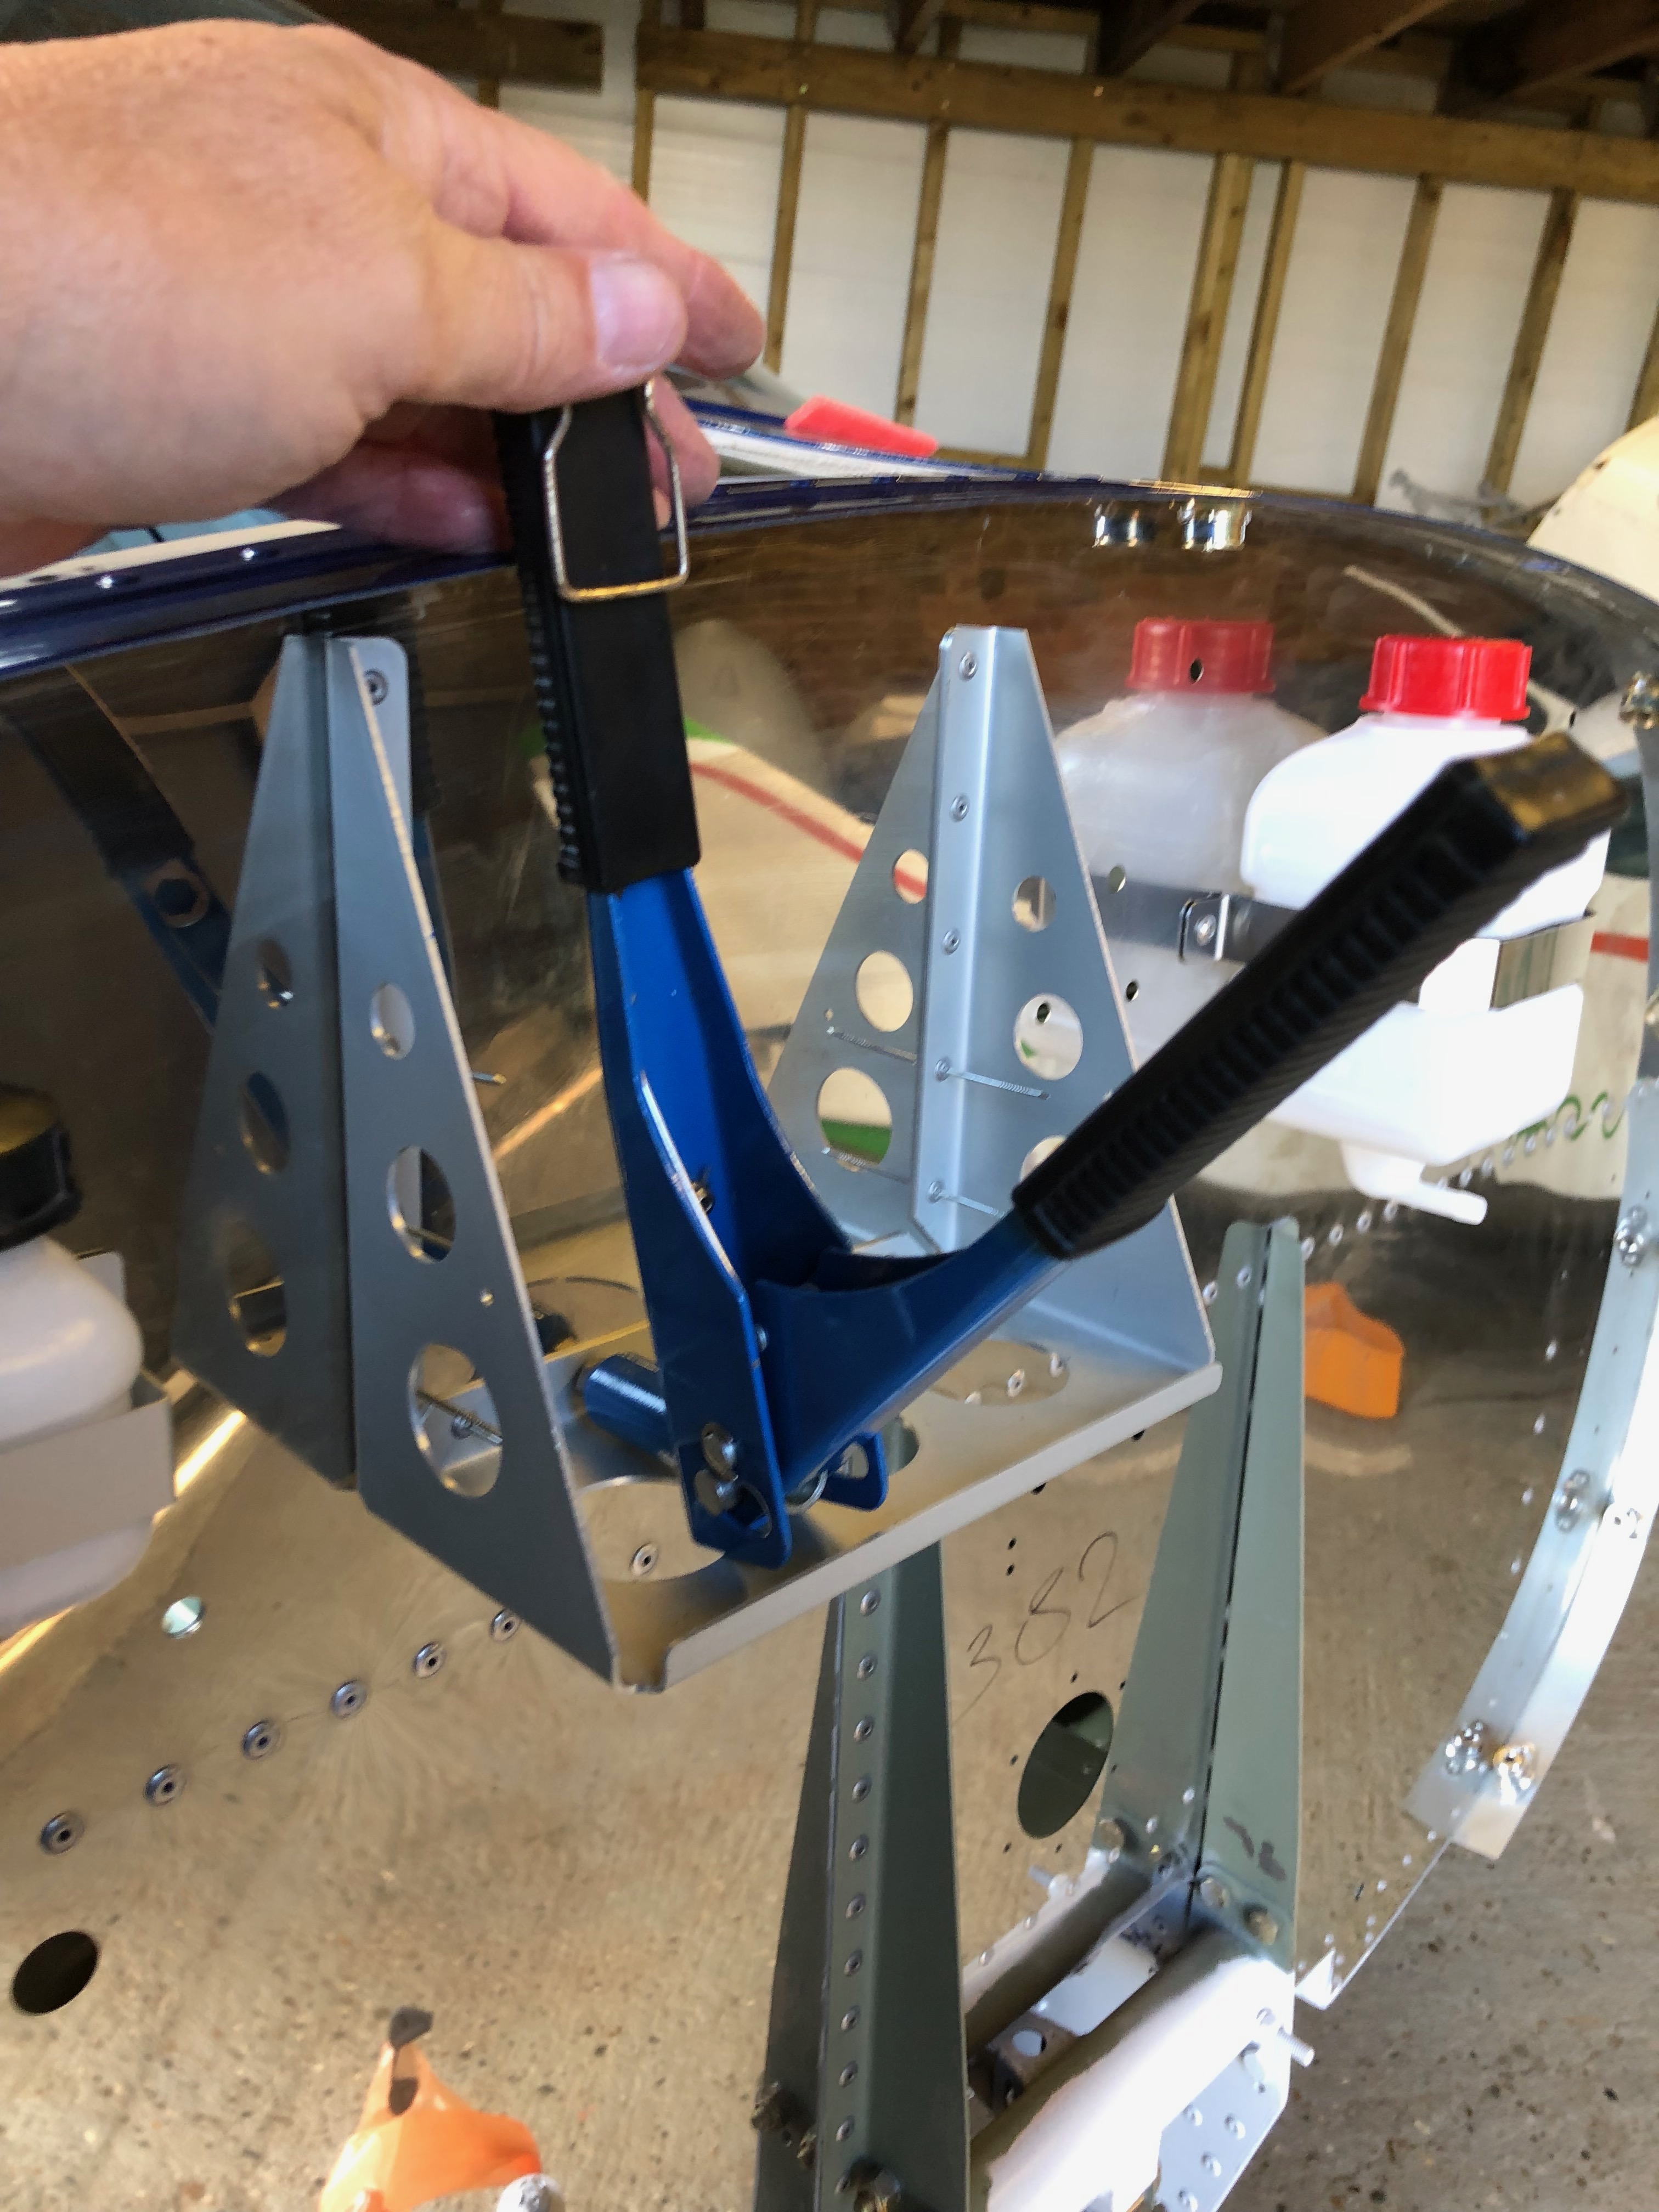
Oil tank bracket. I’ve decided to use a different rivet gun which helps speed up the job
Gascolator bracket
Heater control cable bracket
The fuel pump and firewall air ducts are next to be fitted once the canopy is removed
To ensure the wing root bolts don’t rust some lithium grease was sprayed on them
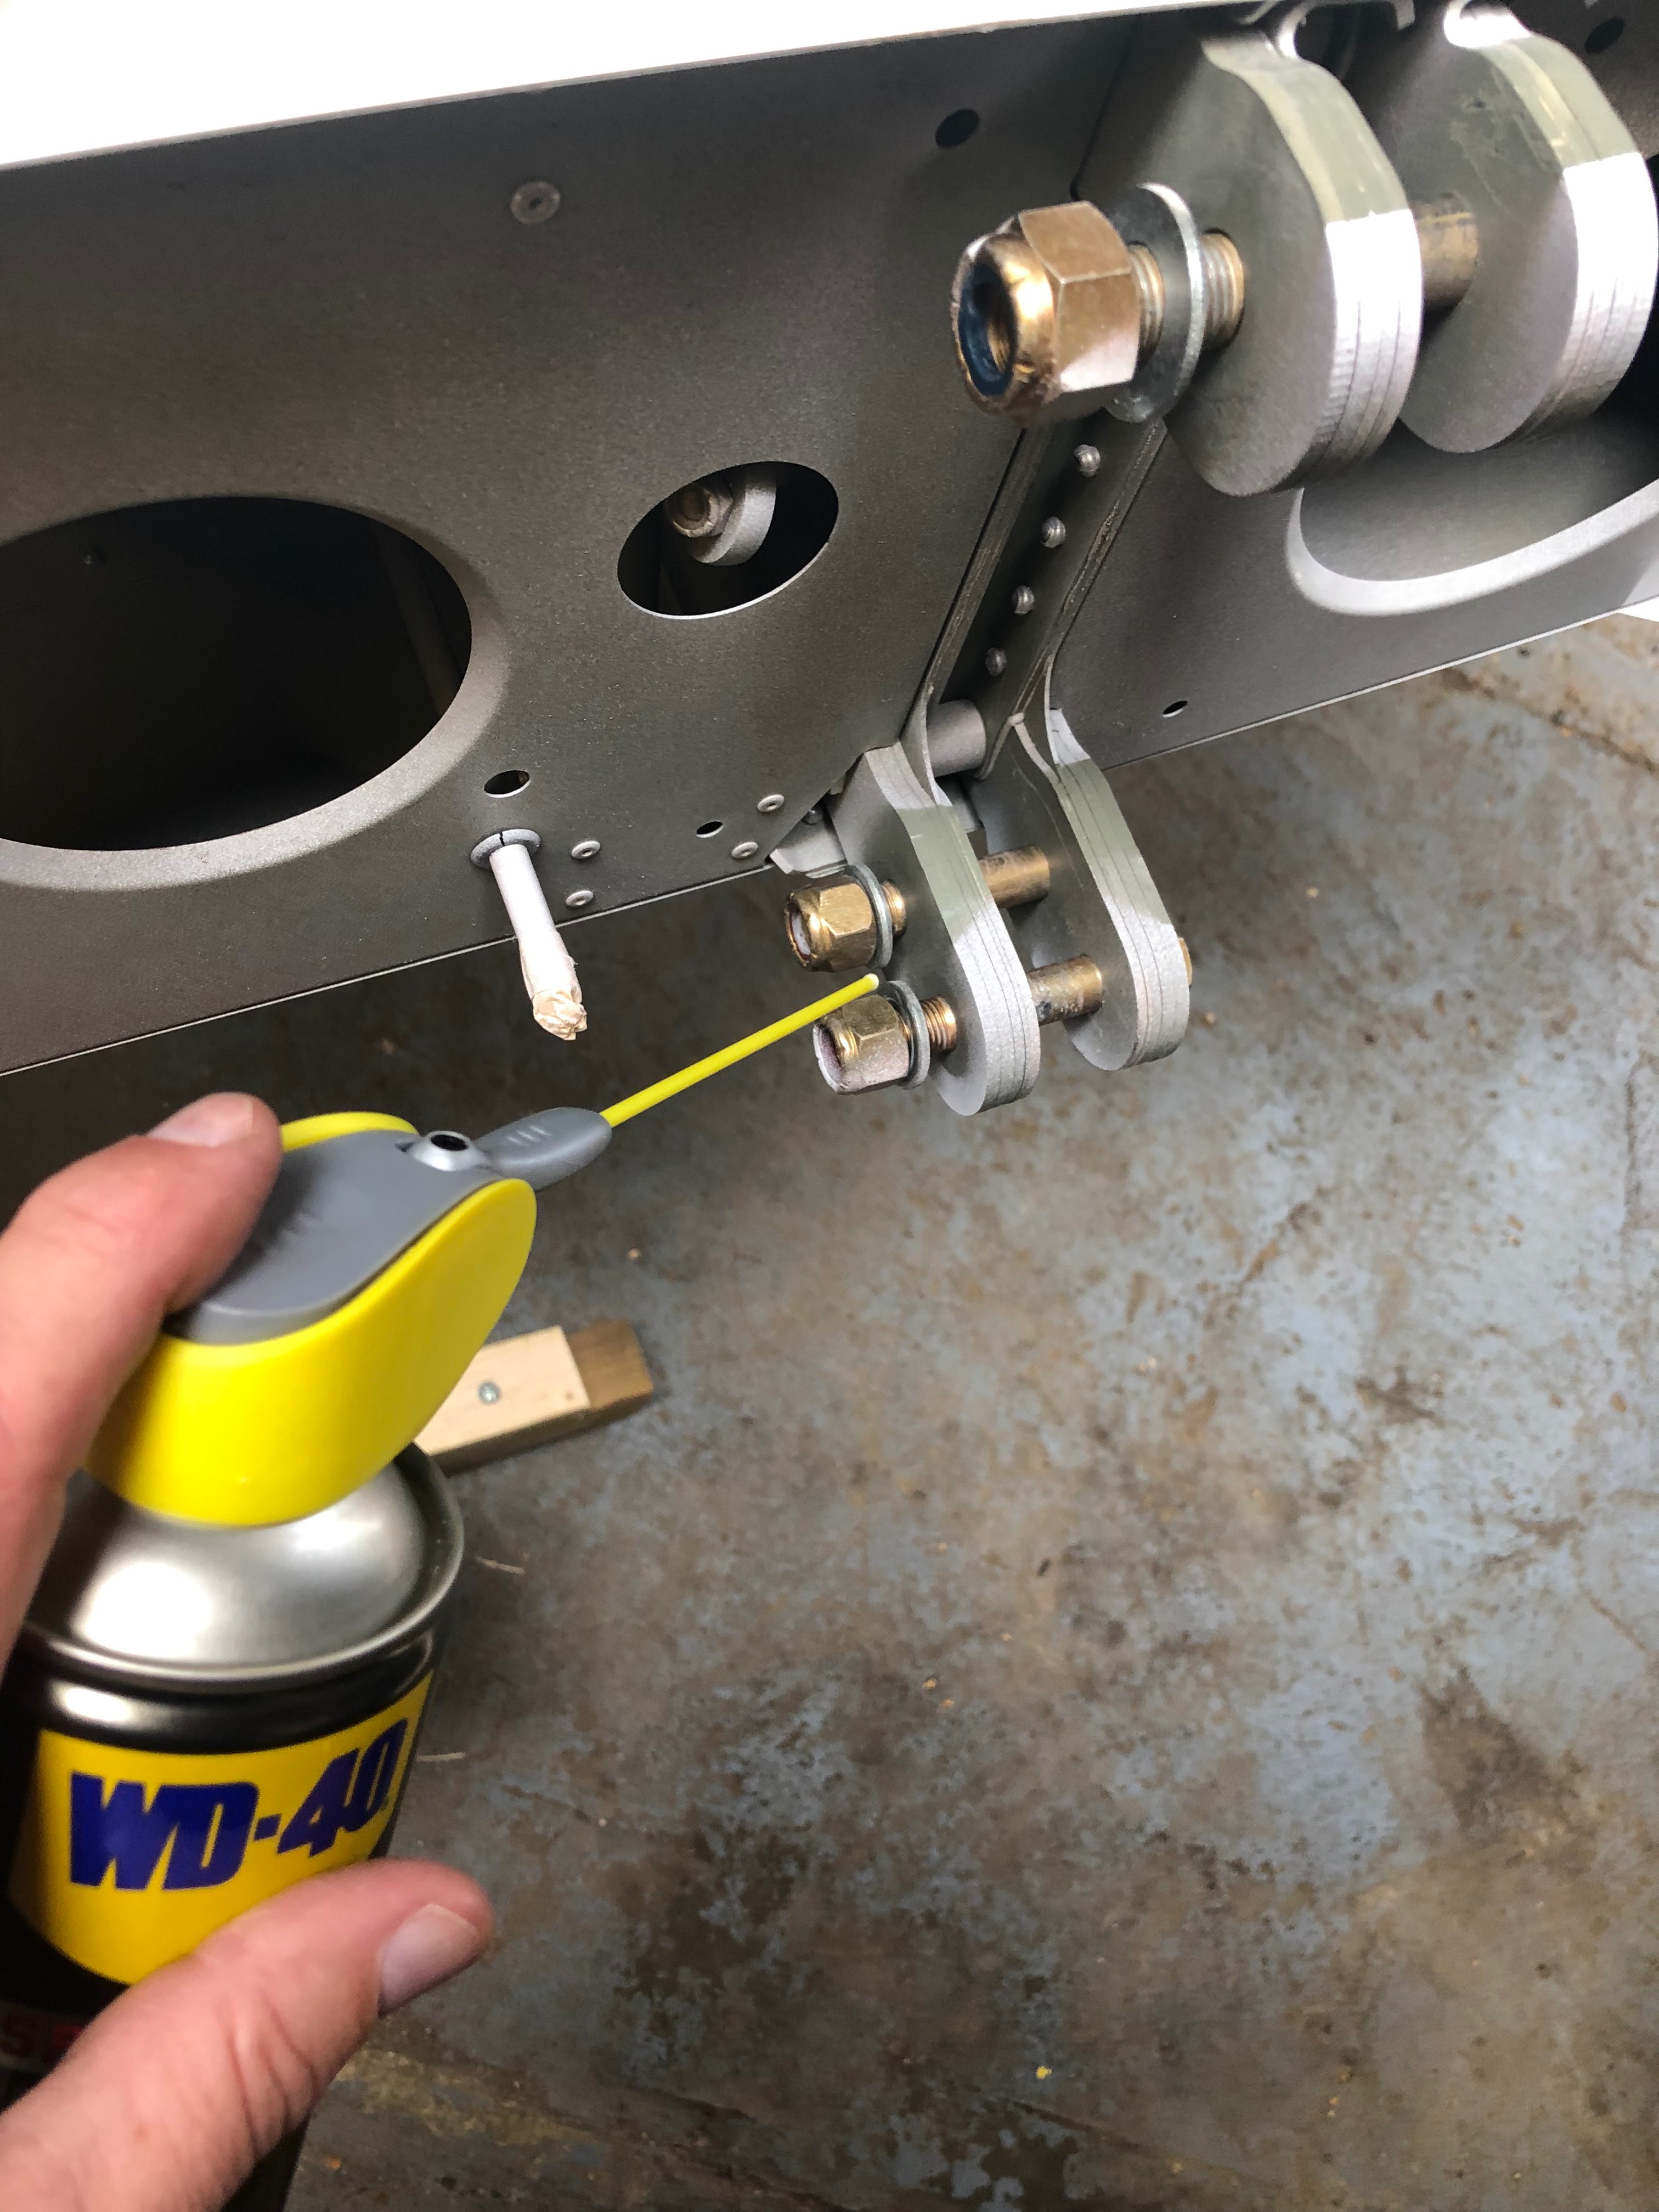
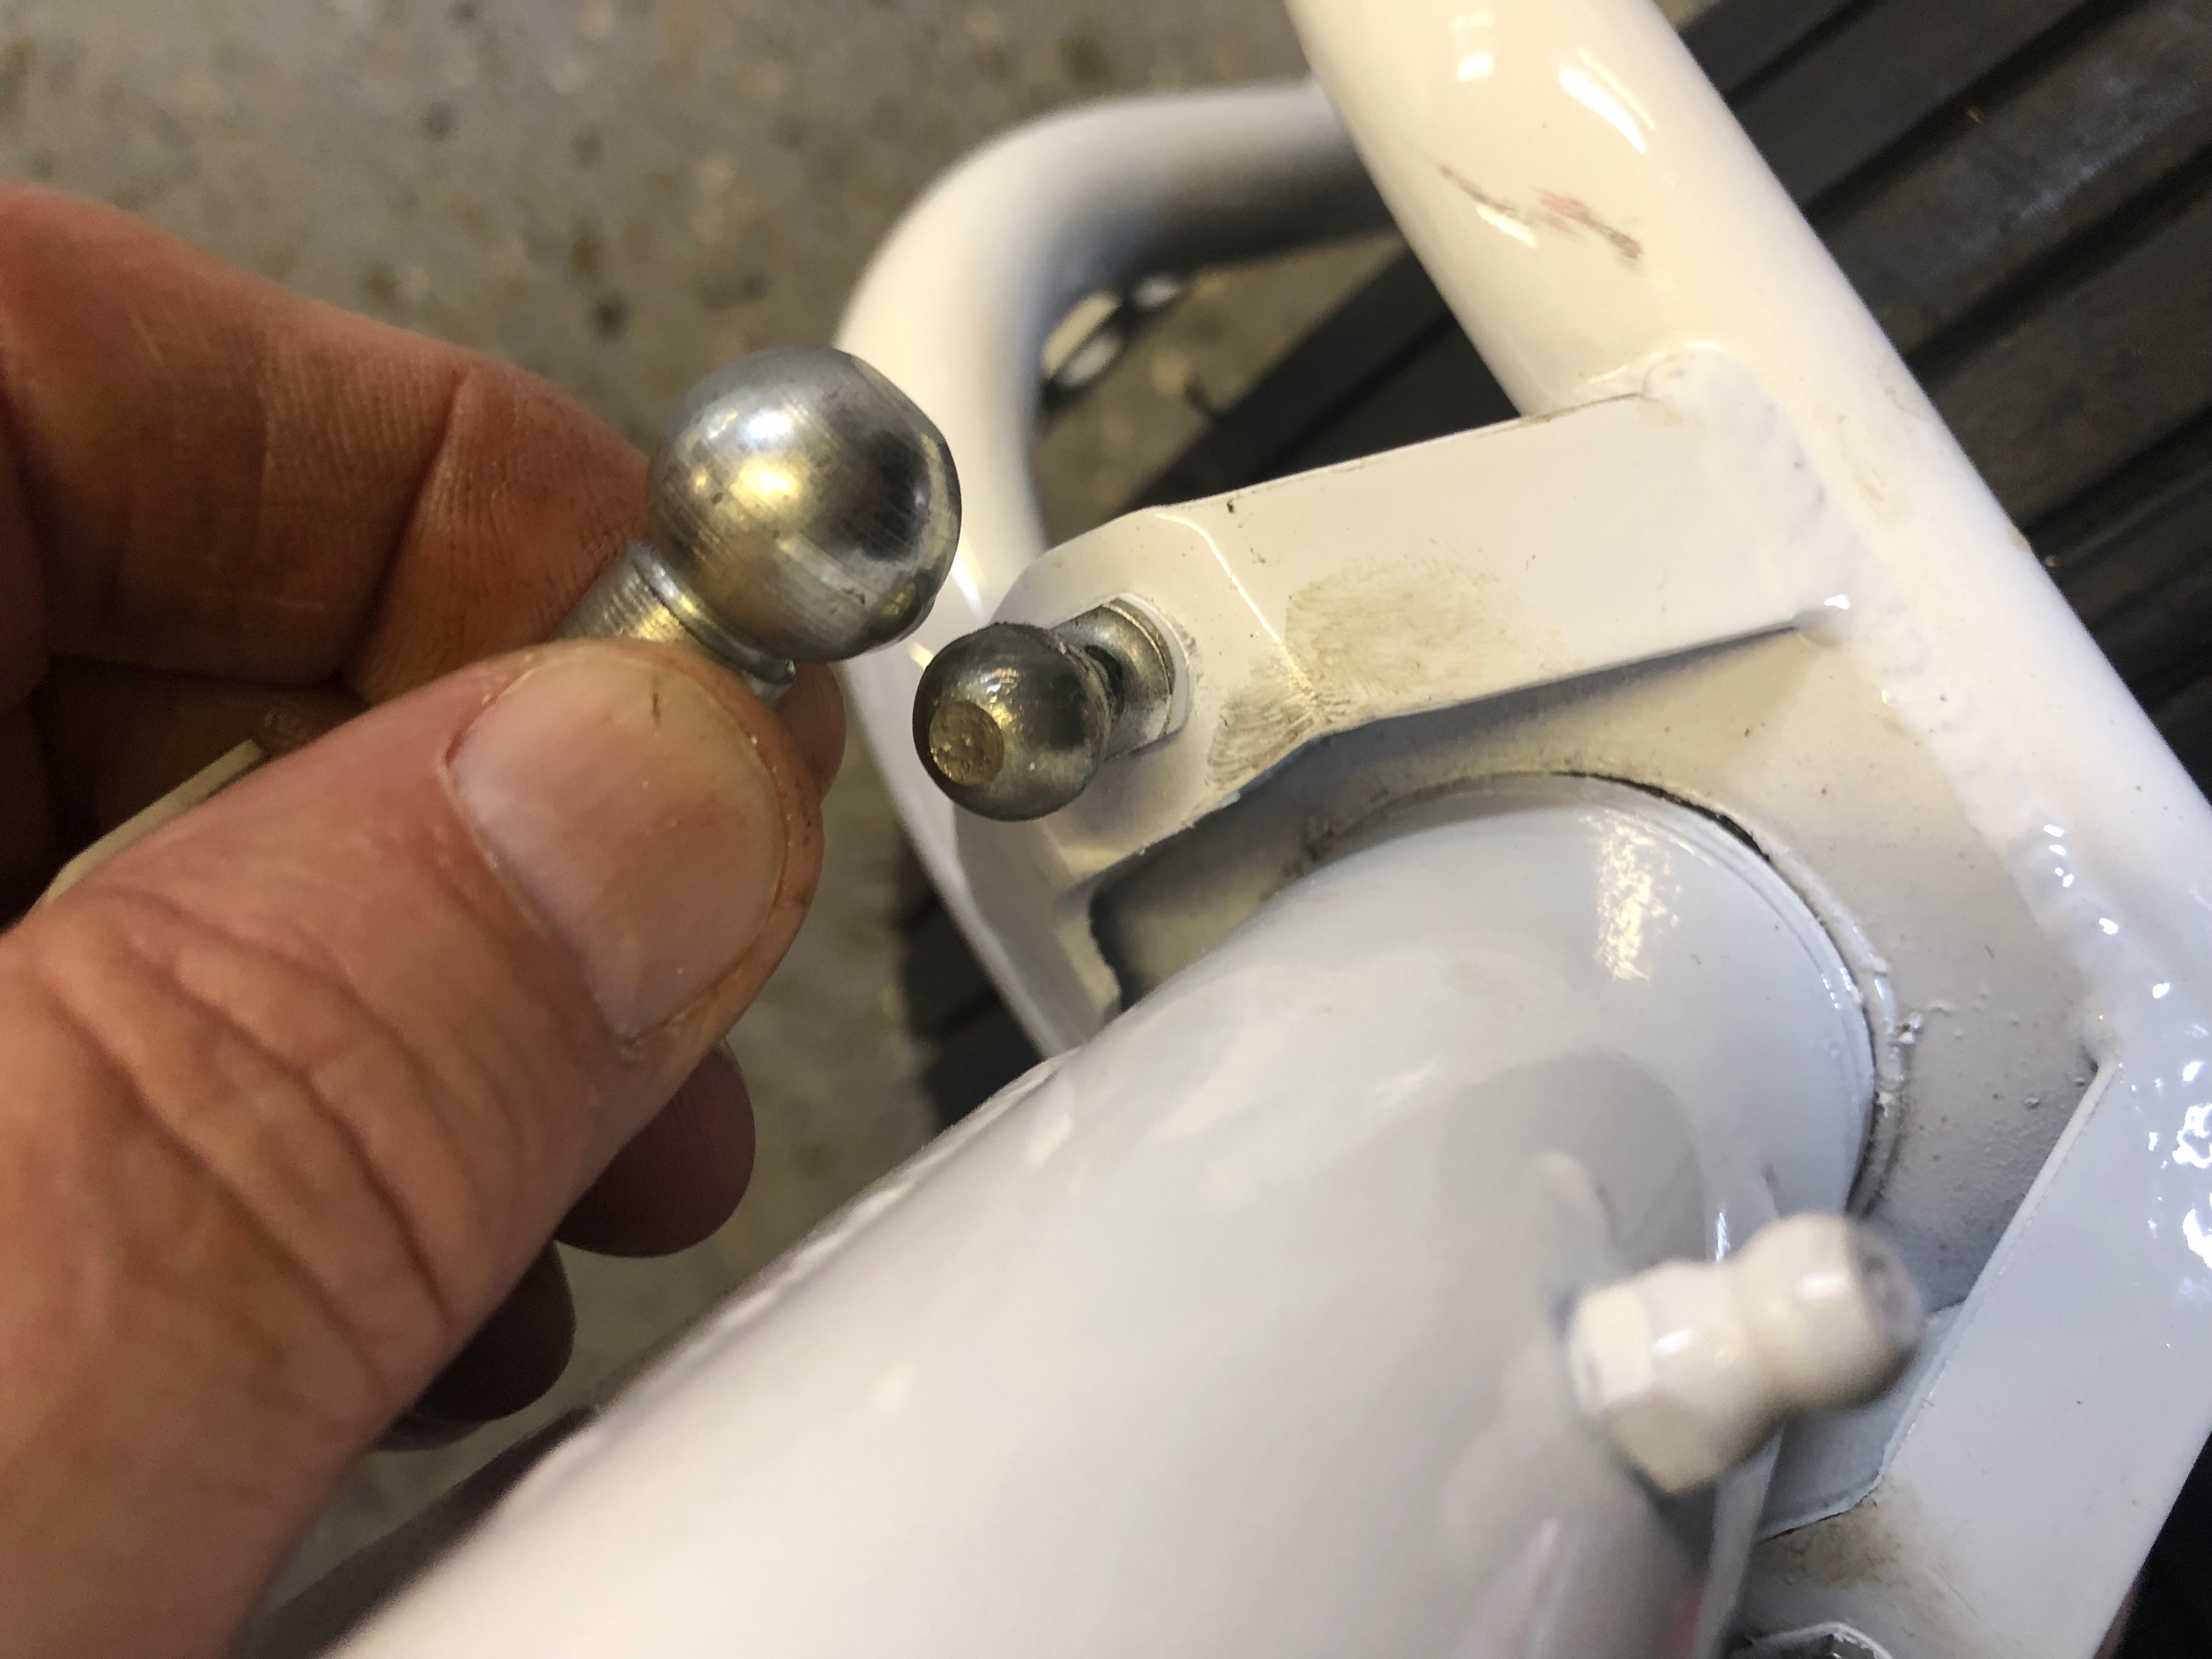
Steering cable ball connectors were removed, greased and refitted
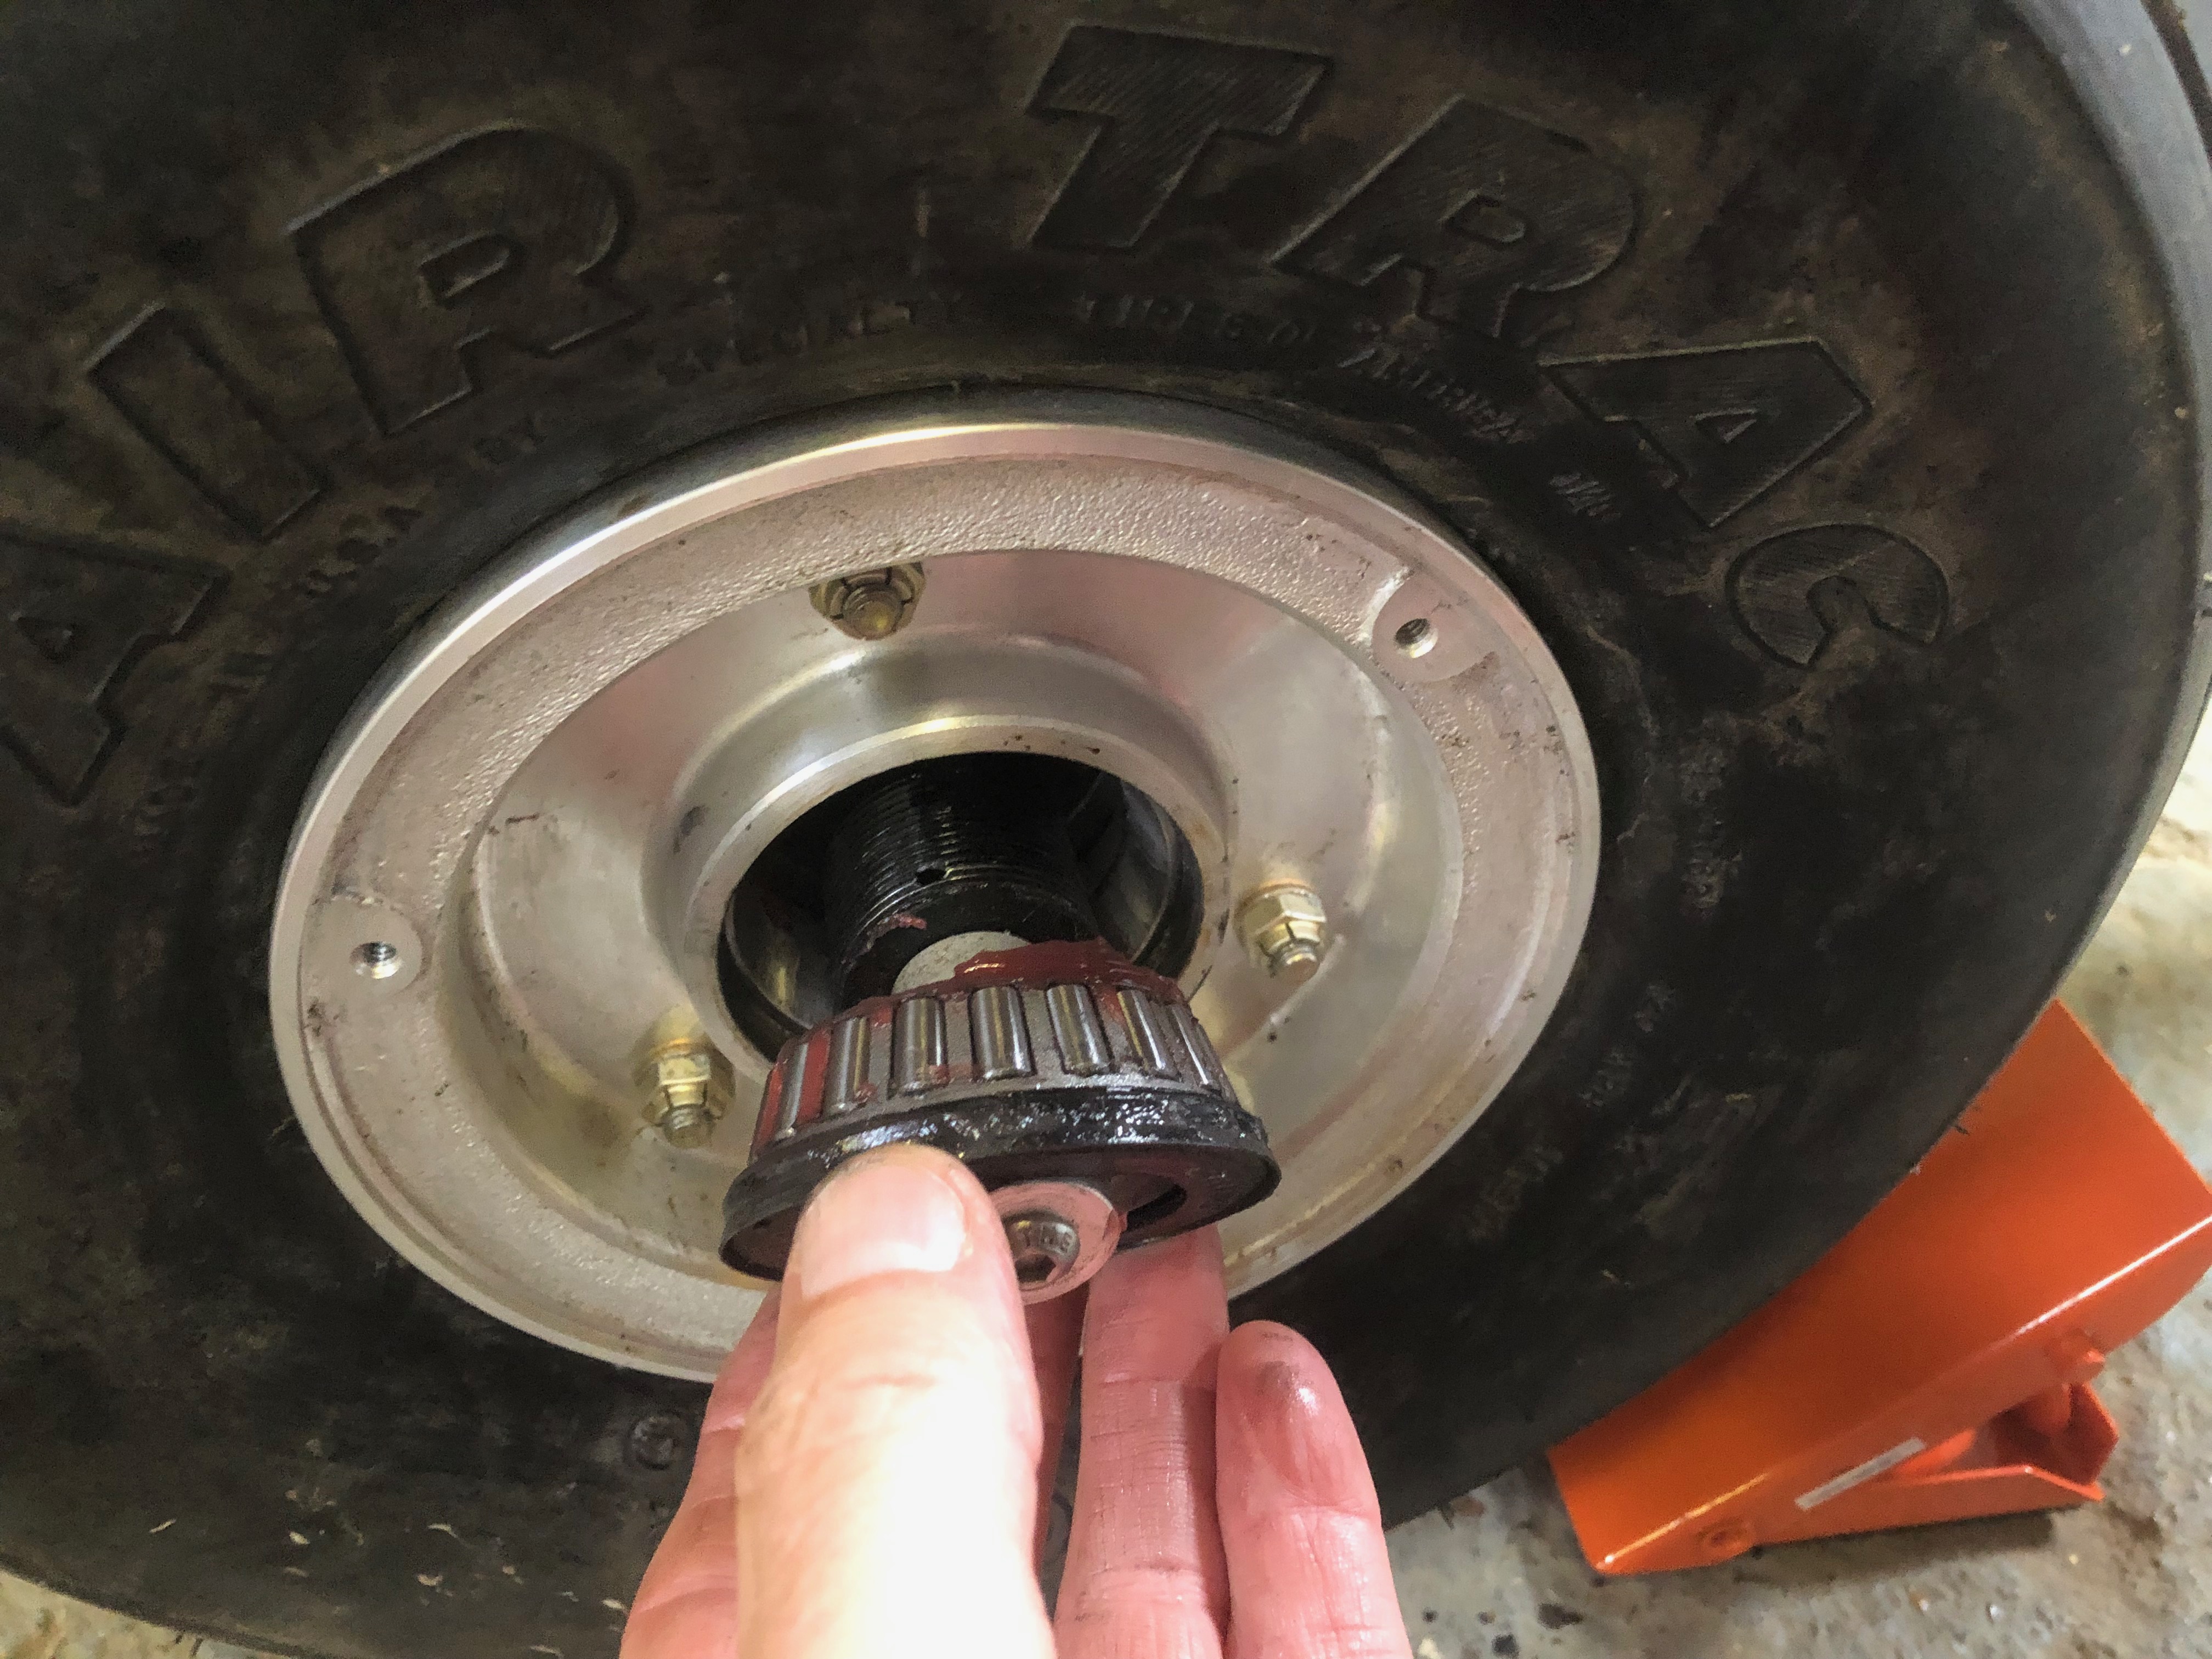
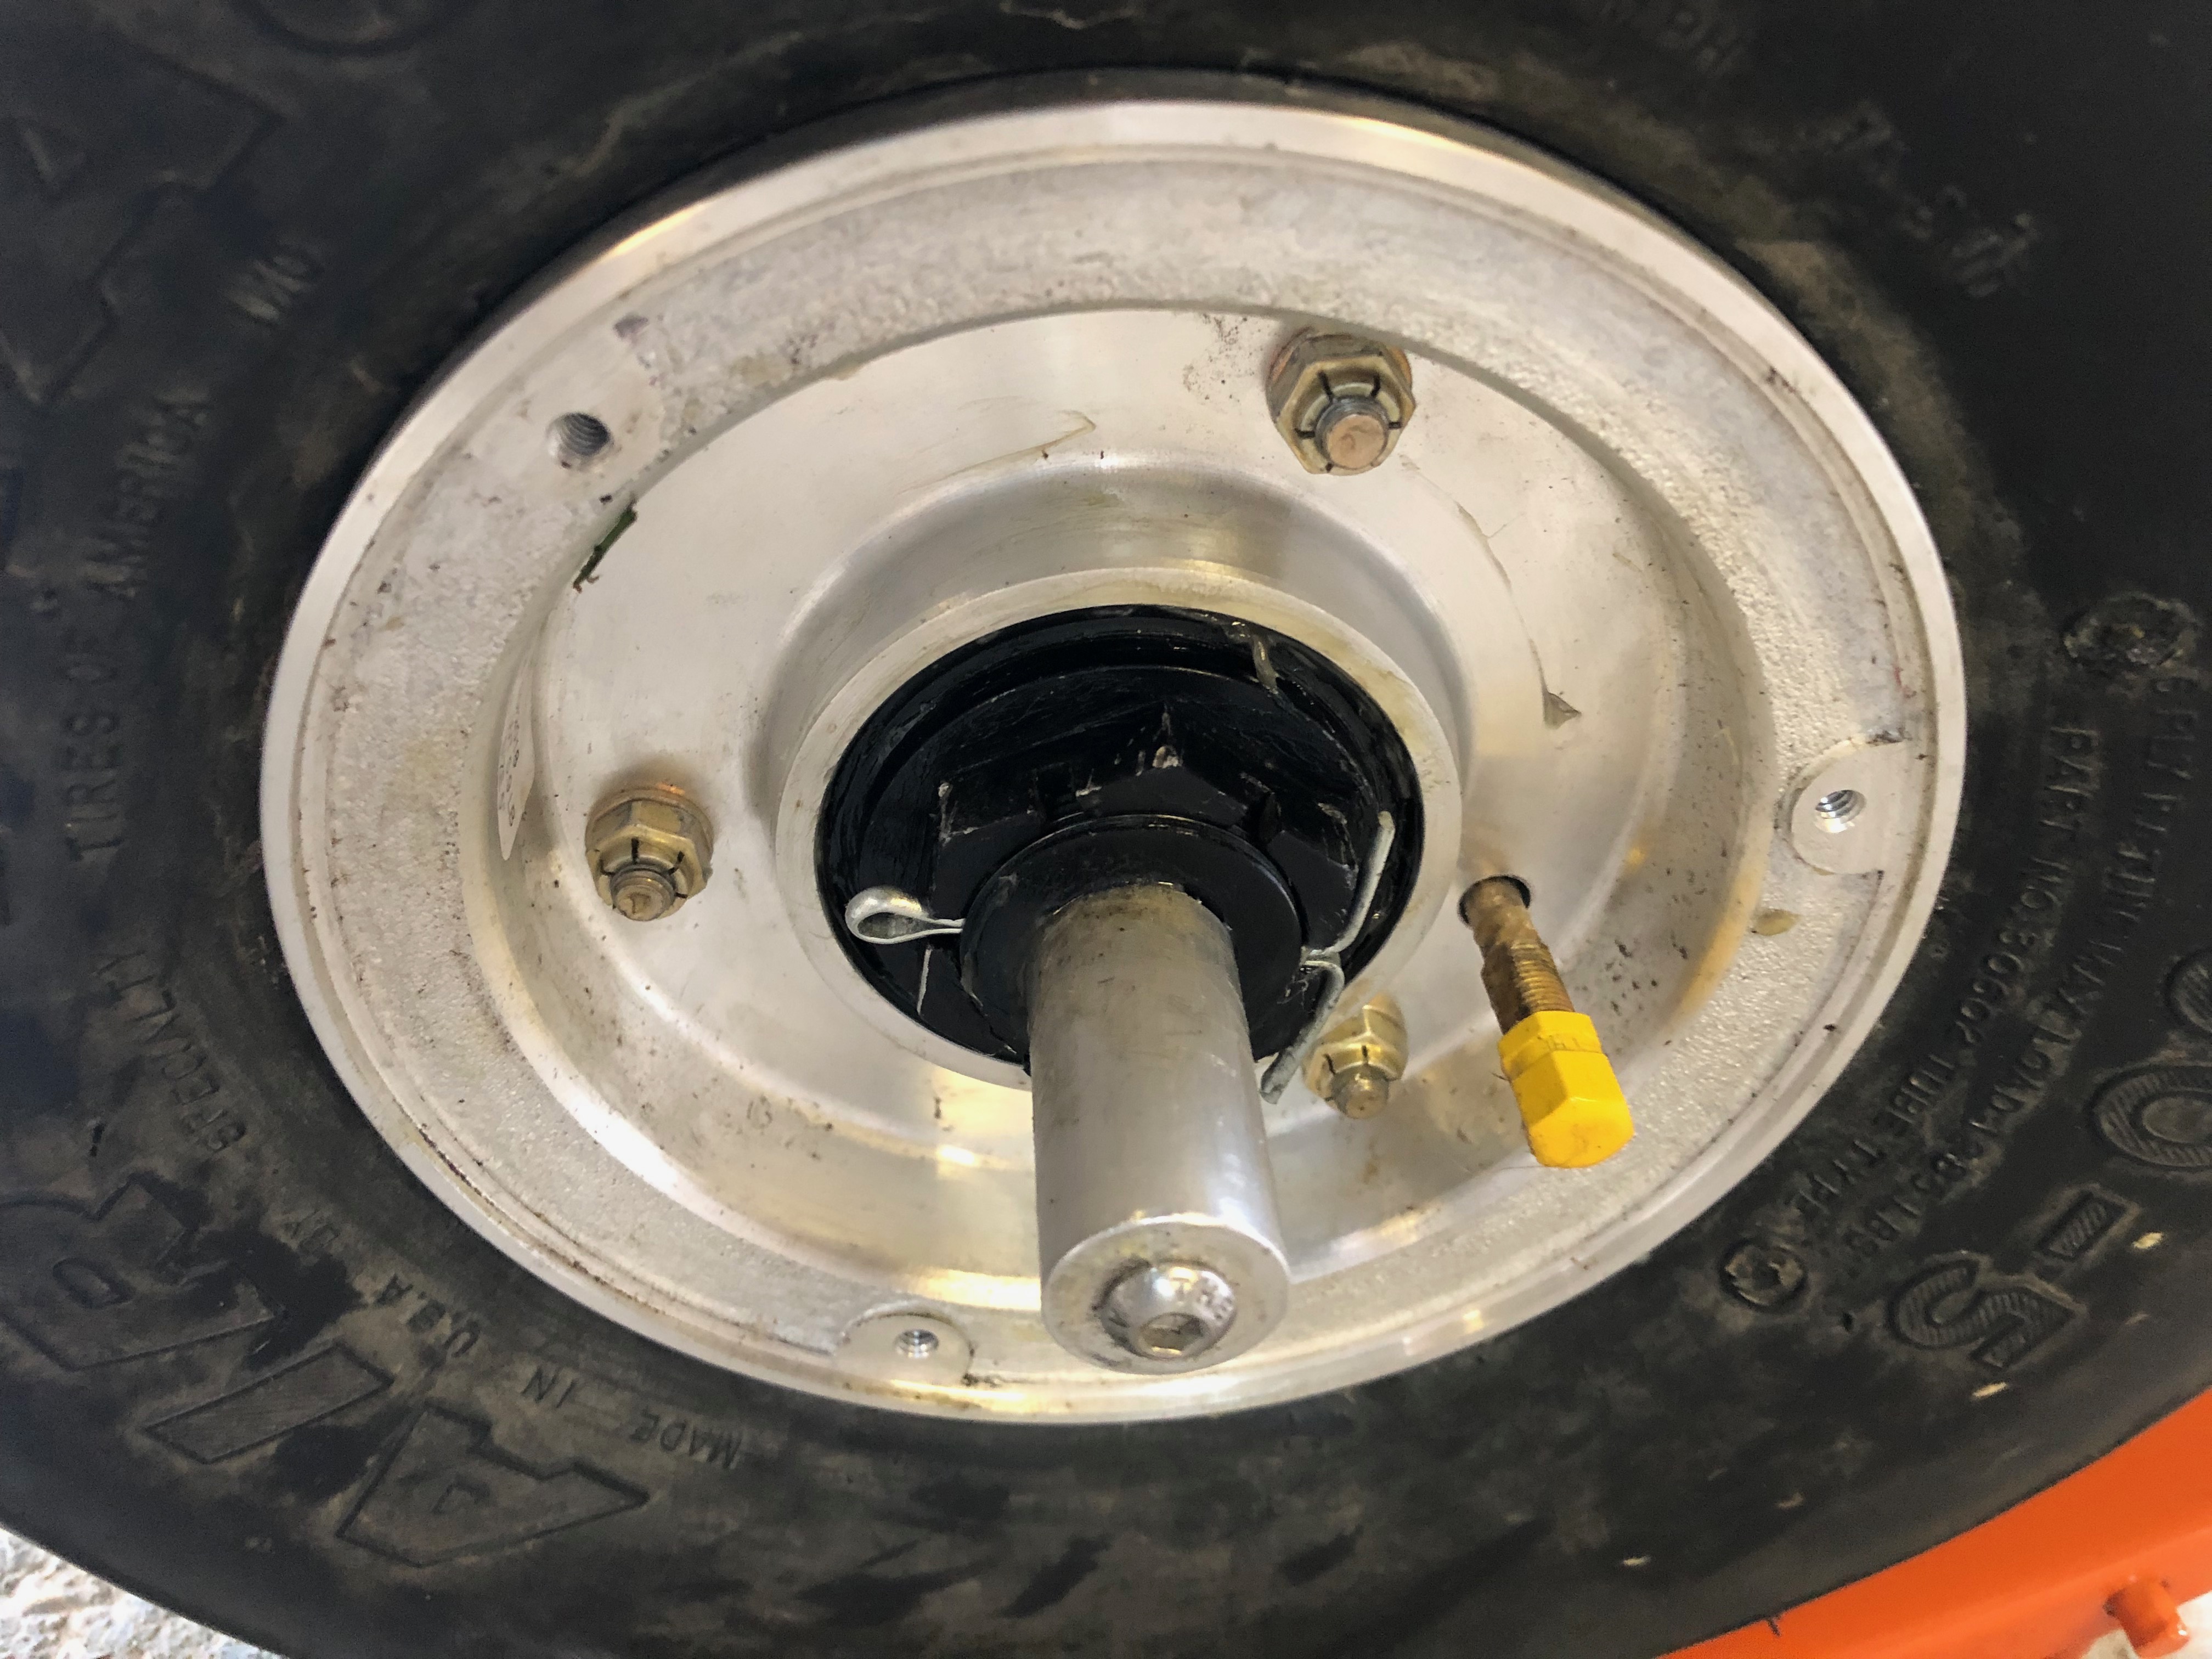
The kit comes with the wheels, hubs and brake callipers fitted to facilitate transport and movement but are not final fit so need to be removed, greased, checked and refitted ensuring all bolts are correctly torqued.
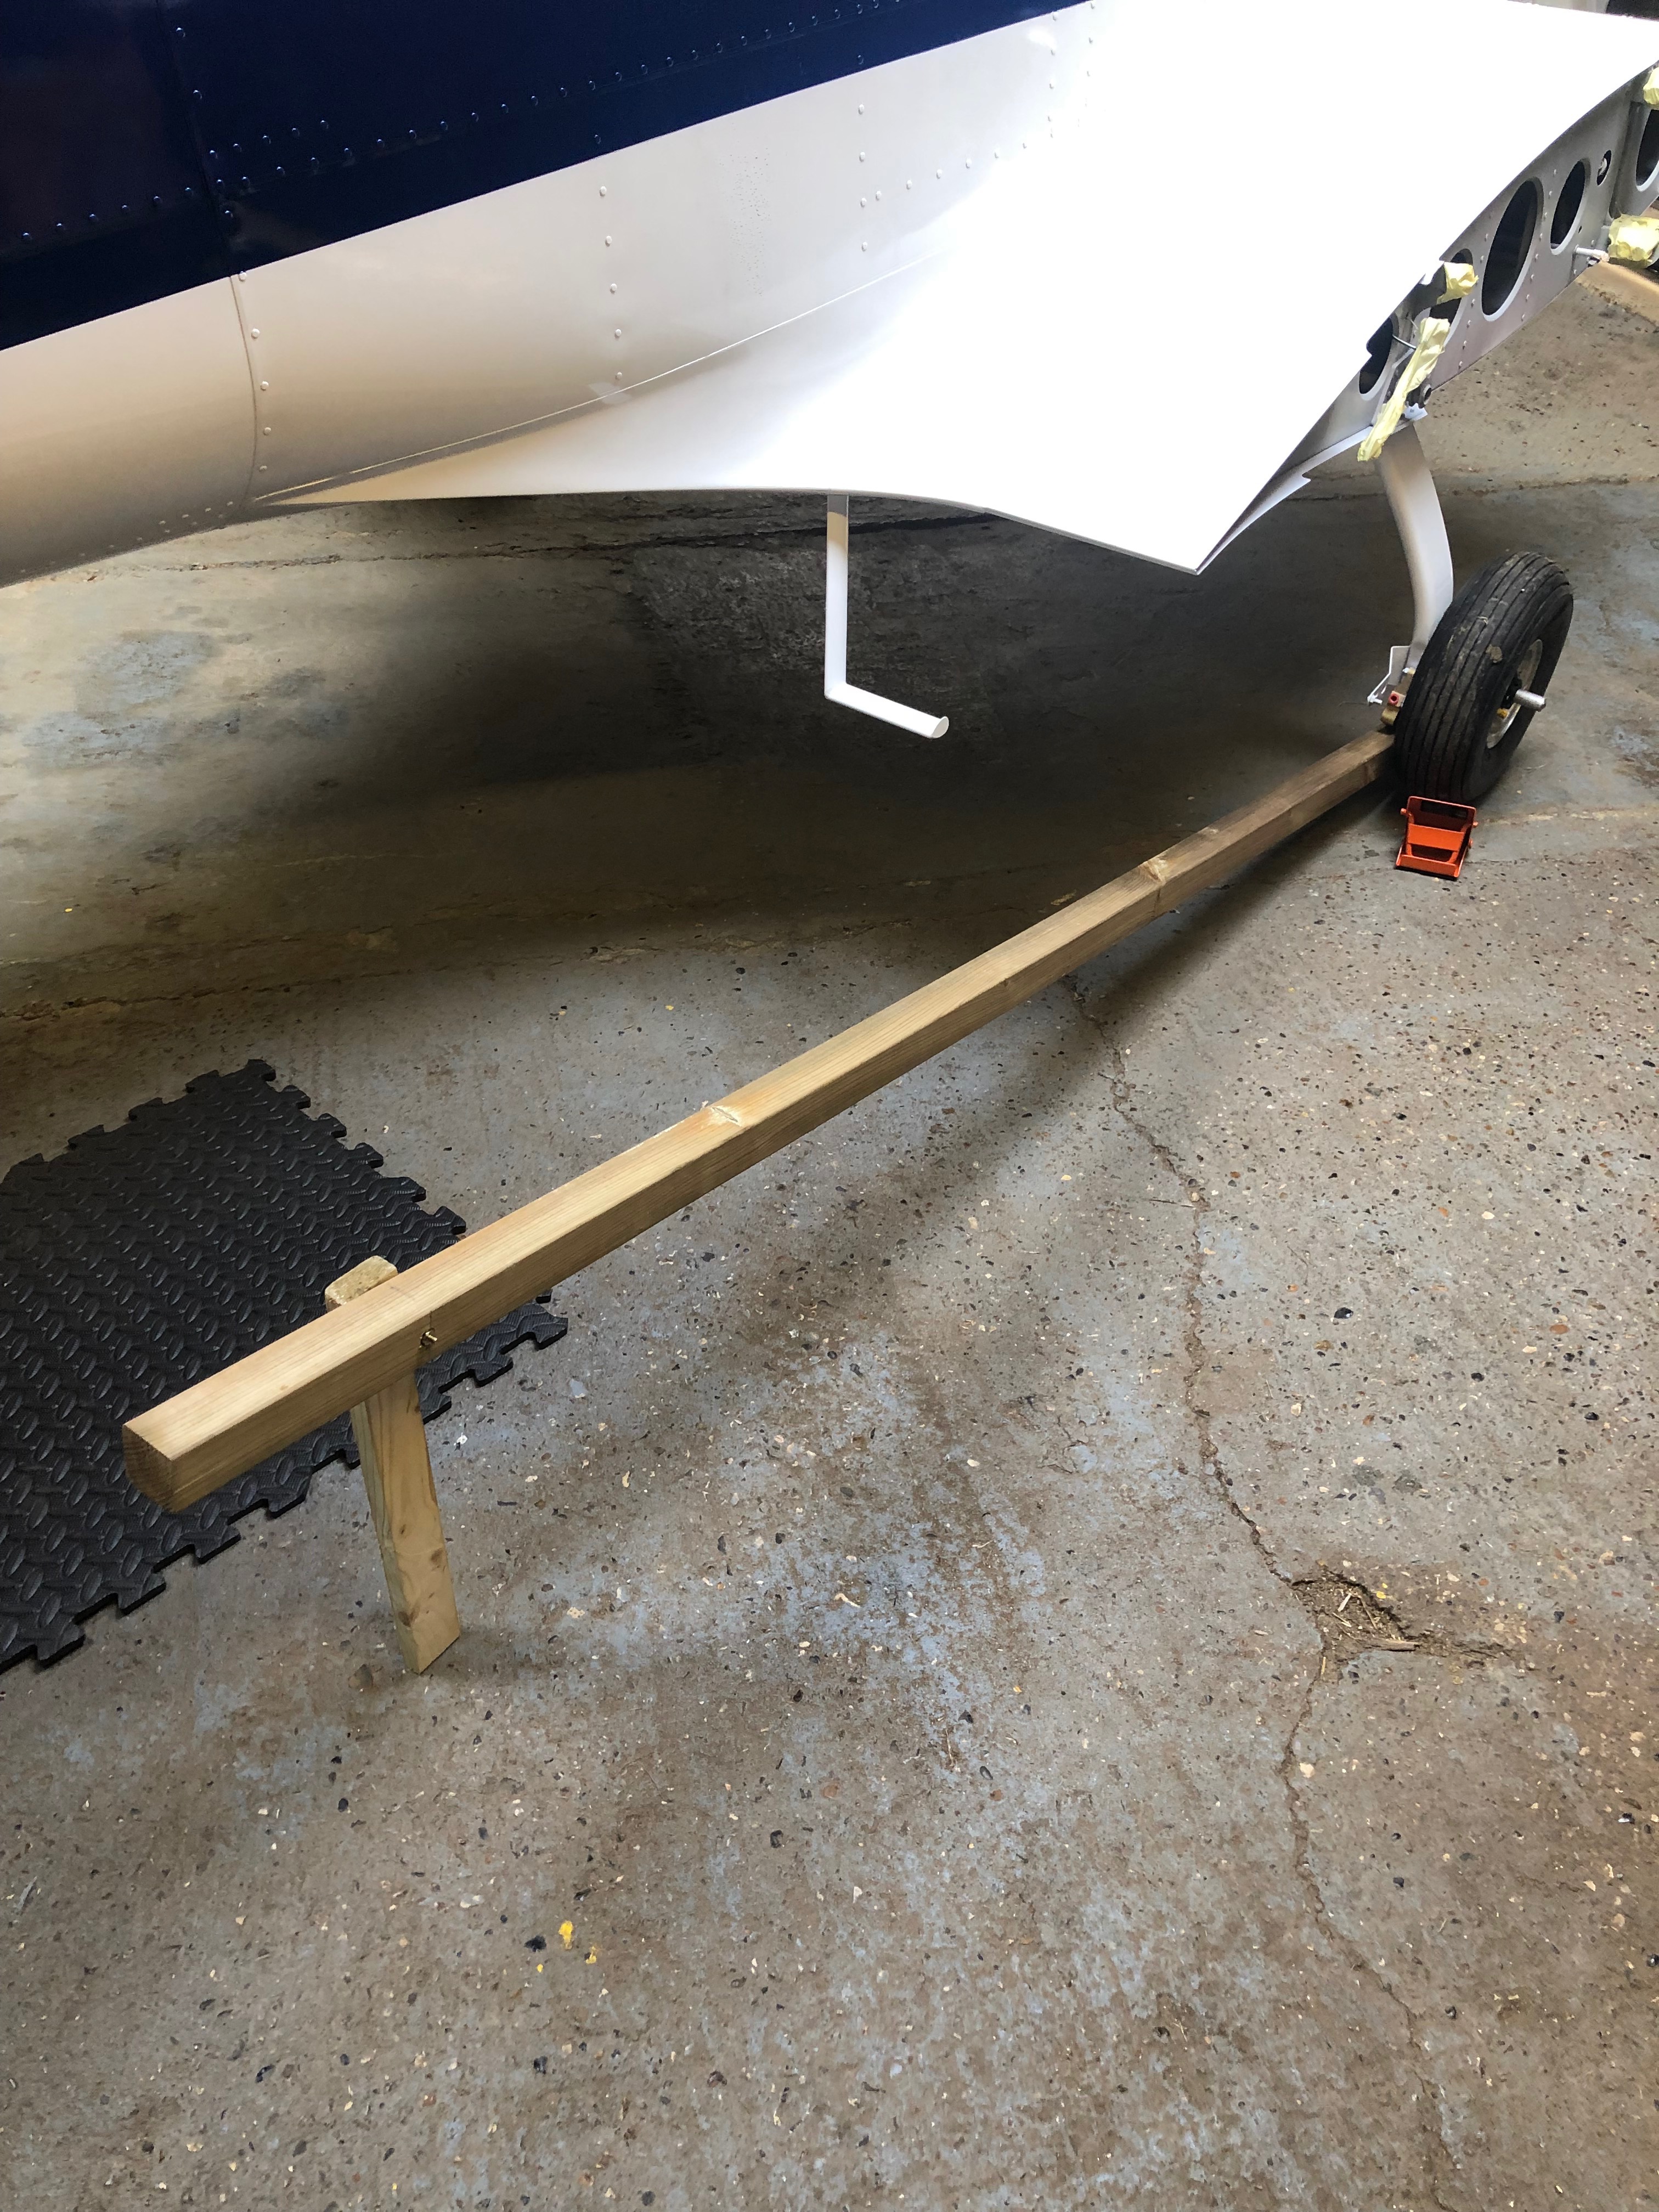
To jack the aircraft so the wheel bearing can be removed and greased a simple wooden jack is made.
To help lift the wheel off the ground a suitable ‘jack’ was made from a length of 2″ x 2″ wood.
Once the wheel is clear of the ground the bearings are removed
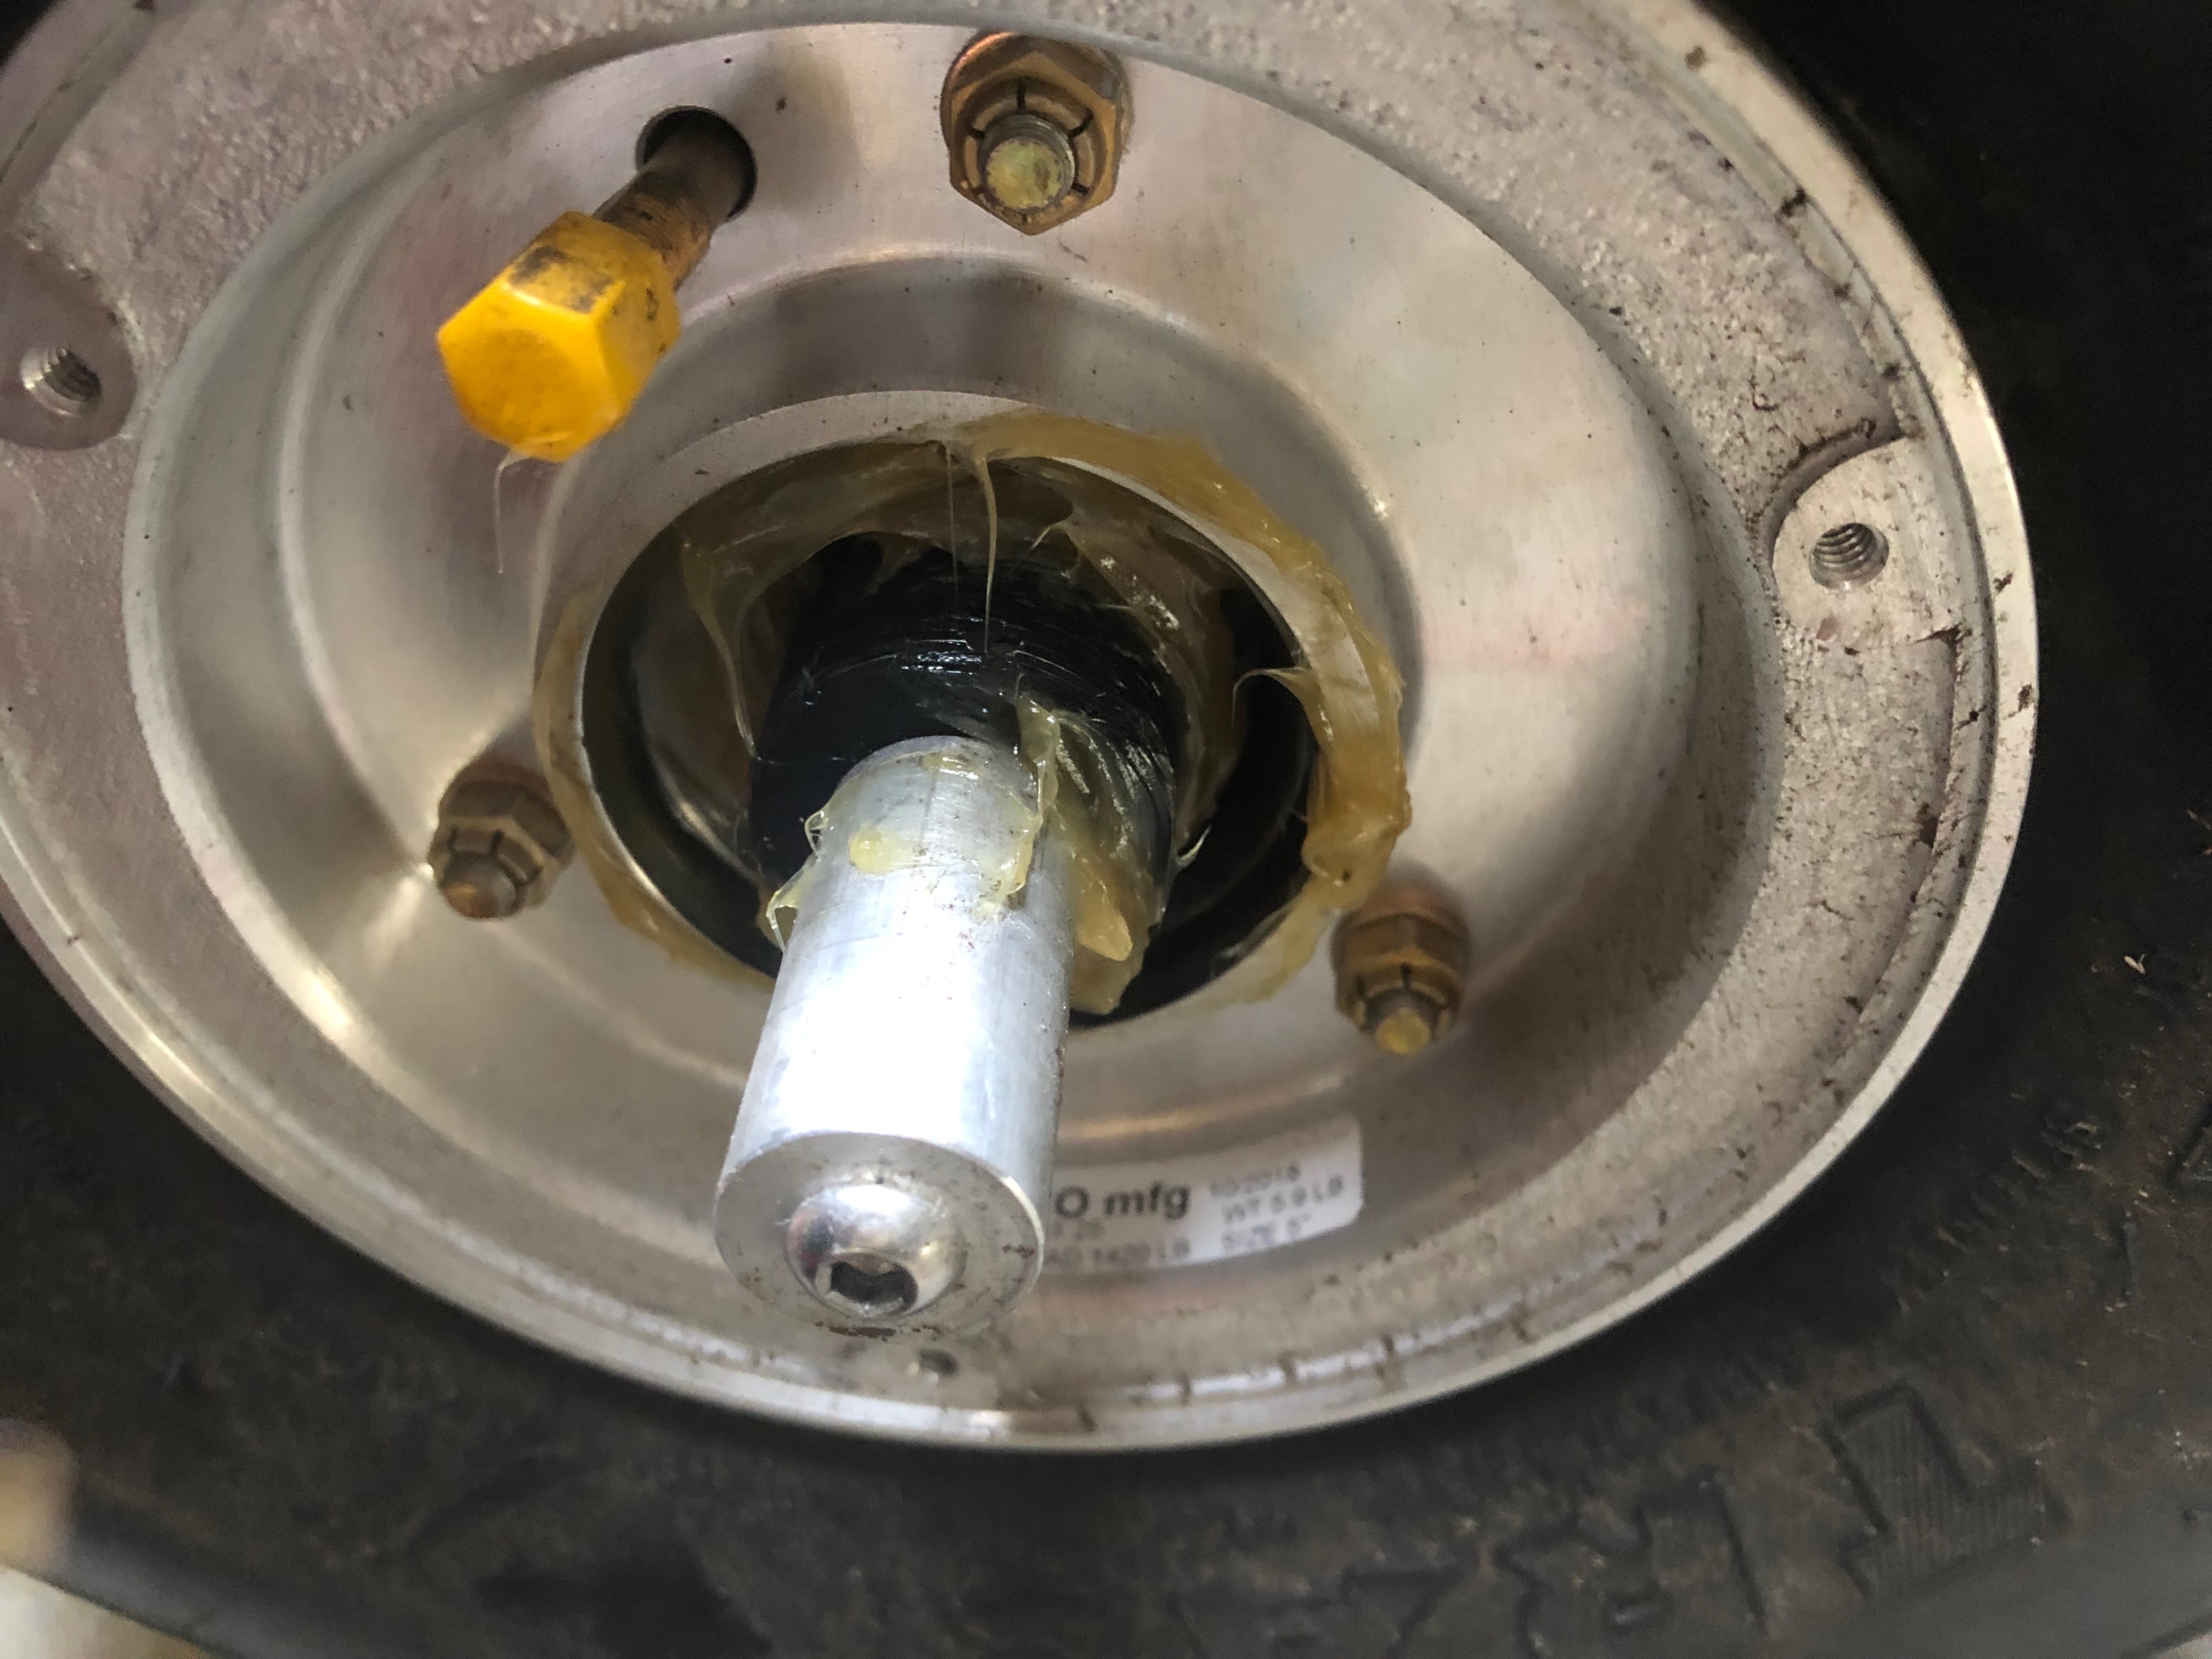
Recess packed with grease.
Wheel bearing is refitted, the wheel nut is refitted, tightened and a new split pin fitted.
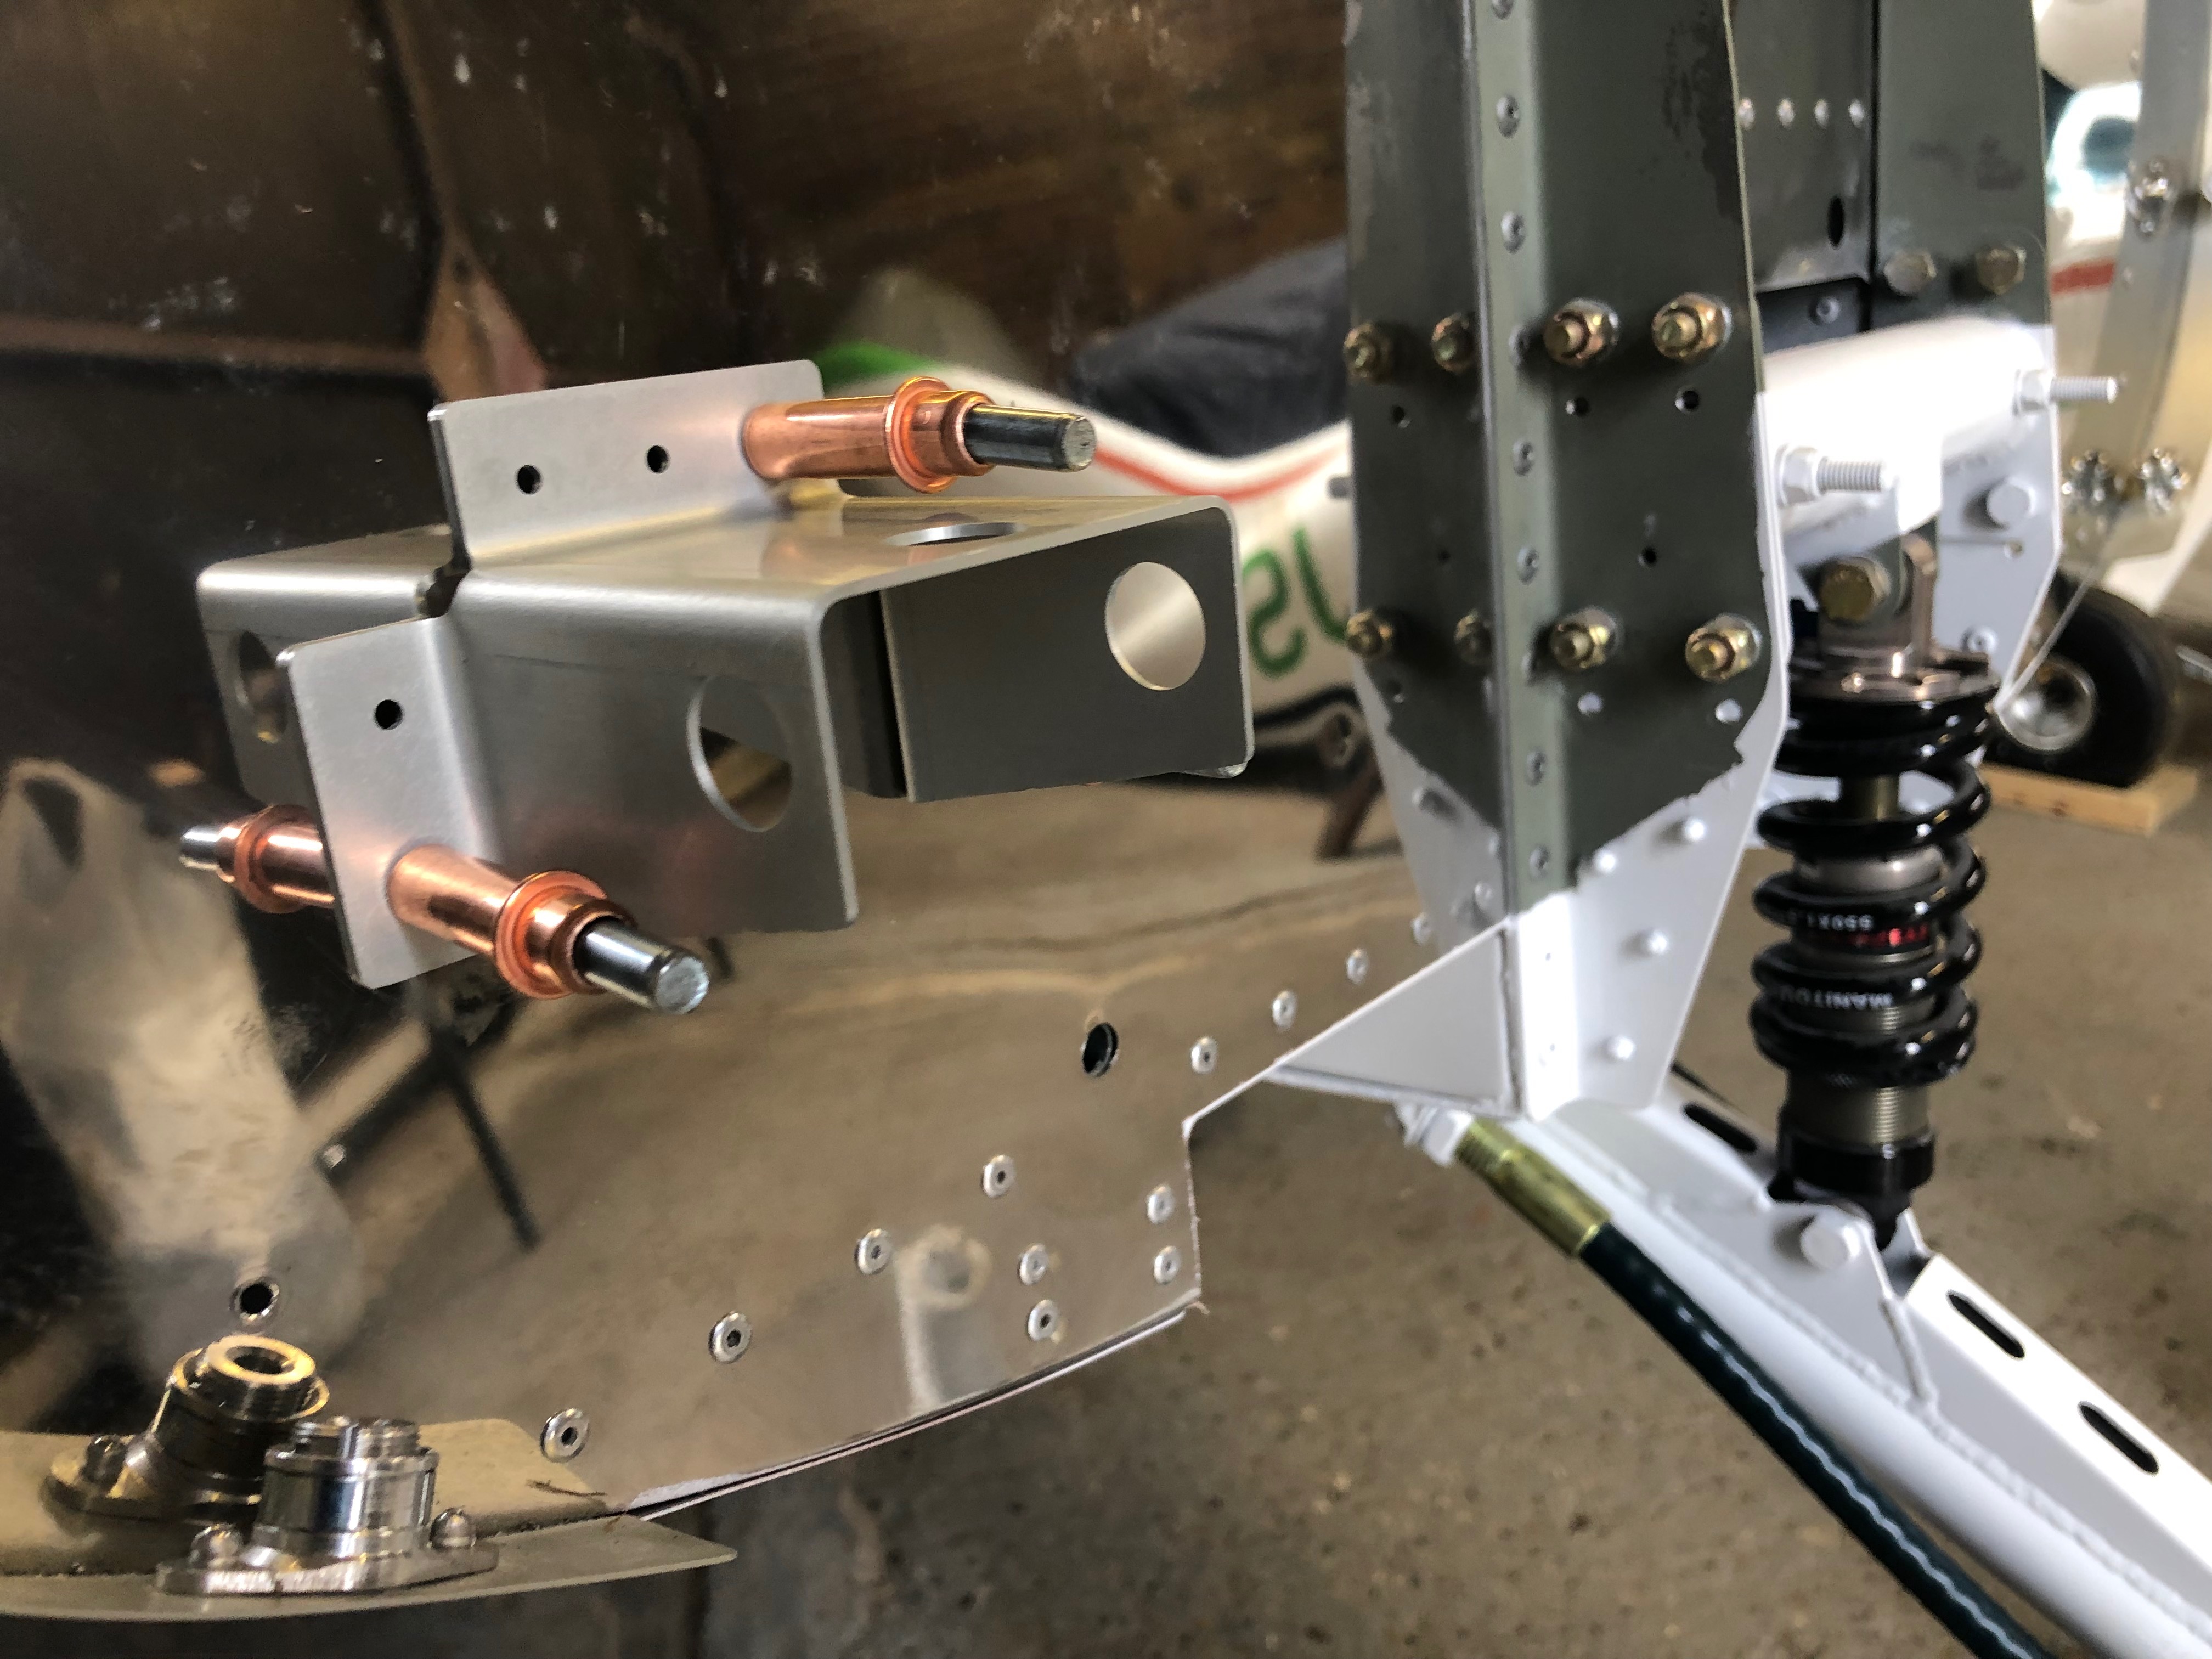
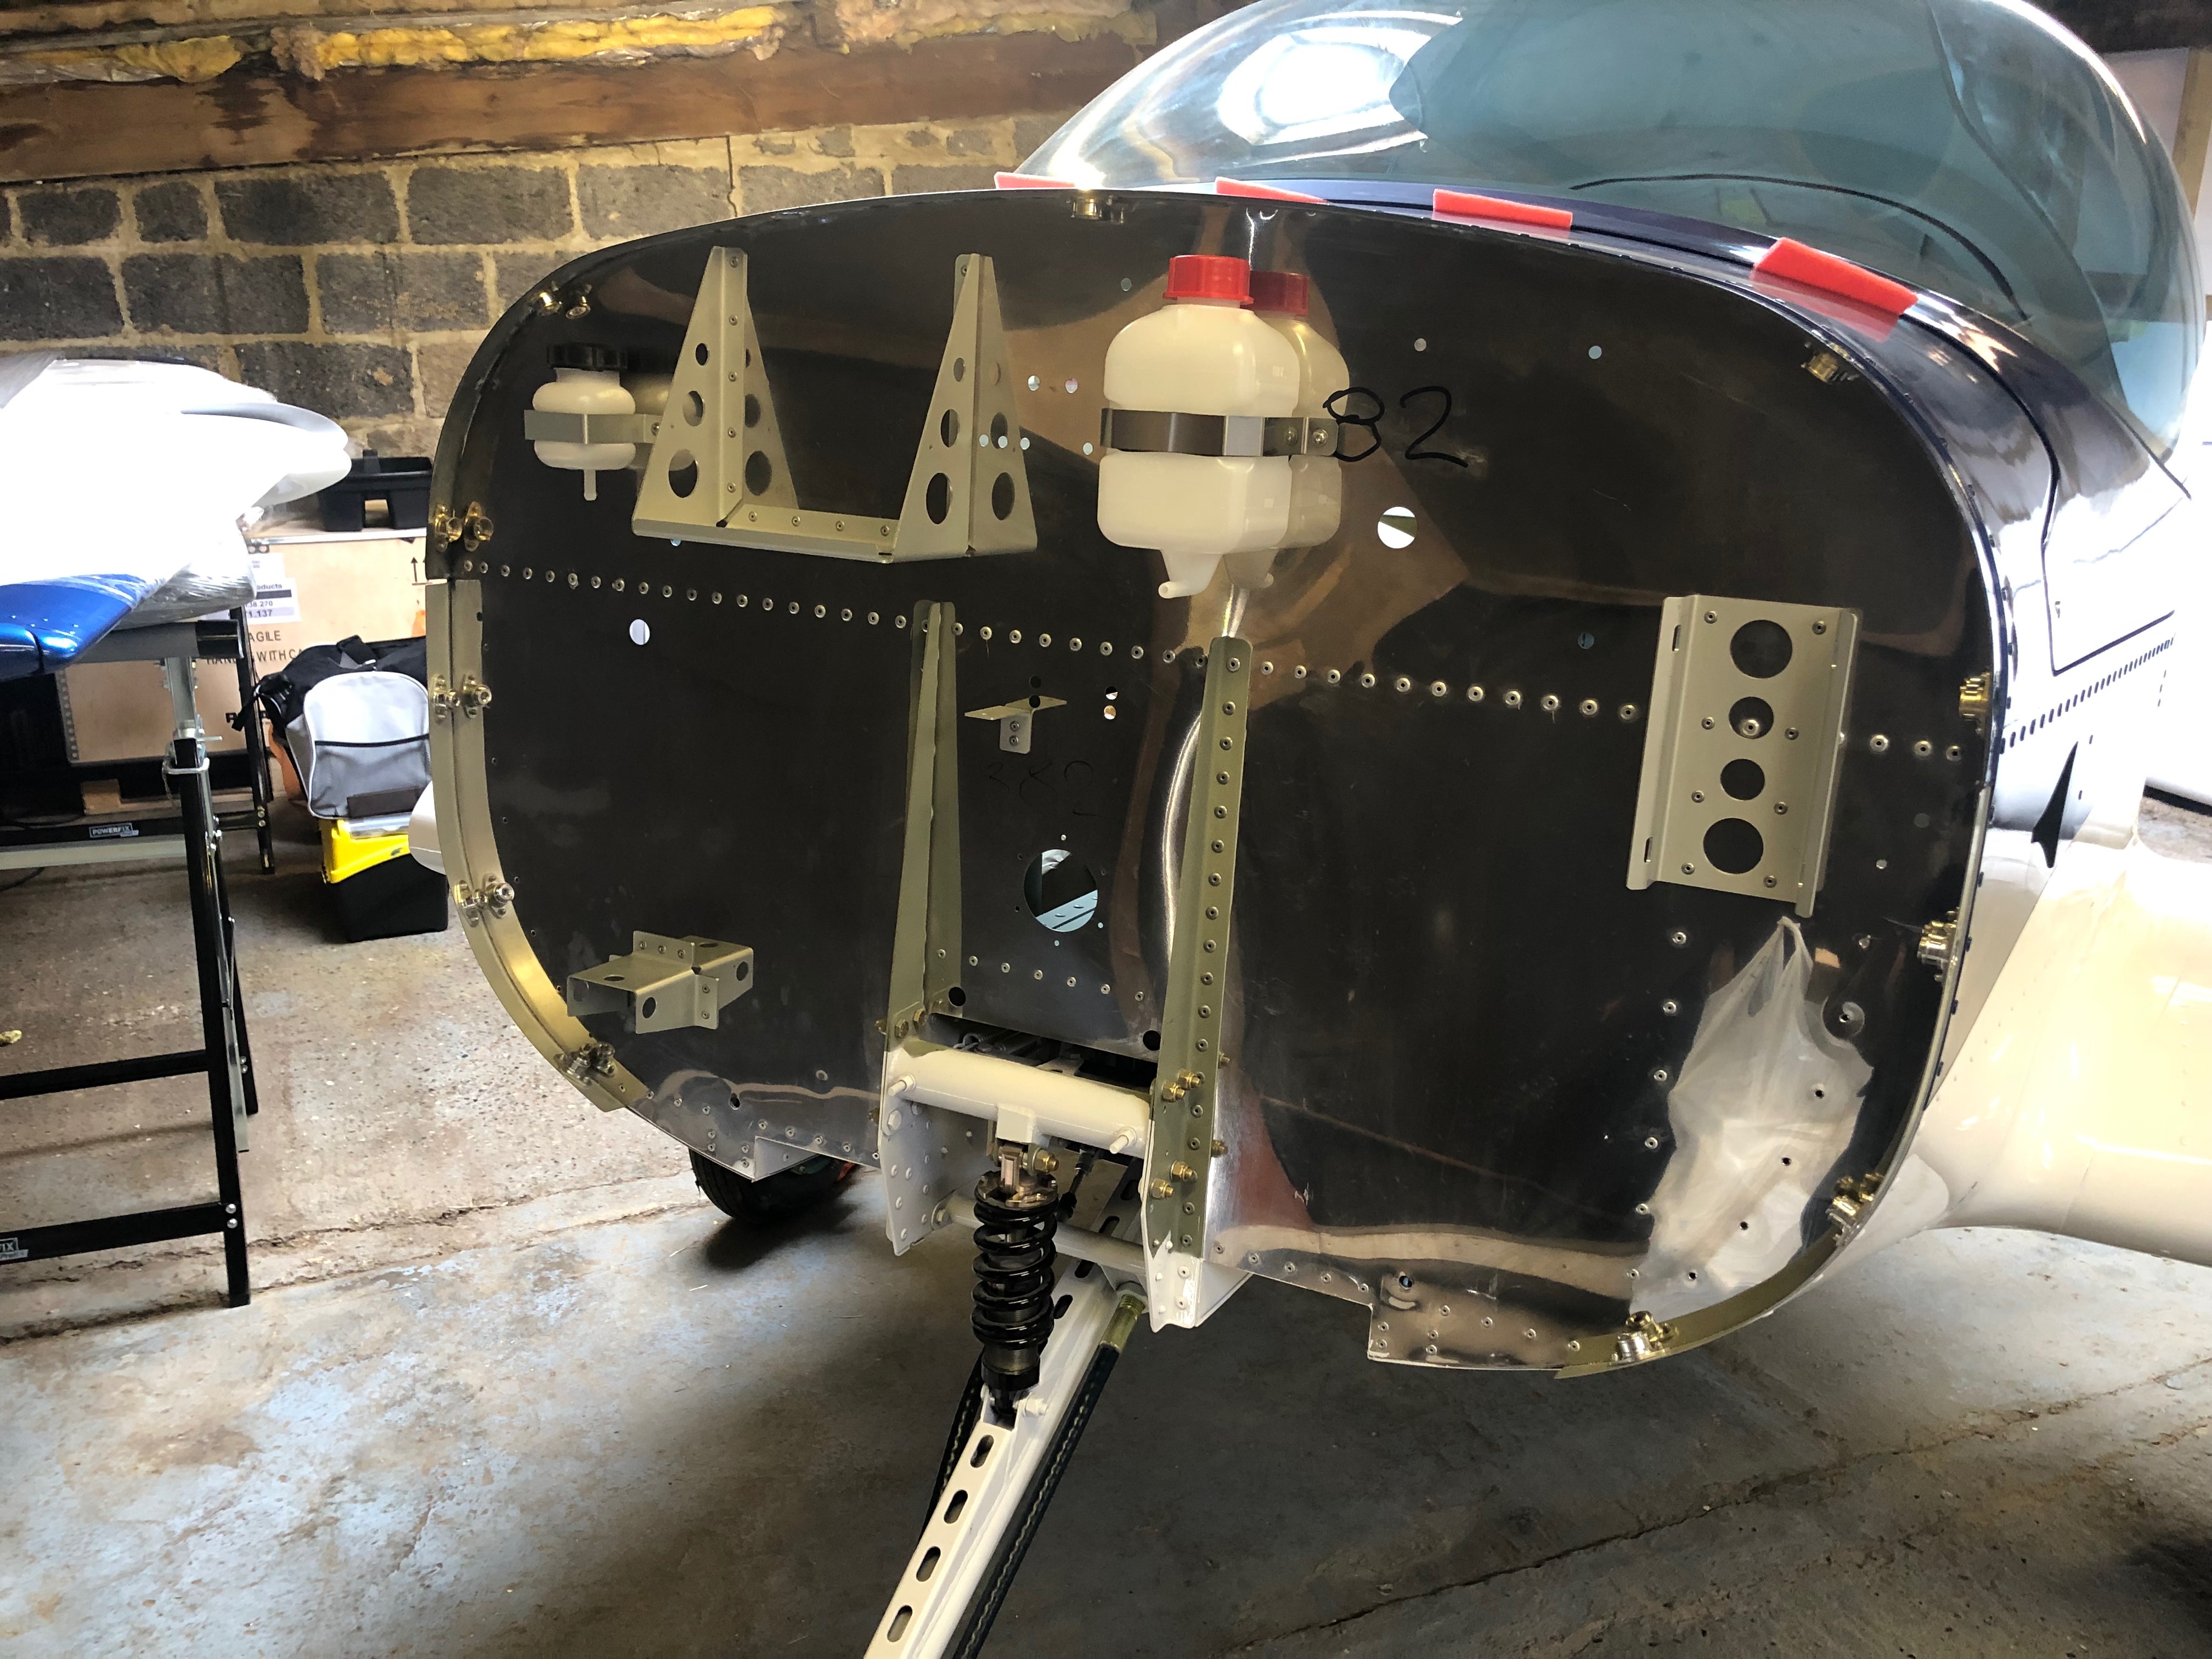
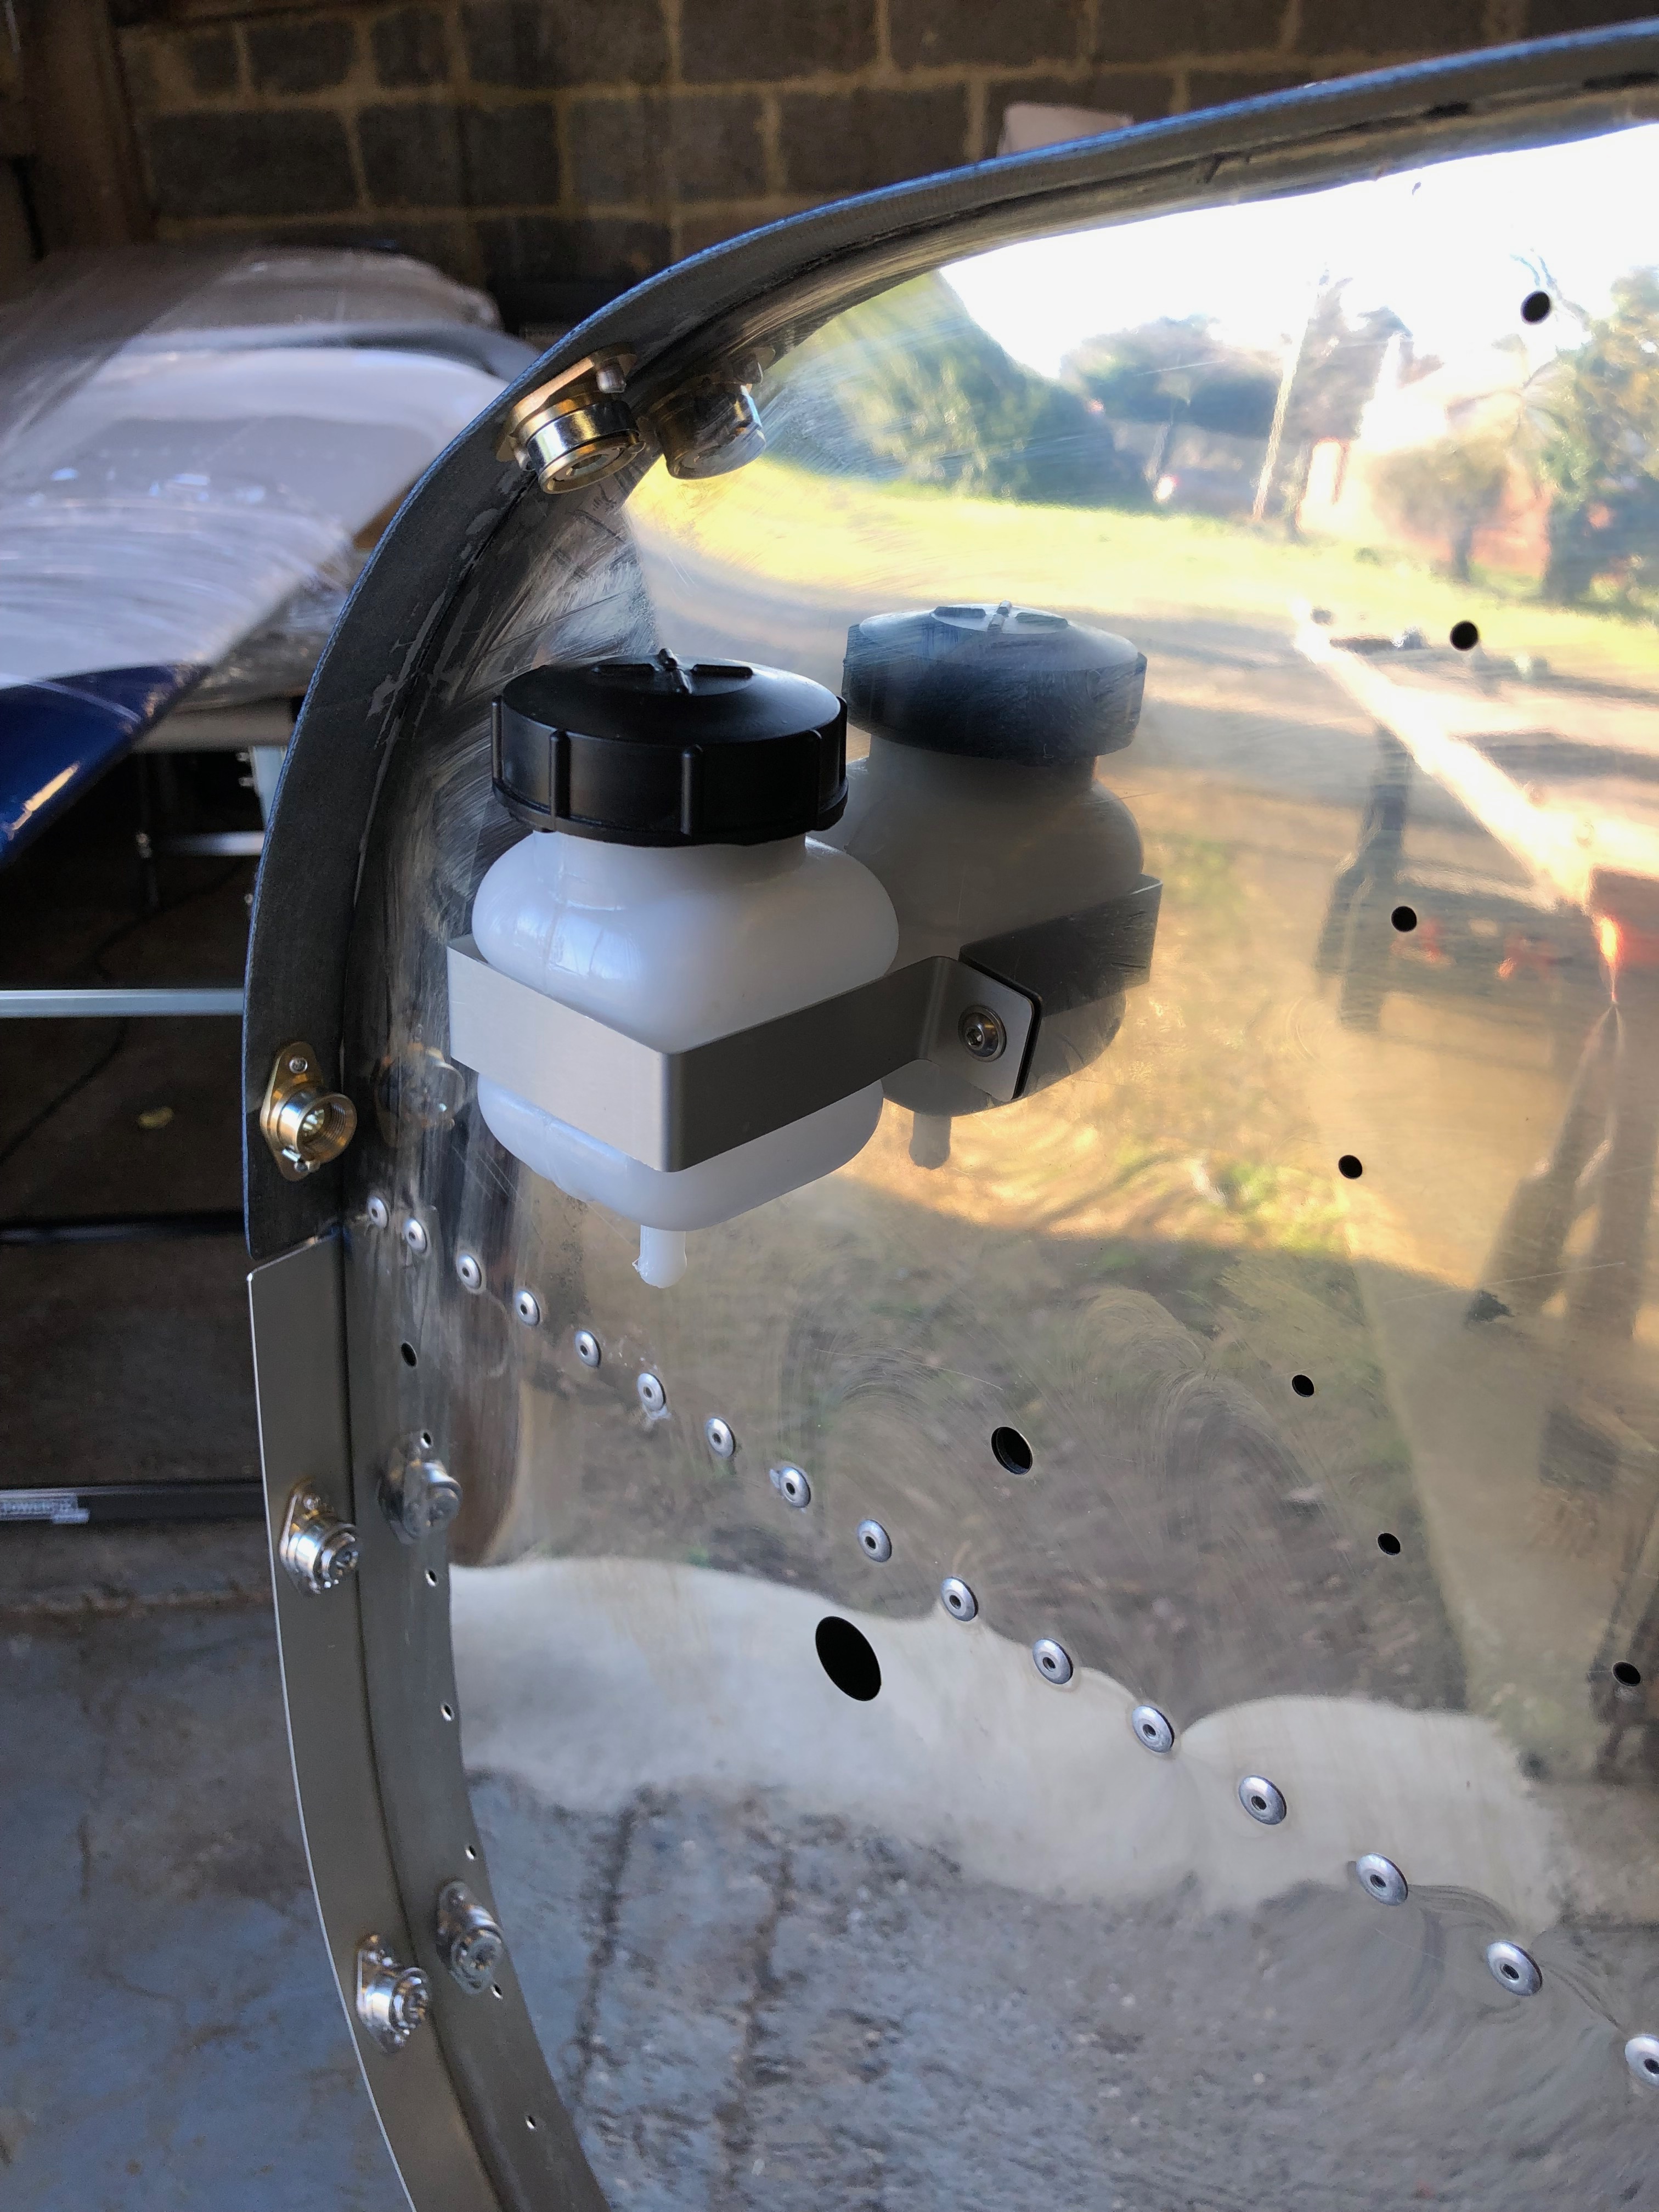
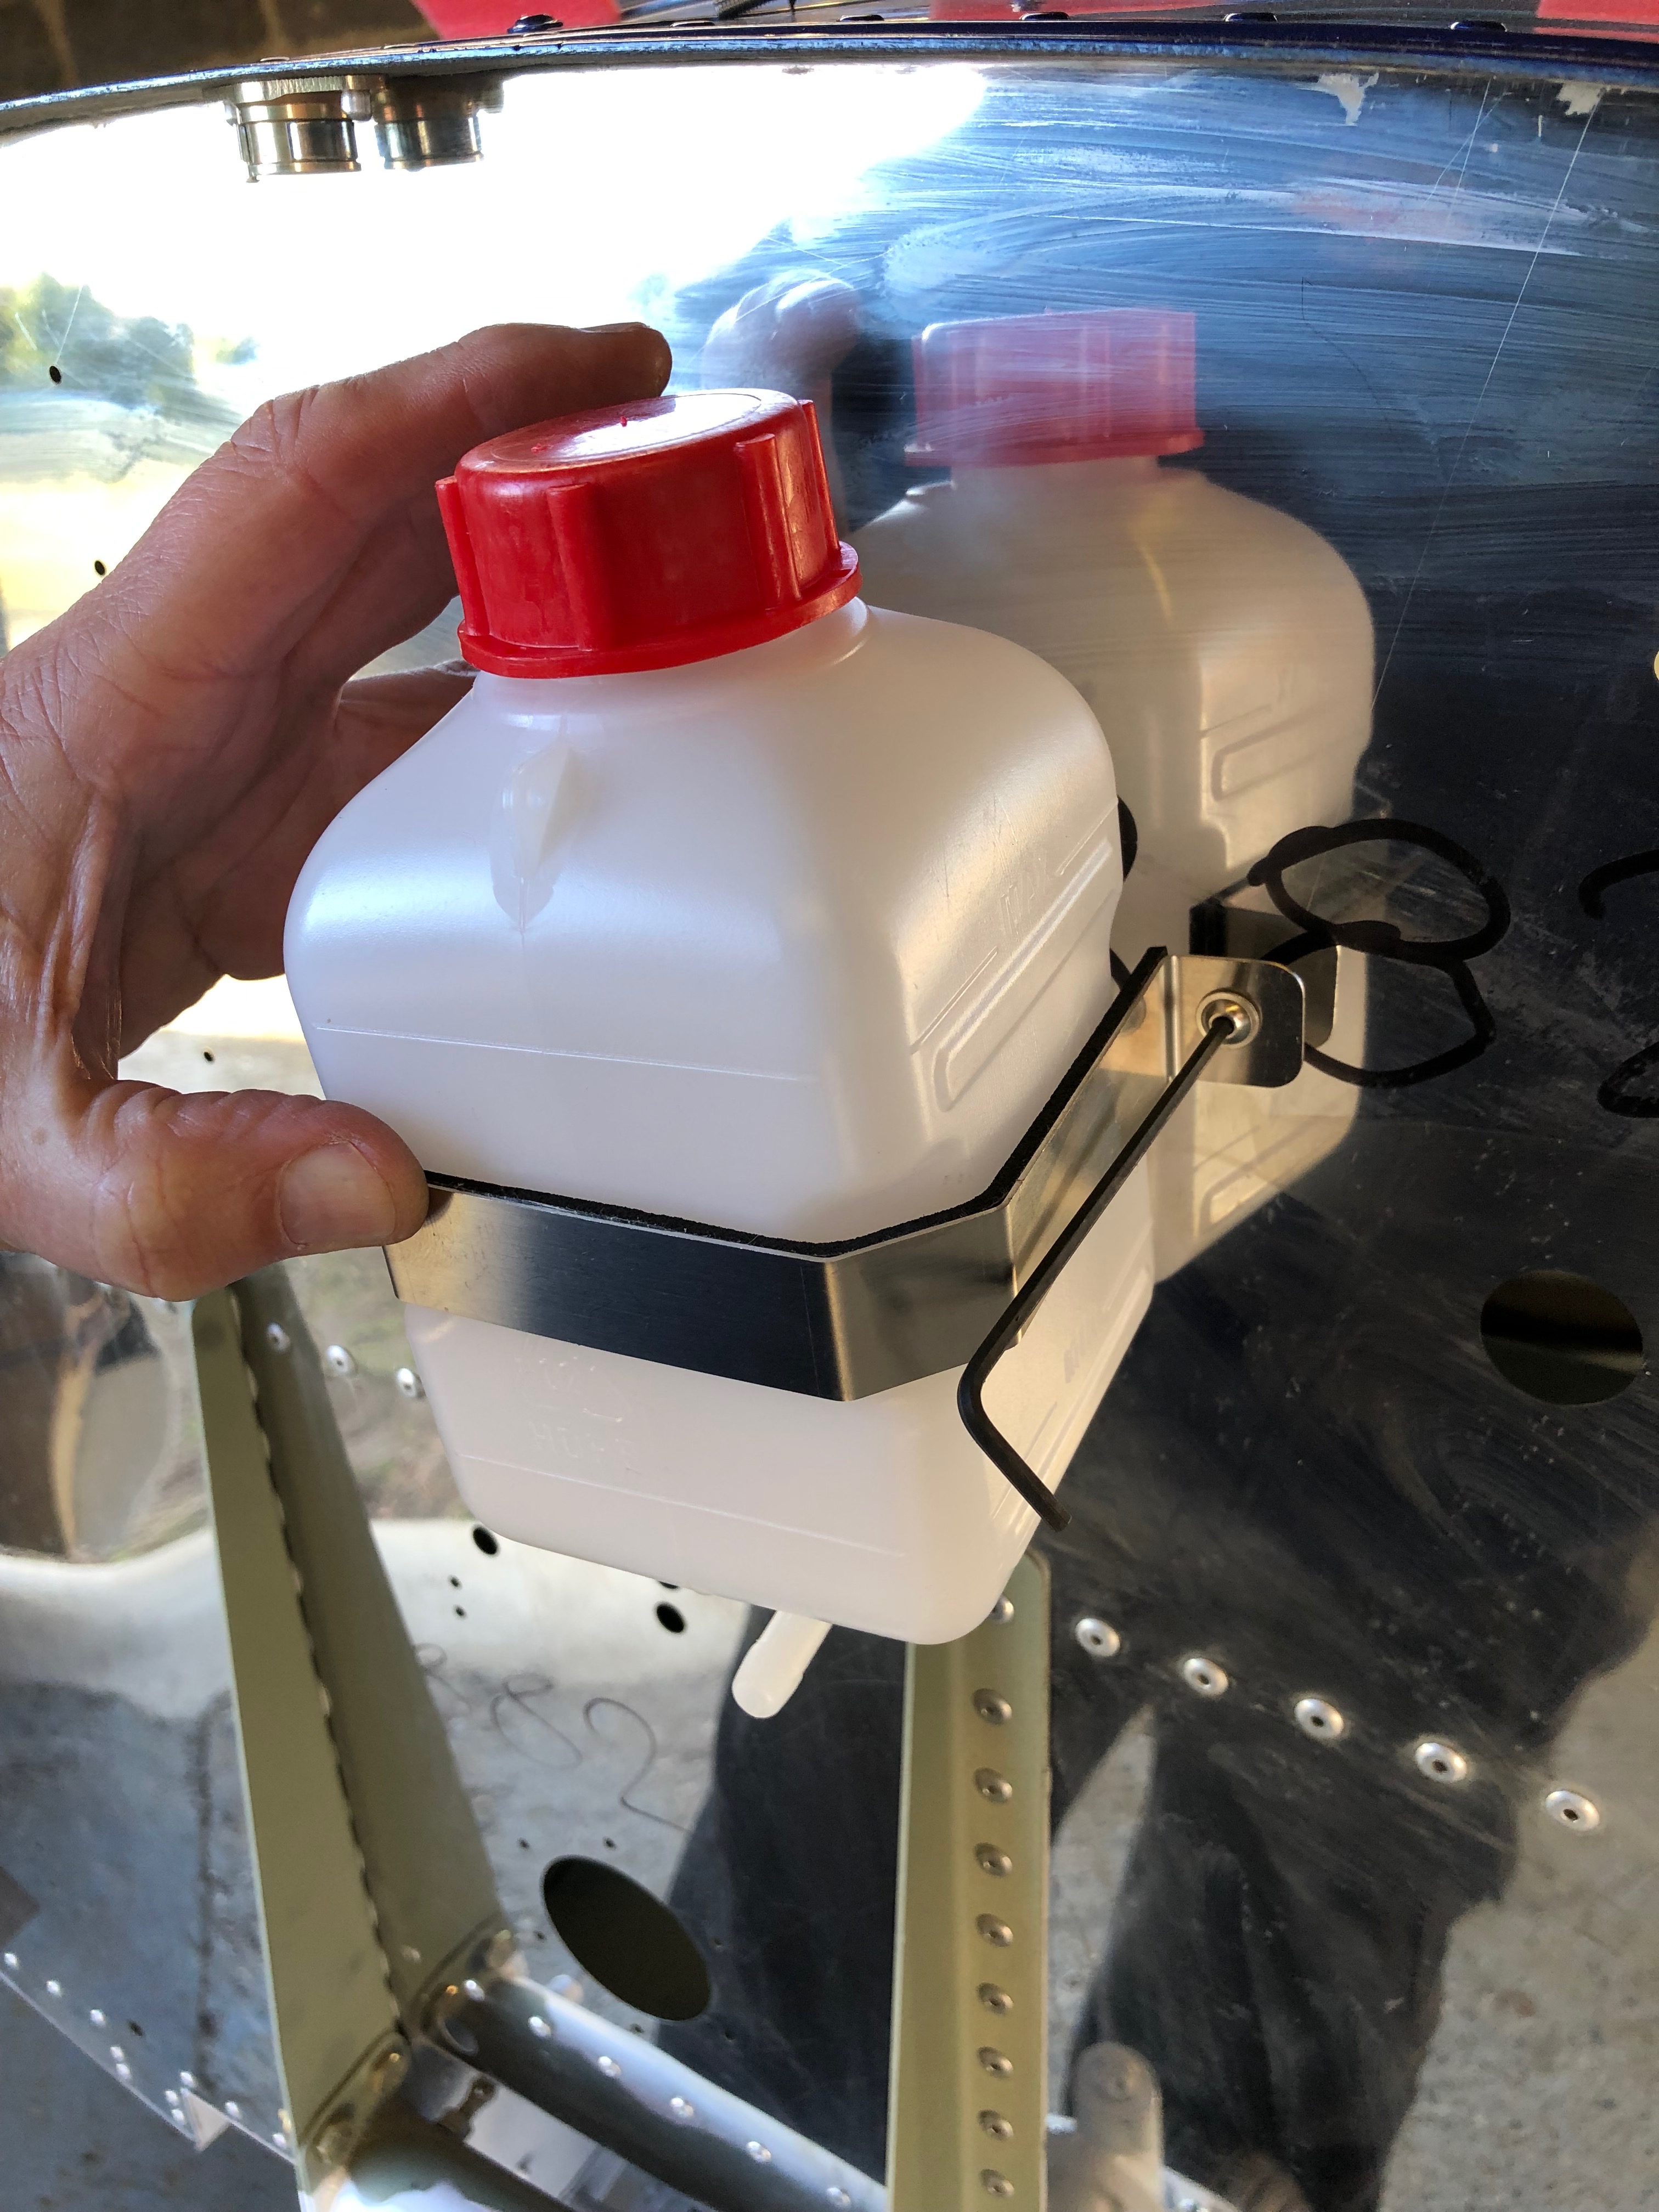
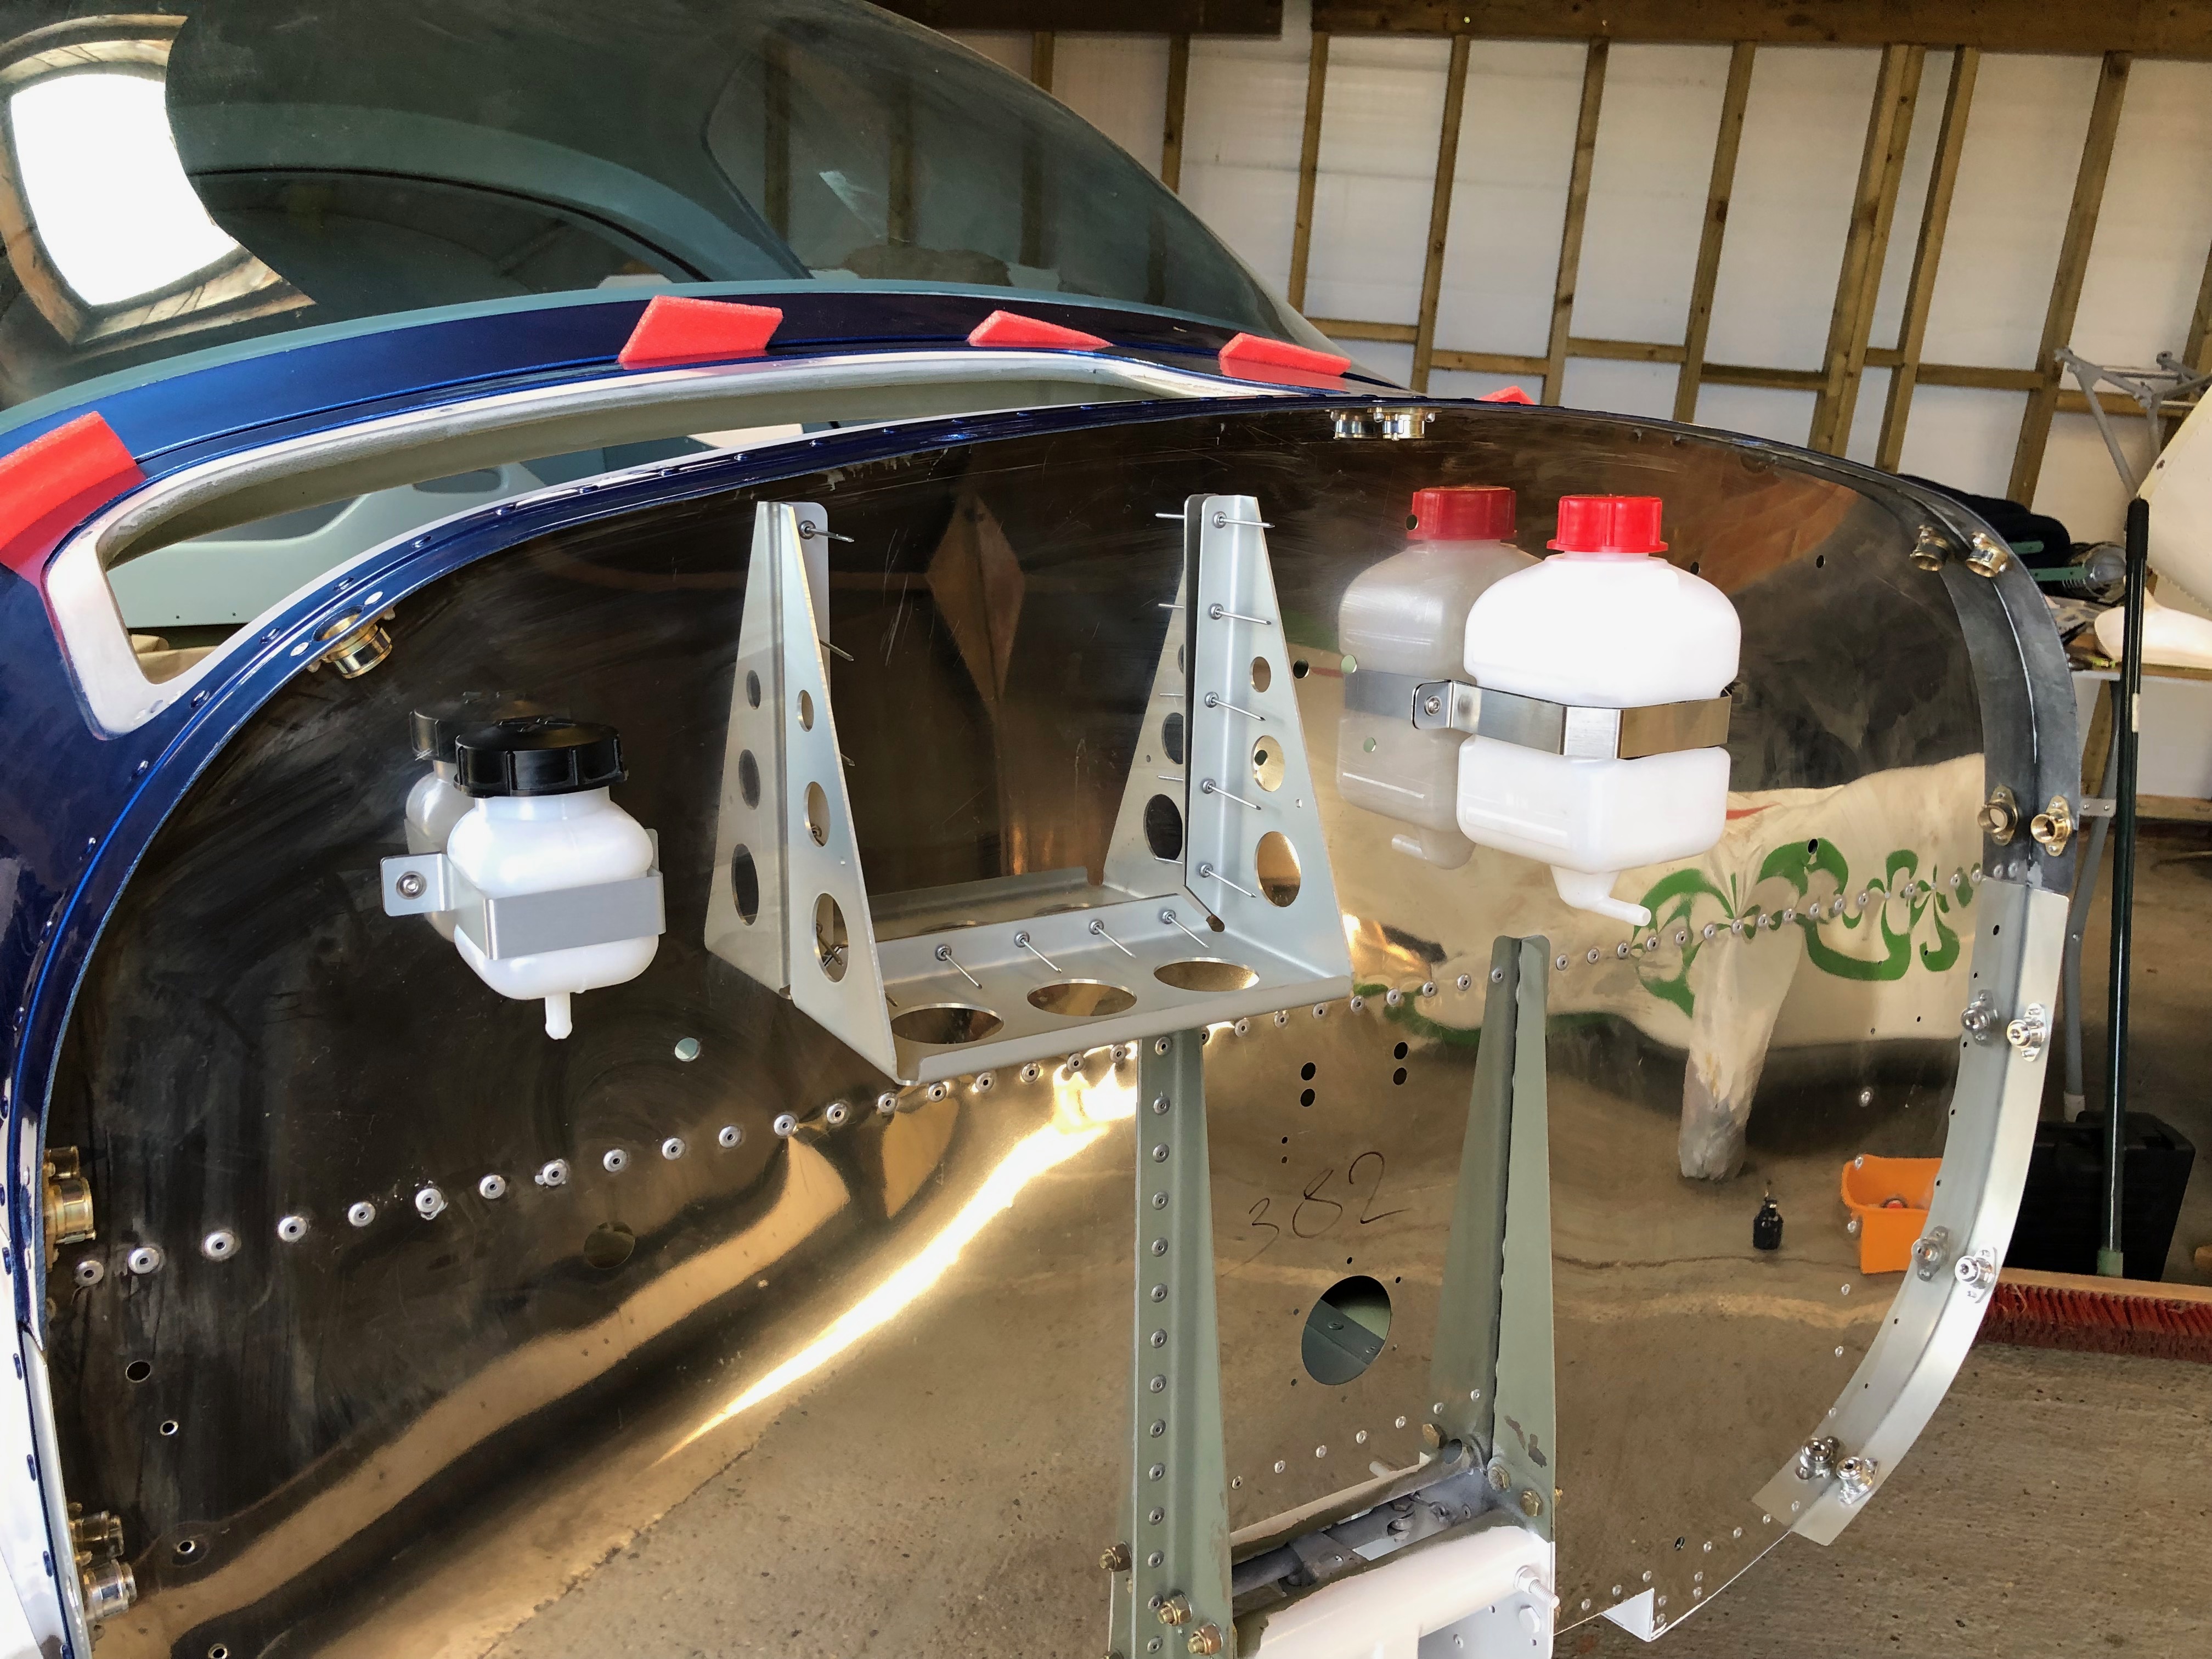
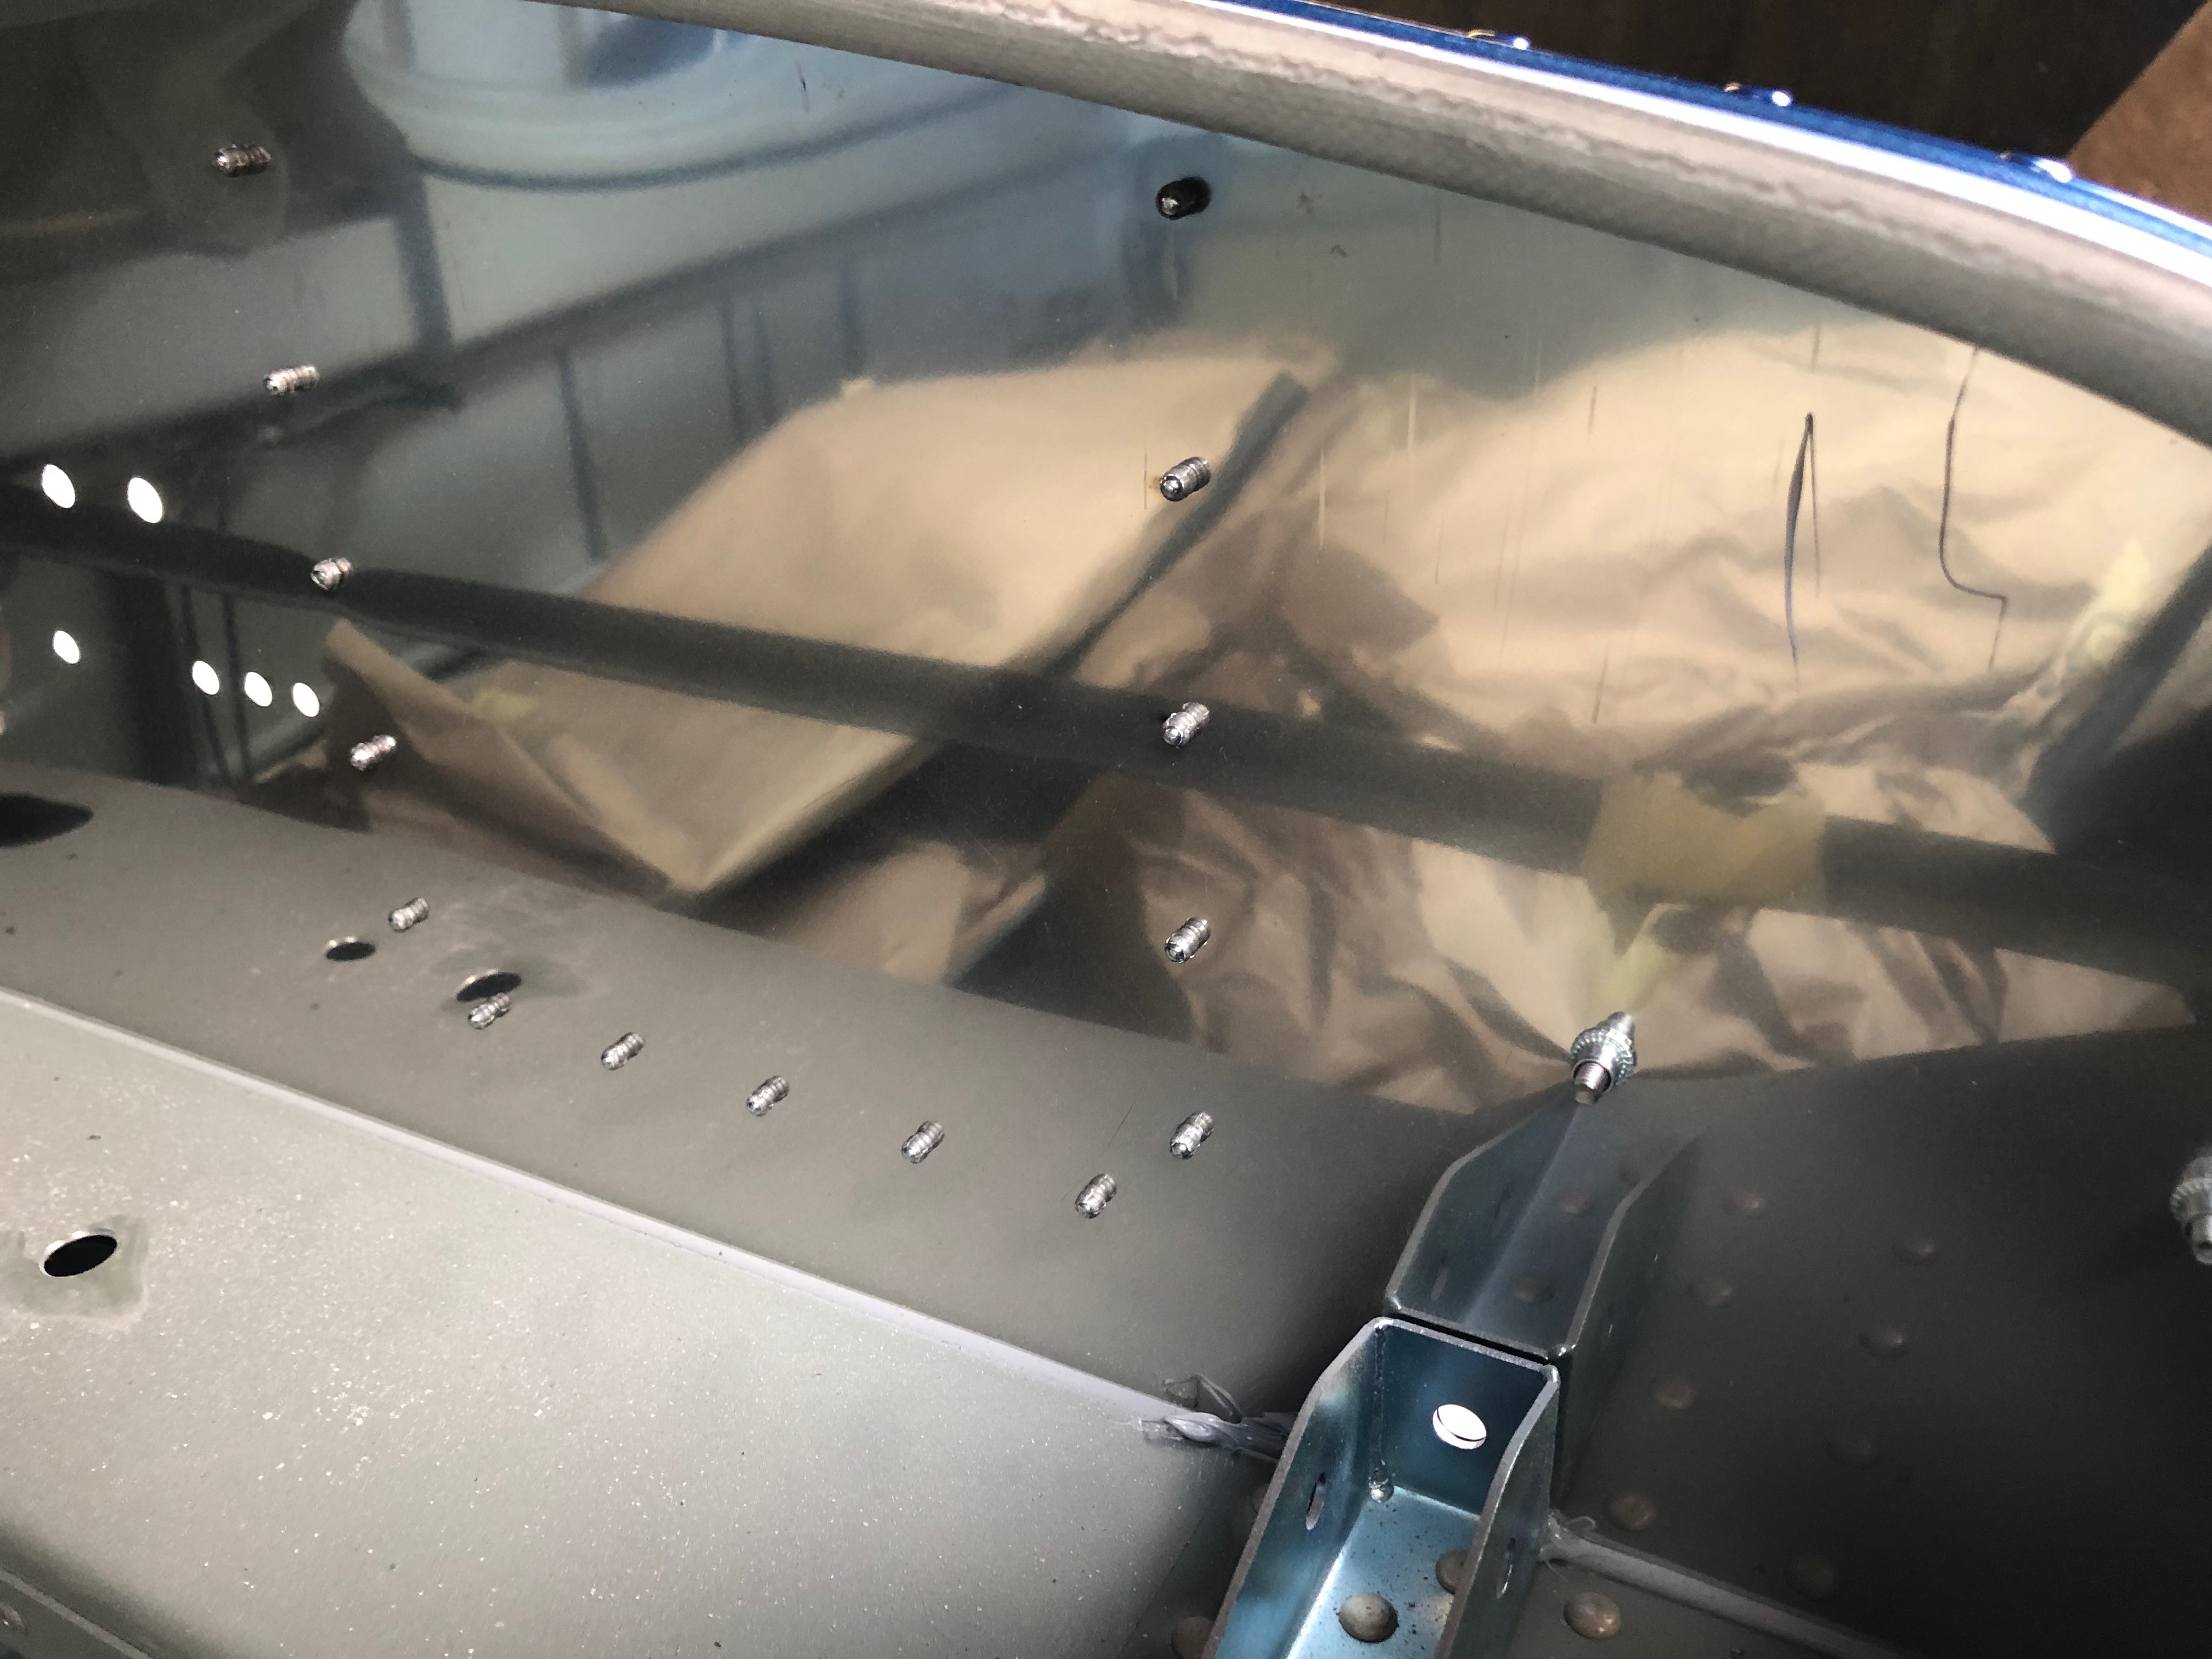
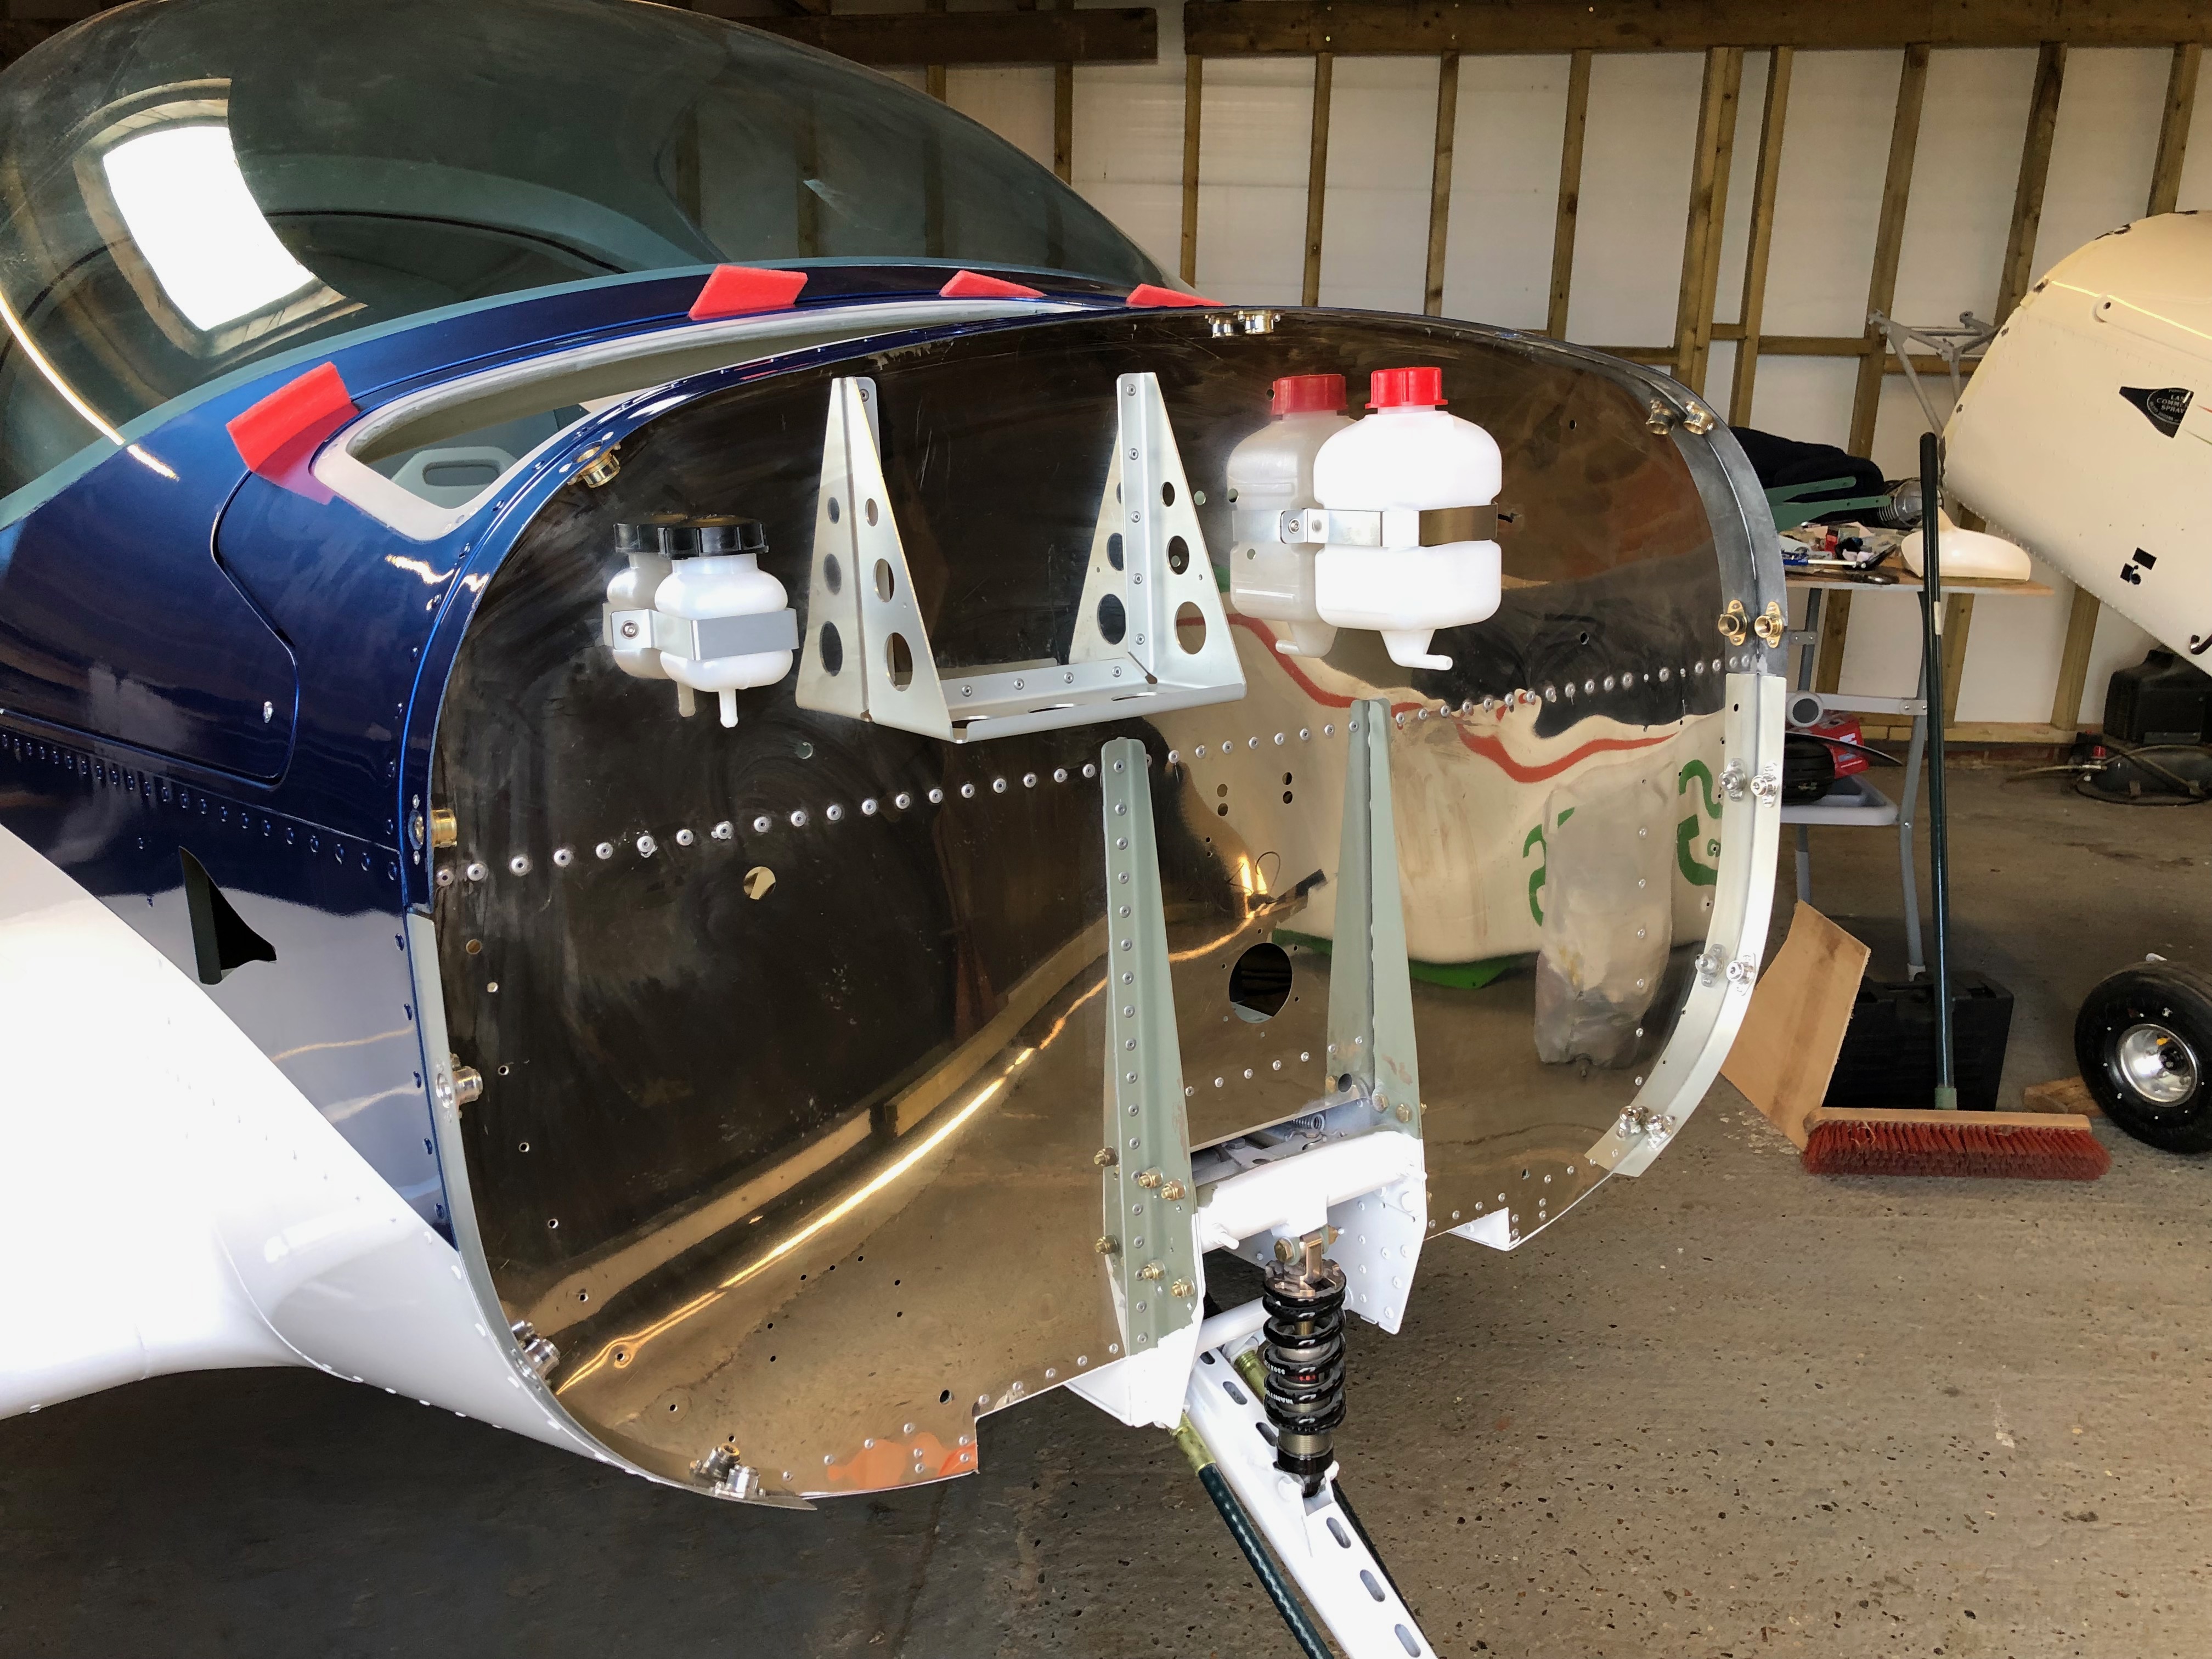
A number of brackets, bottles and components need to be installed before the engine is hung as it’s far easier to gain access to it. Some are just riveted onto the Firewall but other items need to be removed for servicing so Rivnuts are used with hex screws.
Setting an M4 Rivnut
Brake Oil bottle installed
Repeating the procedure for the Rotax water expansion tank
As the battery holder is predrilled I was able to rivet without the use of Clecos.
Farry confirmed that all was painted and ready for collection from his farm. Tony agreed that Thursday 17th Jan would work for his so the date was set.
Starting out at 07:30 I expected a 2 hour, busy but easy journey towards Horsham but that wasn’t to be. An accident just after junction 5 on the A2 meant that I sat stationary in traffic for over an hour. They reopened the road but with the associated delays on other roads it doubled my travel time to 4 hours.
I finally arrived and inspected the work. Overall it was good with a couple of areas of orange peeling. Farry said that it will require a polish and diamond cut later closer to when it will fly and any issues with the paint will be dealt with if I bring it back at some point in the future. There’s a few items outstanding including the wing join covers, noseleg fairing and wheel spats which still need to be painted but don’t impact on the build.
Loading it onto Tony’s trailer and secured, it was time for the journey back to the airfield.
The journey back to the airfield was very straightforward and I managed to pick Karen up from home and still have time to unload in daylight. Ian Daniels was also on hand to help unload the fuselage, wings and engine.Gallery
30/12/2018 – Karen found a nearly new Aldi tool chest for sale. So a quick trip up to Hornchurch to pick it up and now installed, after cleaning, in the workshop. Just the job!
I asked Farry to send some pictures over of the progress of the spraying. These were send showing the insides being painted and the underside of the fuselage in white.
With the white underside complete the metallic blue has now been applied to the top of the fuselage.
With the fuselage complete the wings are next but with Christmas looming it probably won’t be done until the New Year.
The Bristell comes with a fibreglass panel that has a recessed section on the right hand side angled slightly towards the pilot. The problem I found is that with the recess it was impossible to install two Garmin G3X 10.6″ displays.
G-NGII showing the panel and recess on the right
My thought is to remove the recess by cutting it out and then re-glassing the panel to make it flat. To visualise the change I covered the panel in cardboard and white paper and printed life-sized instruments and placed them on the panel.
a) Garmin G3X layout Twin Garmin G3X with GTR225 8.33khz radio, GMC507 Autopilot and Airmaster CSU controller. This panel doesn’t need any backup instruments as the G5 would be adequate.b) Dynon layout Twin 10″ Dynon SkyView HDX screens with Intercom, Radio, Autopilot, common function sub panels and Airmaster CSU controller. Requires more instruments as a backup perhaps a Dynon D6(0)c) Dynon layout Twin 10″ SkyView HDX screens with Intercom, Autopilot, Common function sub panels centrally mounted and an Airmaster CSU controller. Requires backup instruments as above.
Very early stages of design but my preference is c). Both Garmin and Dynon have similar capabilities but the Dynon components look so much neater. Still to be added are the graphics for the switches, fuses, a starter switch and trim position indicators.
I asked Farry to send some pictures over of the progress of the spraying. These were send showing the insides being painted and the underside of the fuselage in white.
One of the activities that must be completed before the airframe can be painted is filling the rivets. After scouring the internet I found a video by Alan Radford who demonstrated the method to fill the rivets using SuperFil. I decided to use the same method and sourced the filler from Aircraft Coverings. I spoke to Alex there who despatched it straight away and I received it a day or so later.
Karen using a syringe and SuperFil to fill each rivet
It’s a long job
The filled rivets ready to be sanded
It was very slow going and very hard to squeeze the SuperFil out of the 16g needle. Consulting with Tony Palmer he suggested that we give up on SuperFil as it was just too thick due to the temperature we were working at which was sub 10c. He suggested that we use a resin, mixed with a 1% slow acting hardener which was mixed with talcum powder to give it a thicker consitency. He demonstrated how to mix and fill the resin and we then tried using the new filler. It was an instant success with much quicker progress made.
Some resin and some SuperFil
One by one the rivets were gradually filled.
It was quite chilly!
The slightly proud fills of each rivet which would be sanded down before painting.
It took 3 days to completely fill the rivets.
The next step was to sand down the tops of the resin in preparation for spraying. Using a very fine grit with an orbital air sander made the process very straightforward although it took a day to complete.
I used the air orbital sander to finish off.
Karen used the electric orbital sander just to take the sharp point off the top of the rivets.
A crawler board was invaluable.
and then Karen inspected my work to make sure I didn’t miss any.
Job done!
and then the cowls
With all the wings, tailplane and cowls in the van the Fuselage will be loaded onto a trailer for it’s journey to the paint shop.
After seeing the Bristell at Air Expo I arranged to have a test flight with Farry. So Karen and I travelled to his farm to get a test flight in the aircraft before ordering.
Handling was sublime and it was very stable and well harmonised in the turns. Farry knows the aircraft very well and made some manoeuvres that were slightly outside of my comfort zone but only because I don’t know the aircraft very well.
Once we landed I asked Farry if he could take Karen for a quick ride but with only gentle manoeuvres. Karen hopped in and then she was off.
She came back telling me we could use it to go wine shopping in France. I think she was sold on it 🤣
Following the build of my Bristell NG5 Kit No. 382 Registration G-MLSY