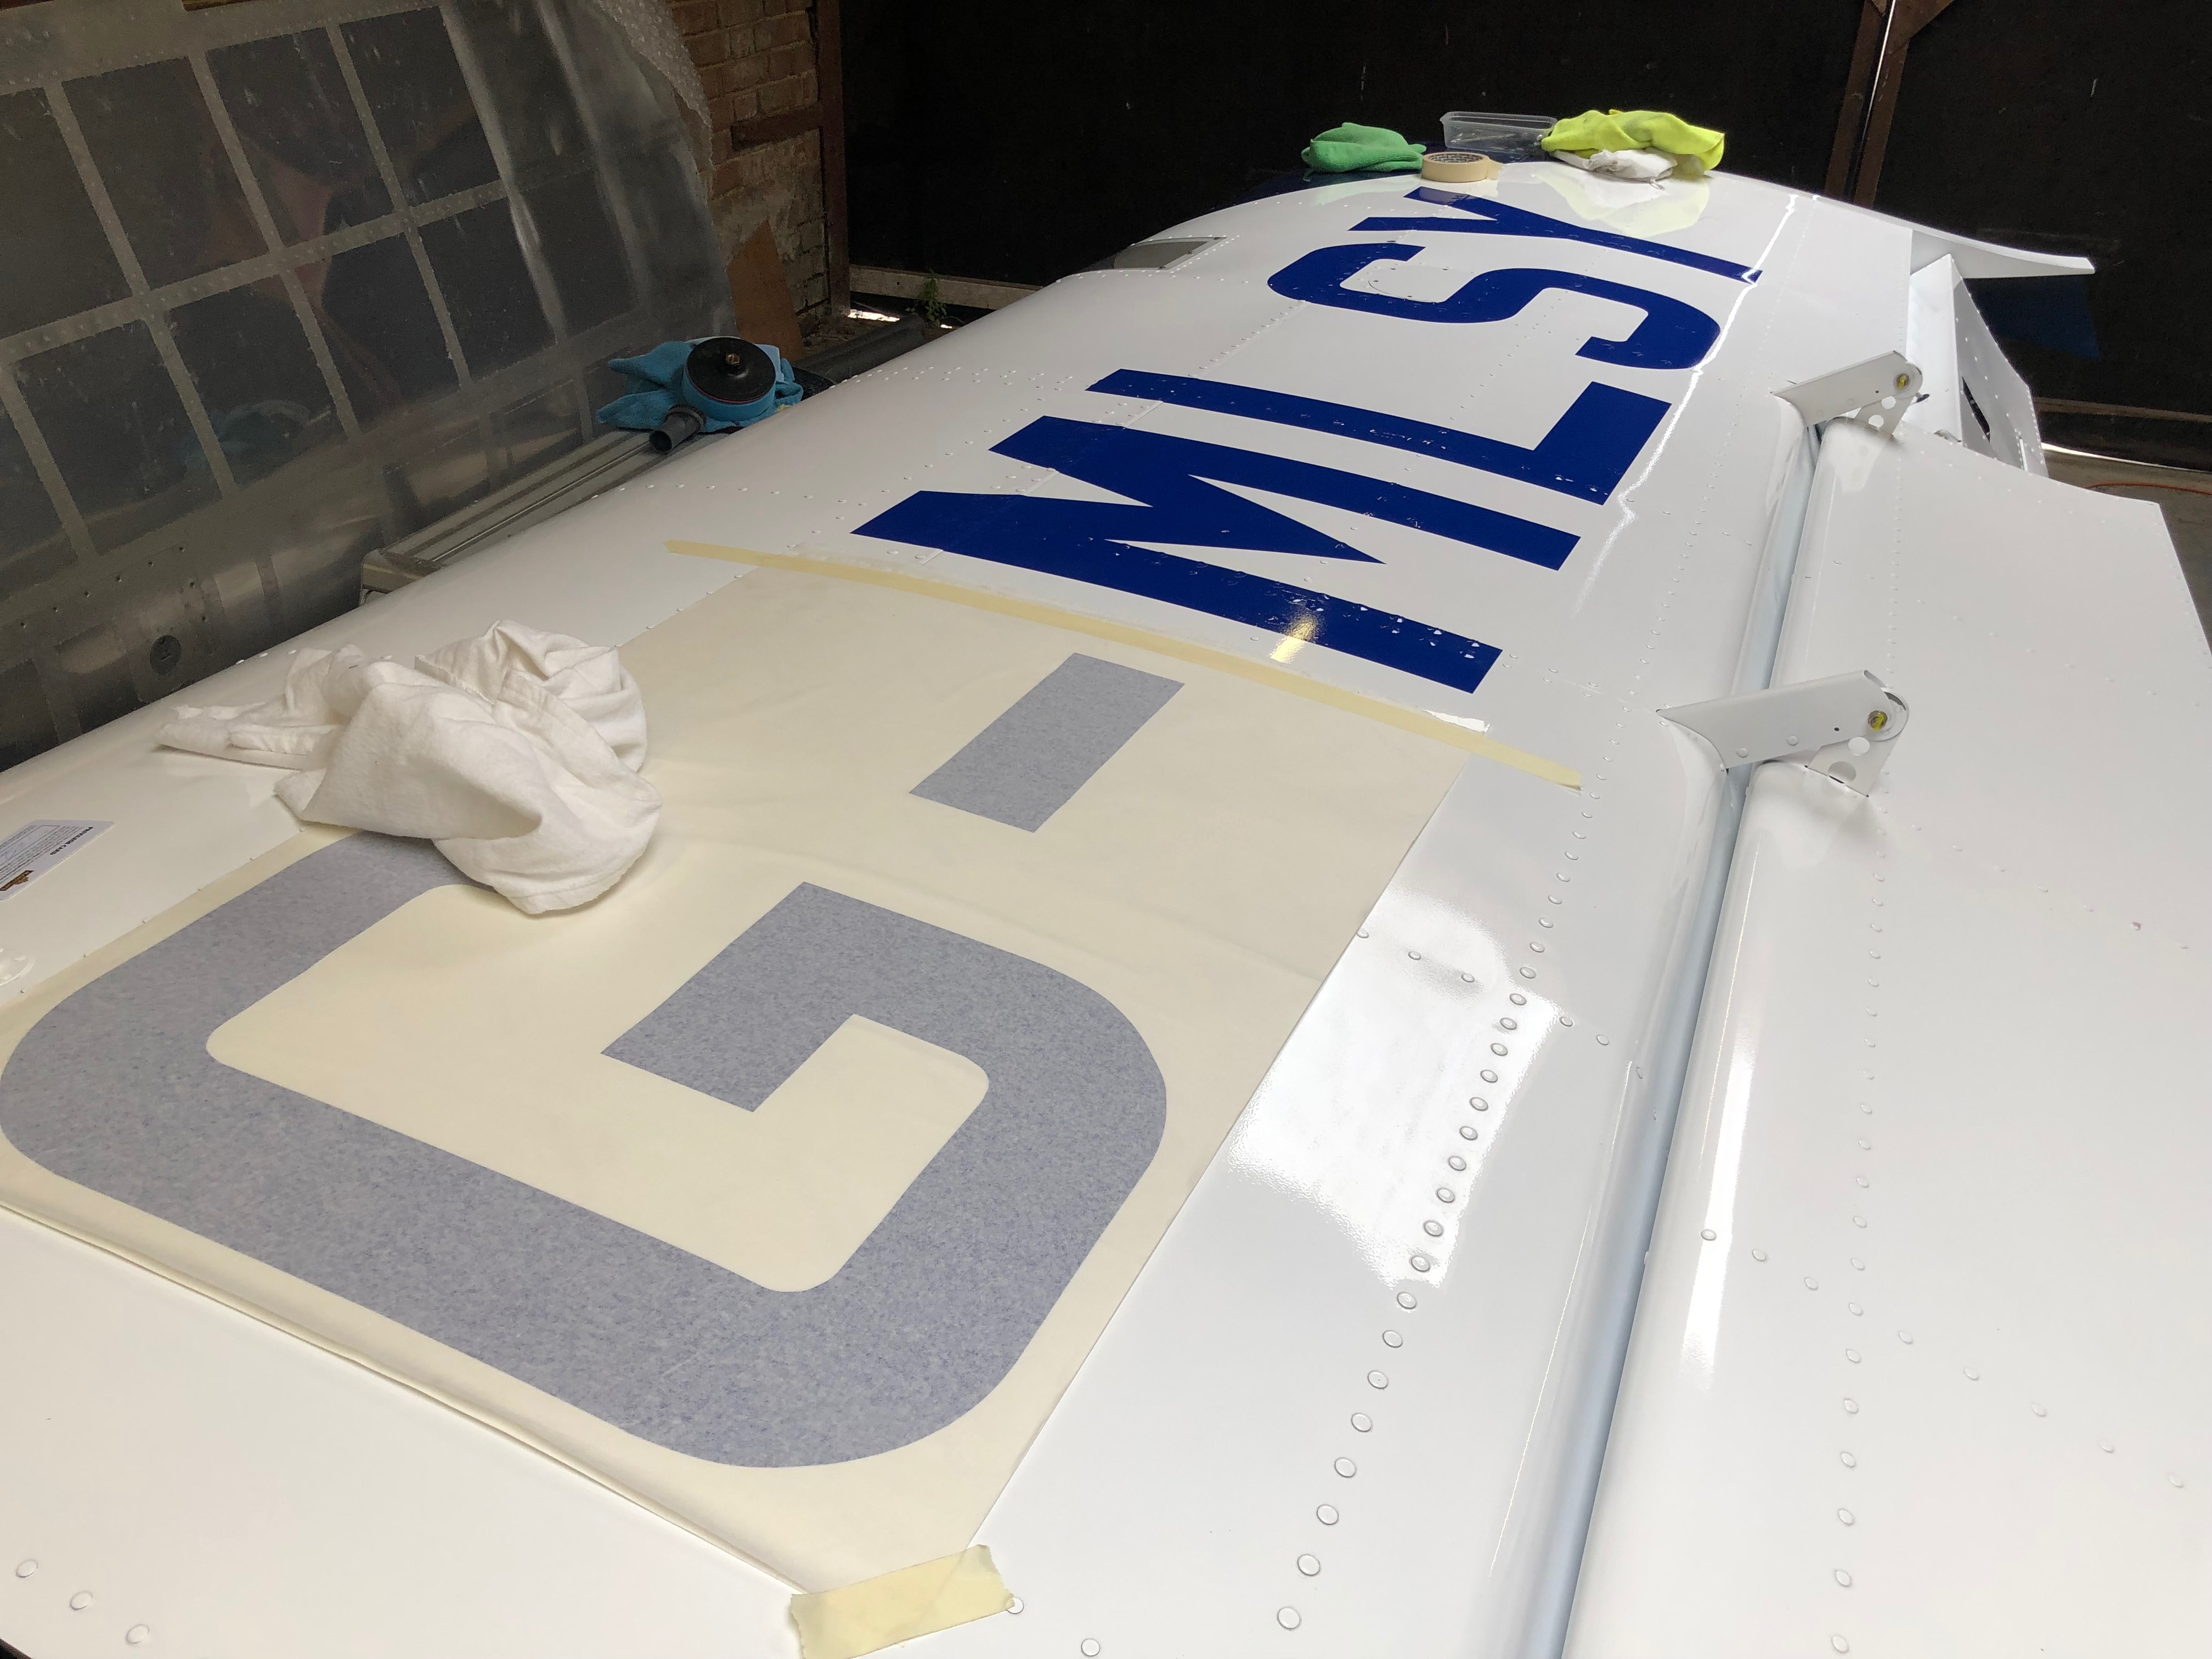
Applying the registration marks looks to be quite simple but like so many of the jobs I’ve done during this project it’s something I’ve not done before so it needs a bit of thinking about before I attempt it. I’ve watched a couple of Youtube videos that has helped.
The registration has been cut and is already spaced but Ian noticed that the hyphen spacing was much bigger than it needed to be so I needed to re-space the G, -, and M which will make it a little more difficult.
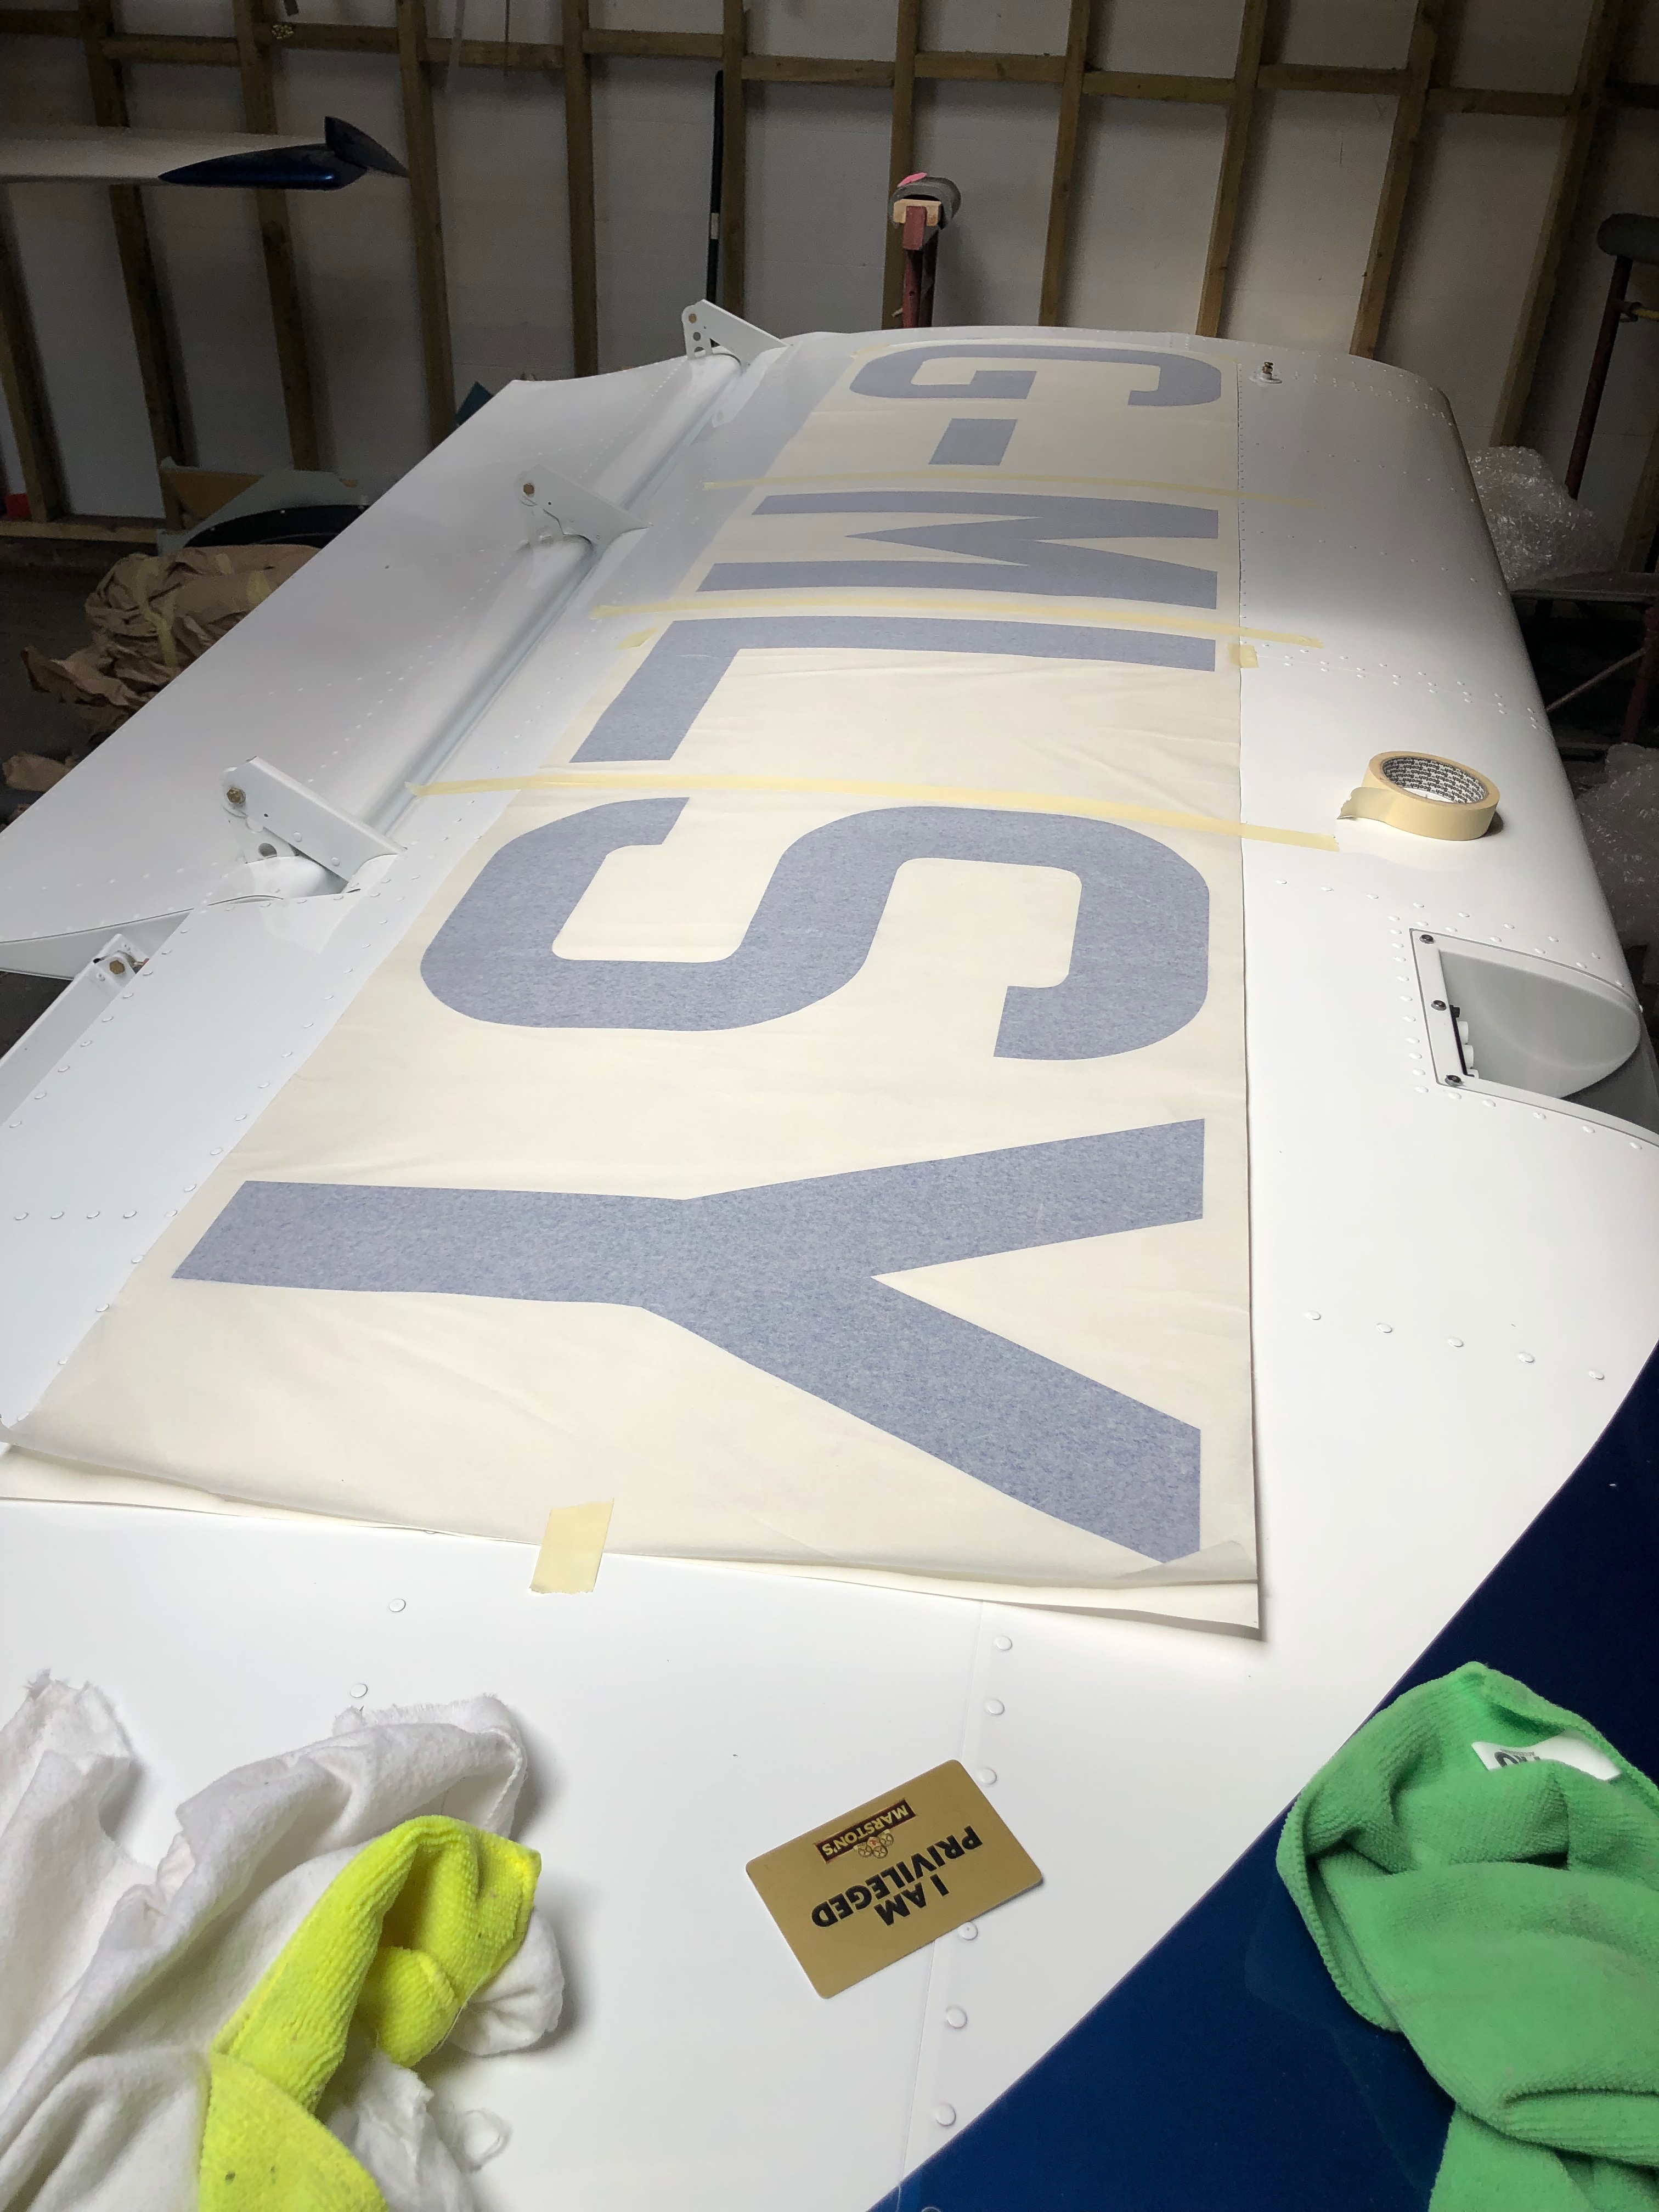
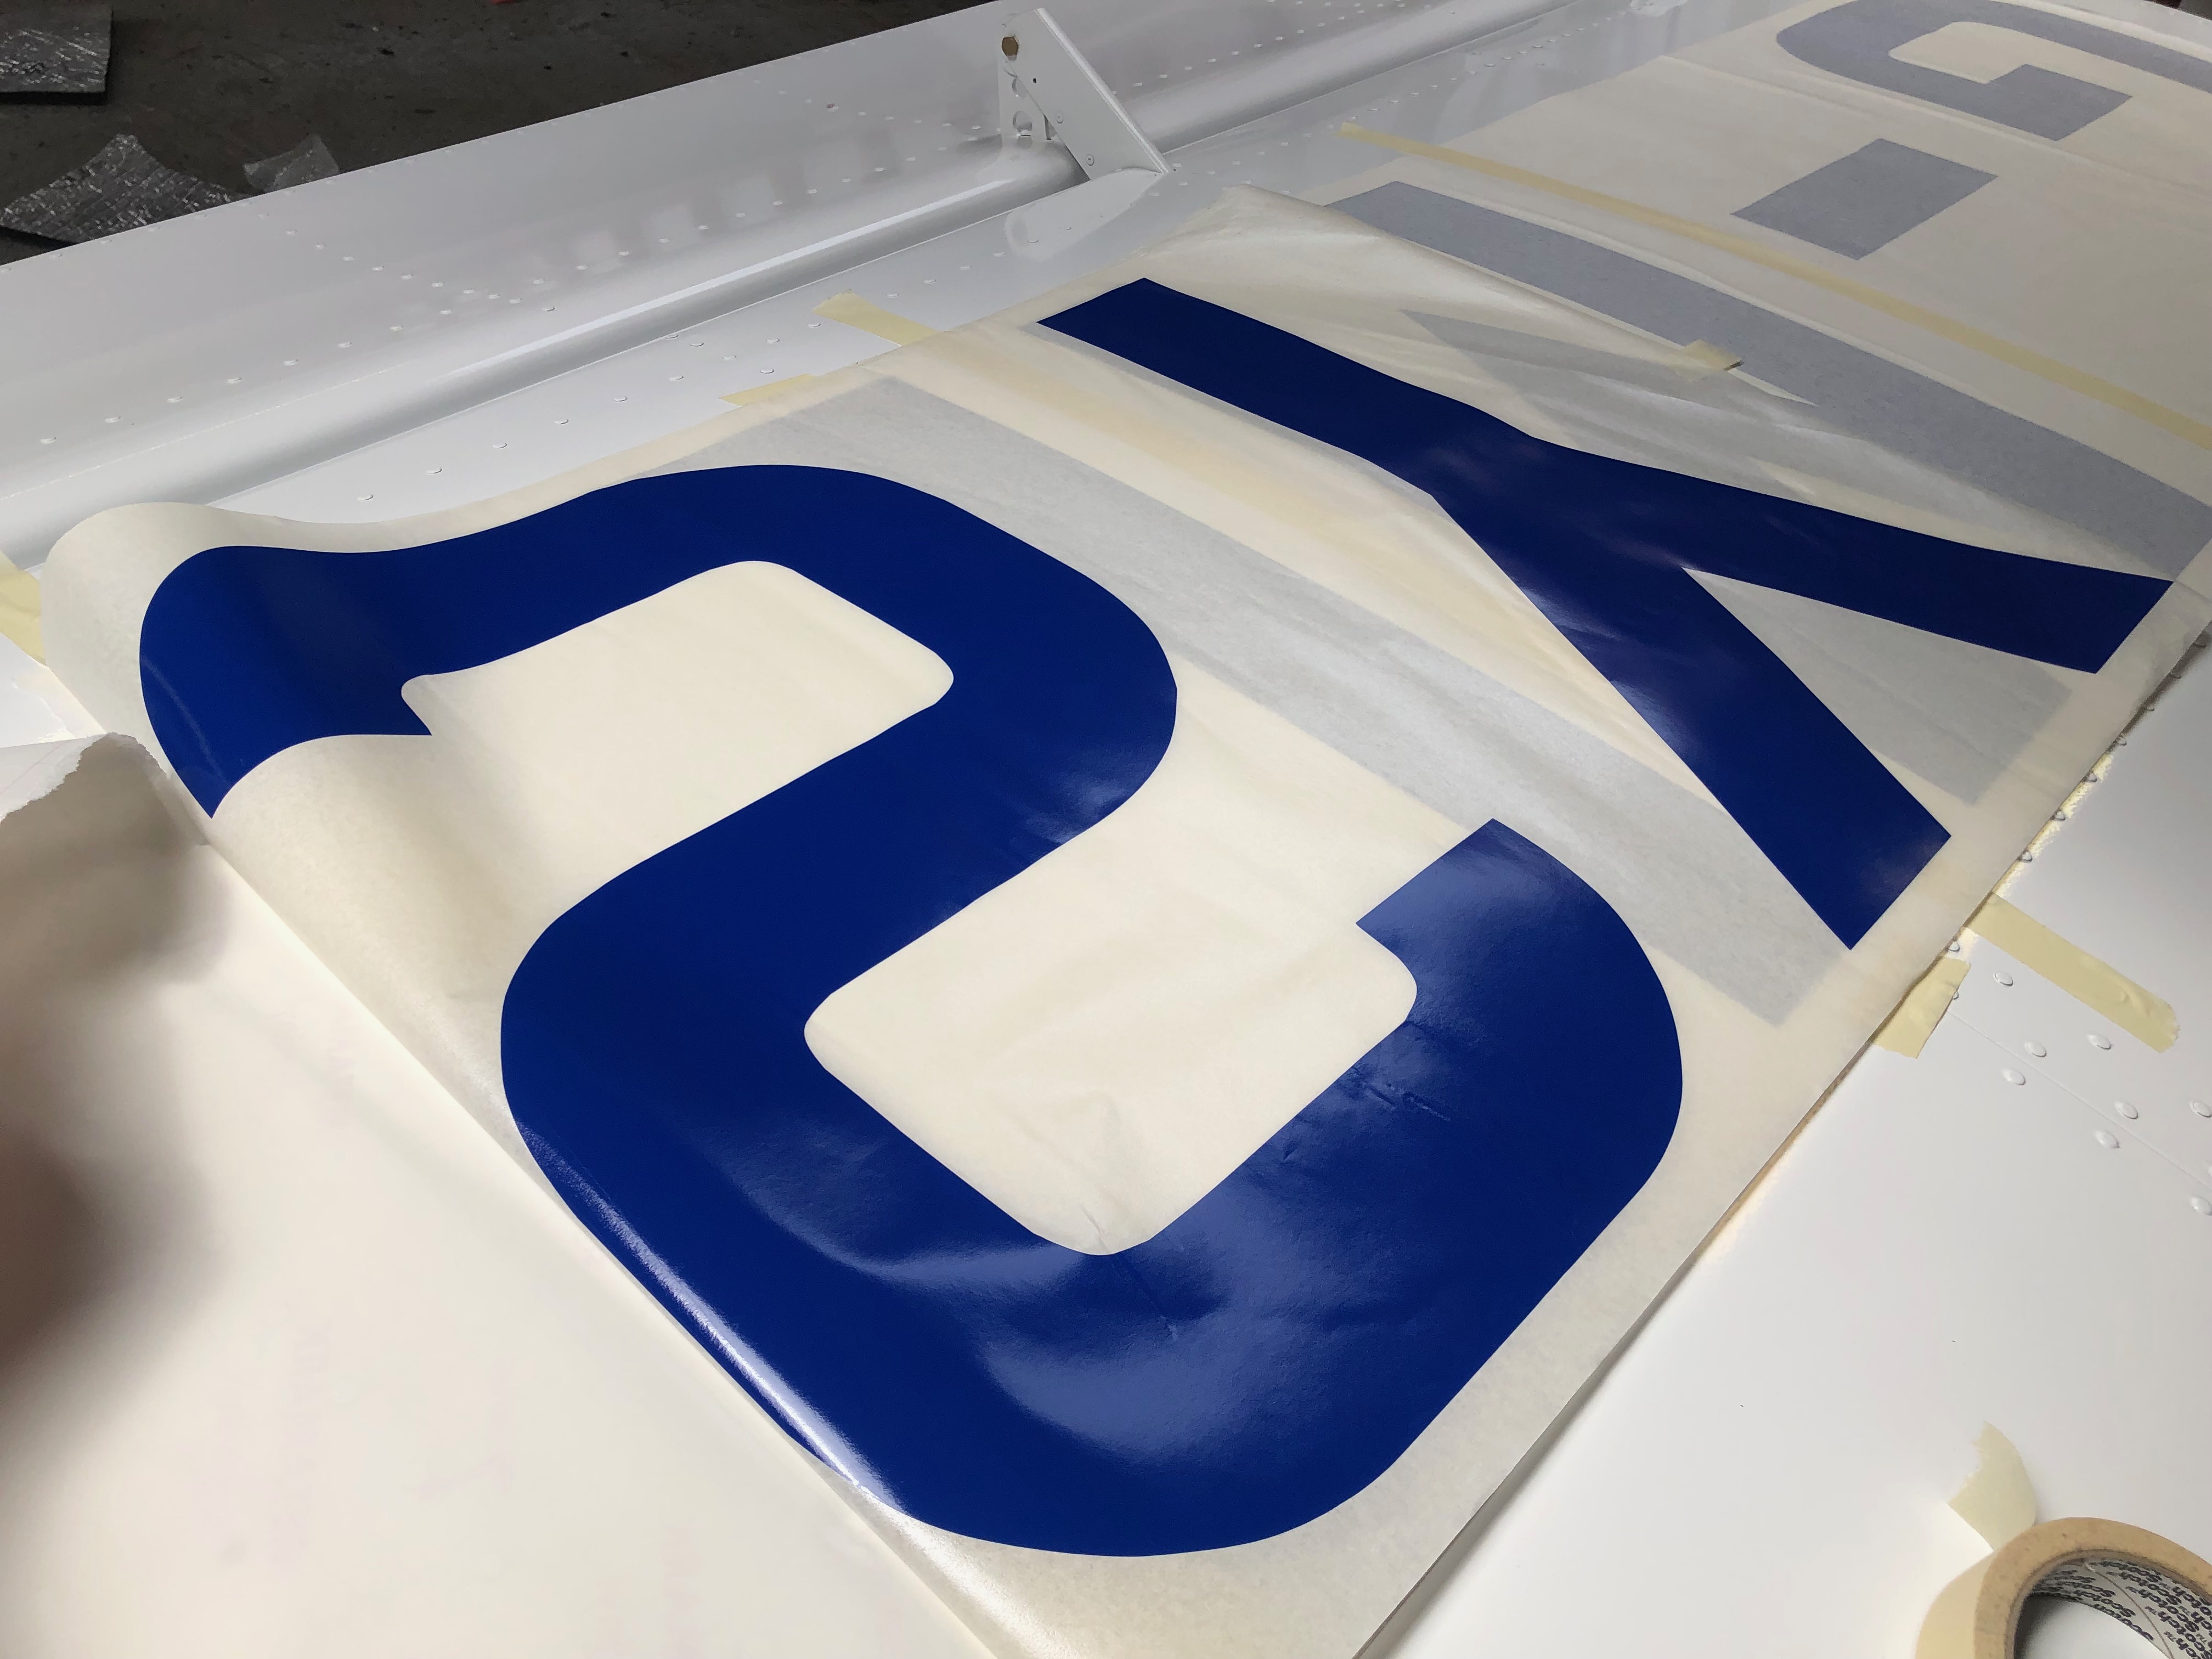
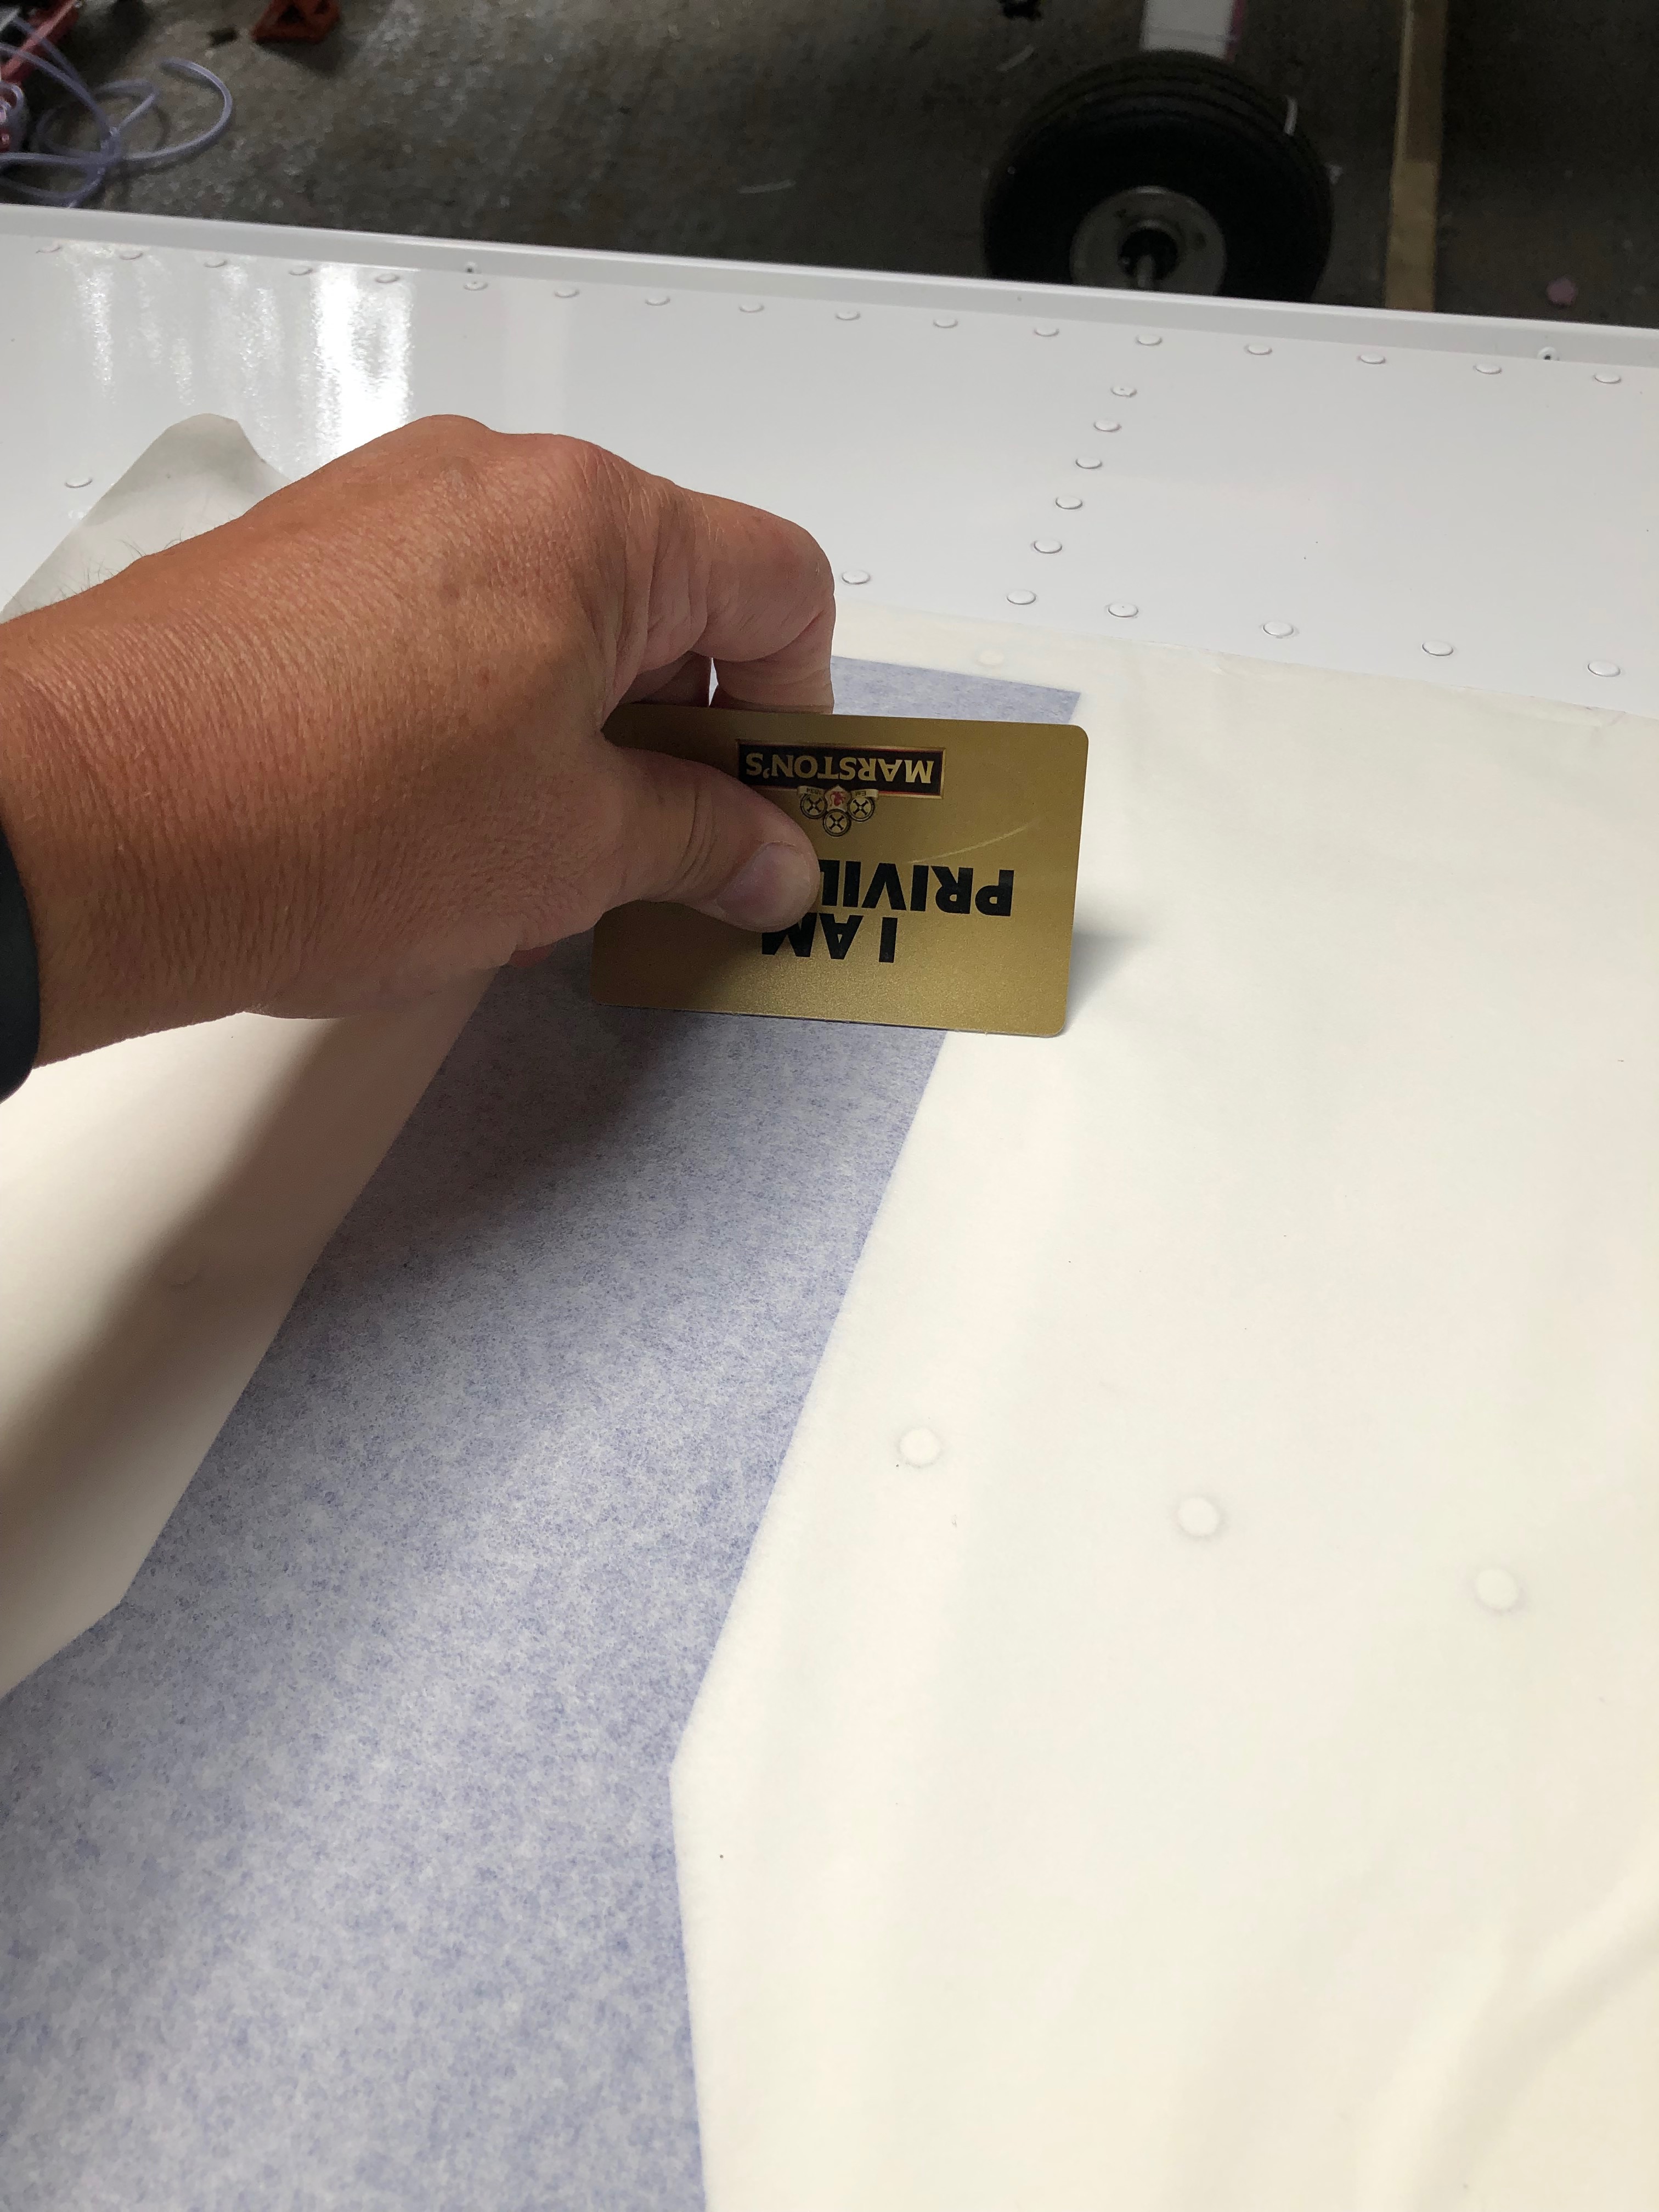
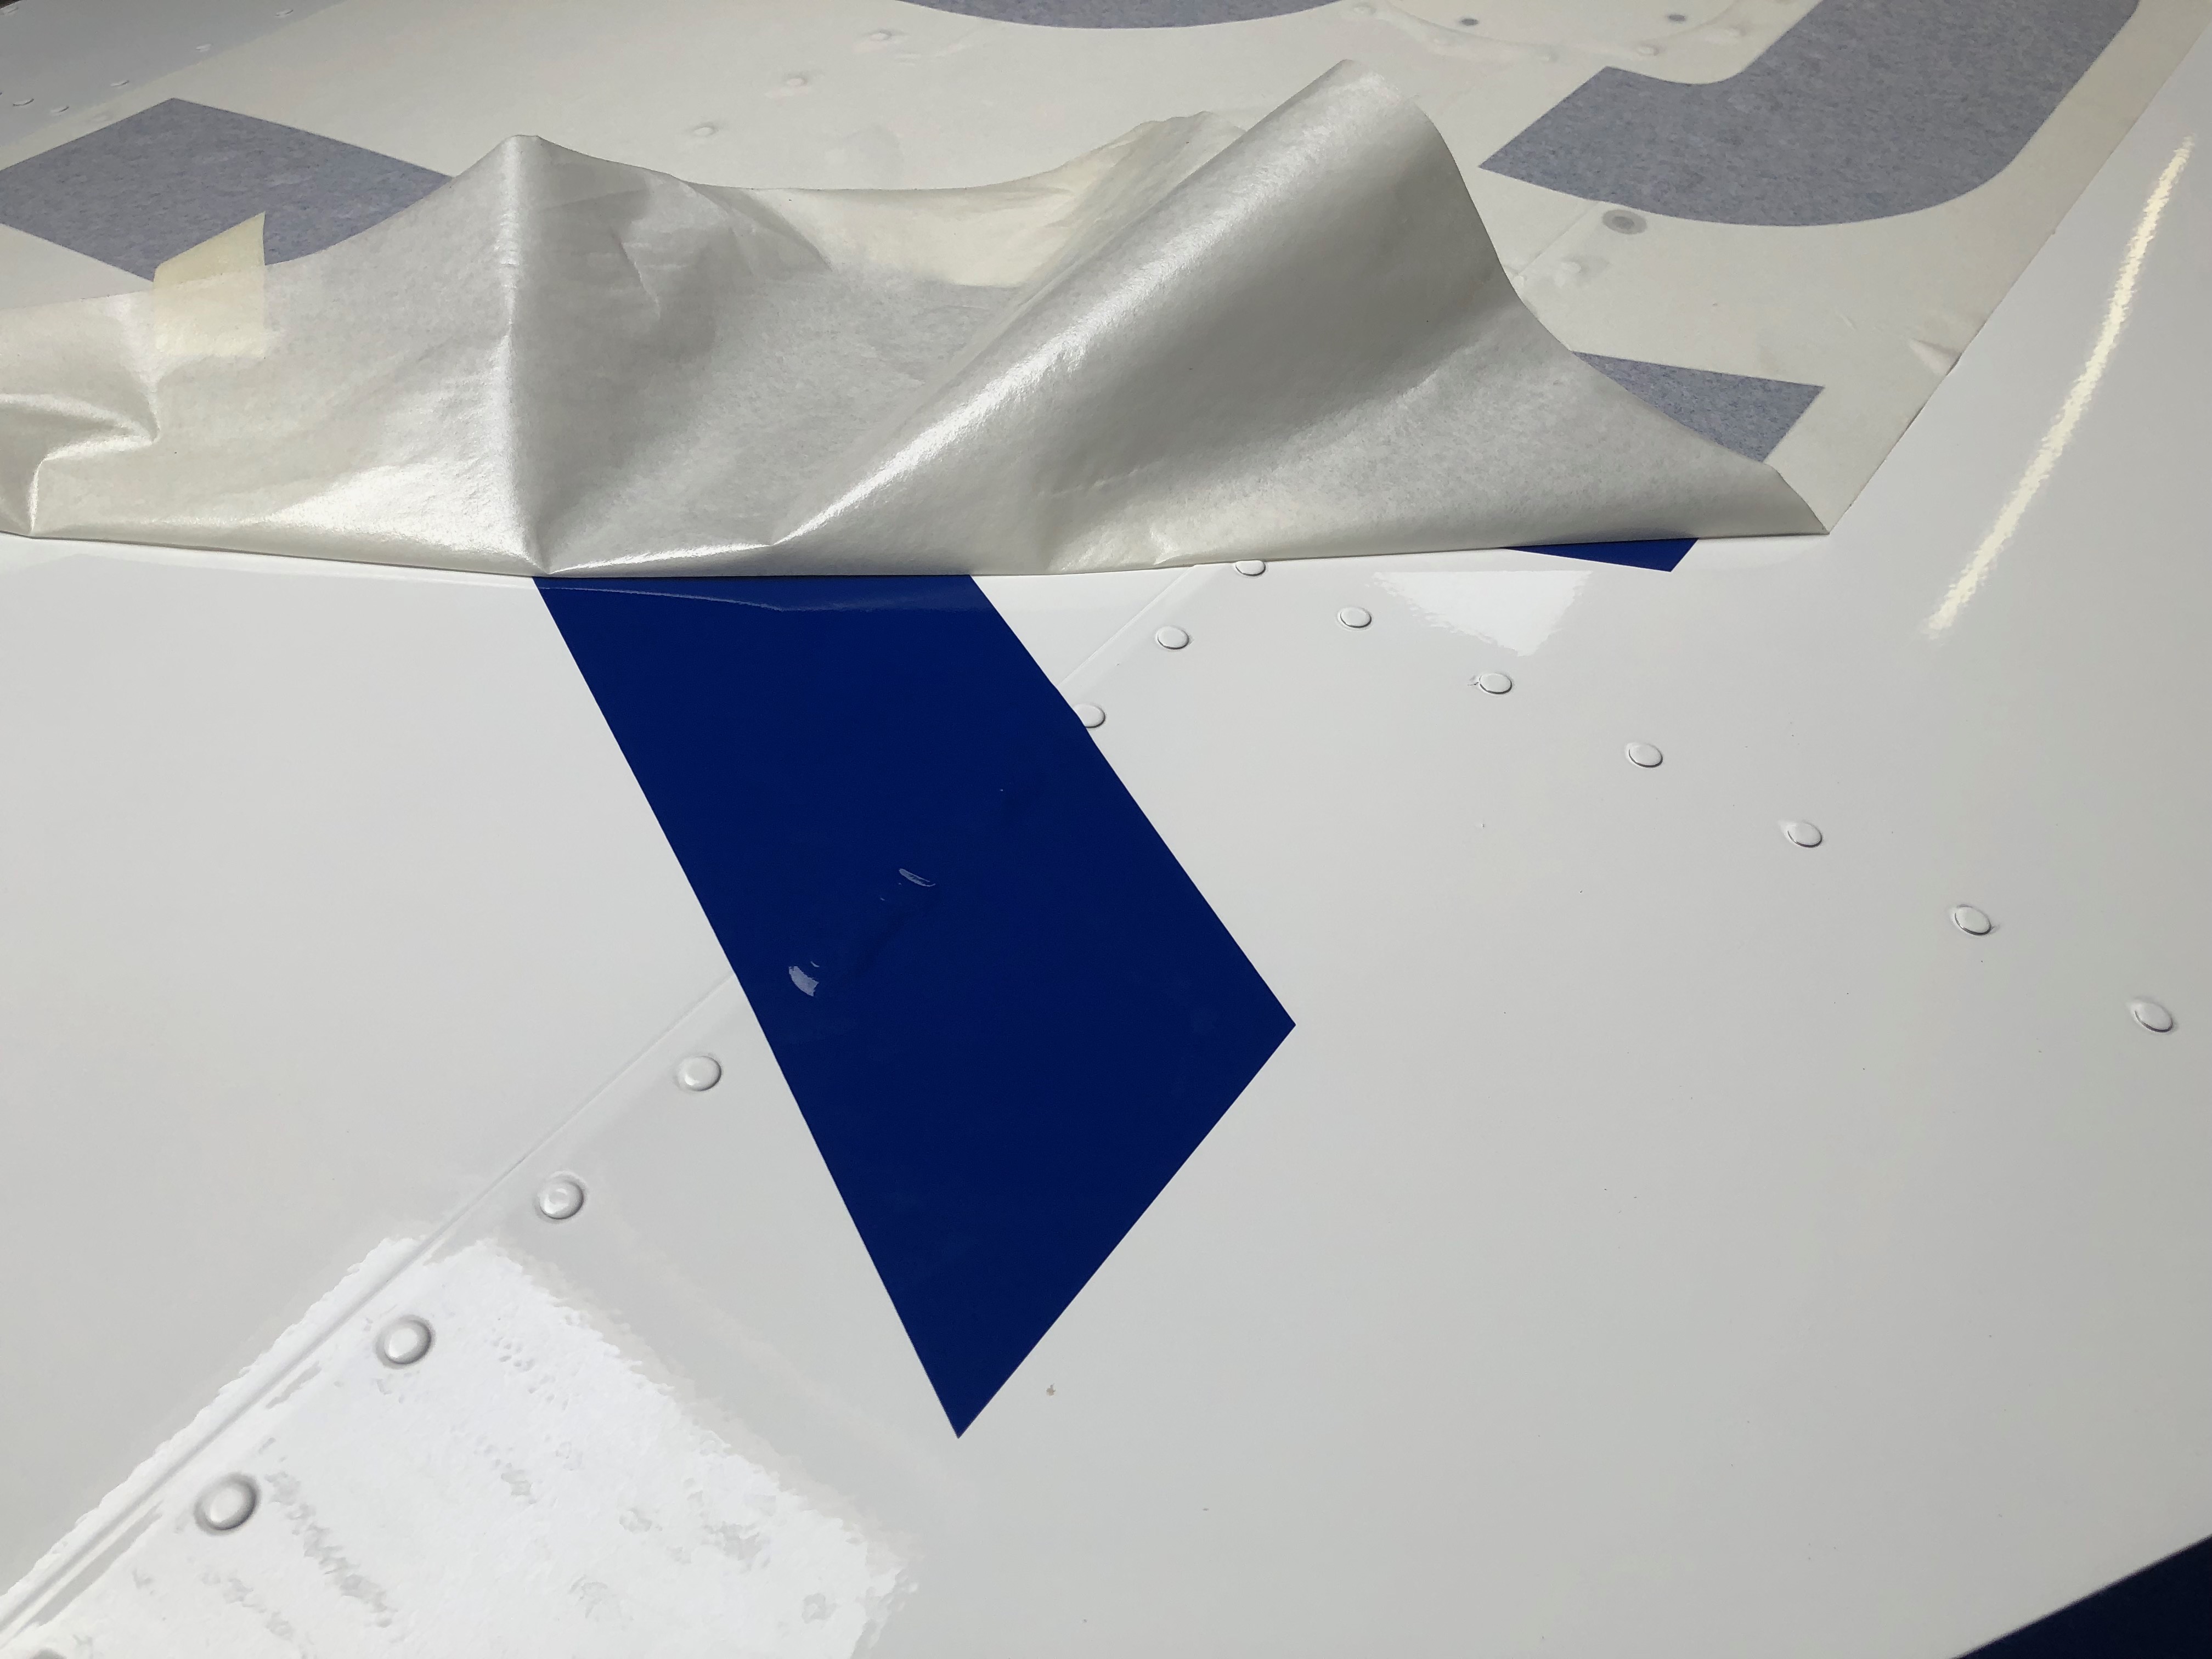
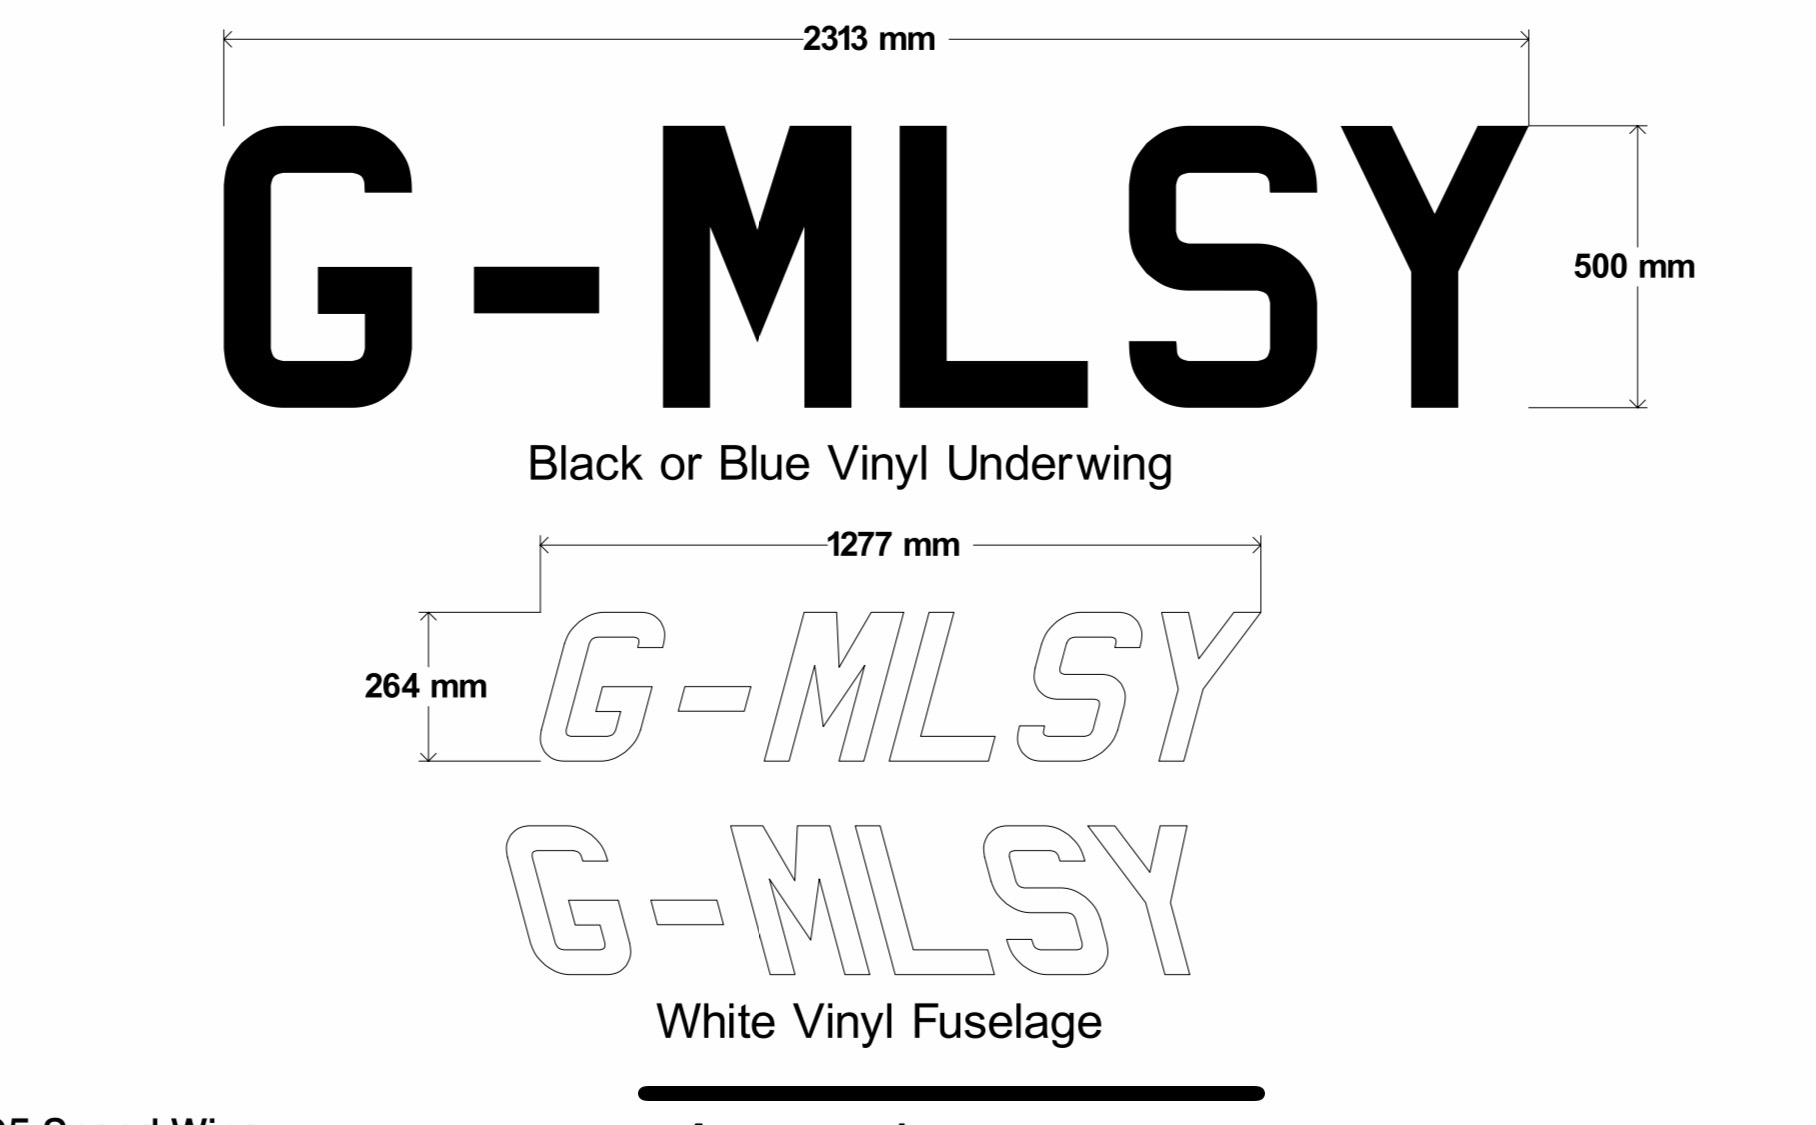
One of the first things that needs to be done is to polish the surface and degrease it will Panel wipe. During the polishing I found a number of flaws with the paint. Noticeably runs, areas where the paint is quite thin, a slight wobble in the paint line and some orange peeling. There’s not a lot of it but it’s a bit disappointing when you pay so much for a ‘professional’.After the polishing and degreasing the surface the registration is laid out on the wing, aligned and taped down. The paper is lifted to reveal the registration and the backing paper is cut away. It’s then laid back on the wing and…… pressed down. I used a plastic card to press the letters into place and remove any air bubbles.Once the adhesive has been given a bit of time to set the top backing paper is carefully removed.Now the MLSY part has been done I need to re-space the Hyphen and the G to eliminate the extra space.Job done. It looks quite good. What you can’t see from this picture is that there are air bubbles around each of the rivets so I’ll need to deal with them at a later date. Now I can refit the wings for the final time, I hope!
Music: Gerry Cinnamon, Stereophonics, The Libertines
6 months to the day since I took delivery of G-MLSY and it’s coming to the end of the build… but I say that every day to be fair. The next major stage is the testing and lots of paperwork to do and approvals to gain before it can fly.
A few people have dropped by to view how I’m doing and some have sent messages. All I can say is “Thanks”. It’s been a bit like a marathon and the support from those that have taken the time to visit or send messages is very much welcomed and keeps my motivation topped up.
I’ve decided to use the light function on the switches so each switch require an earth lead to be attached to the third contact to enable the function. It required a bit of back tracking but was fairly easy to do. The wings need to come off again so Ian is called to action again helped by Pete Sharpe I need to run the fuel level sensor wiring in, polish the wings and apply the registration before refitting for the final time. When I arrived home the stainless steel ID plate and Radio licence had arrived ticking off another couple of items from the list of Admin that accompanies the build.
Getting close to finishing now so some small outstanding jobs to do including wiring starter solenoid protection, a stuck starter indicator connection and external level button on each stick top hat. I also trial fitted the registration and polished the fuselage ready to apply it.
I received the registration vinyls on Friday so today I need to ready the fuselage for them to be applied. Just a case to working out the best placing for them. Along the line of paintwork line or along the rivet line? that’s the question!I’ve bought a polishing machine to make the job easier with some G6 cutting liquid cutting compound. It takes a bit of getting used to using it but it makes a good job it. The paintwork needs to be de-greased before I can apply the registration letters.When I sent the aircraft for spraying they noticed that one rivet hadn’t been squeezed on the trailing edge of the wing. So Ian brought his rivet squeezers in with a special head for this type of rivet. A little more wiring to do. A diode is placed from the starter solenoid to earth to kill any spikes caused from the contacts releasing when starting the engine. Also I’ve wired up a contact on the Dynon screens to that will show a ‘stuck starter’ situation. I was a little worried that a higher voltage may find it’s way back to the EFIS so I’ve protected the connection with a diode to prevent spikes and a 1 amp fuse.
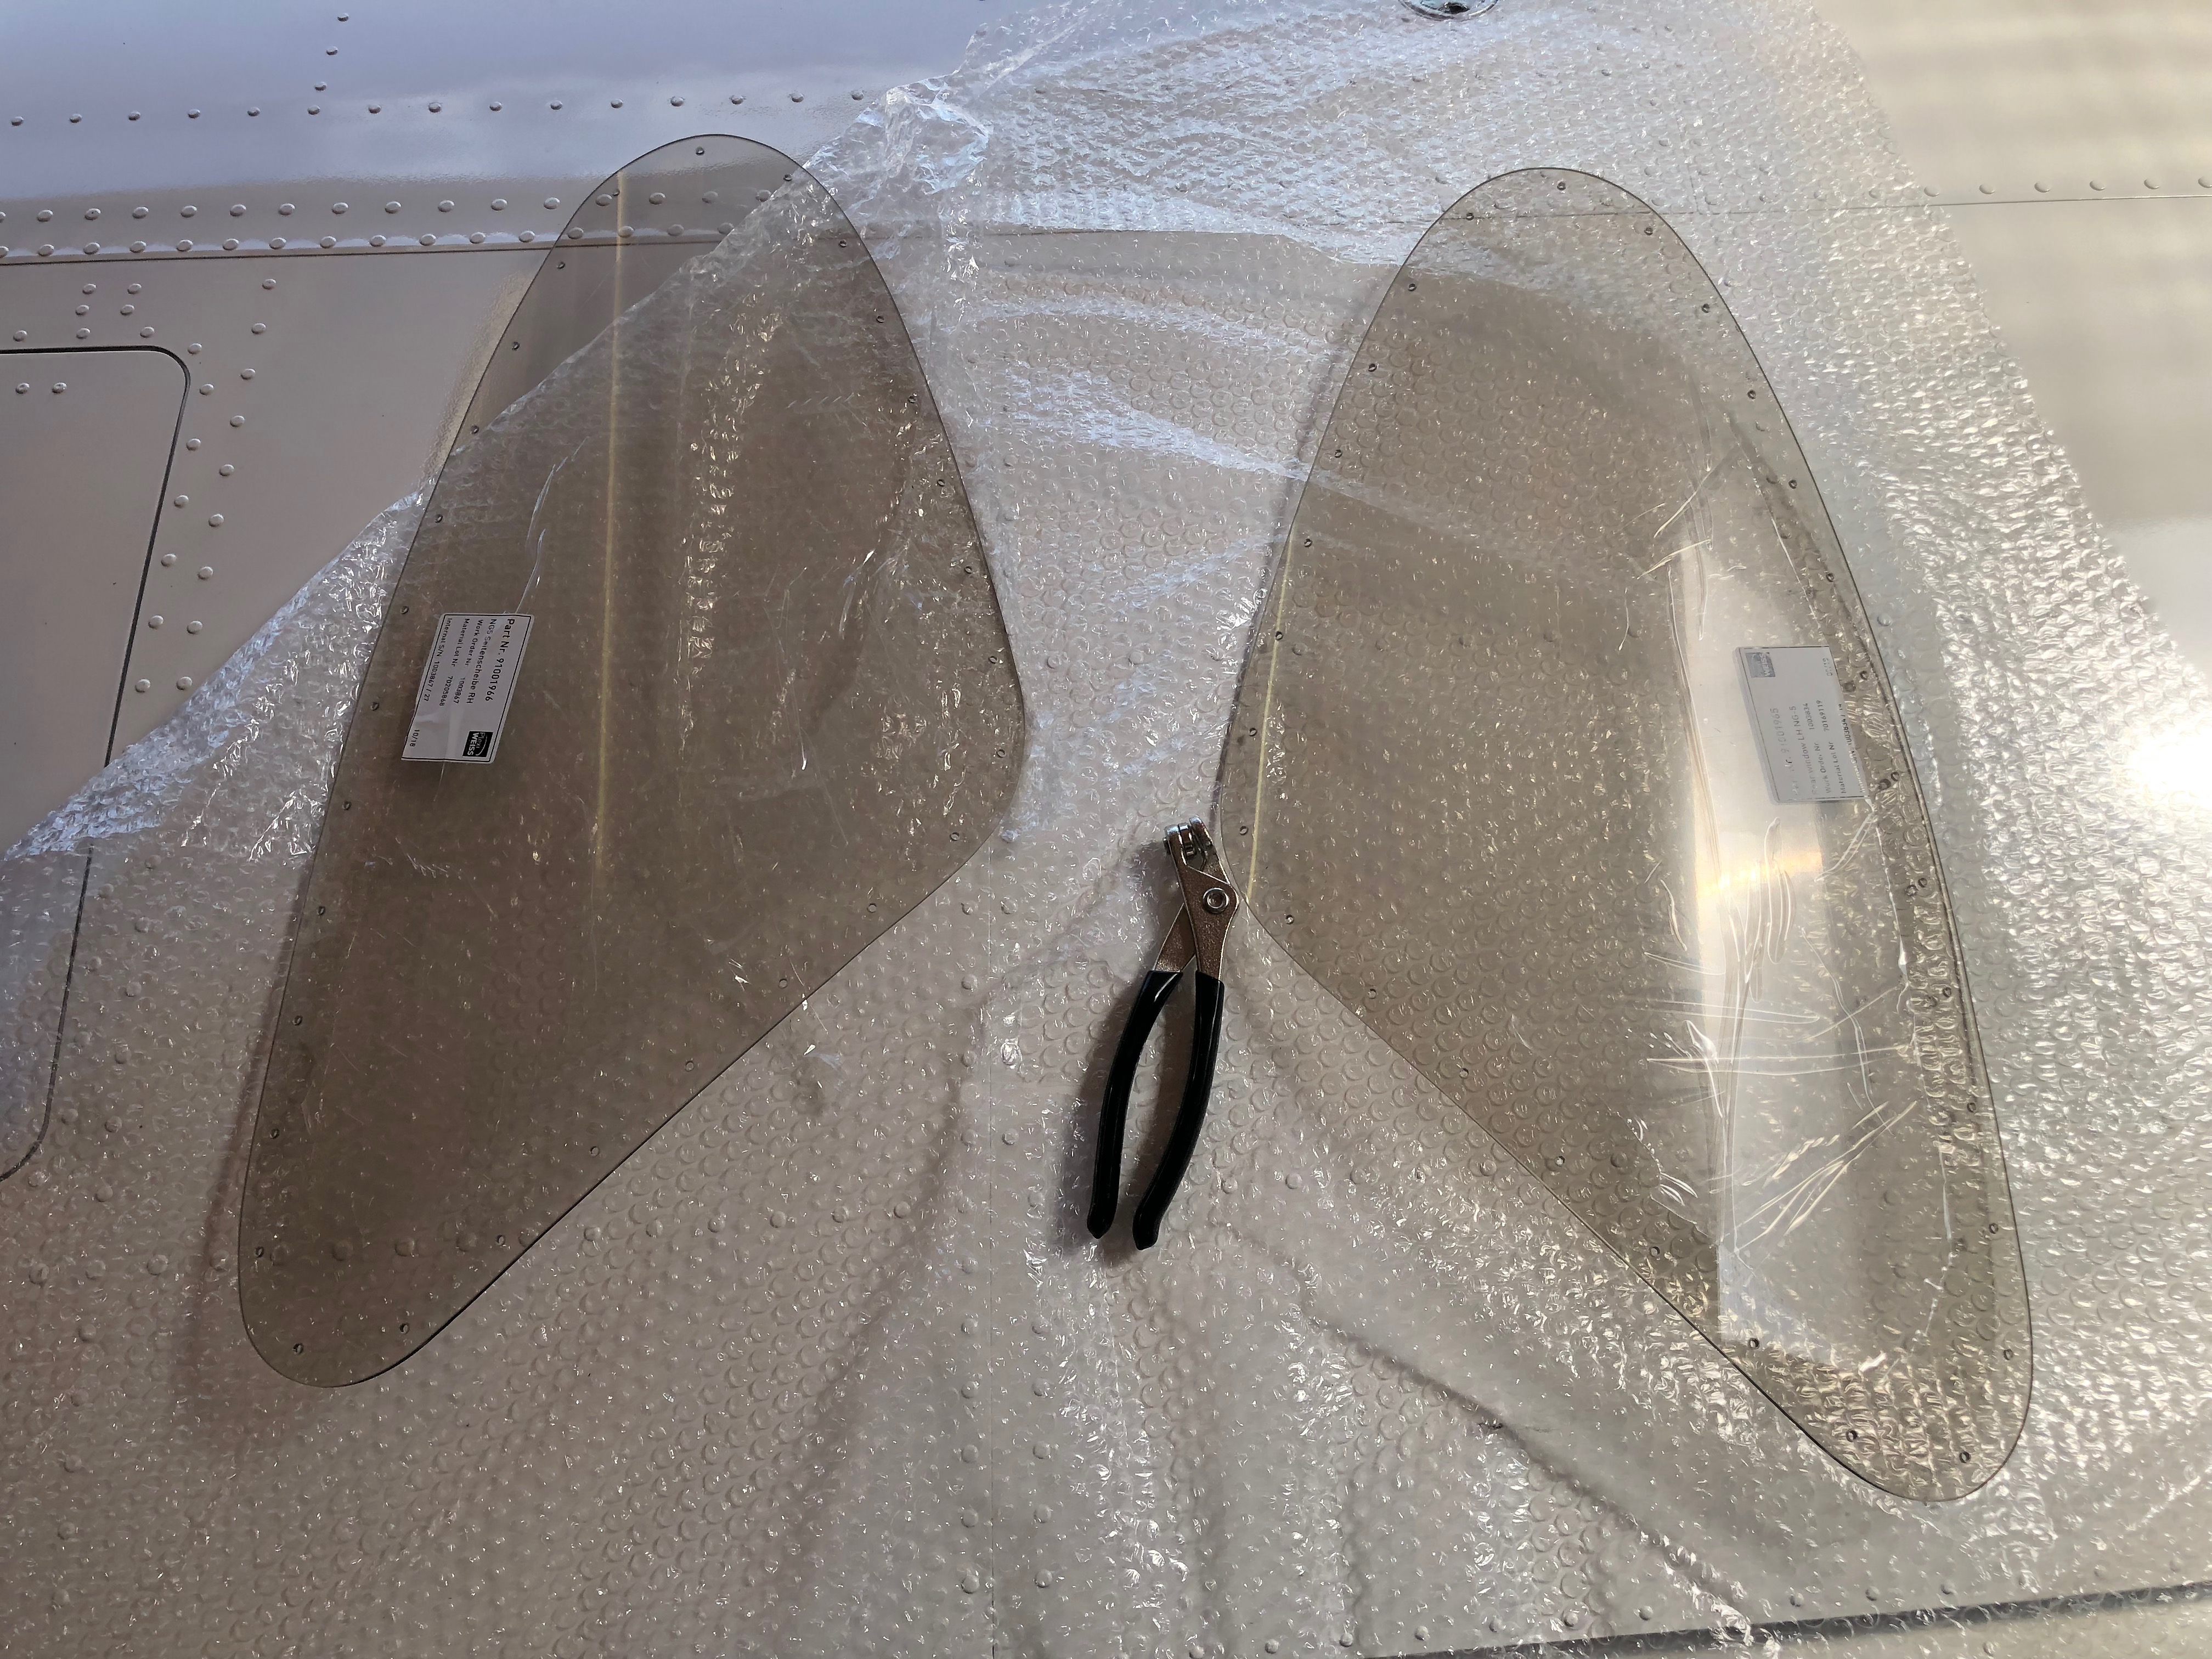
A short day again as I needed to travel over to Palmers Farm to get the correct colour rear windows from Bristell. Unfortunately it’s a 5 hour round trip so took most of the day. The only thing I got done in the end was to fit them but another job ticked off.
The correct colour Plexi Glass!Trial fit with Clecos to make sure they fit properly.I ran a bead of clear silicone around the edge of the window and sandwiched it between the fuselage and rear window support.It took a surprisingly long time to do both sides and I could of done with a second person helping as it would have made it easier. Just need to let the silicone set and I’ll be able to trim off the excess.
I’m expecting the registration to arrive today and some G6 cutting liquid. I’ve also designed and ordered the stainless steel identification plate which will hopefully be with me on Monday or Tuesday.
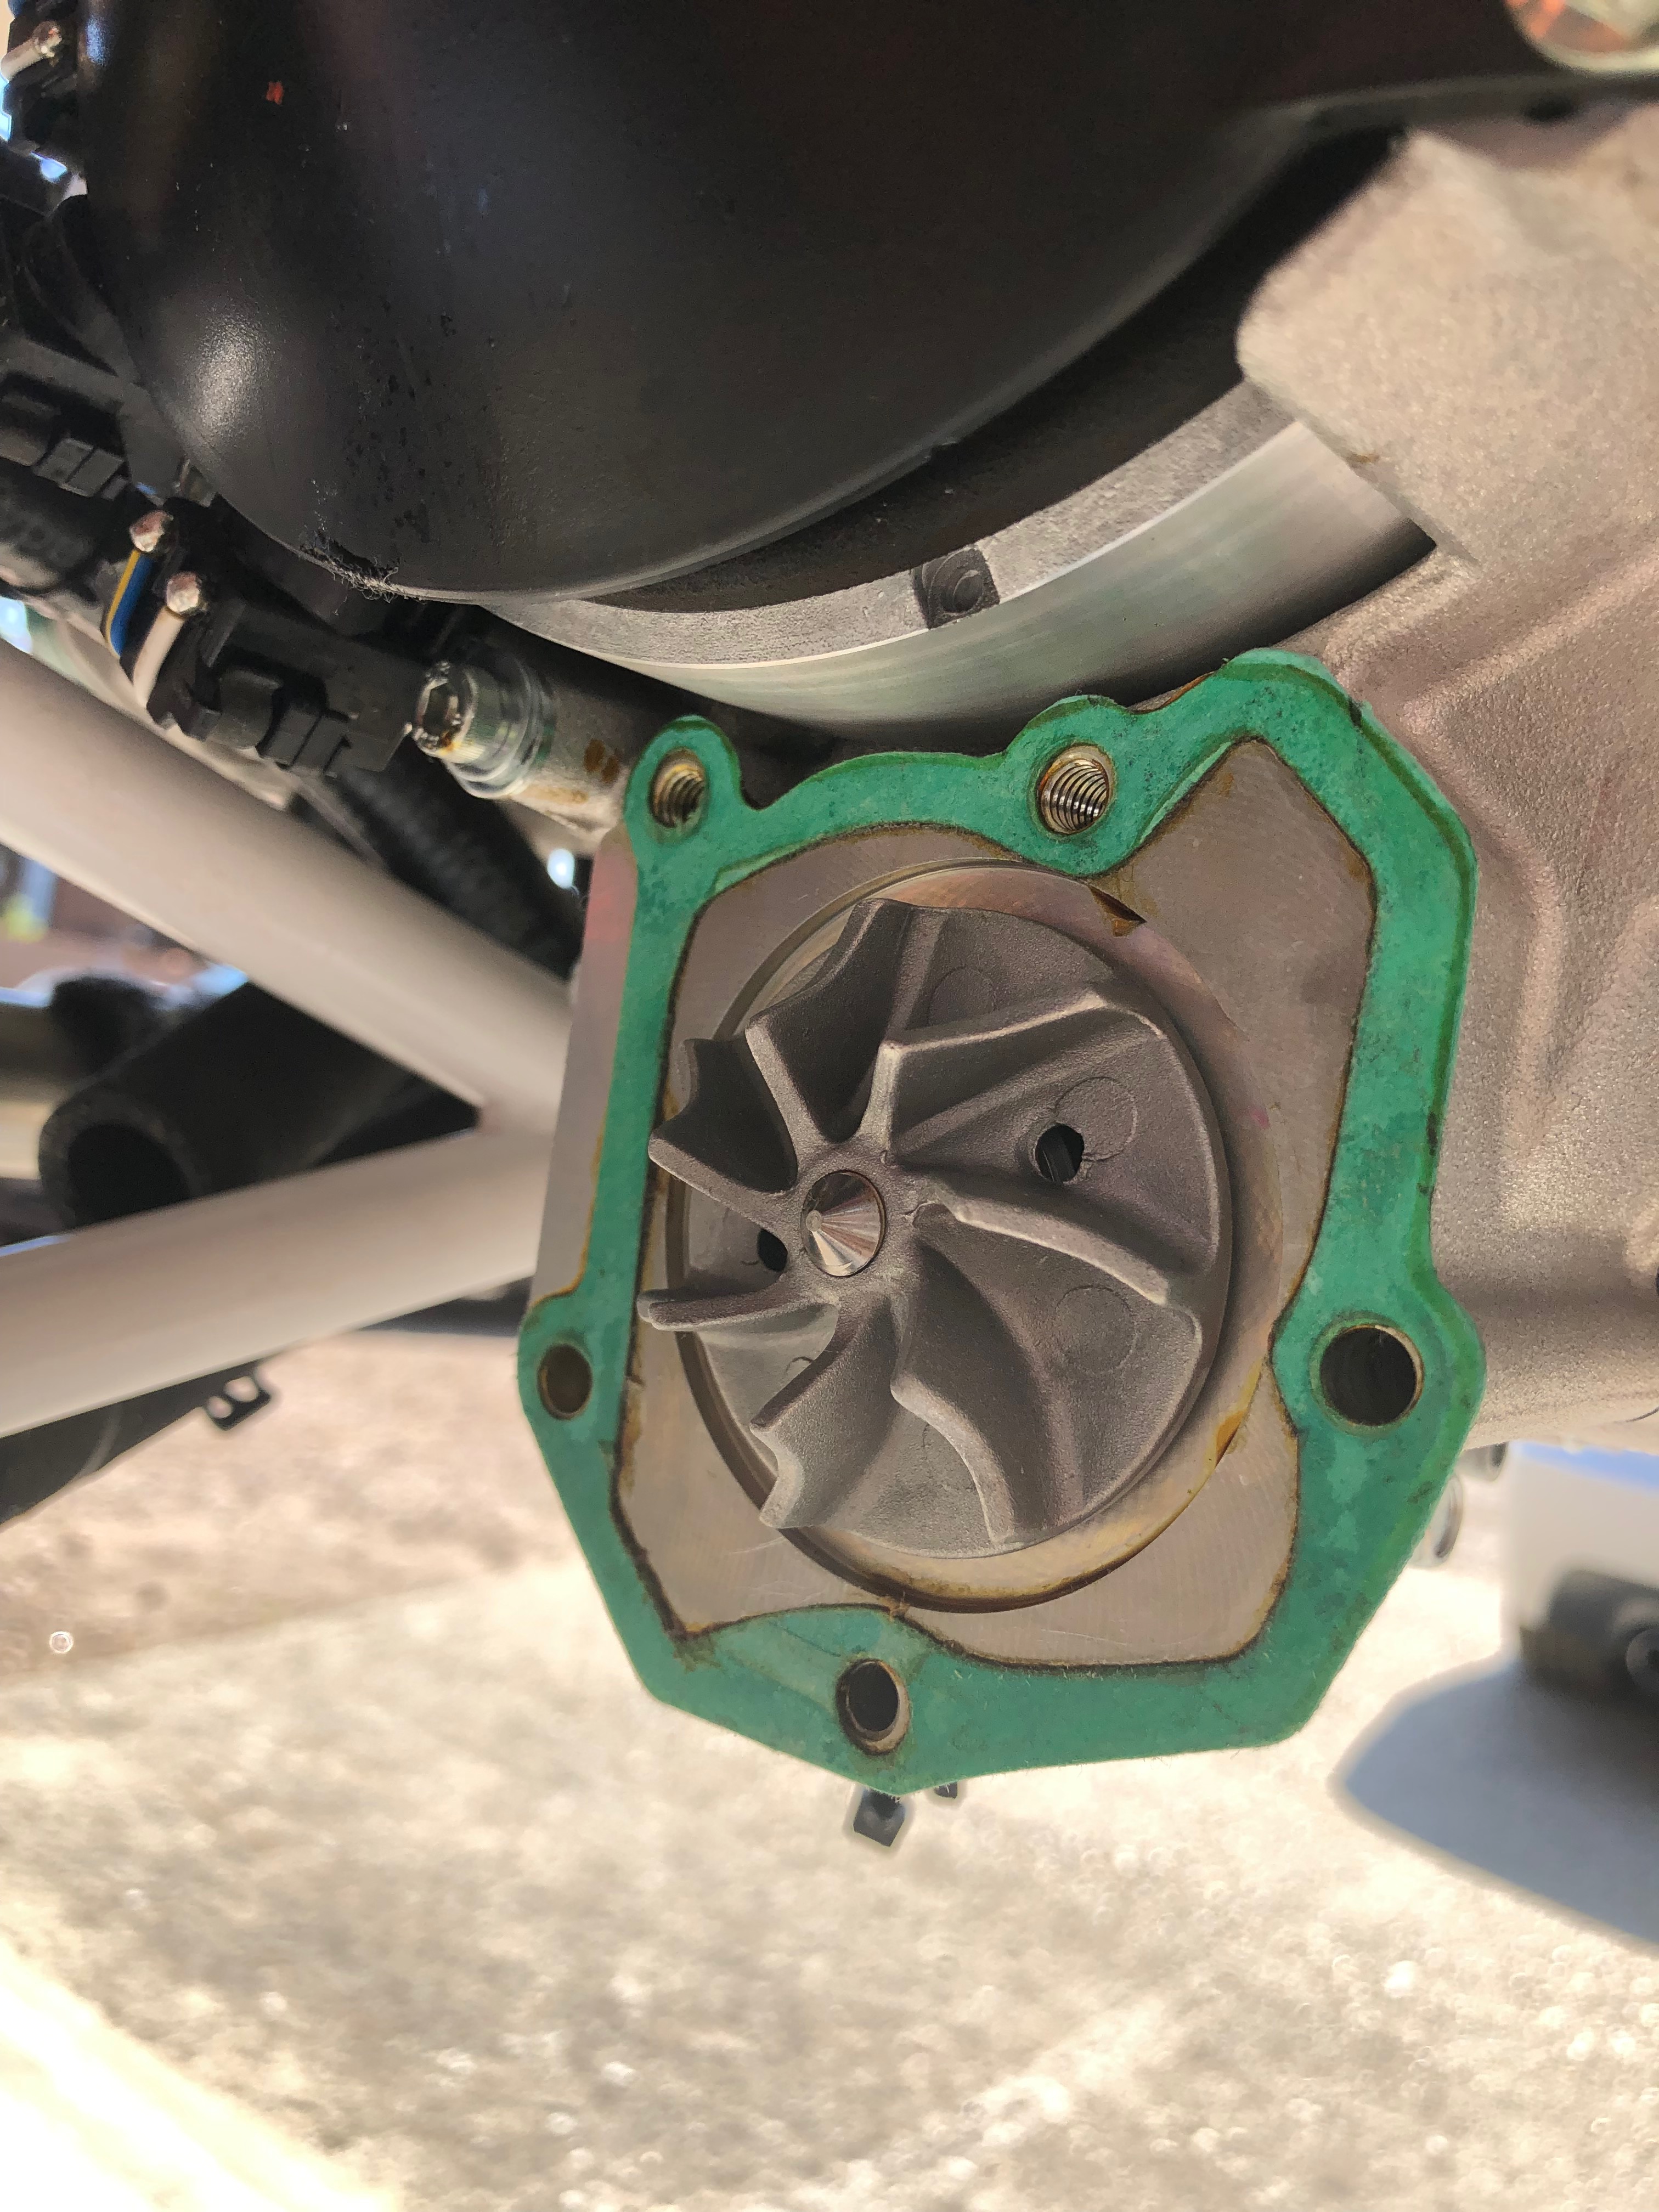
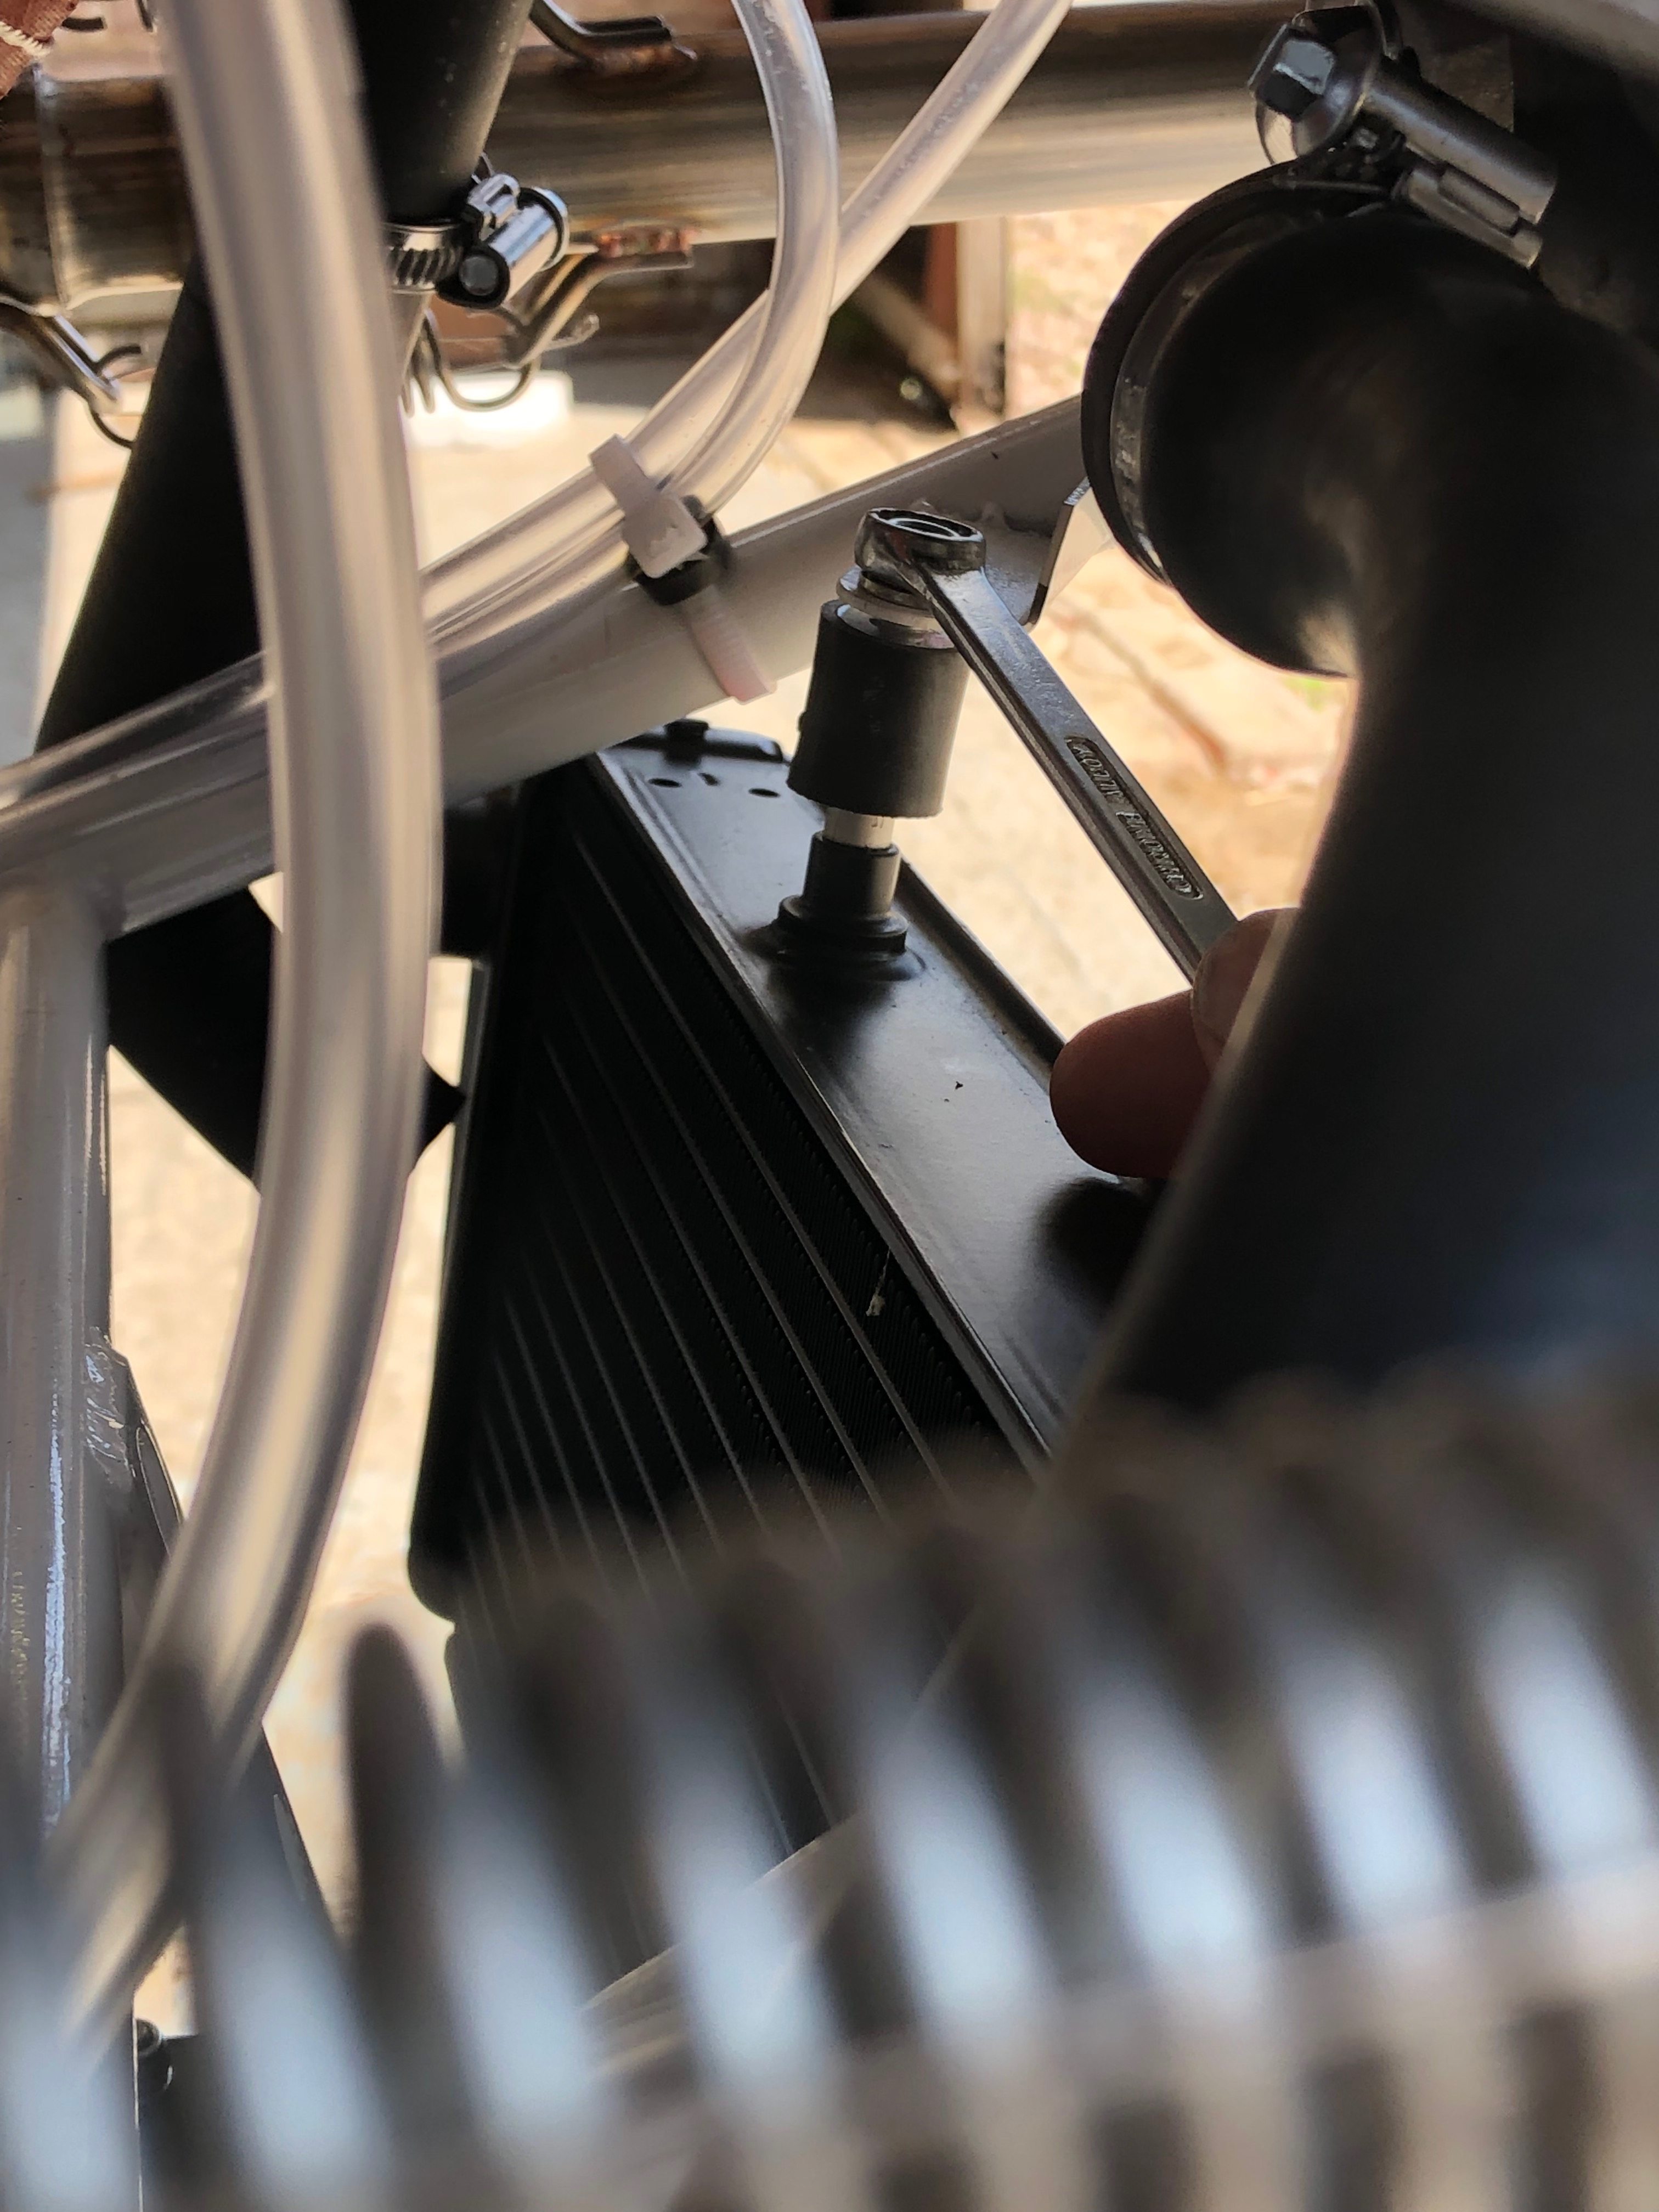
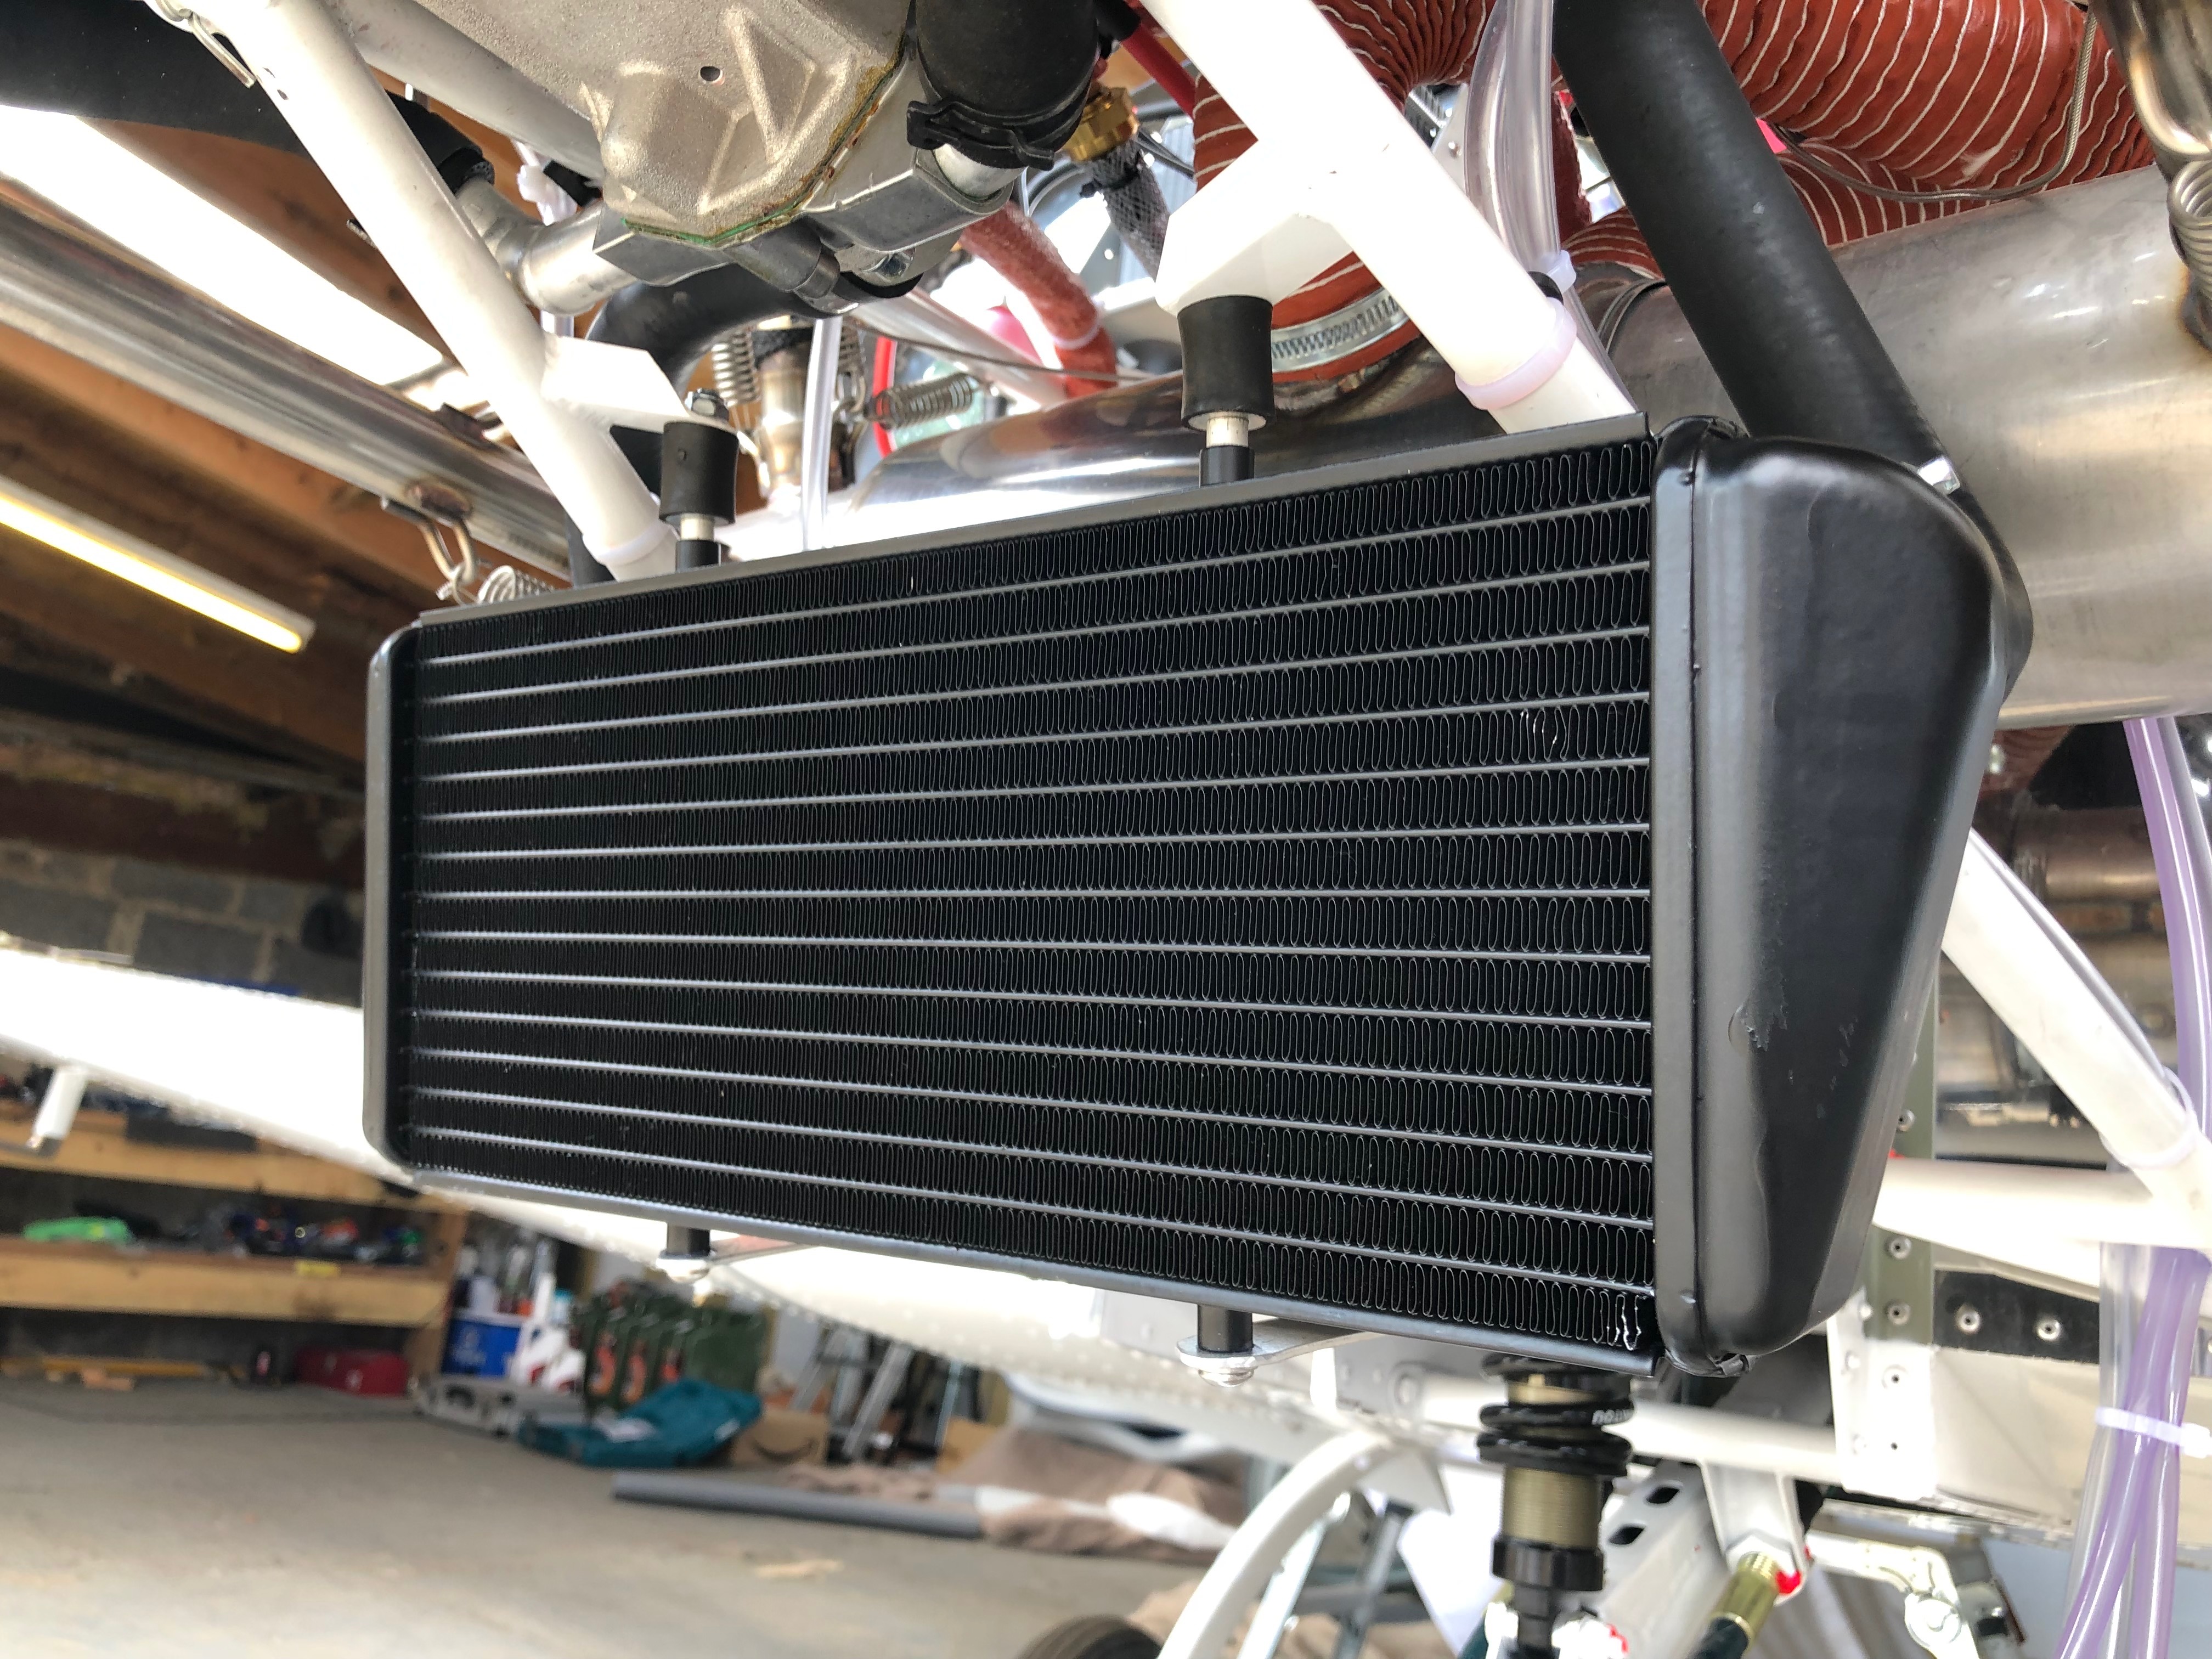
Today’s the day to refit the water pump, it’s had plenty of time to cure so fingers crossed that it’s sealed properly this time. I’ll also finish fitting the glare shield.
Also Bristell have been in touch to say that they have a pair of rear windows in the correct colour so I need to pick them up at some point soon…
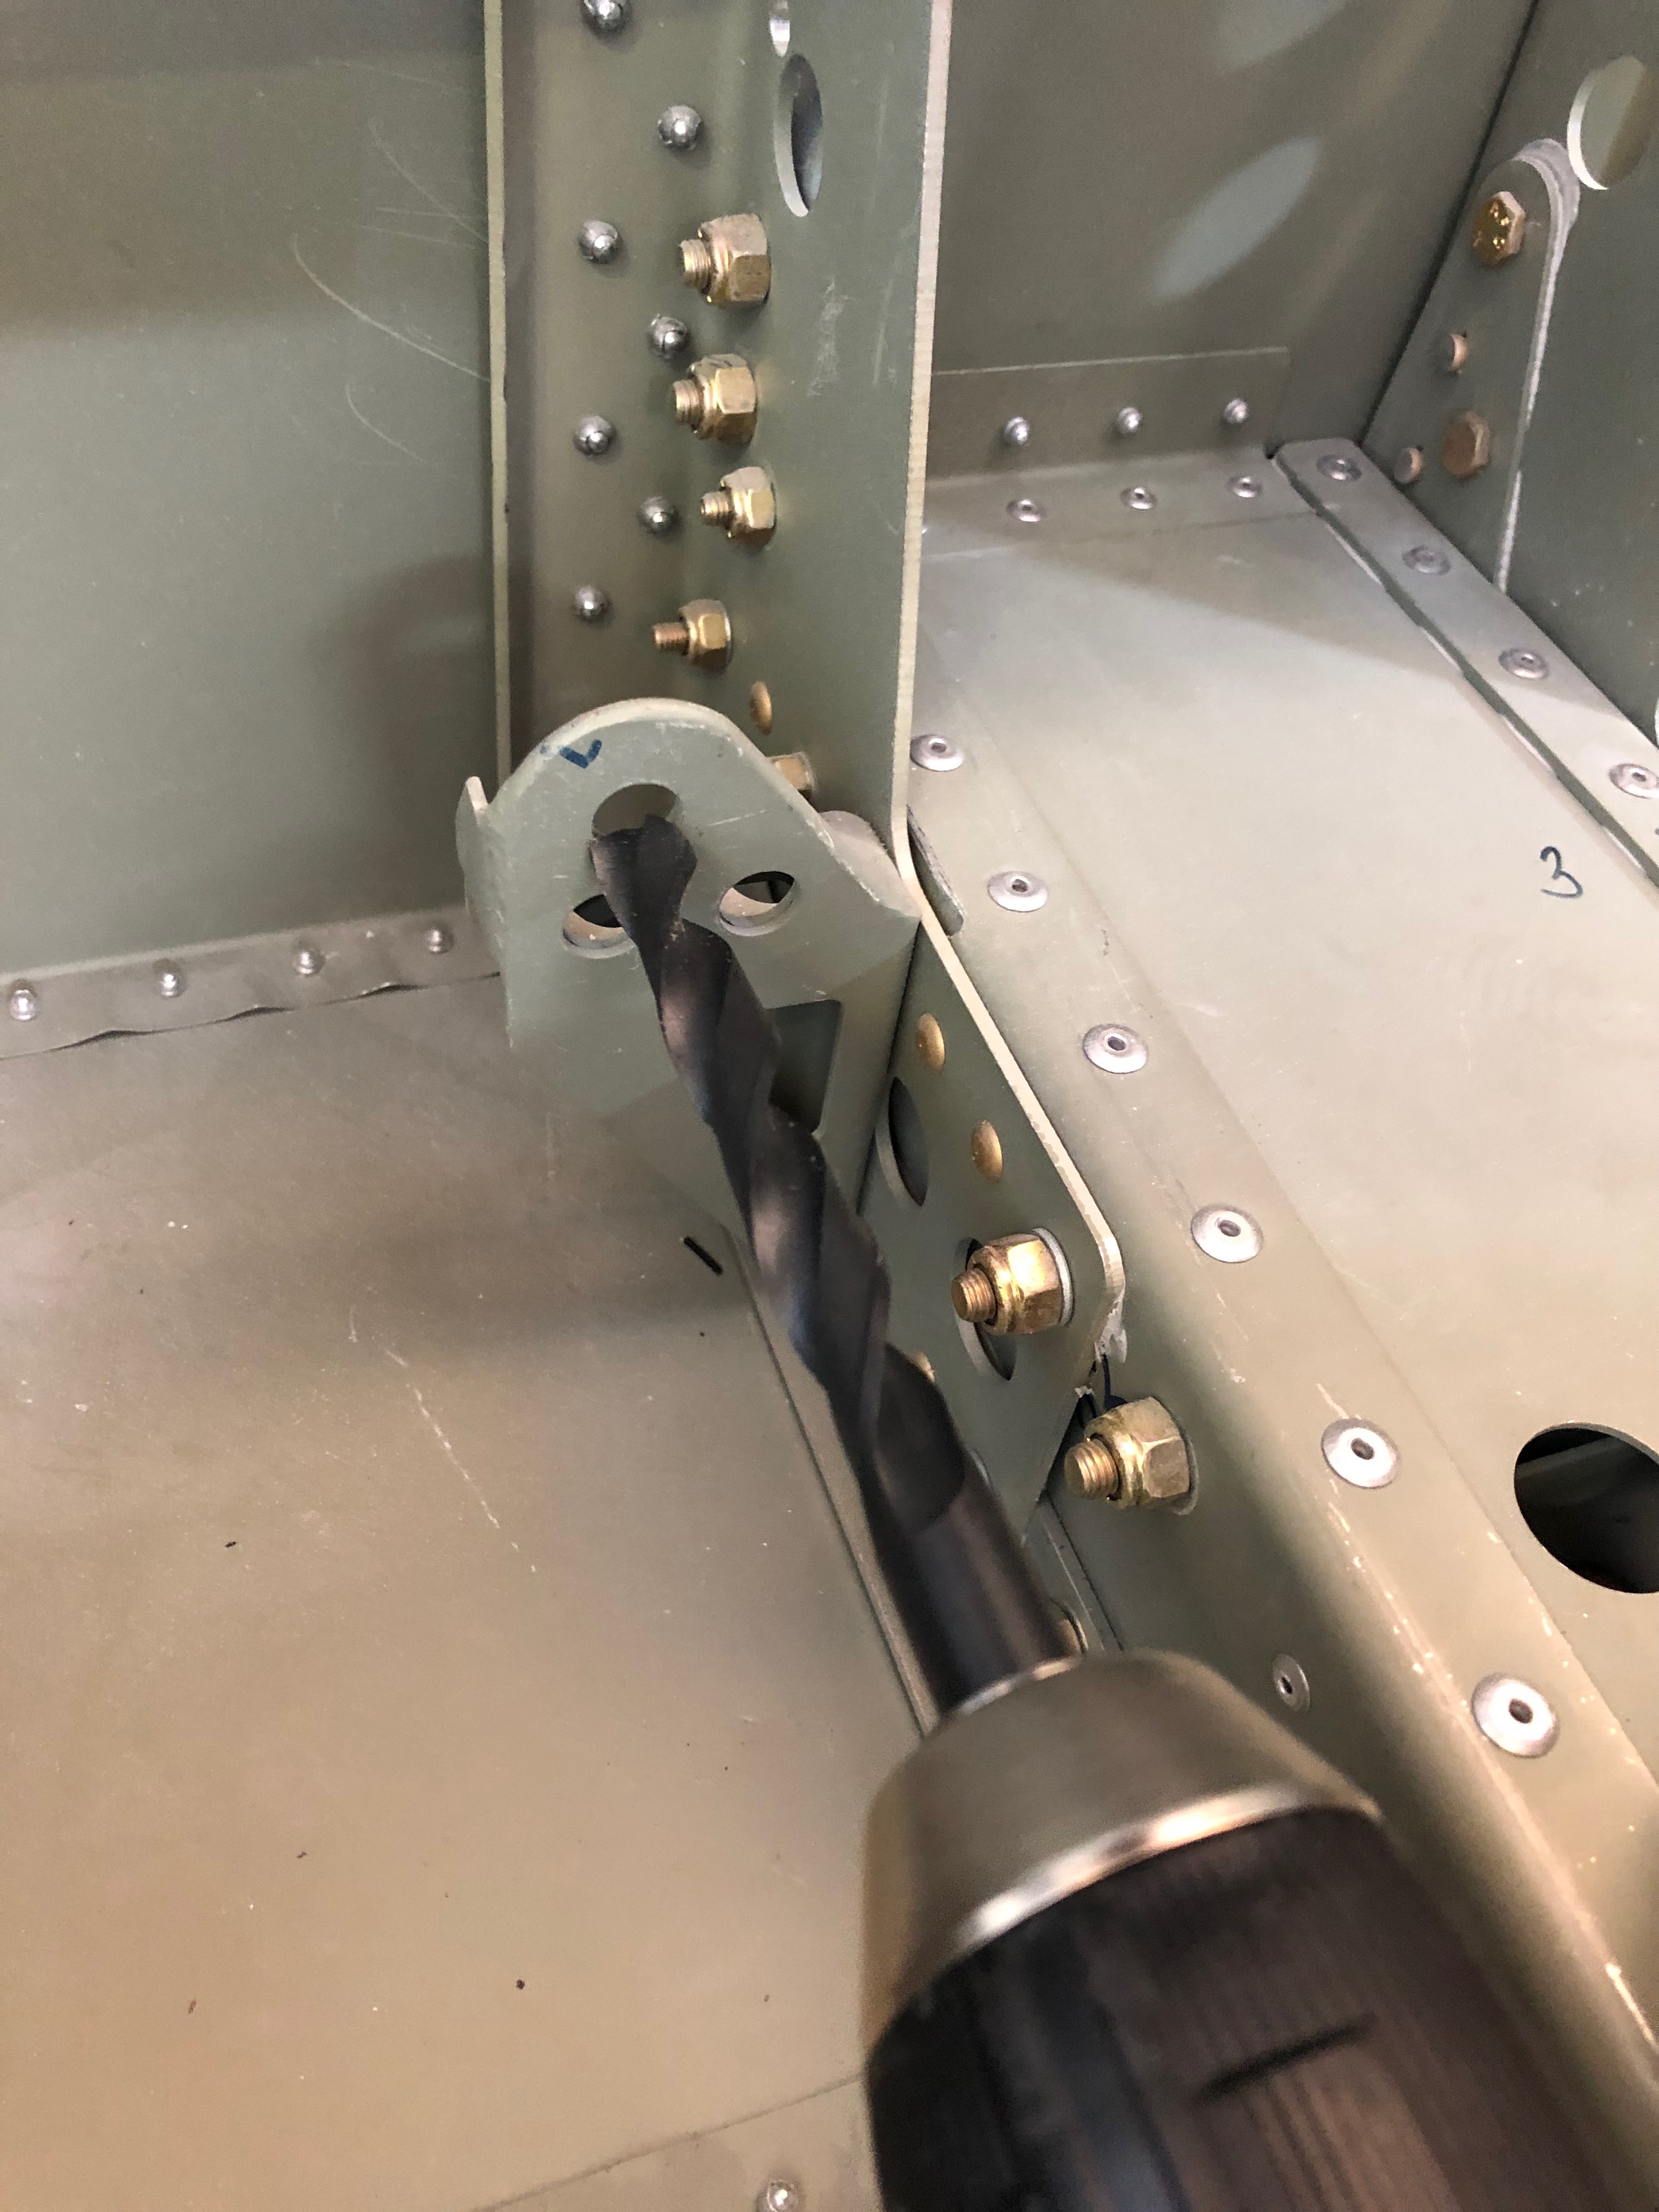
I’ve cleaned up the gasket ready for the refit.After running a thin bead of Wellseal around the pump mating surface it’s bolted back on and the bolts are torqued up.The radiator is remounted……and all the pipes reconnected,The water system has been refilled and I’ll leave it for the weekend to see if the reseal has been successful.Next is to finish fitting the glare shield. It’s a tricky job as there is only a very narrow band to secure it too but it has to be done ‘blind’. I’ve decided the best way to do this is to position the glare shield and use a very small drill to drill a pilot hole and just mark the fuselage skin. Removing the glare shield reveals if I’ve drilled in the correct position. If so I can open it up and fit the Rivnut. Seven screws are used to secure the glare shield and I’m considering using a couple more to secure the shield to the instrument panel. That’s a job for Monday.
A couple of things to do today including fitting the rear windows, ordering the stainless steel identification place and fitting the glare shield.
Unfortunately my hay fever was so bad/annoying that I really couldn’t get into the grove today and wasn’t very productive at all.
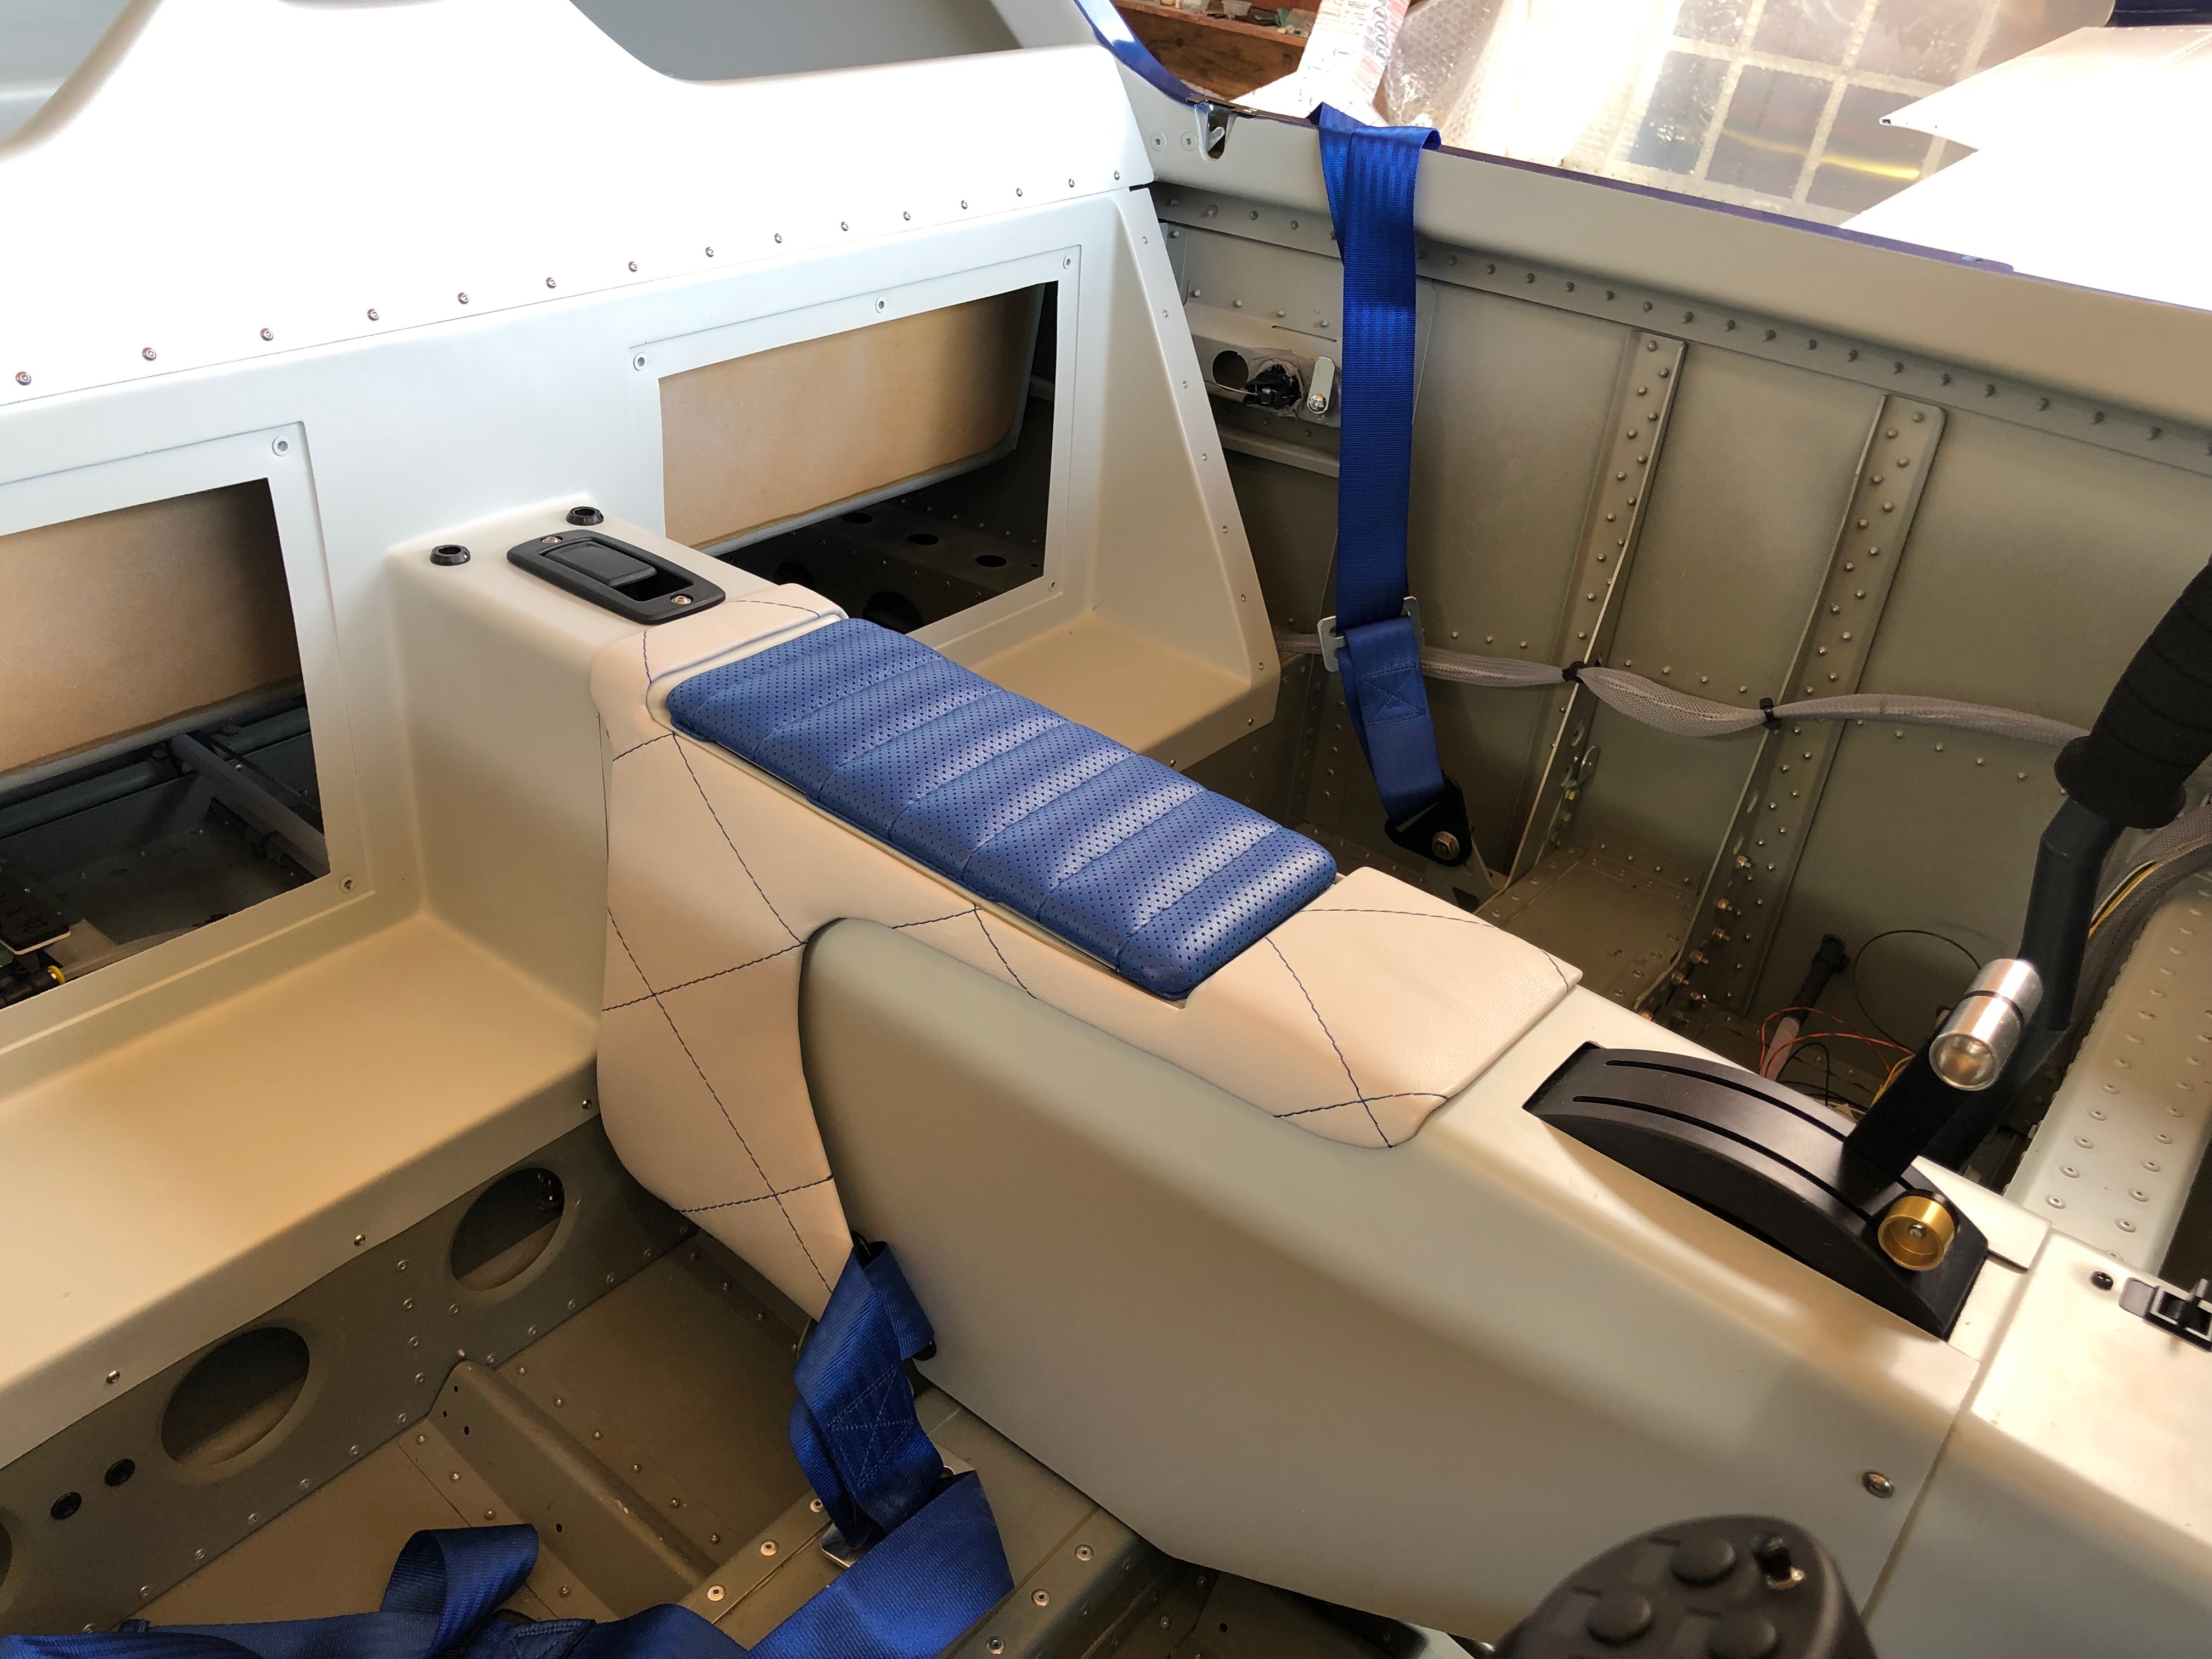
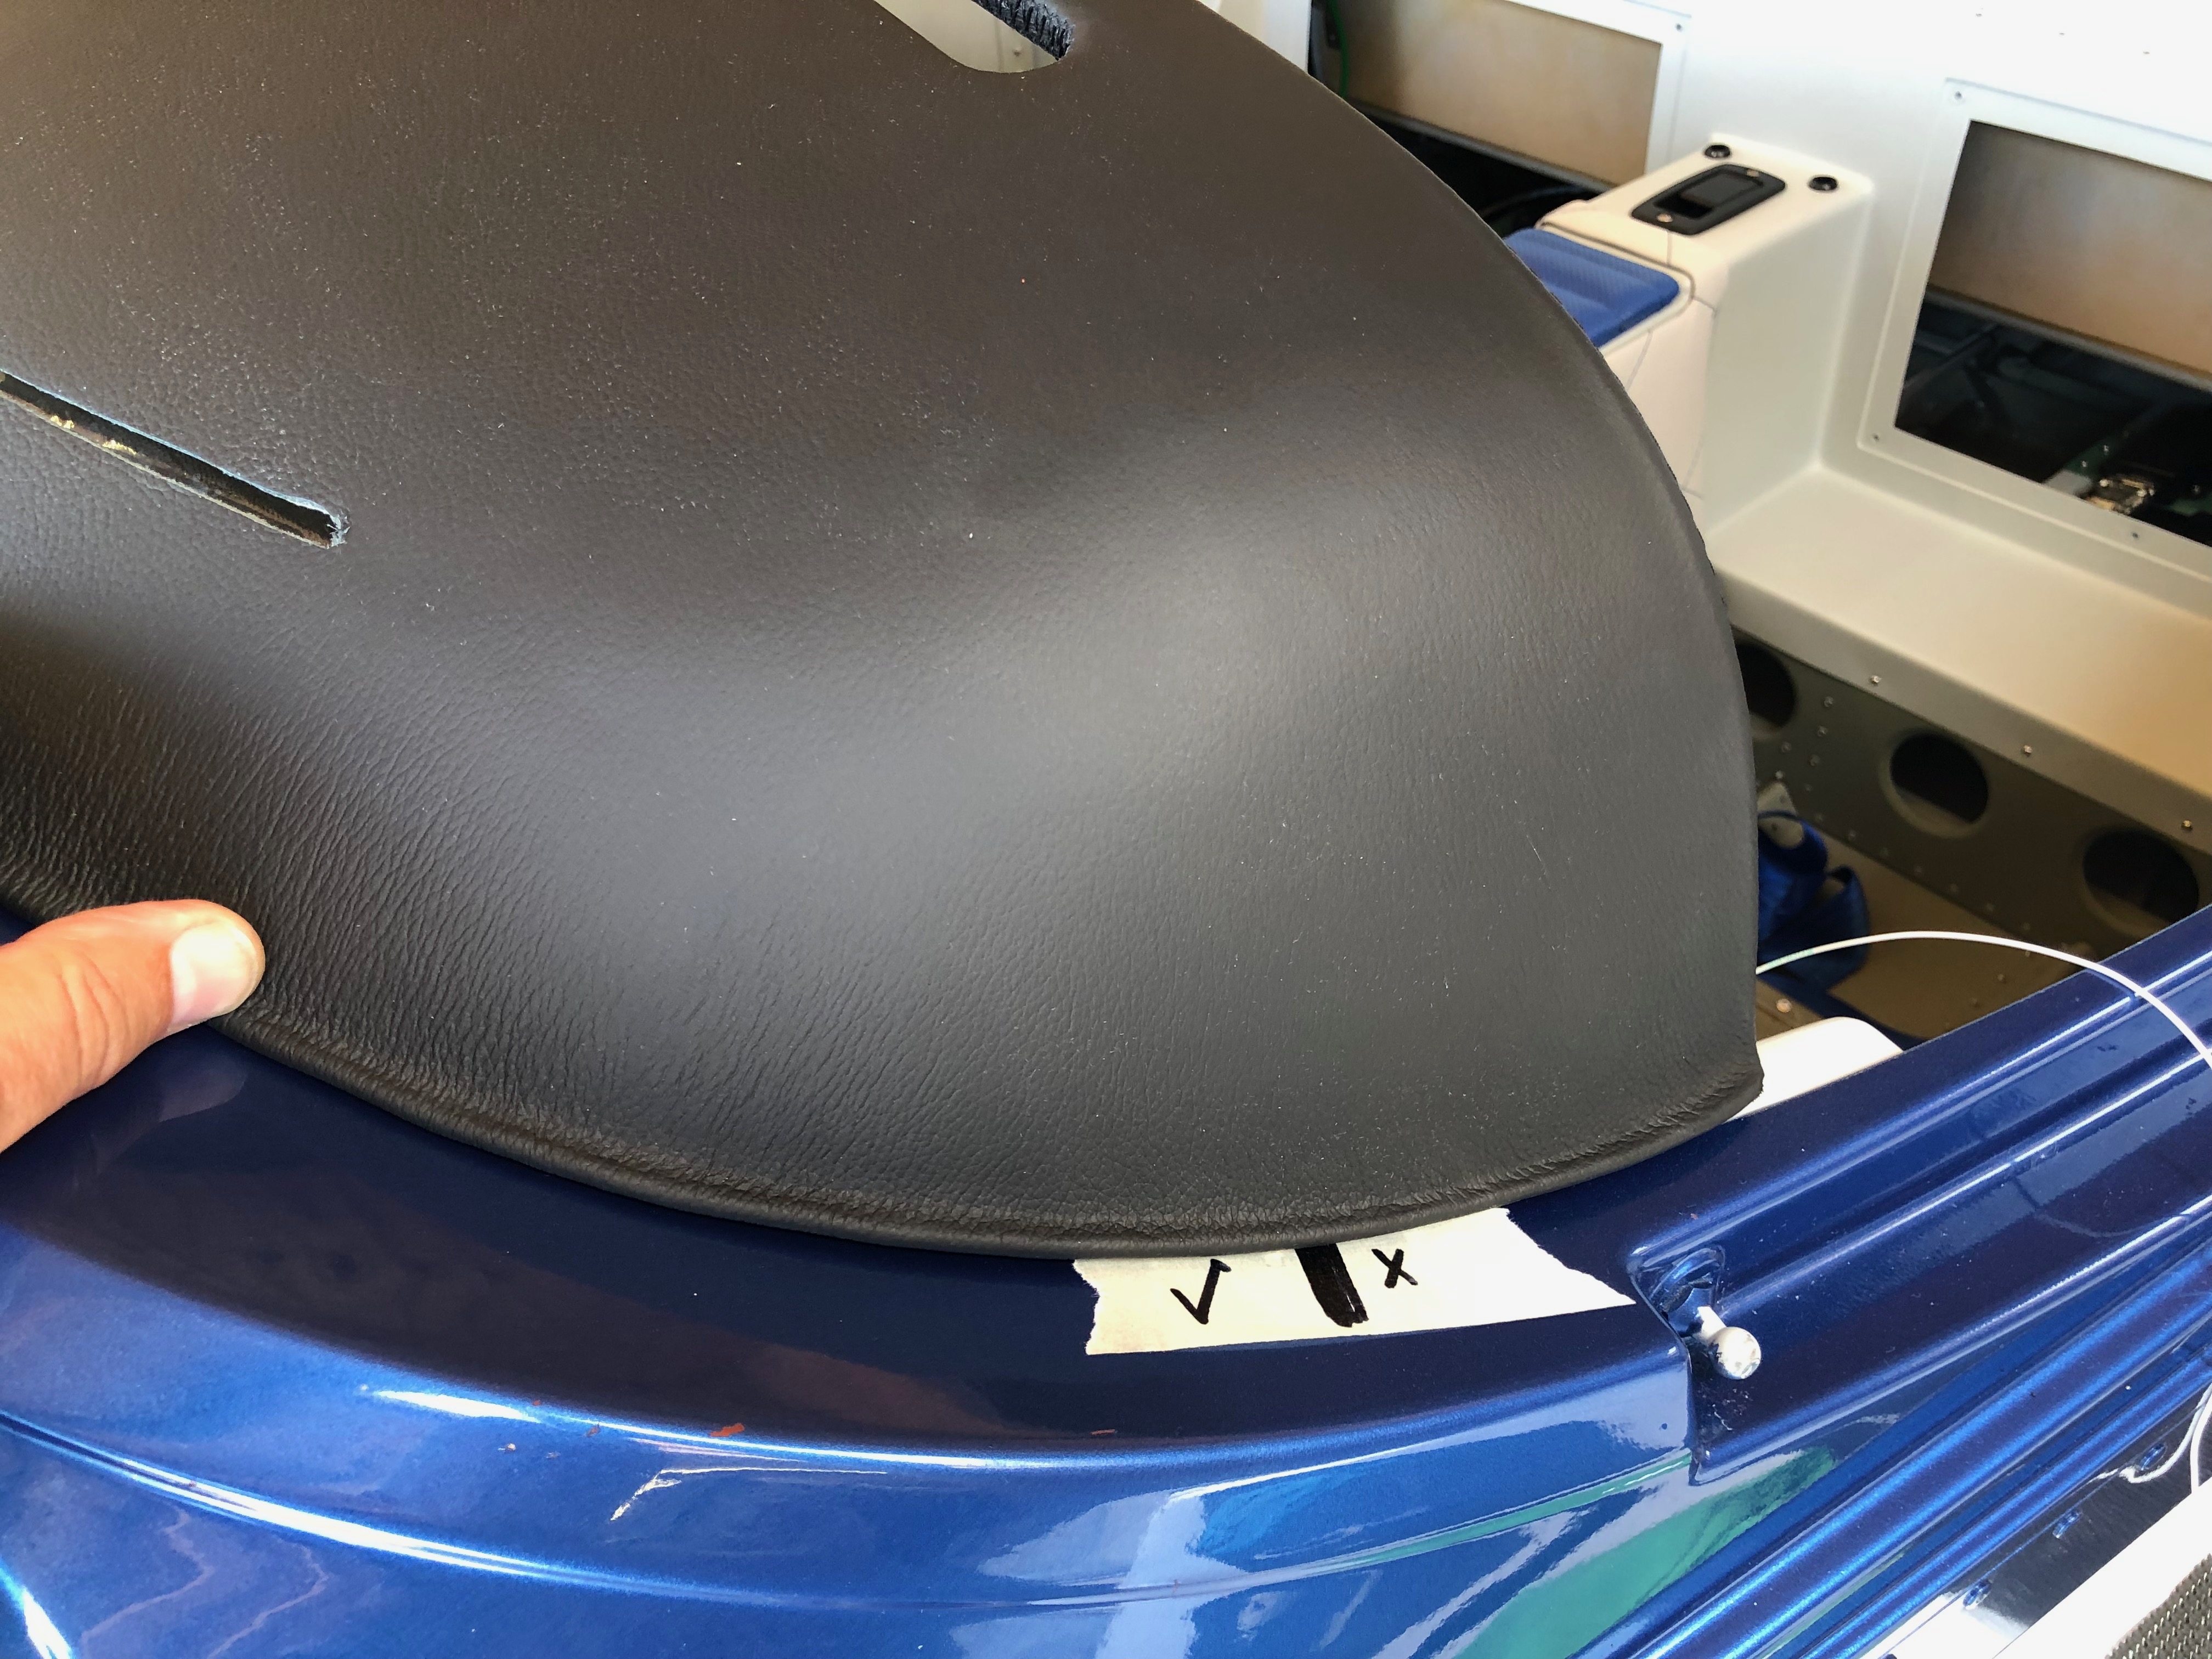
These have been locked away in a cupboard to make sure they didn’t get broken or damaged. The only problem is that when I unwrapped I found they were the wrong colour :-{ Very annoying and I’m not sure who’s fault it is. I’ve sent a note to Bristell UK to ask if they have mine and they’ve given me someone else but no response yet. How frustrating…The colour difference is very obvious.To fill the time and between wiping my nose due to bad hay fever I thought it would be easy to fit the centre console. It’s retained with 10 screws and……a leather trim is fitted over the top. It’s only a temporary at this stage. I’ll fit properly once the test flights have been completed.The glare shield is next. I’ve marked the end of the ‘ledge’ that i can mount it to but after drilling one hole my hay fever got the better of me and I packed up for the day.
Music: Lightening Seeds, The Beautiful South, Gerry Rafferty
Feel like I’m going backward as I need to do some remedial work to the water pump and replace the carburettor floats. But I have a few other things that I’ll do today which will get me back on track. I will o order the registration vinyls (that I have left far too late) and I’ll also be fitting the seatbelts.
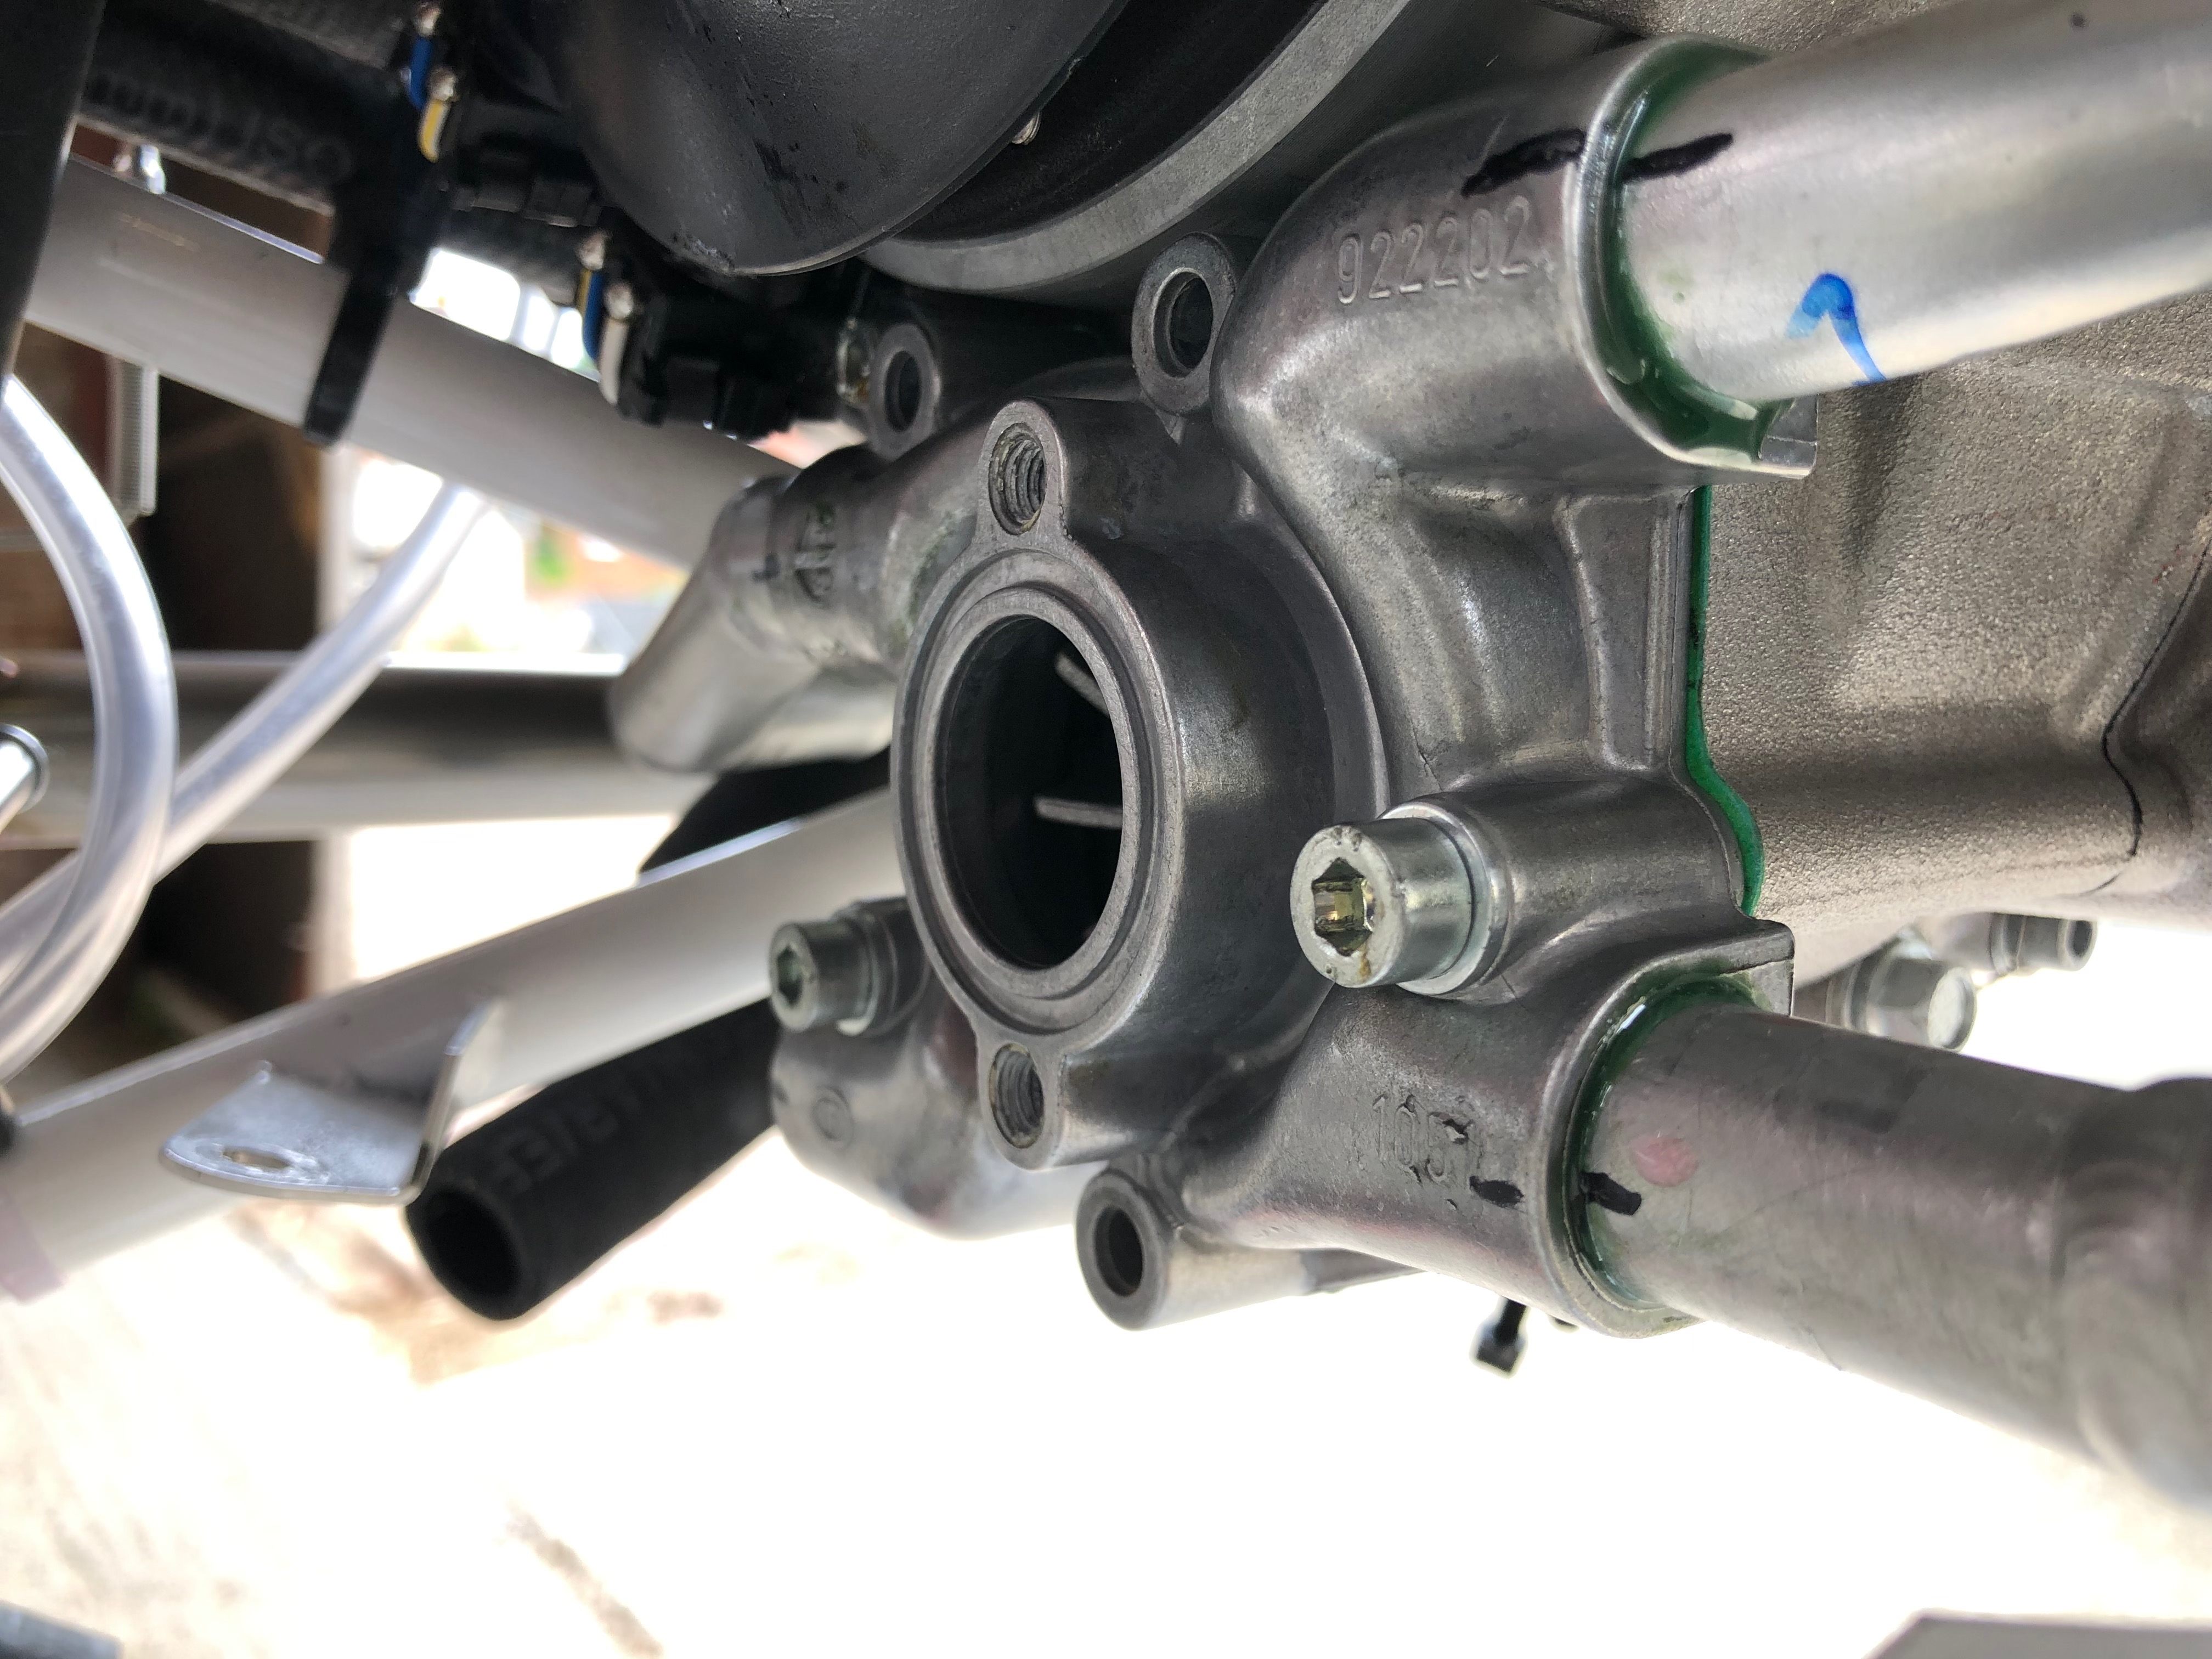
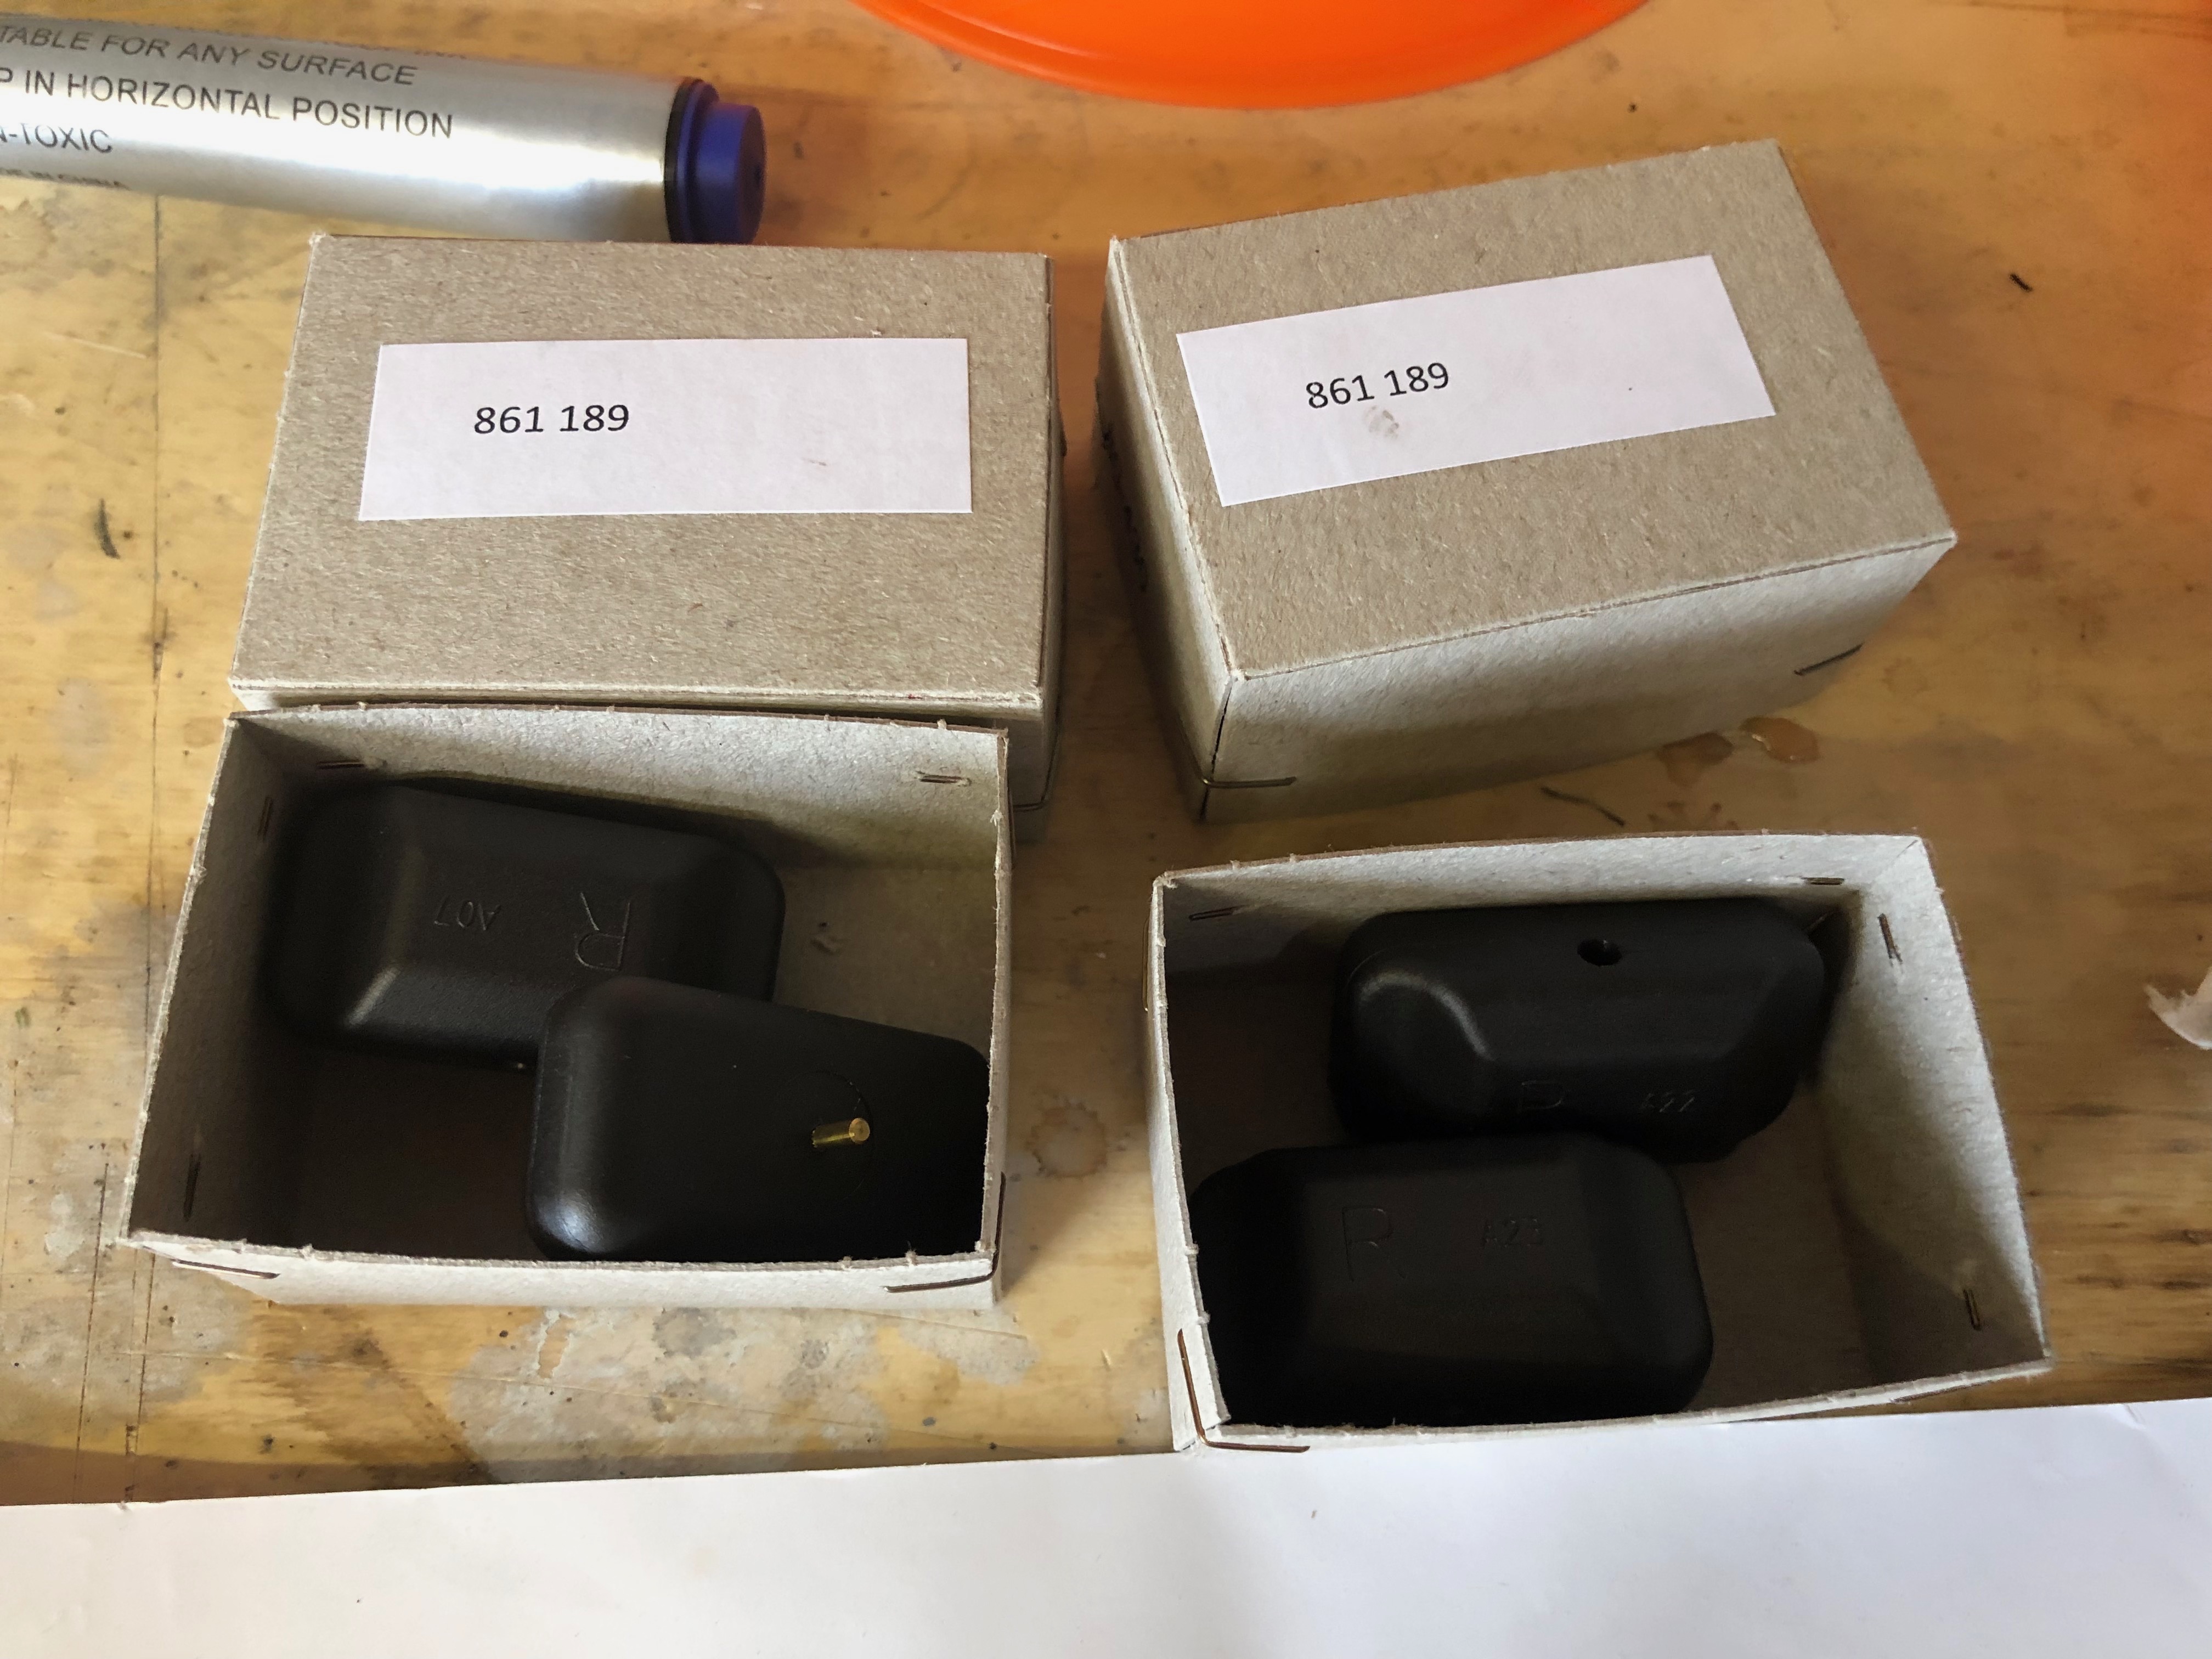
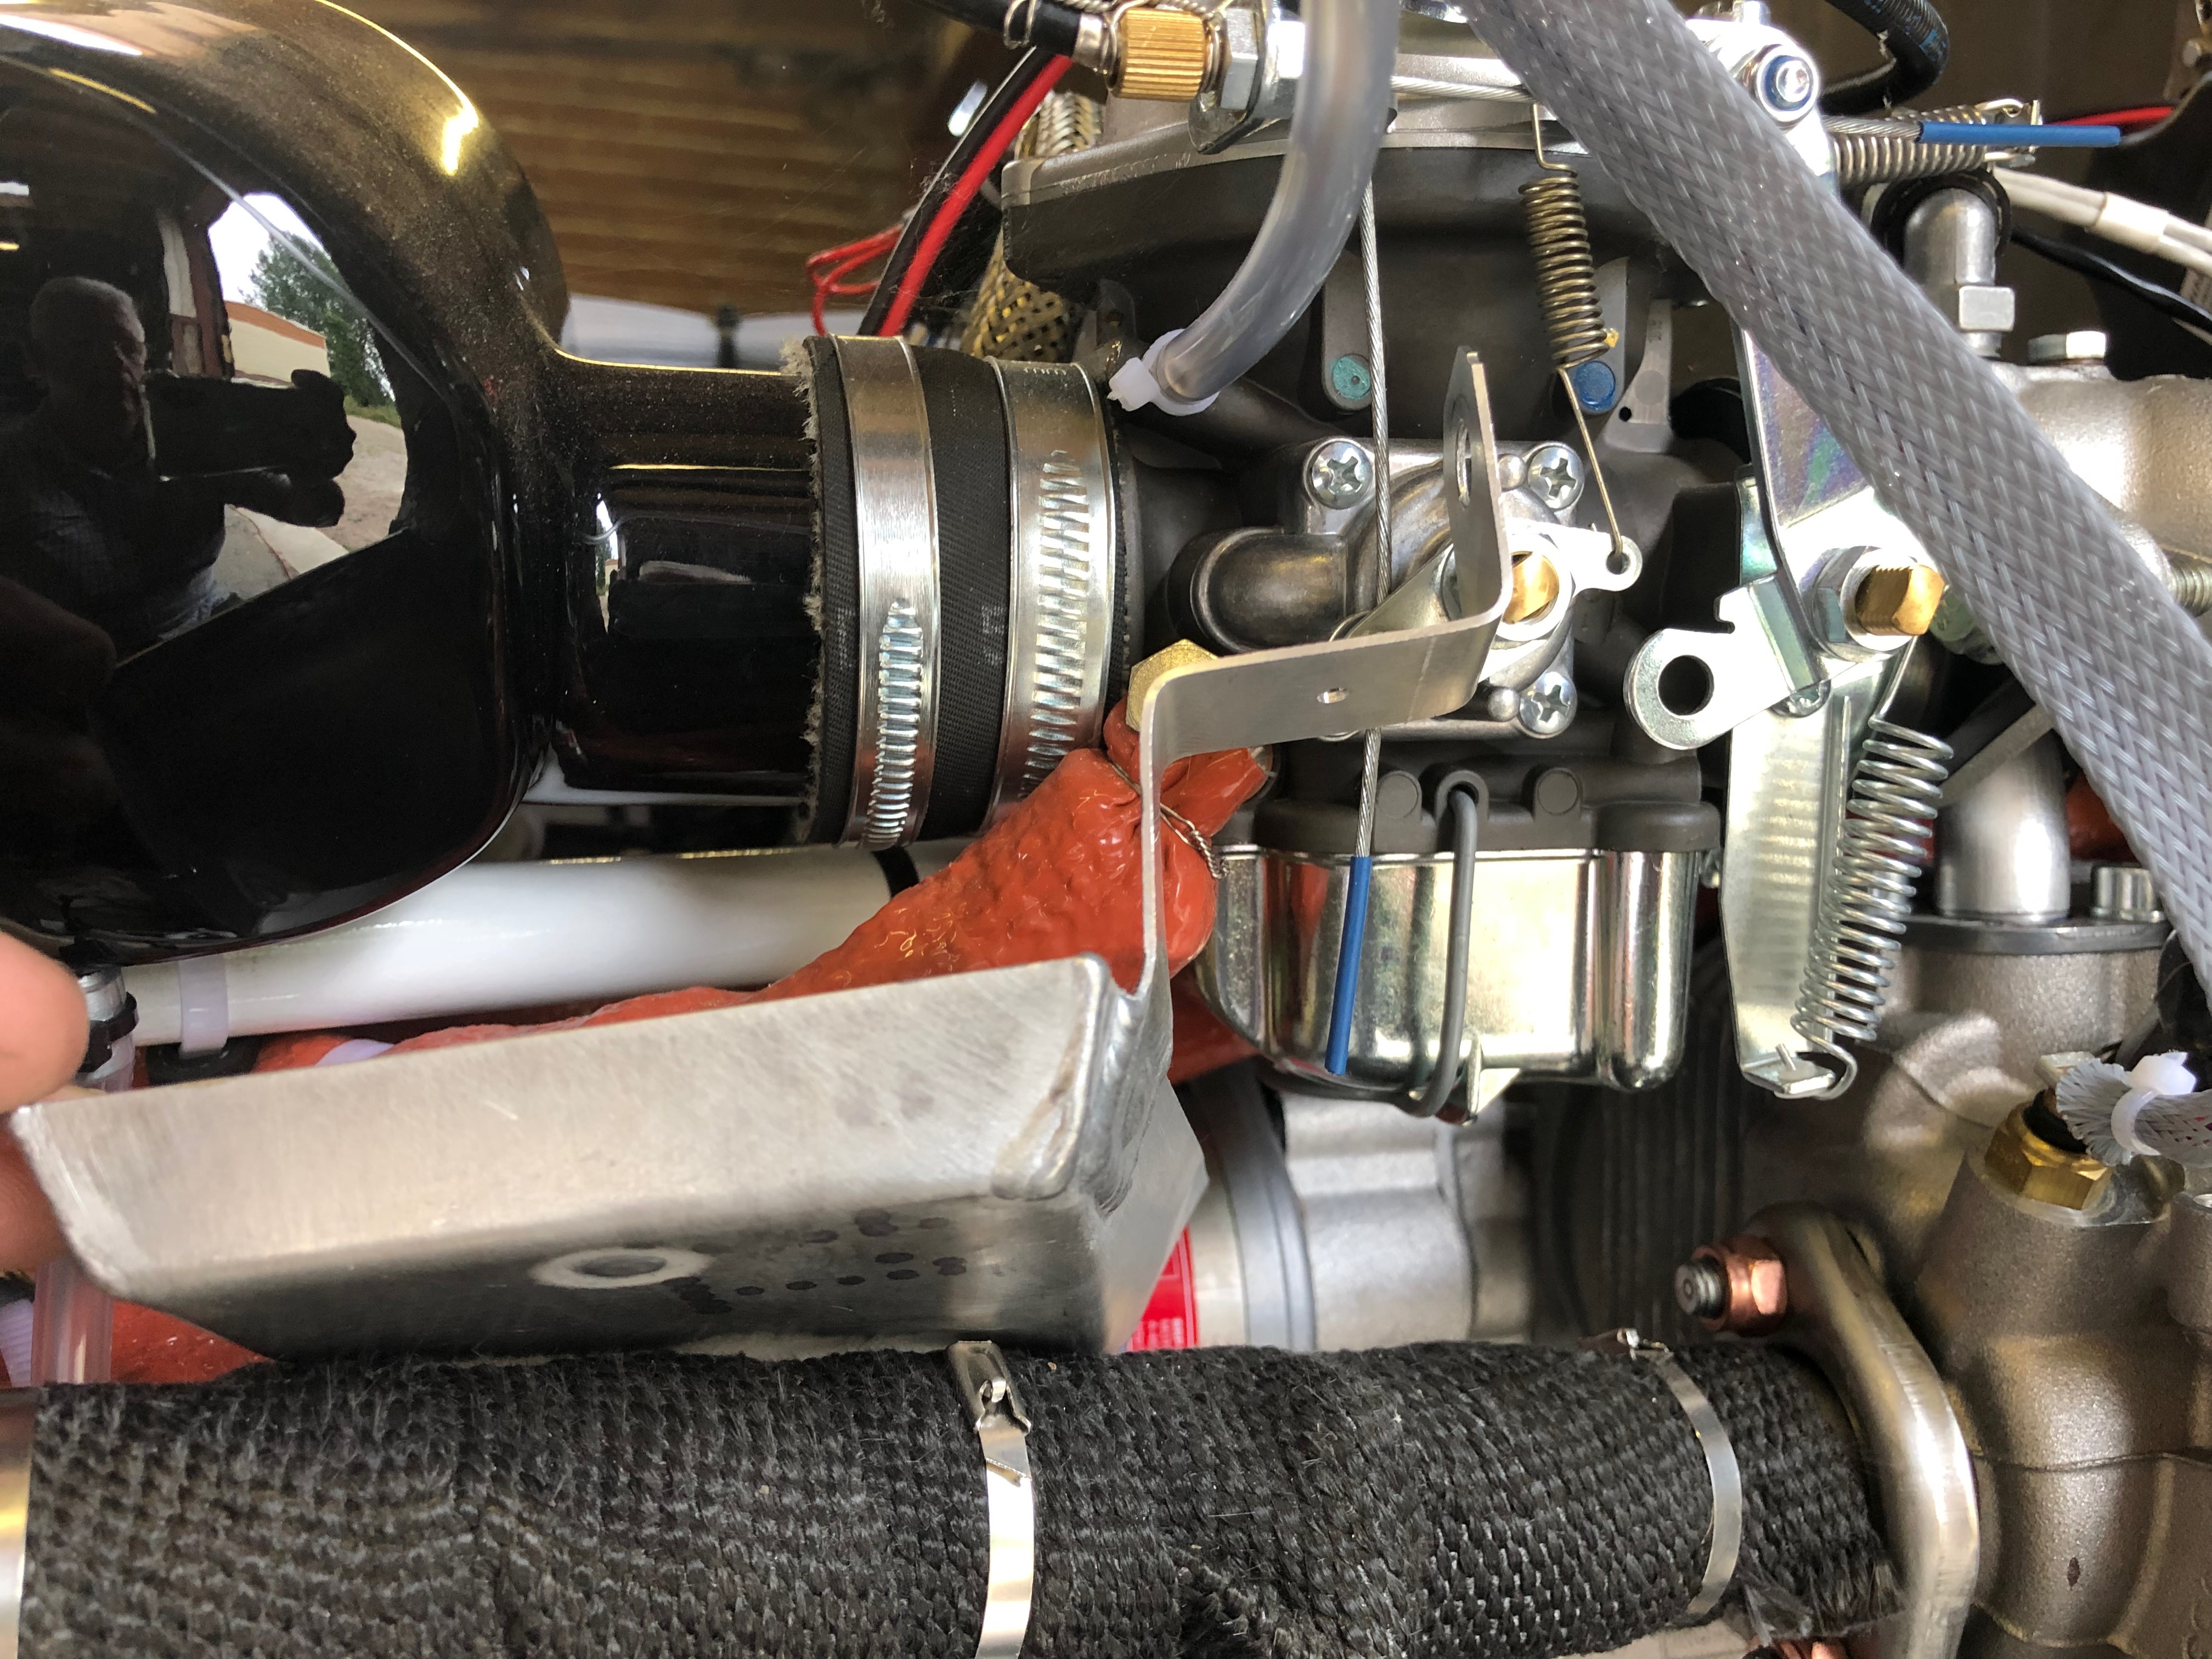
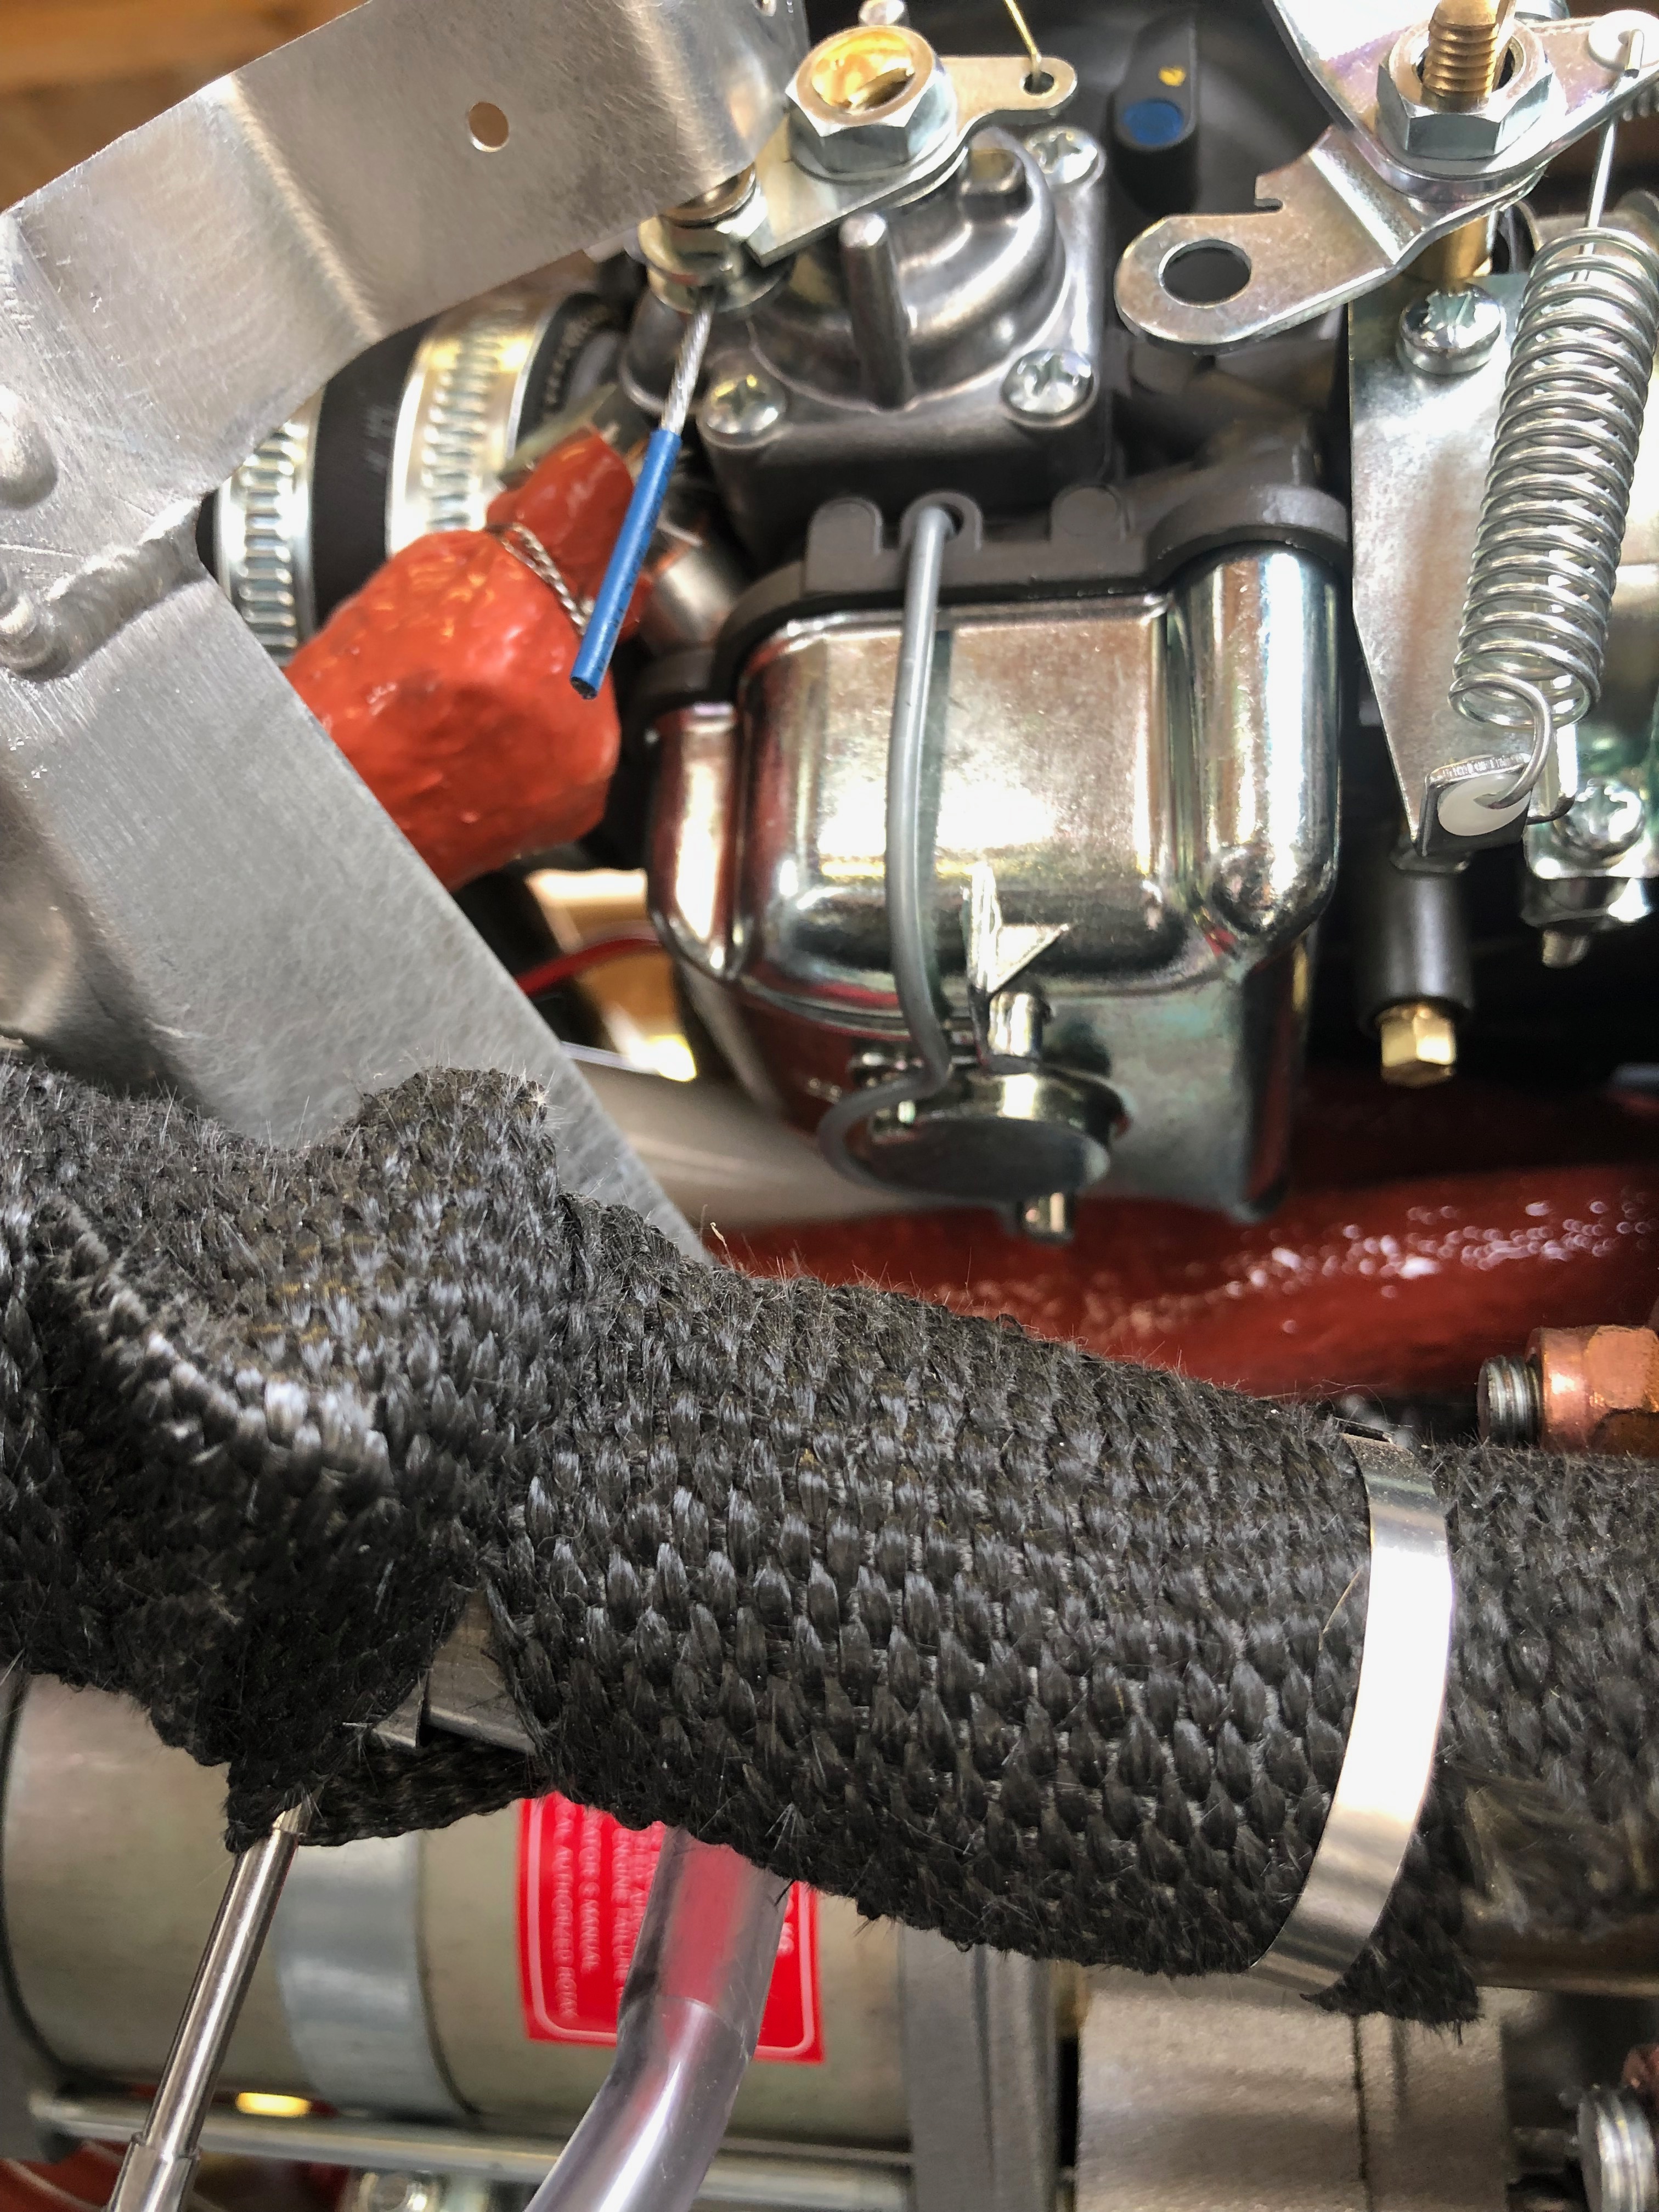
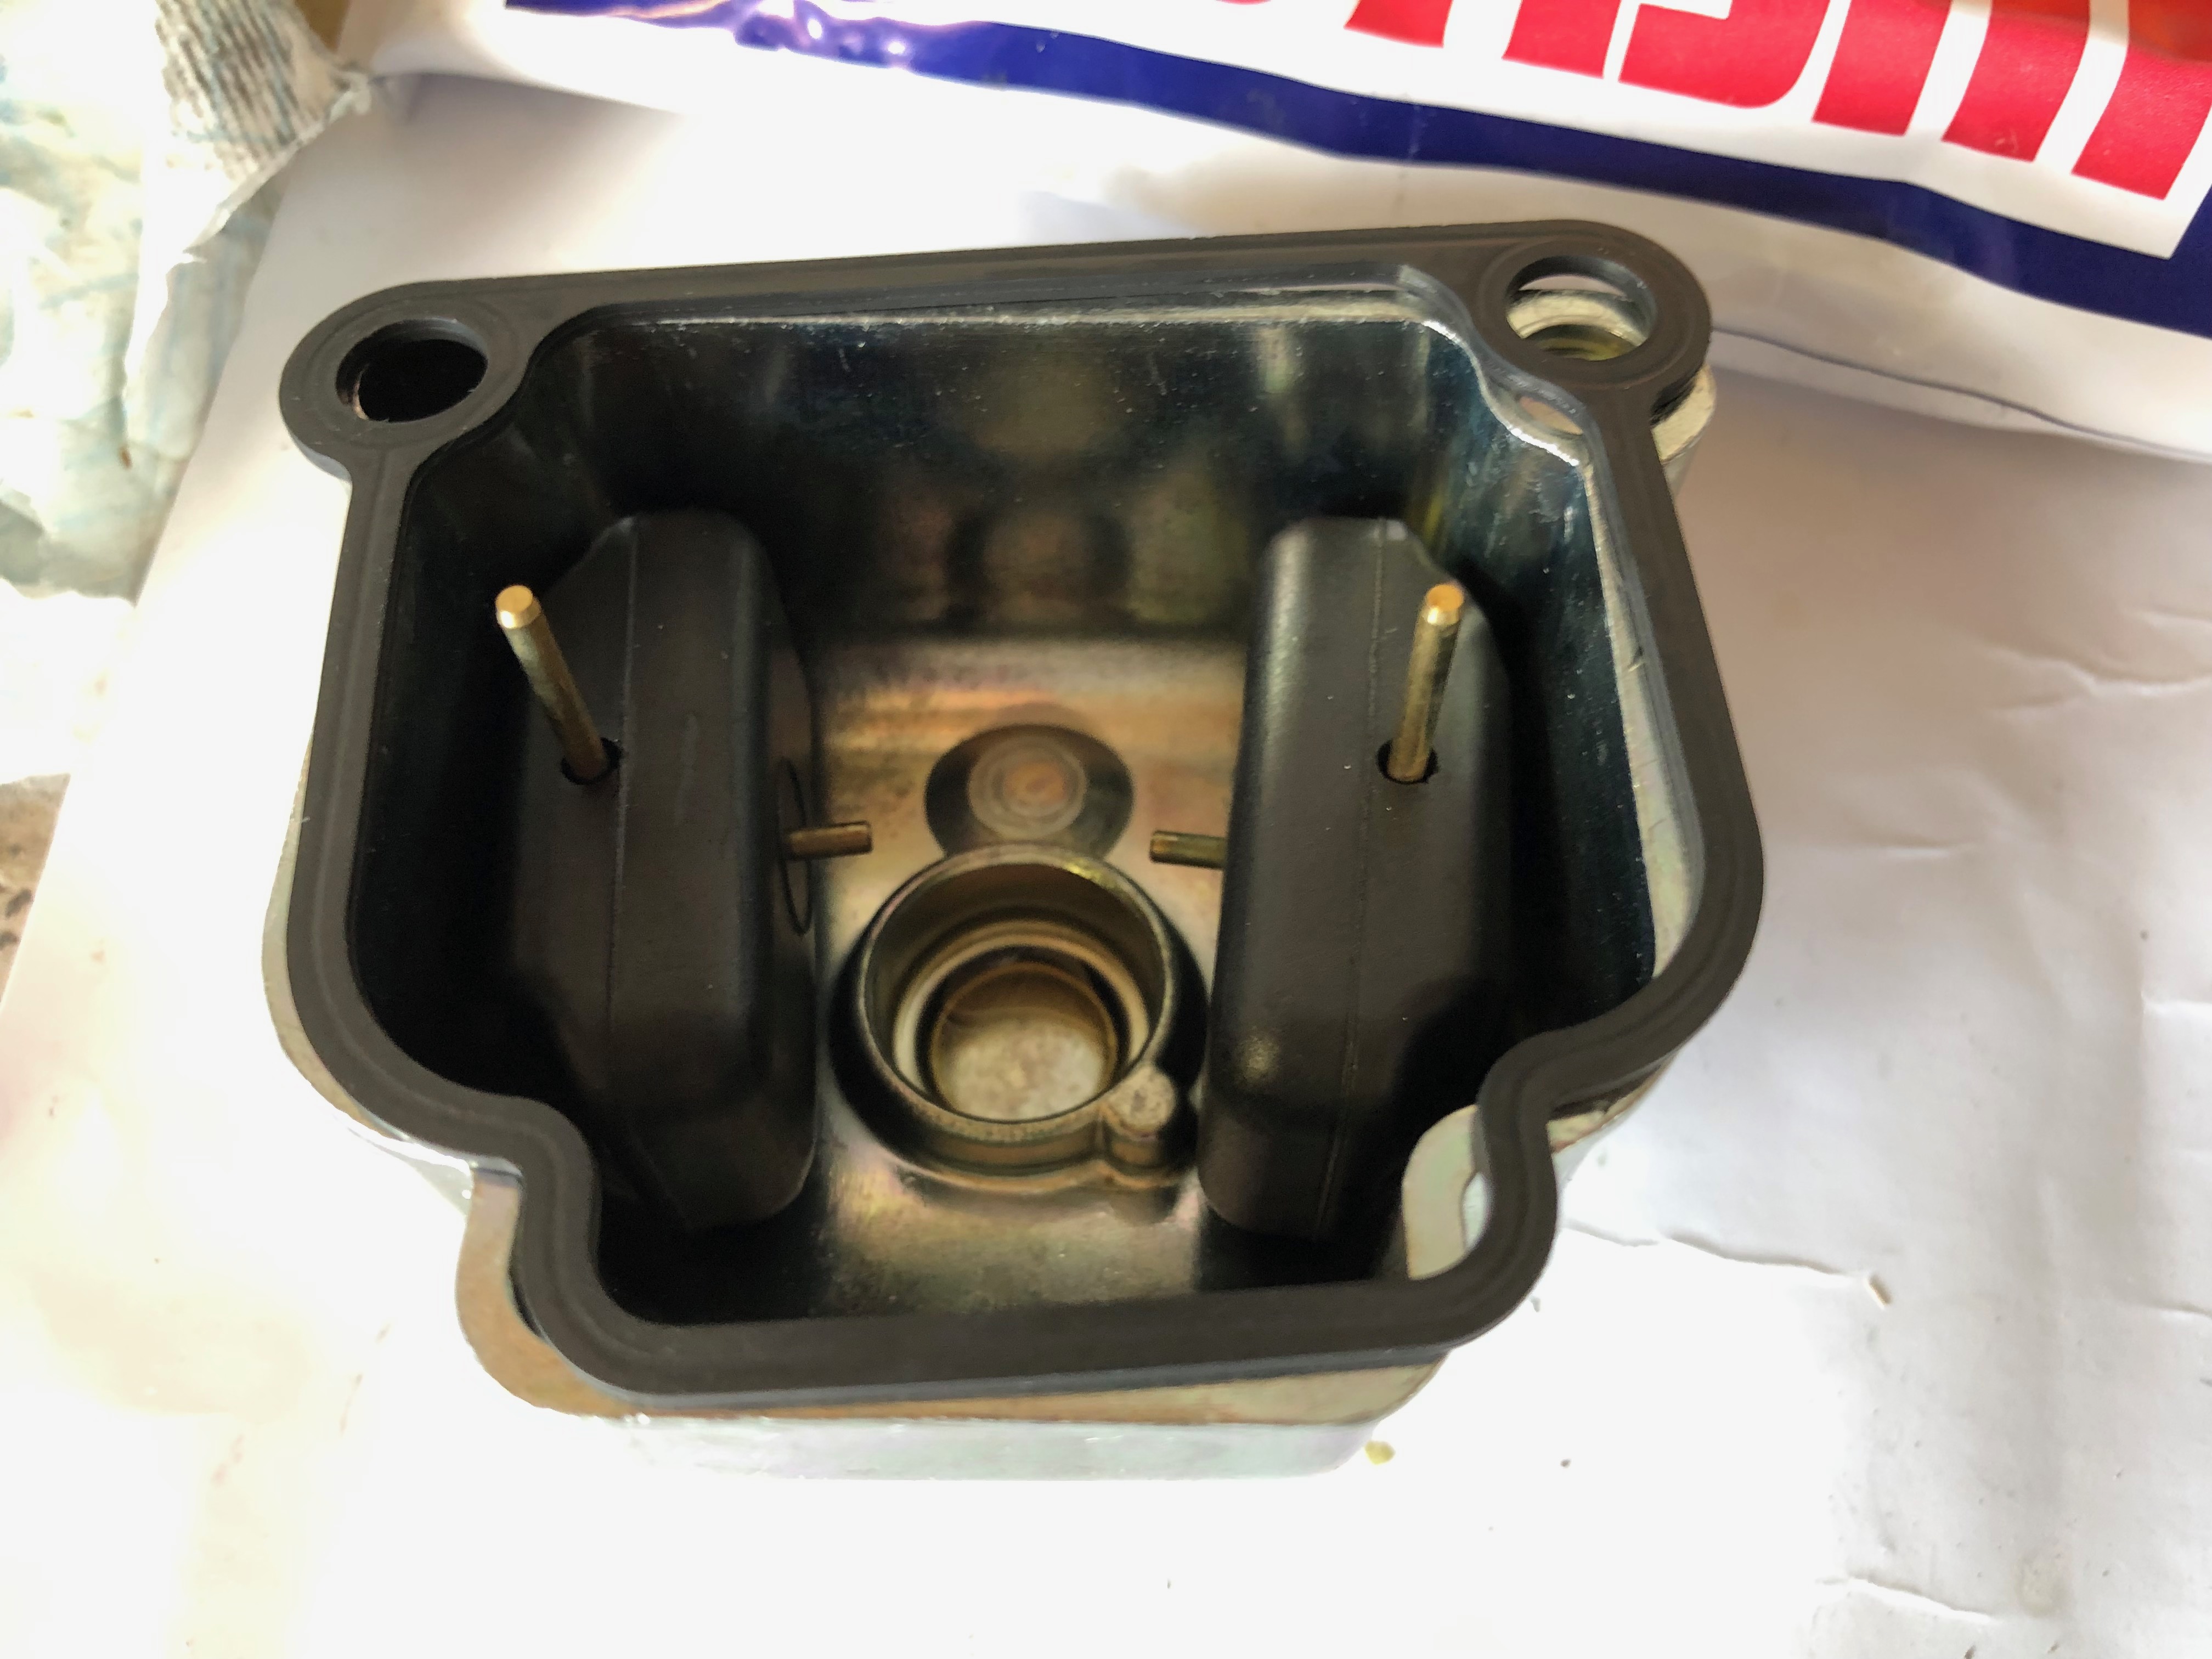
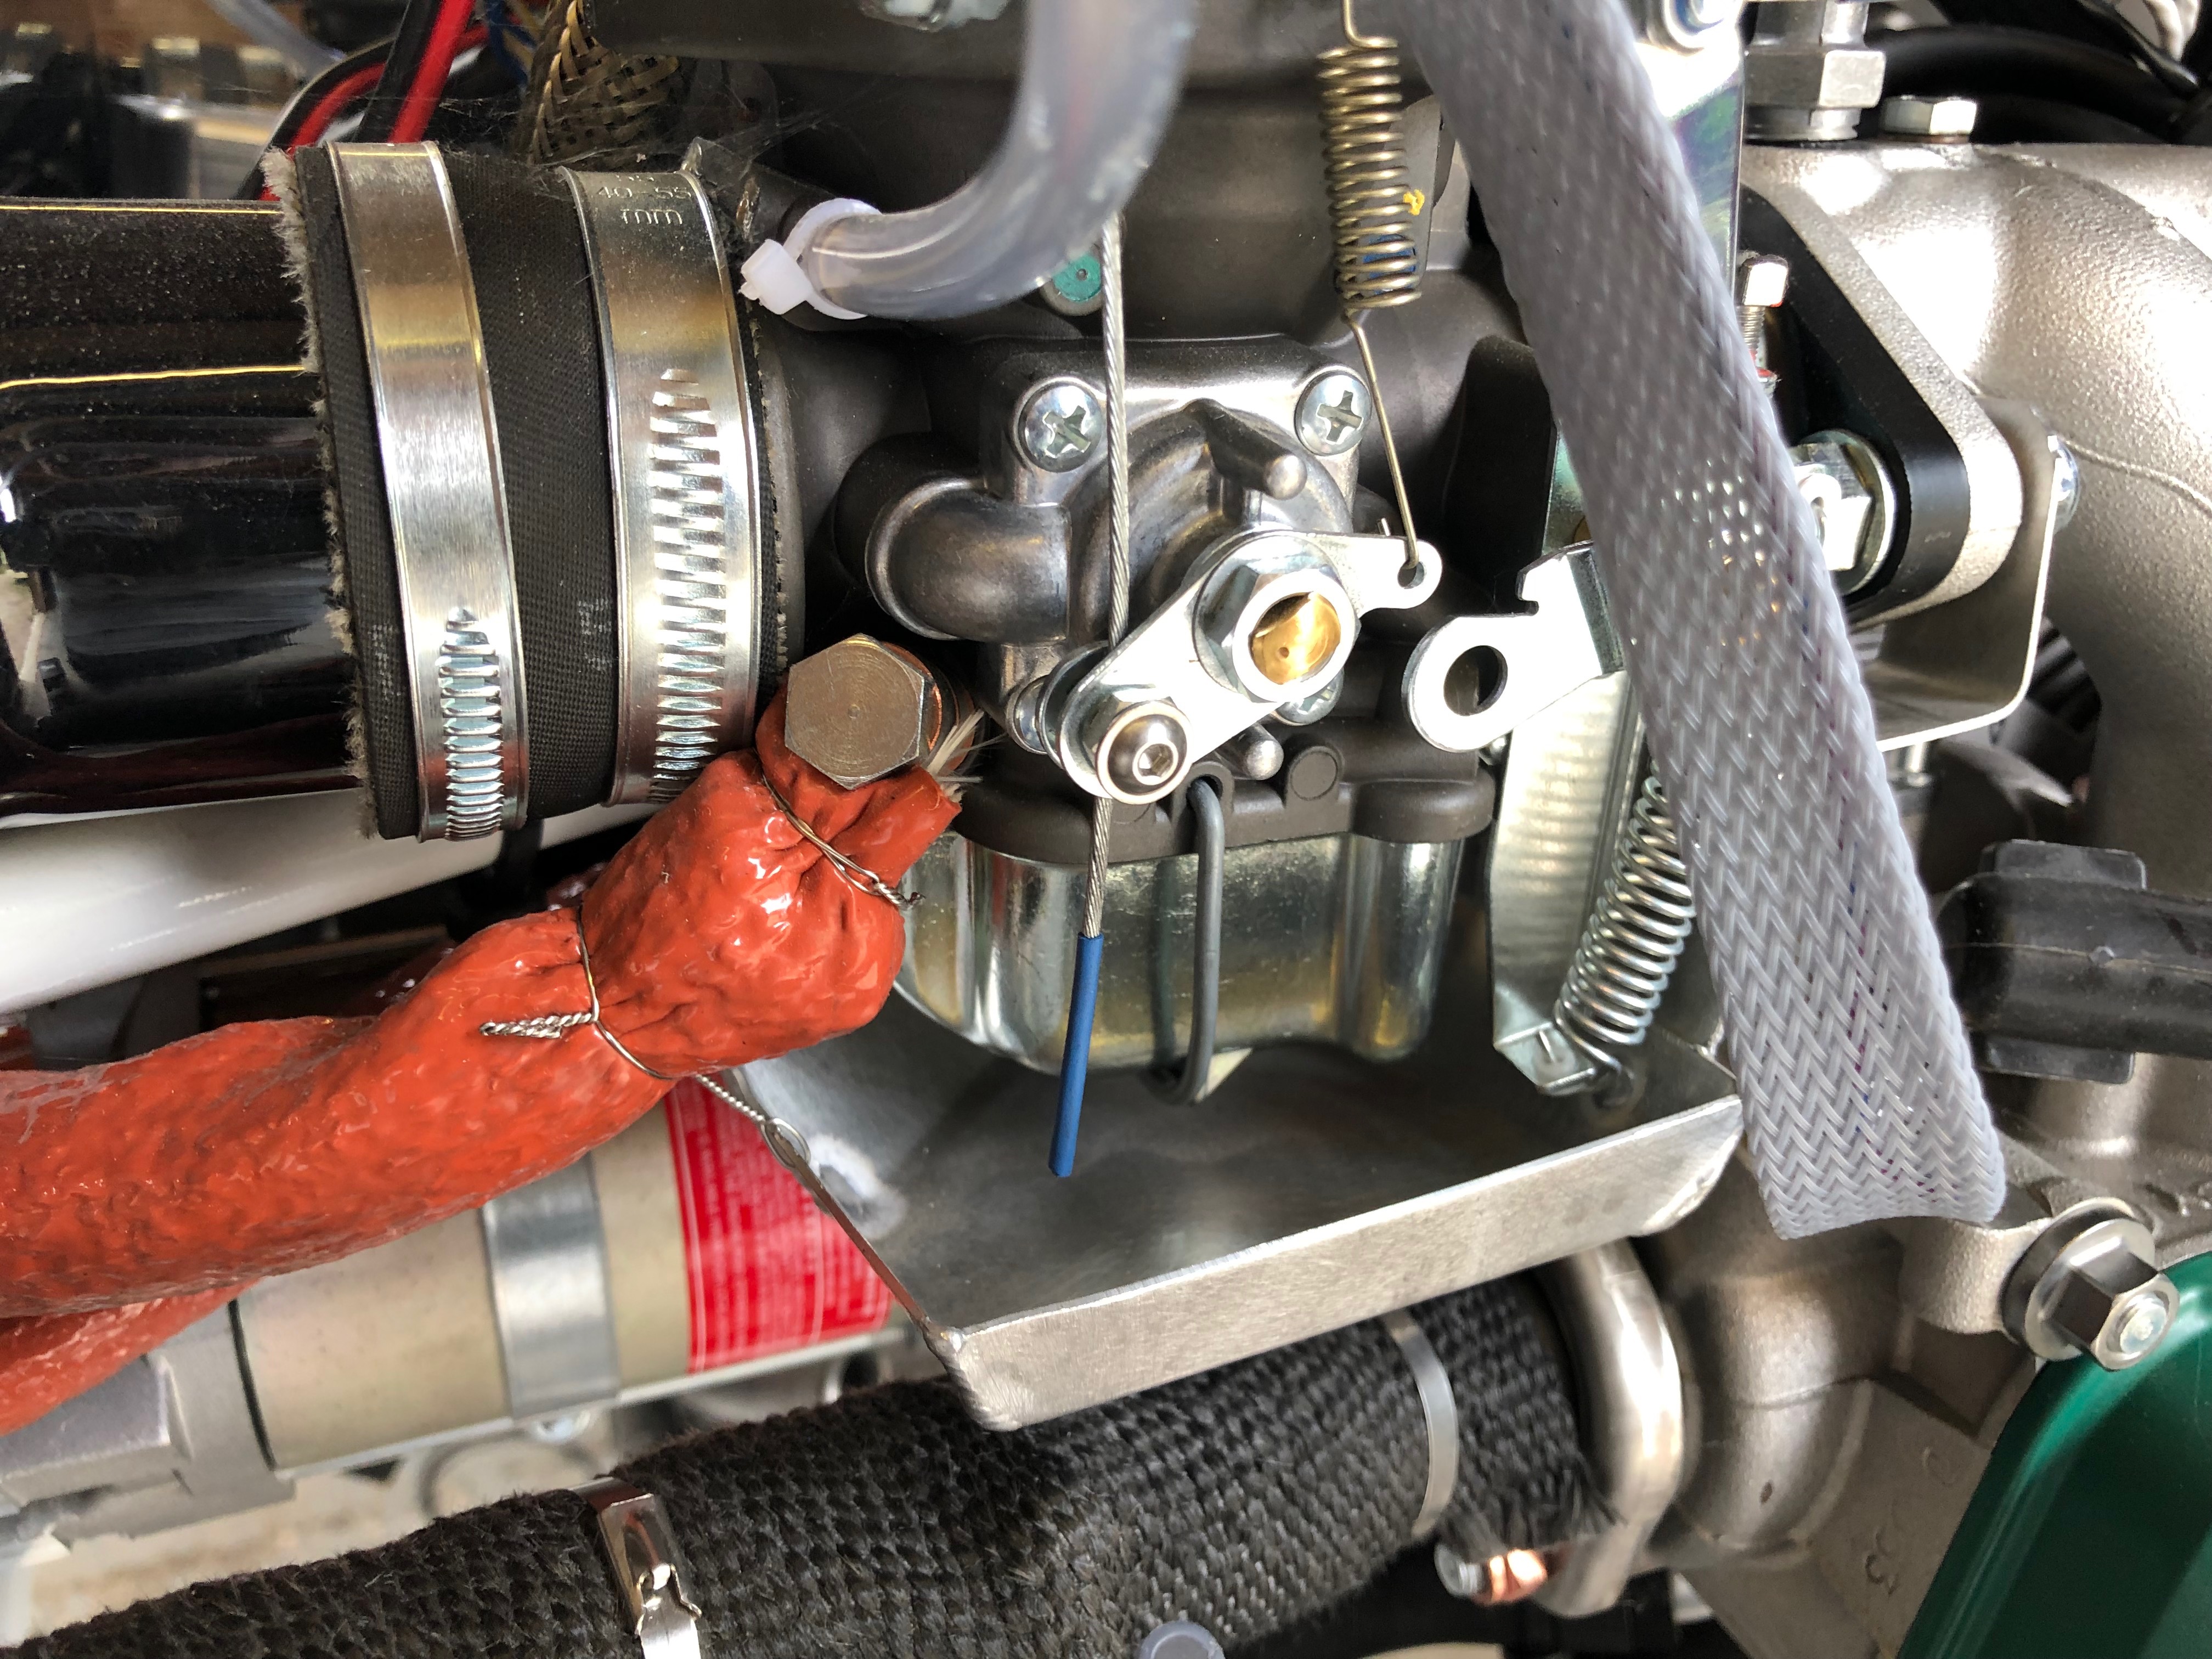
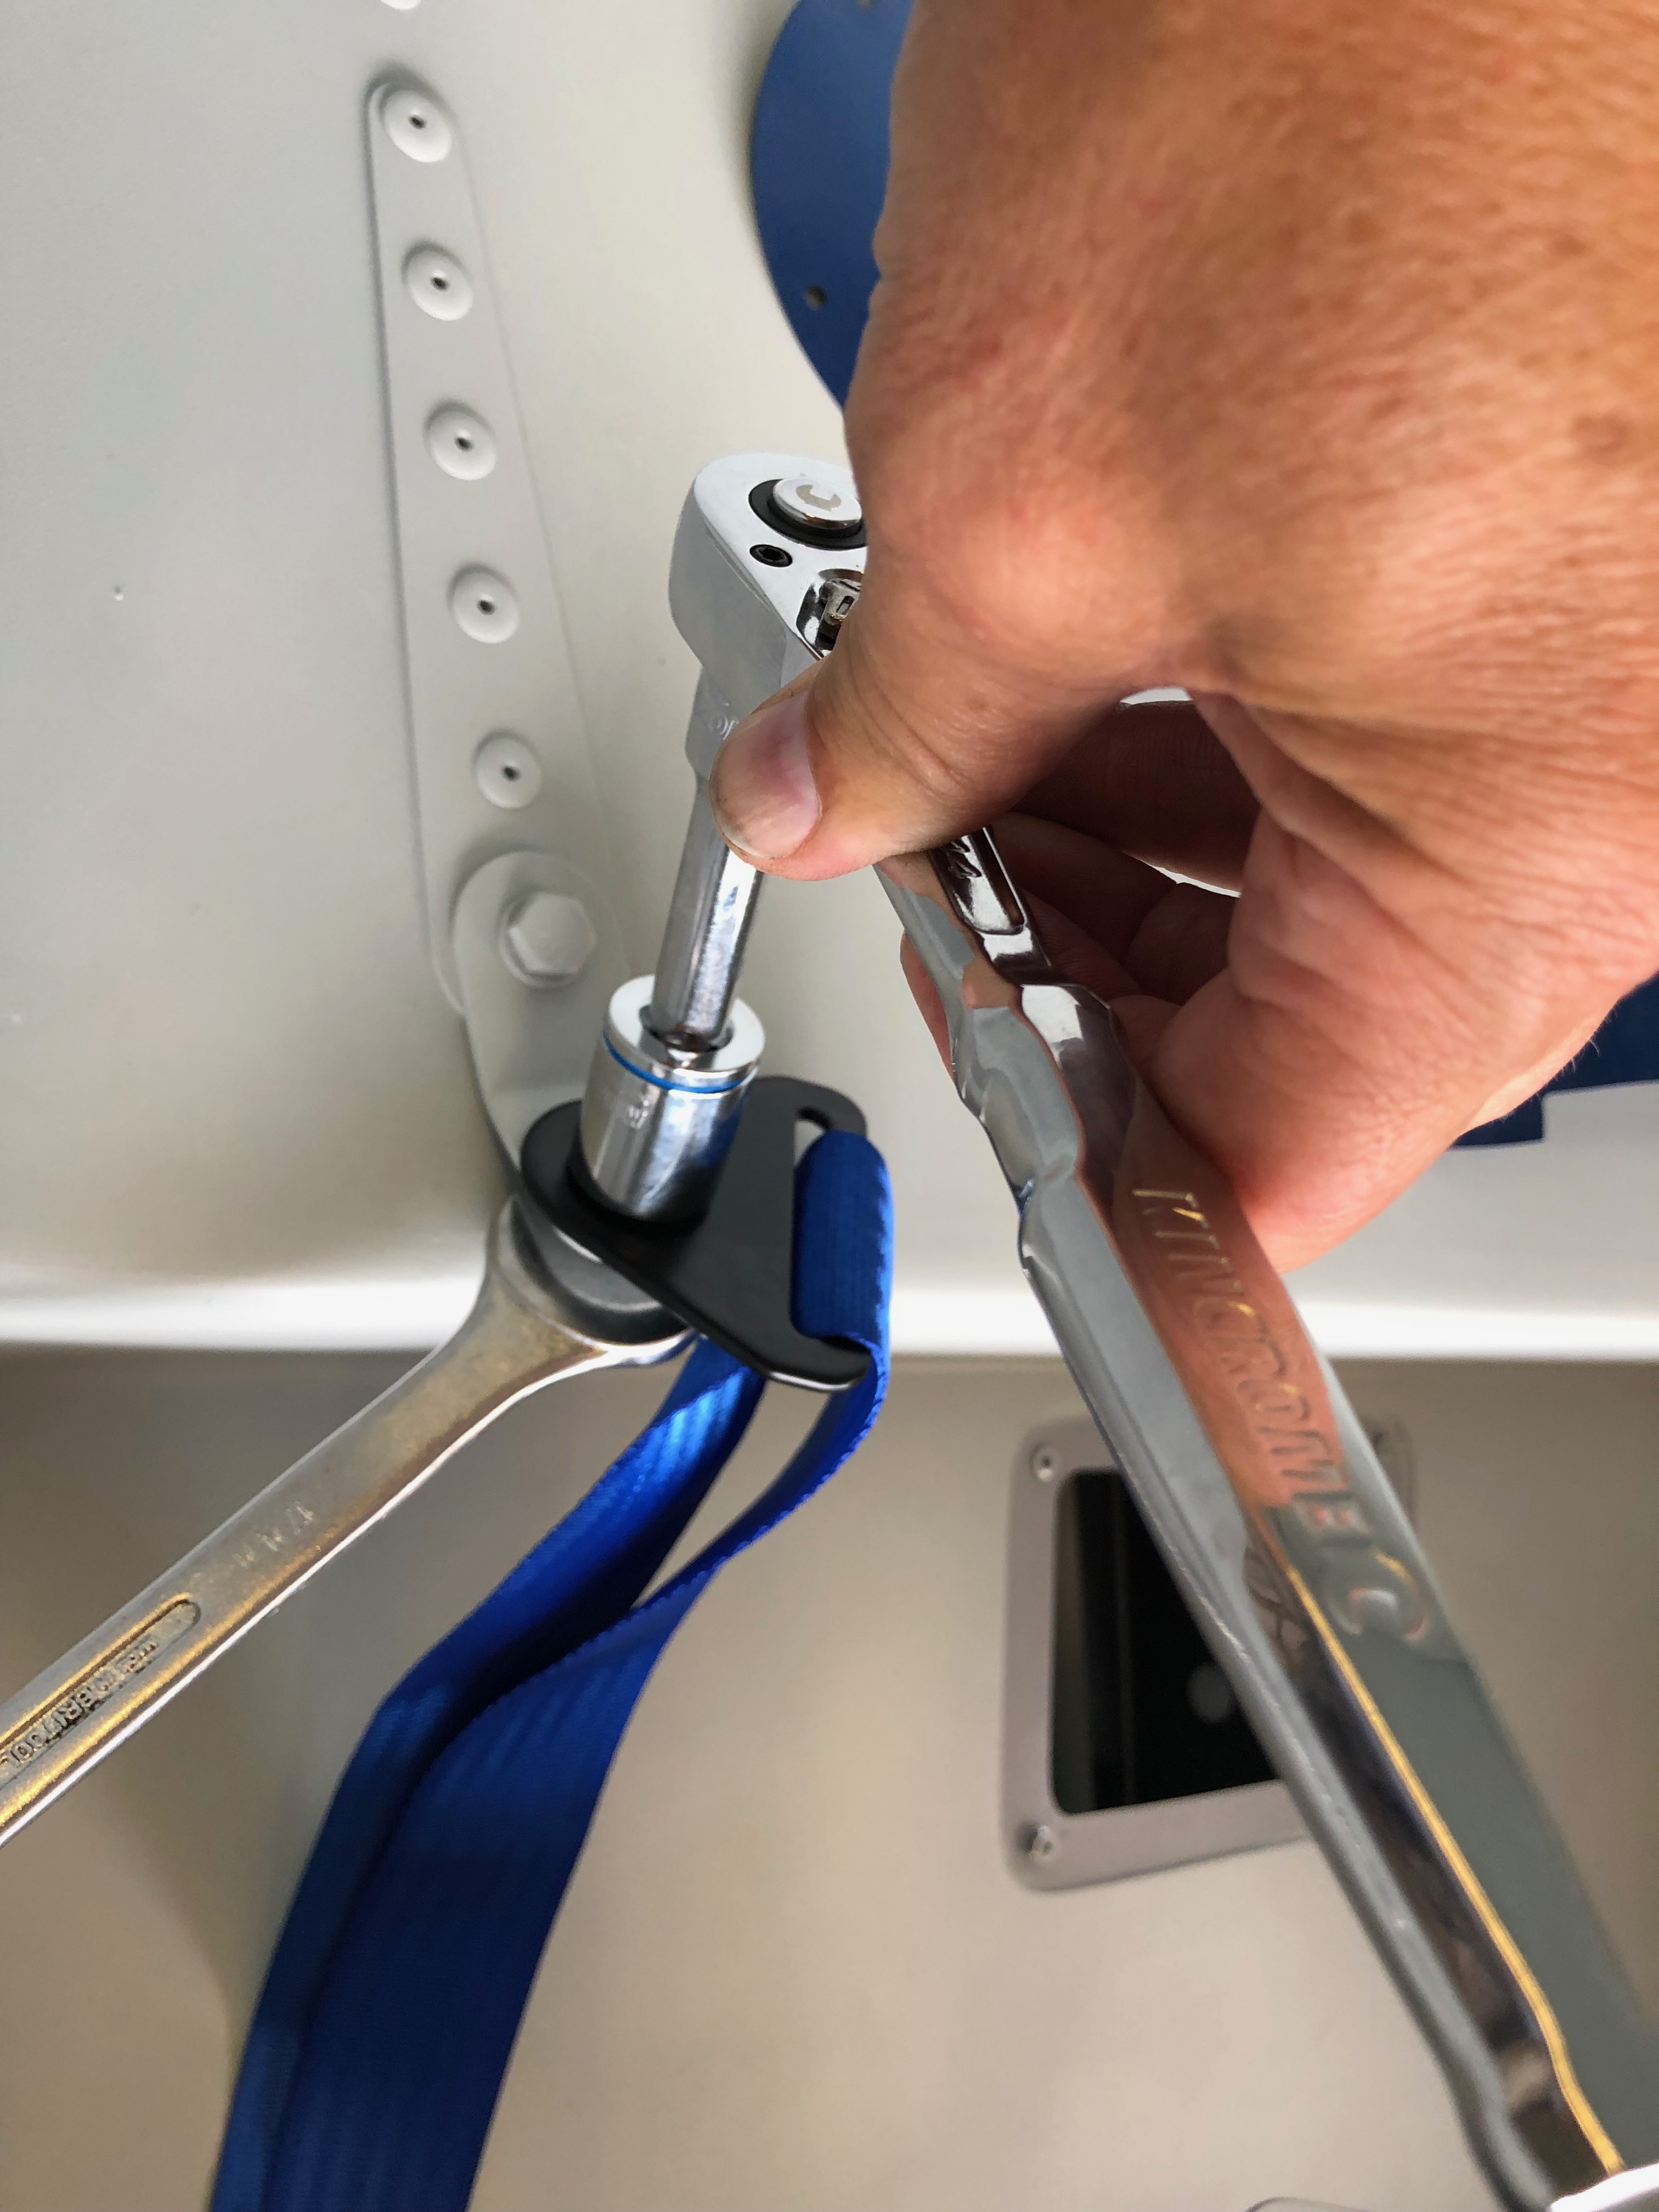
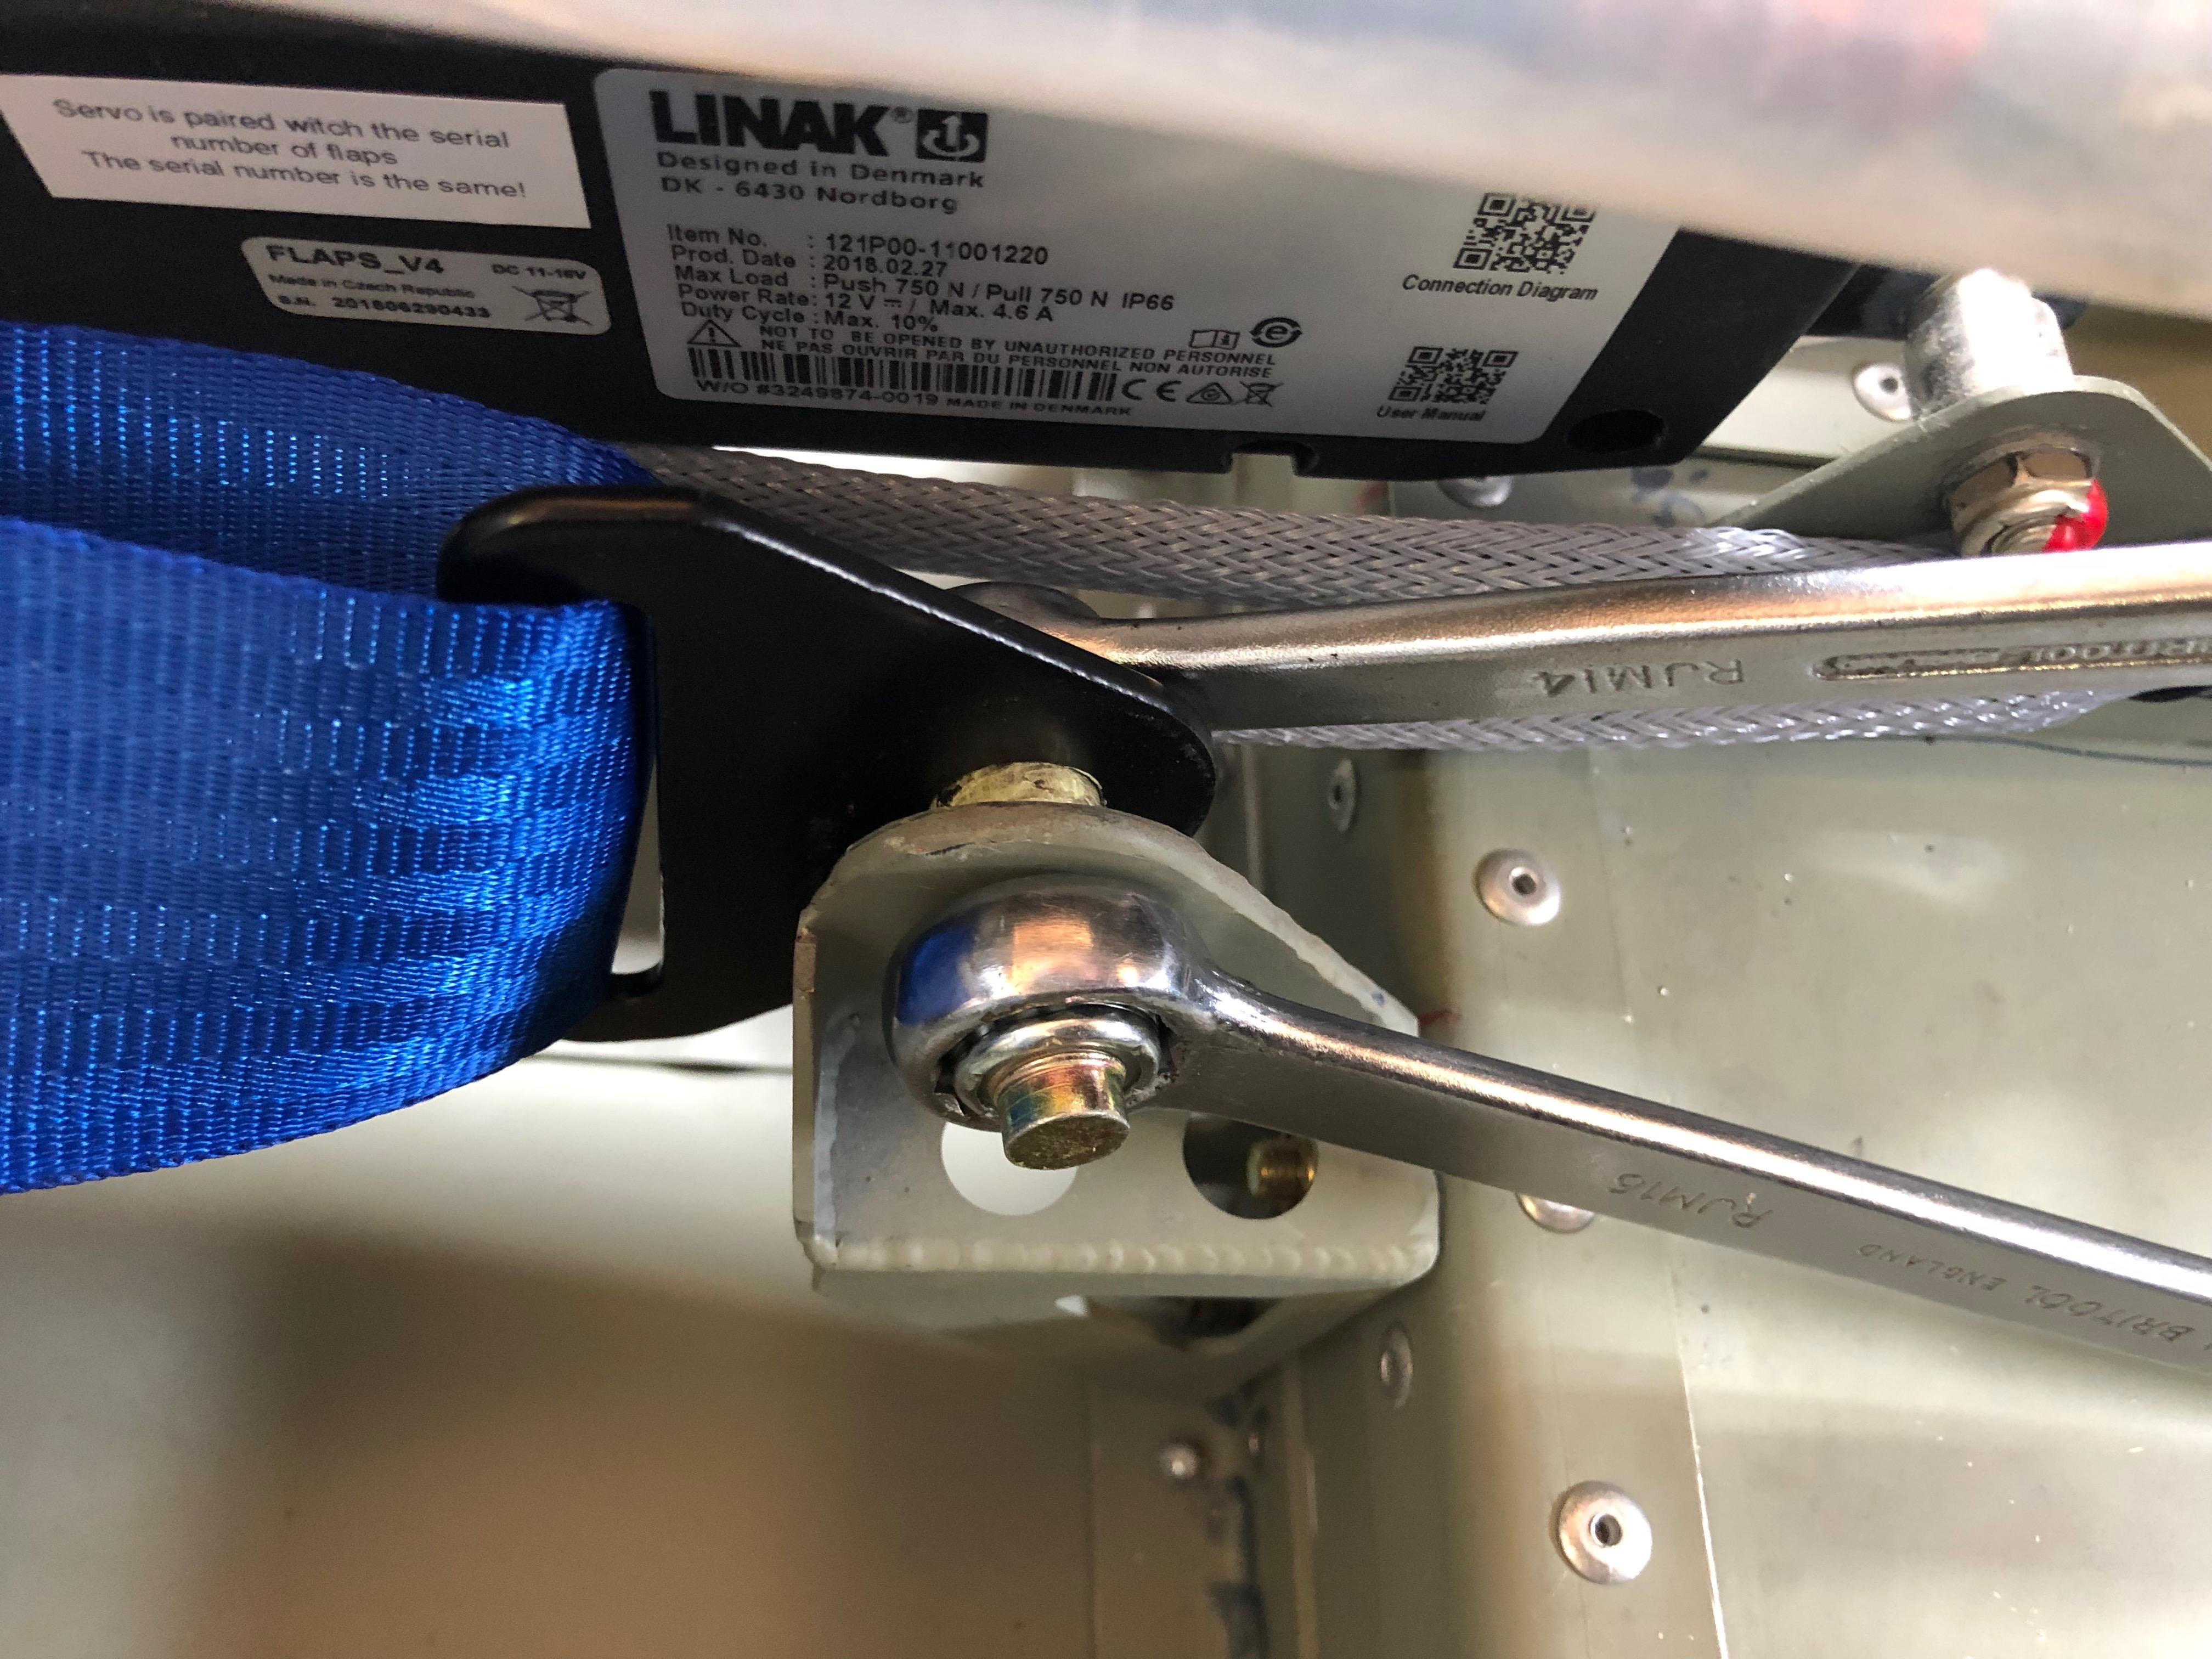
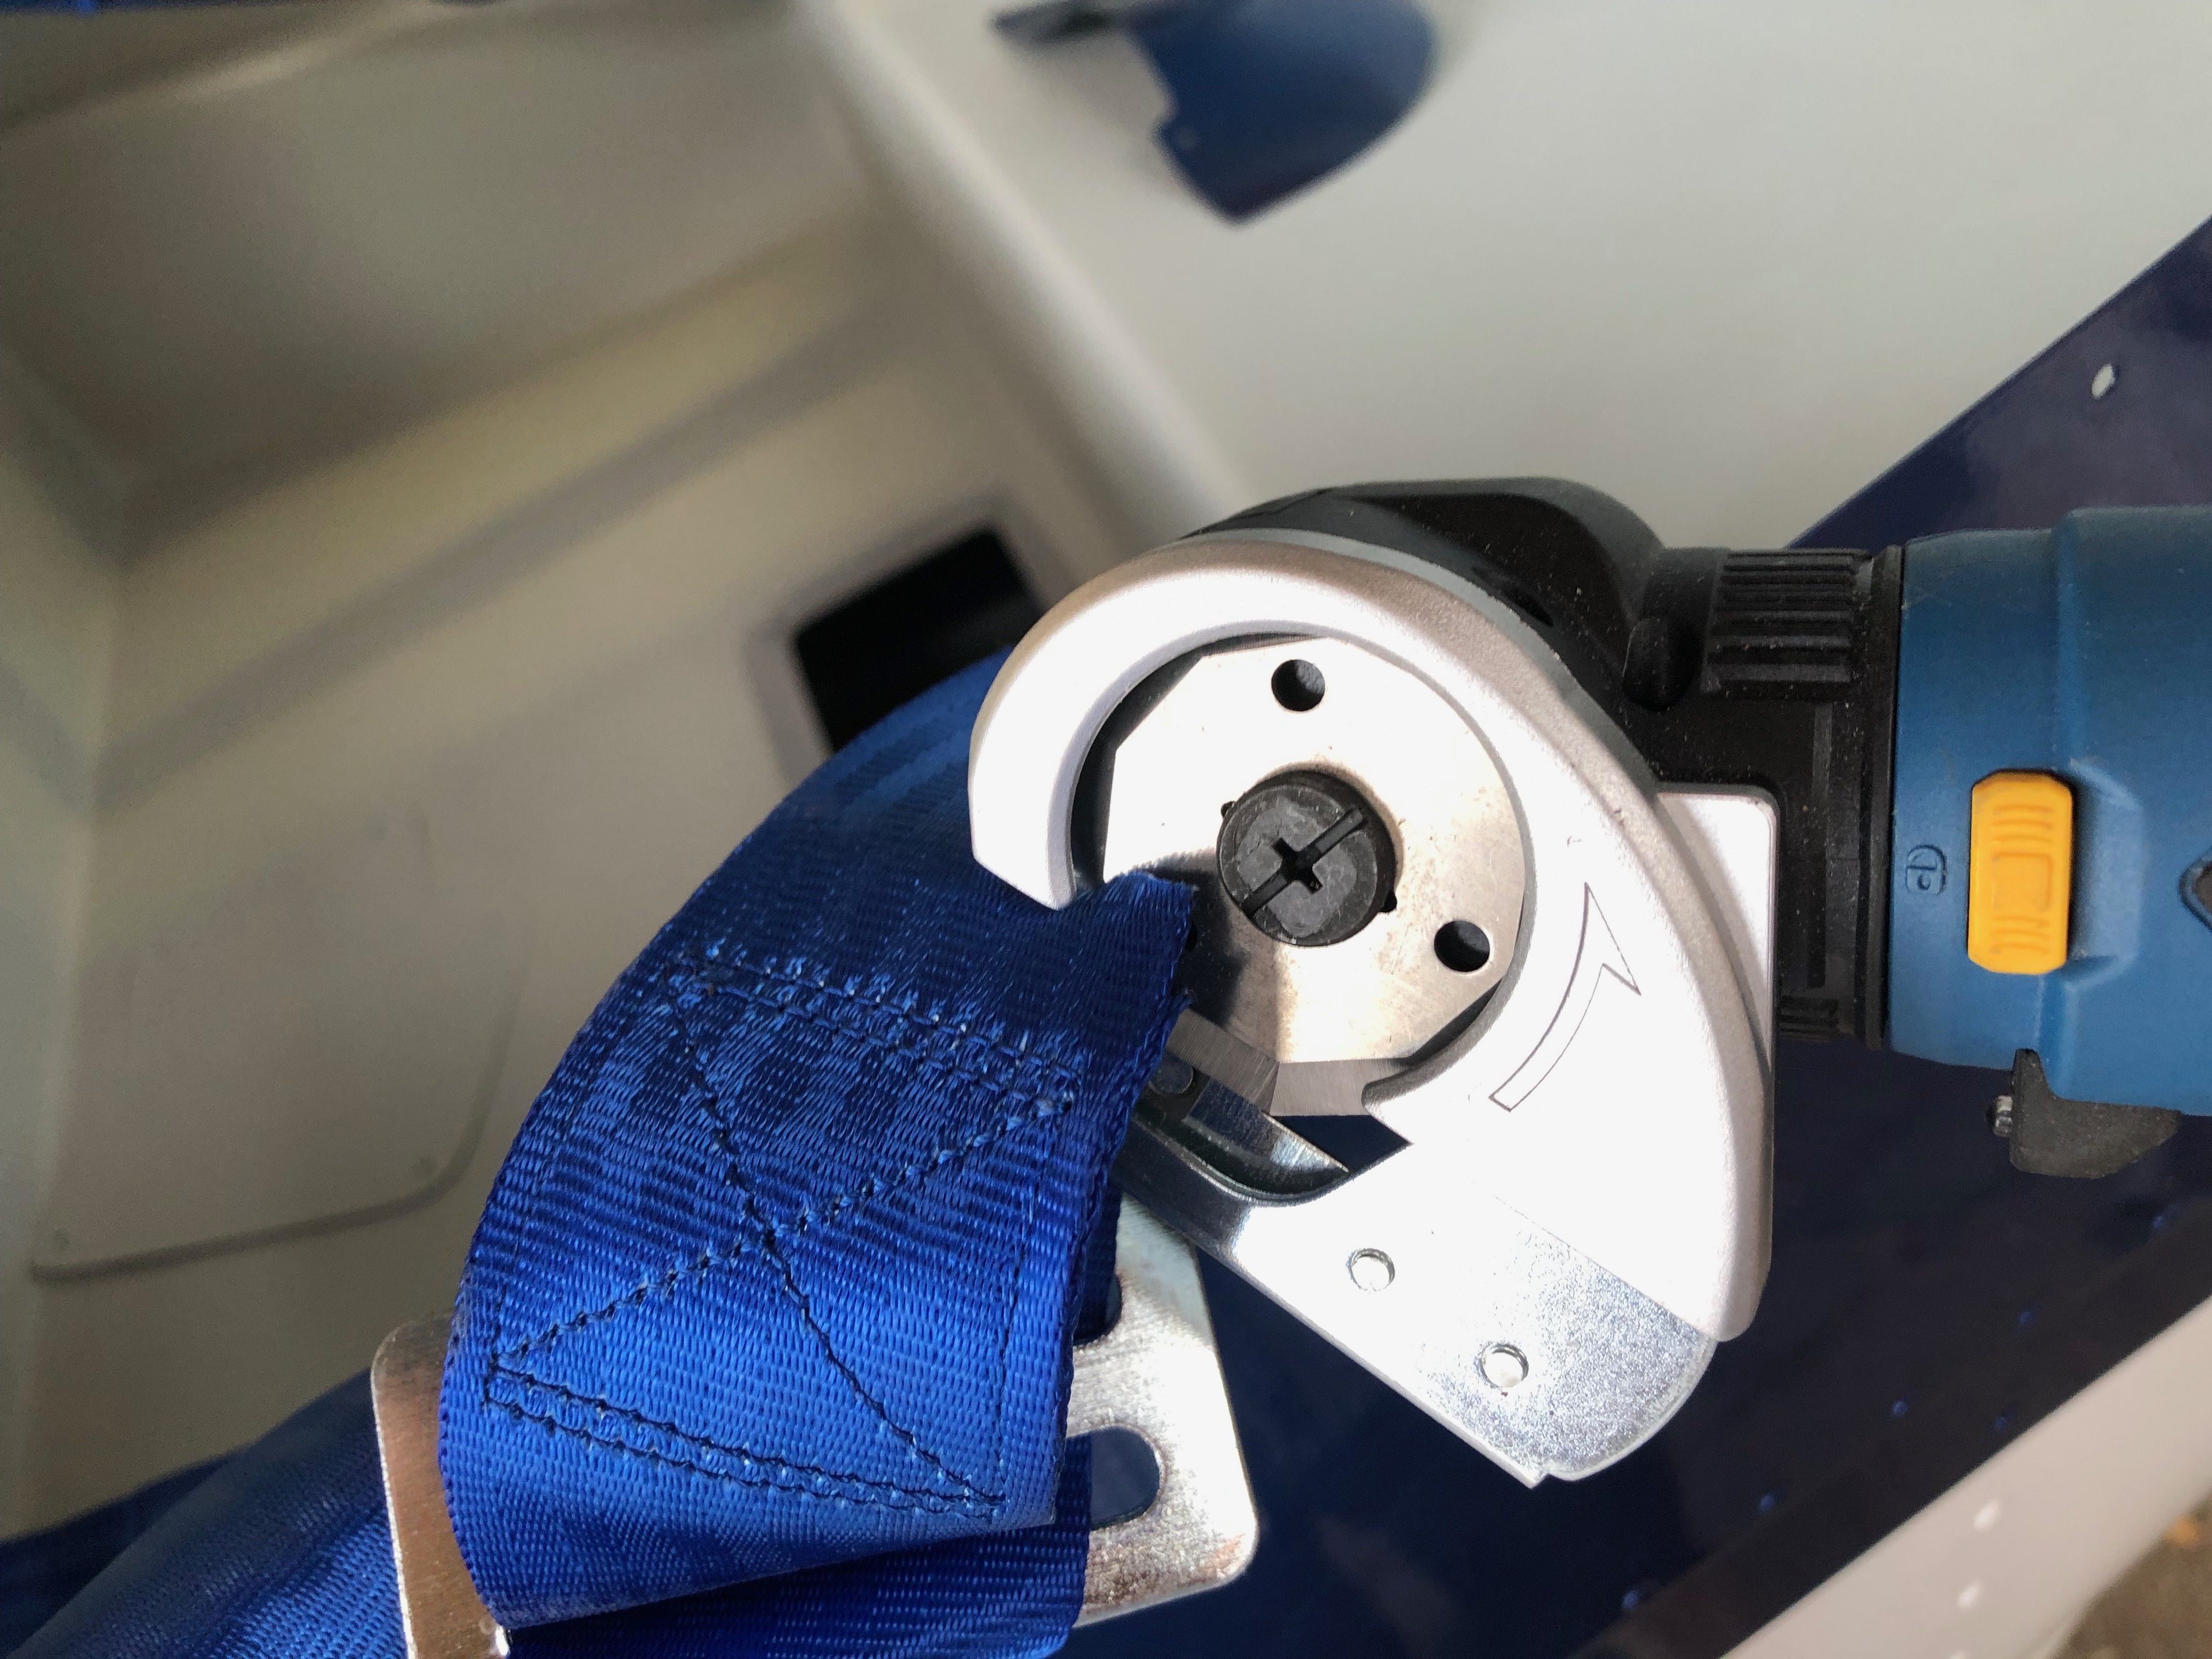
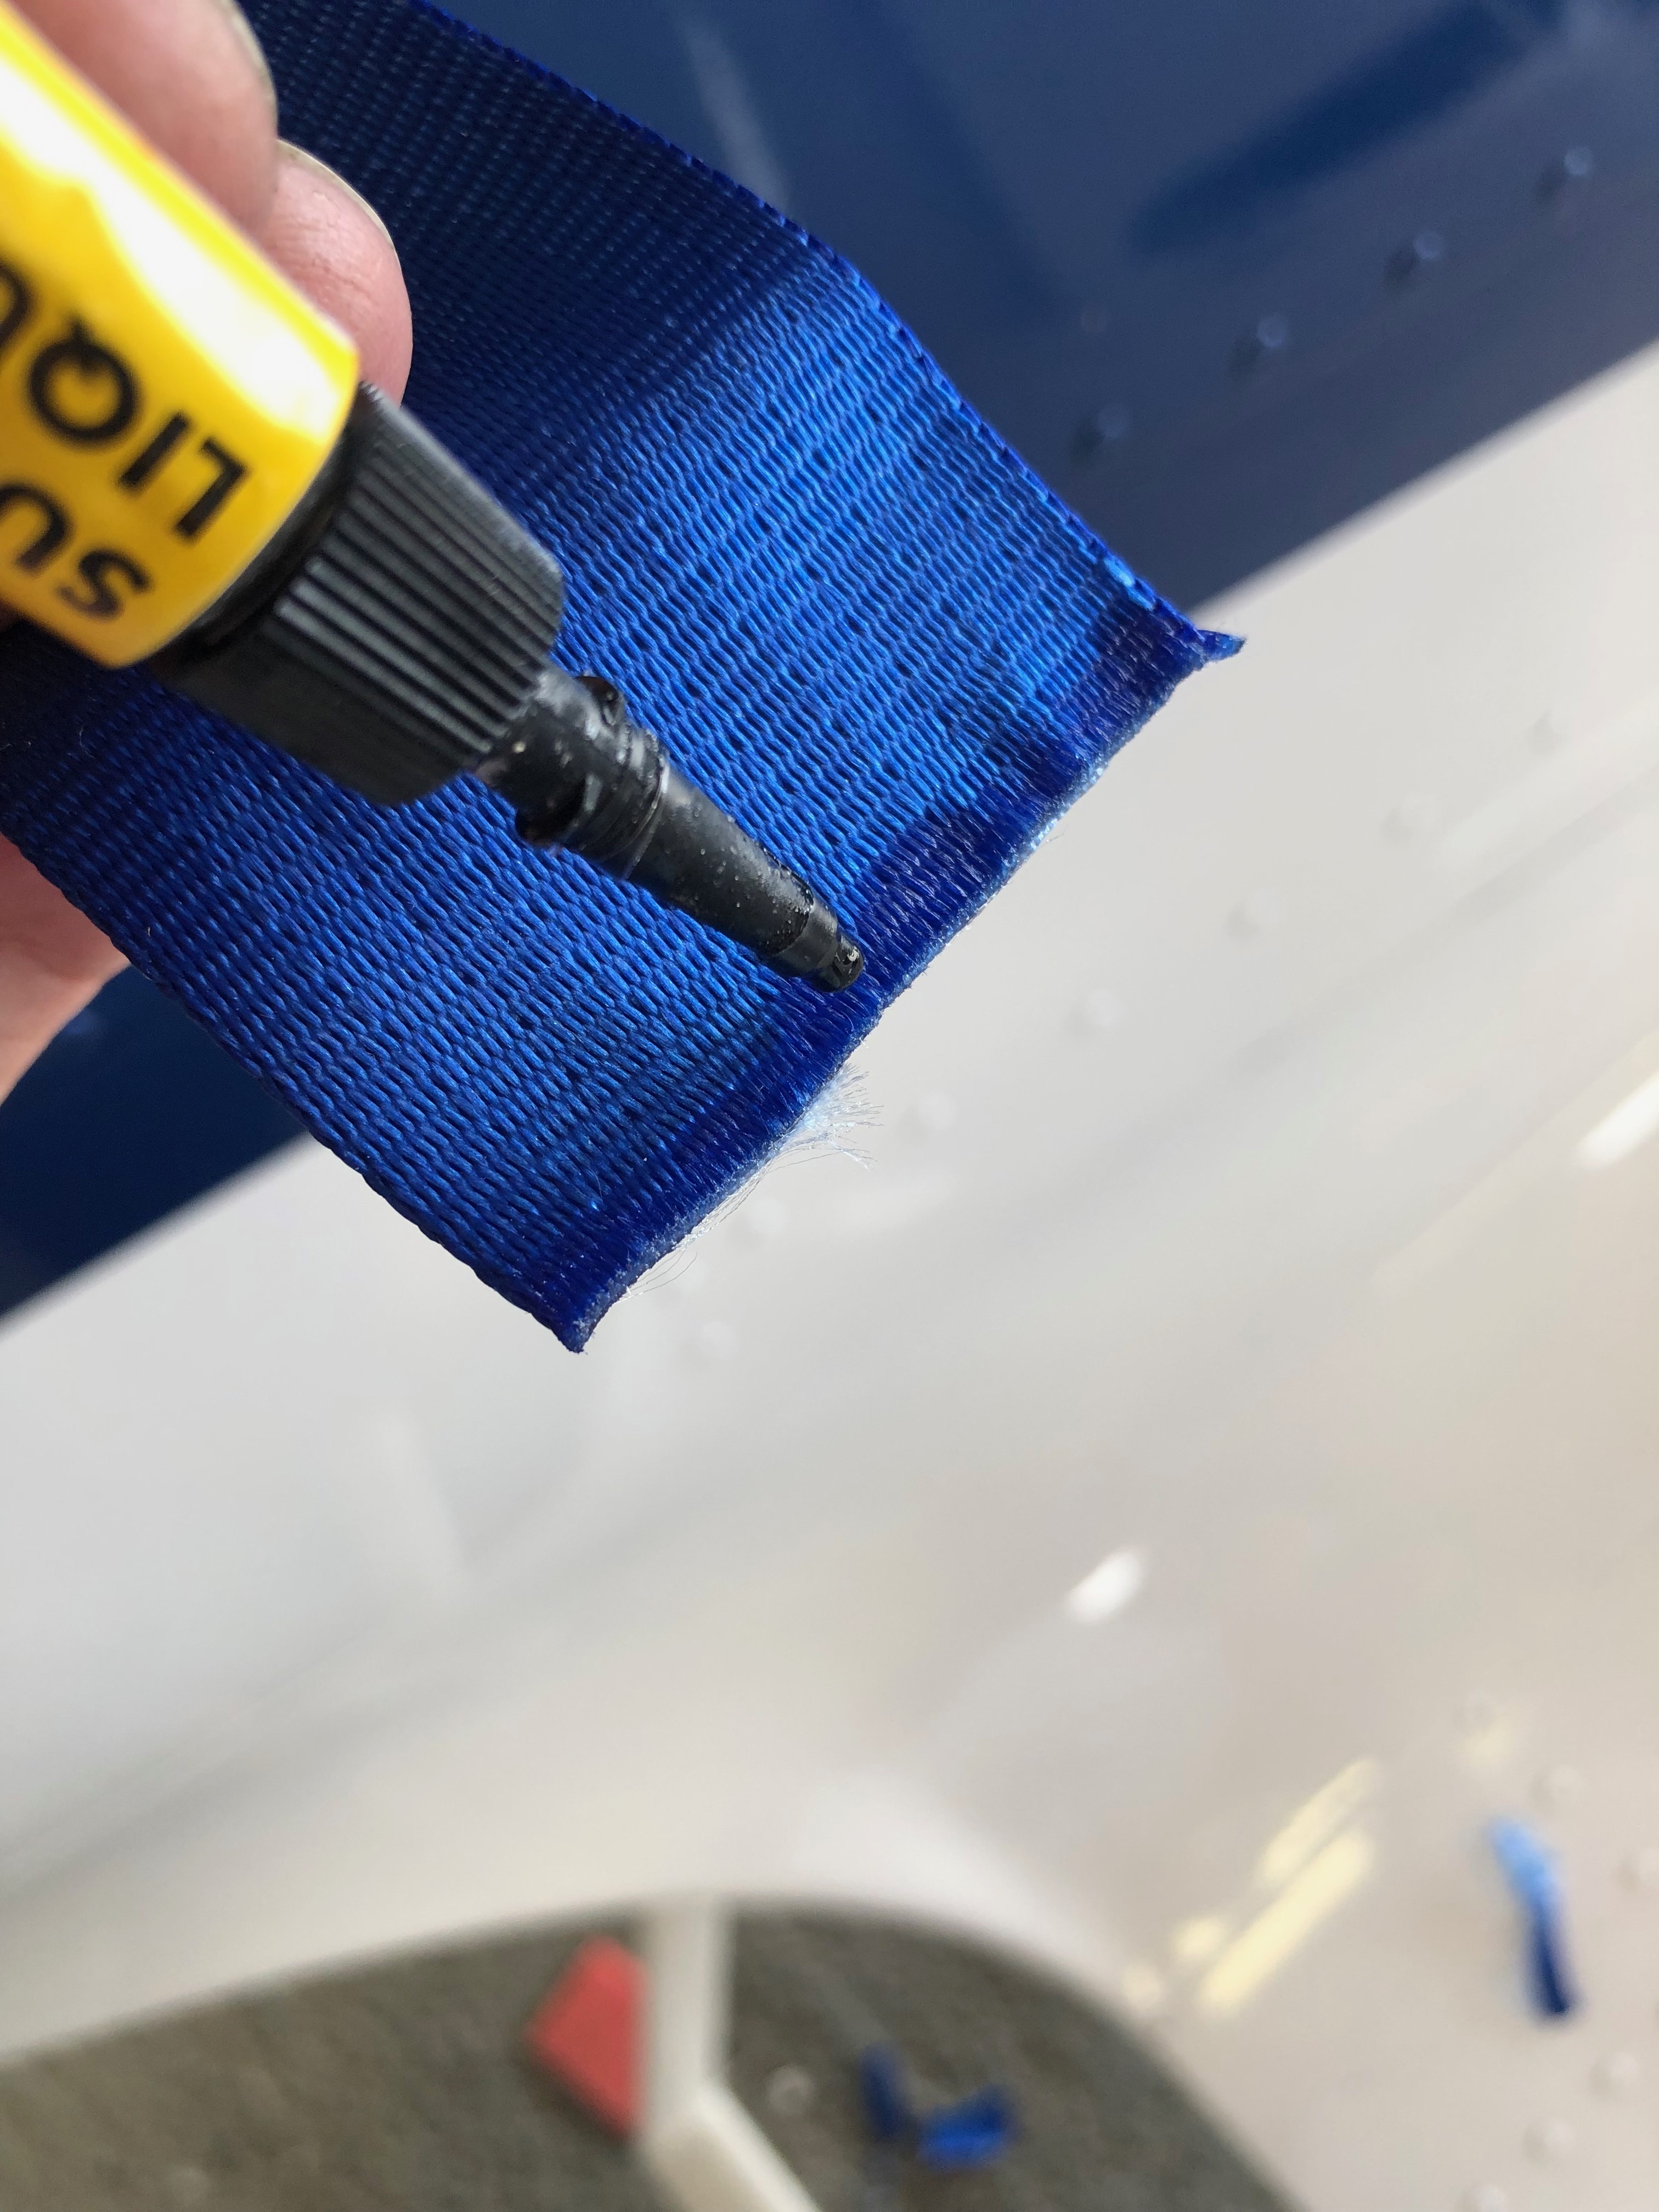
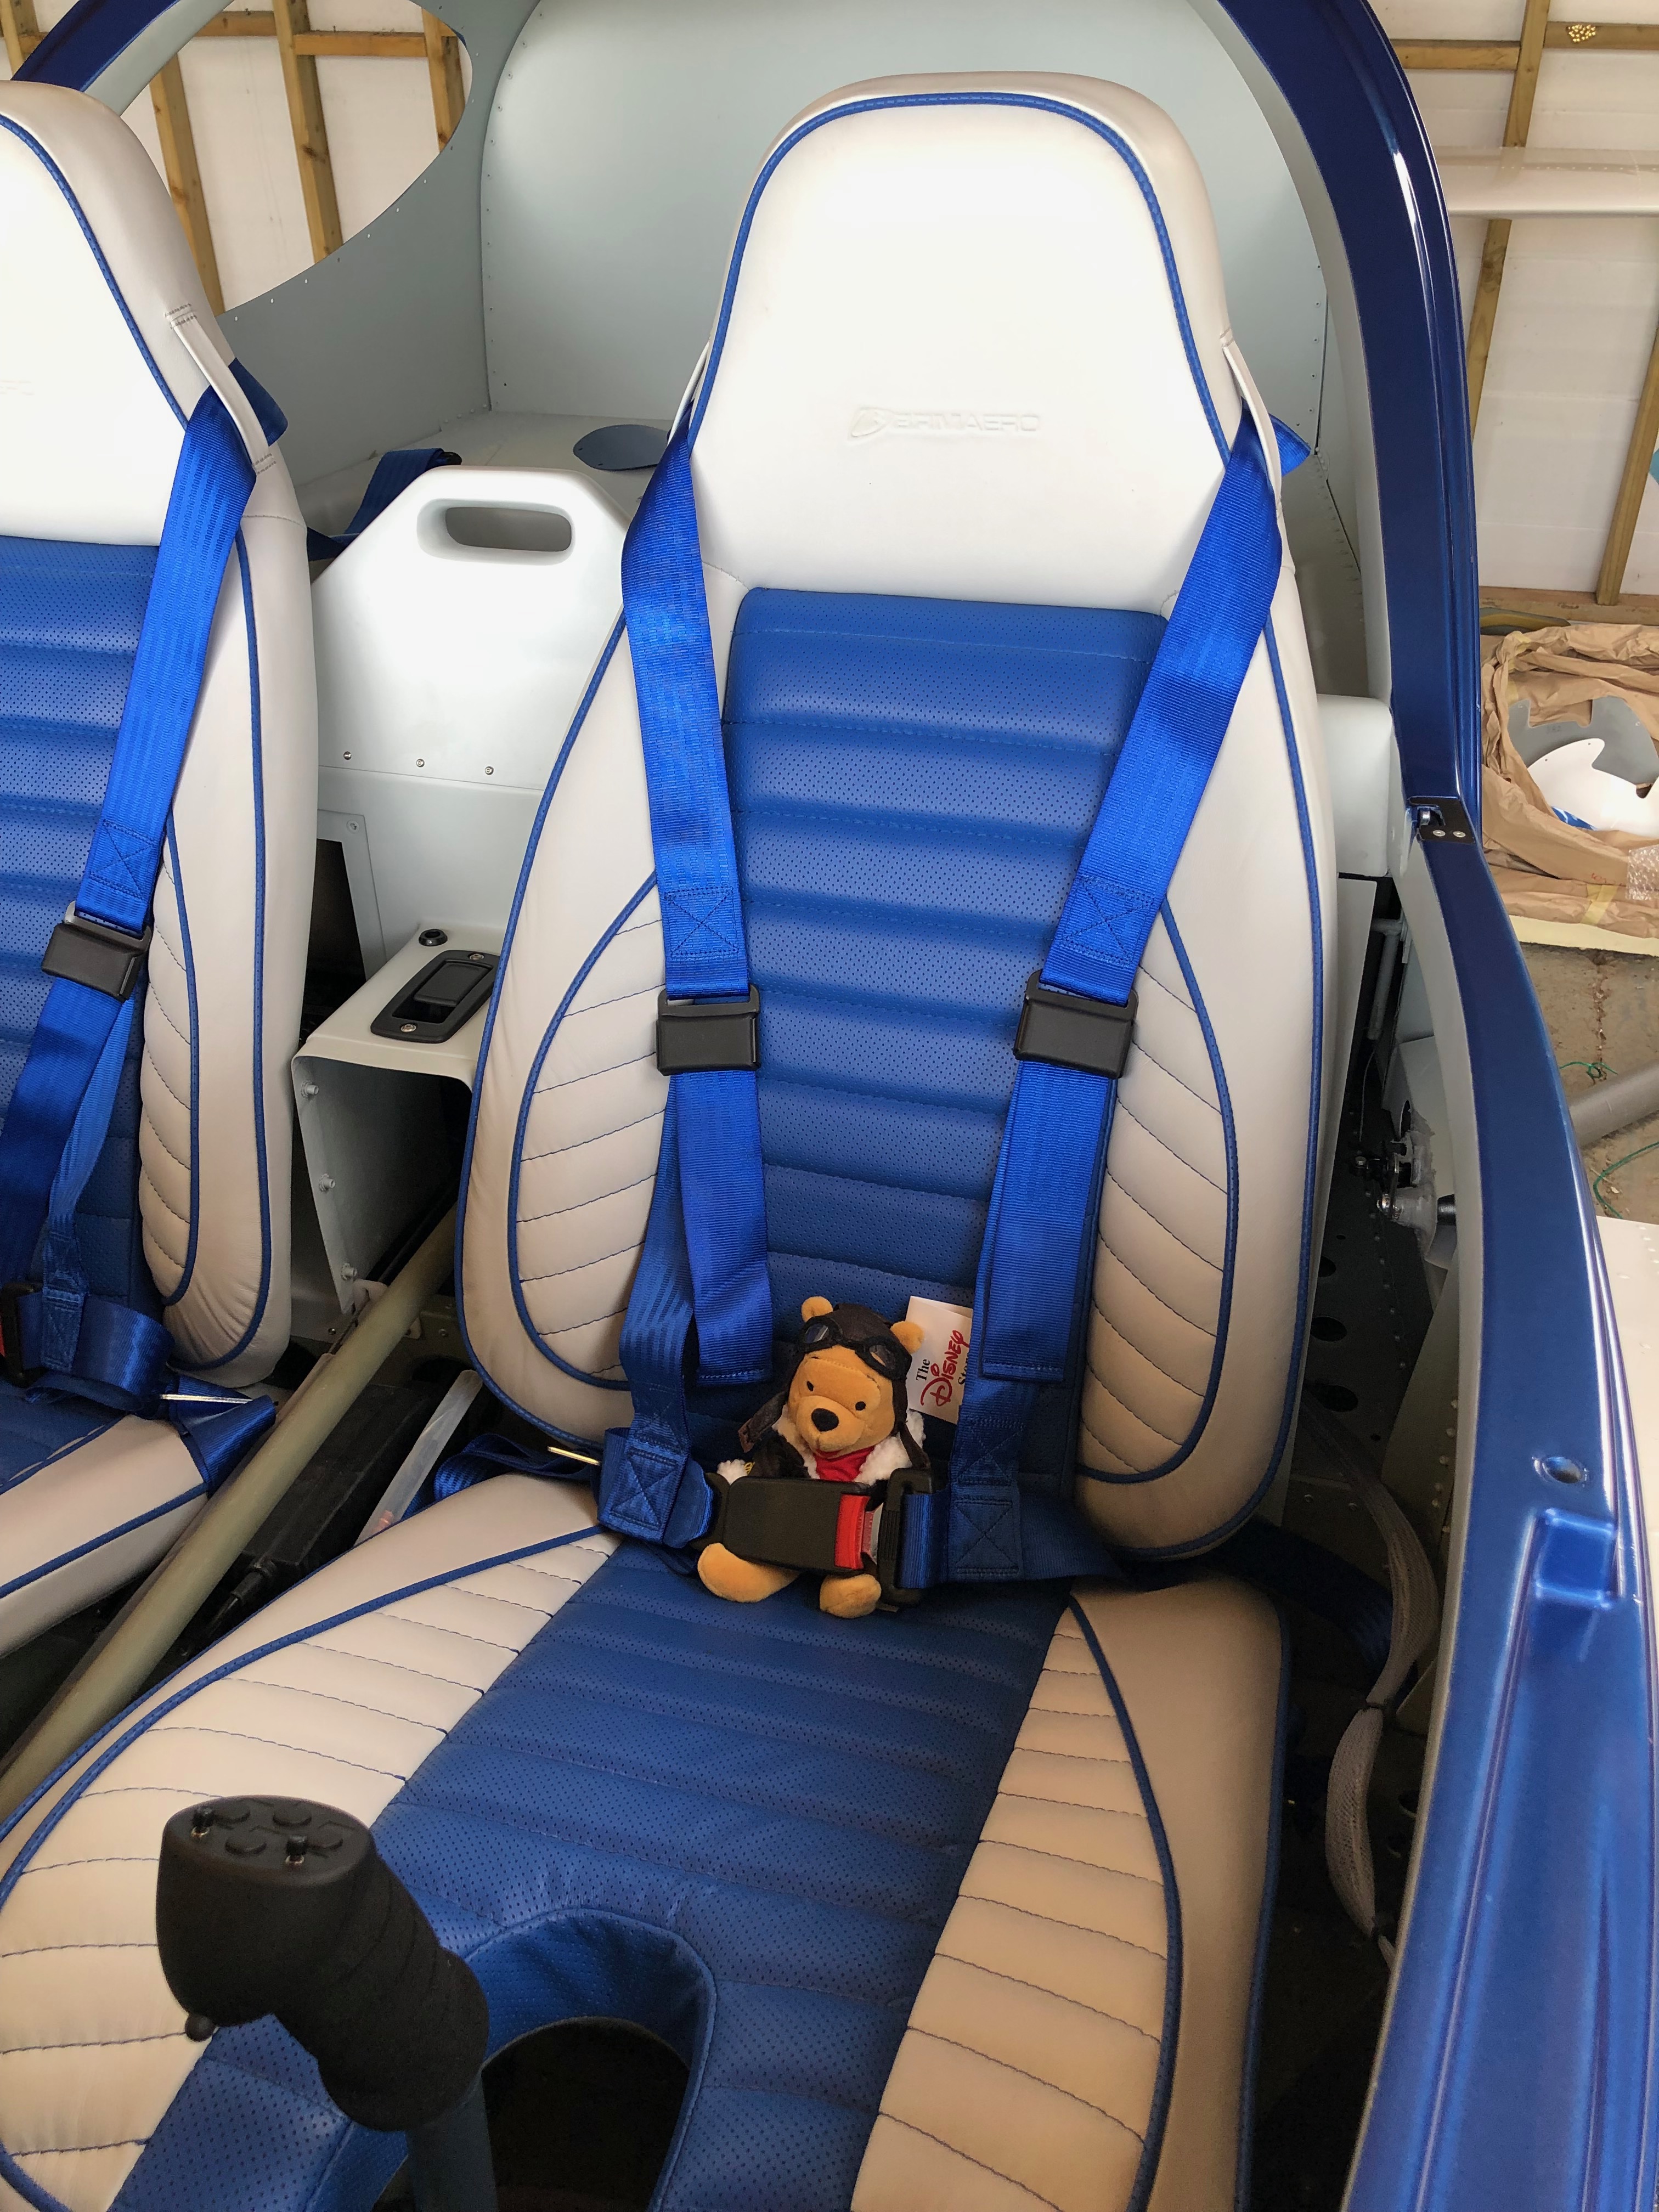
The order that I’ve been waiting for was an 18mm x 1 fine pitch die to cut a little more thread on each water pump pipe. Fairly easy to do but I make to make sure that the die went on perfectly straight otherwise it might start cutting a new thread!All done and sealed with Loctite. I’m going to leave it in position for a couple of days to fully cure before touching the pipes. Hopefully this will ensure I won’t have a repeat of the leak.Now onto the floats. I spoke to CFS aero who are the importers for Rotax engines and they sent me a full set of new floats to replace those that were in my carbs. This is really a precautionary measure as I don’t know if the floats fitted are defective or not but I didn’t want to find out on the first flight! To get to the float chambers I have to undo some of the work that I’ve done previously. First off are the carb drip trays……revealing the float bowl retaining clip. This is prised off to allow the bowl to be removed.The flaots sit in the bowl and rise and fall on pins to retain them. Brings back memories when I used to play about with motorcycles when I was younger.When refitting must make sure that I don’t damage this mechanism and ensure that the seal is seated correctly.Then a refit of the carb drip trays before repeating the procedure on the other carb.All done and back to home it was before my intervention.Next on the agenda is to fit the seatbelts. Three bolts and nyloc nuts are used to secure them.The top hole in the retaining mount is opened up to 11mm before the bolts can be fitted.The top retaining strap is fitted first and tightened to pinch the fitting and then just eased off slightly to allow for some movement in operation.The bolts with a ‘shoulder’ are then fitted to to the left and right seatbelt retaining brackets.The top strap is too long to use as is so the seatbelt webbing needs to be modified by cutting and running through the retaining adjusters.To stop the webbing flying in service I’ve sealed the ends with superglue. This may work ok but if it fails after some use I’ll seal with heat instead but this seemed a good solution.With both side now done is was time to try out on a ‘real’ pilot so Pilot Pooh was given first go…
A short day today as I was hoping that the M18 x 1 die would be delivered today so I could do the work in the afternoon. Unfortunately for some reason it was delayed so will have to wait in for it tomorrow now. The leak has caused me a couple of days delay so far which is a little frustrating.
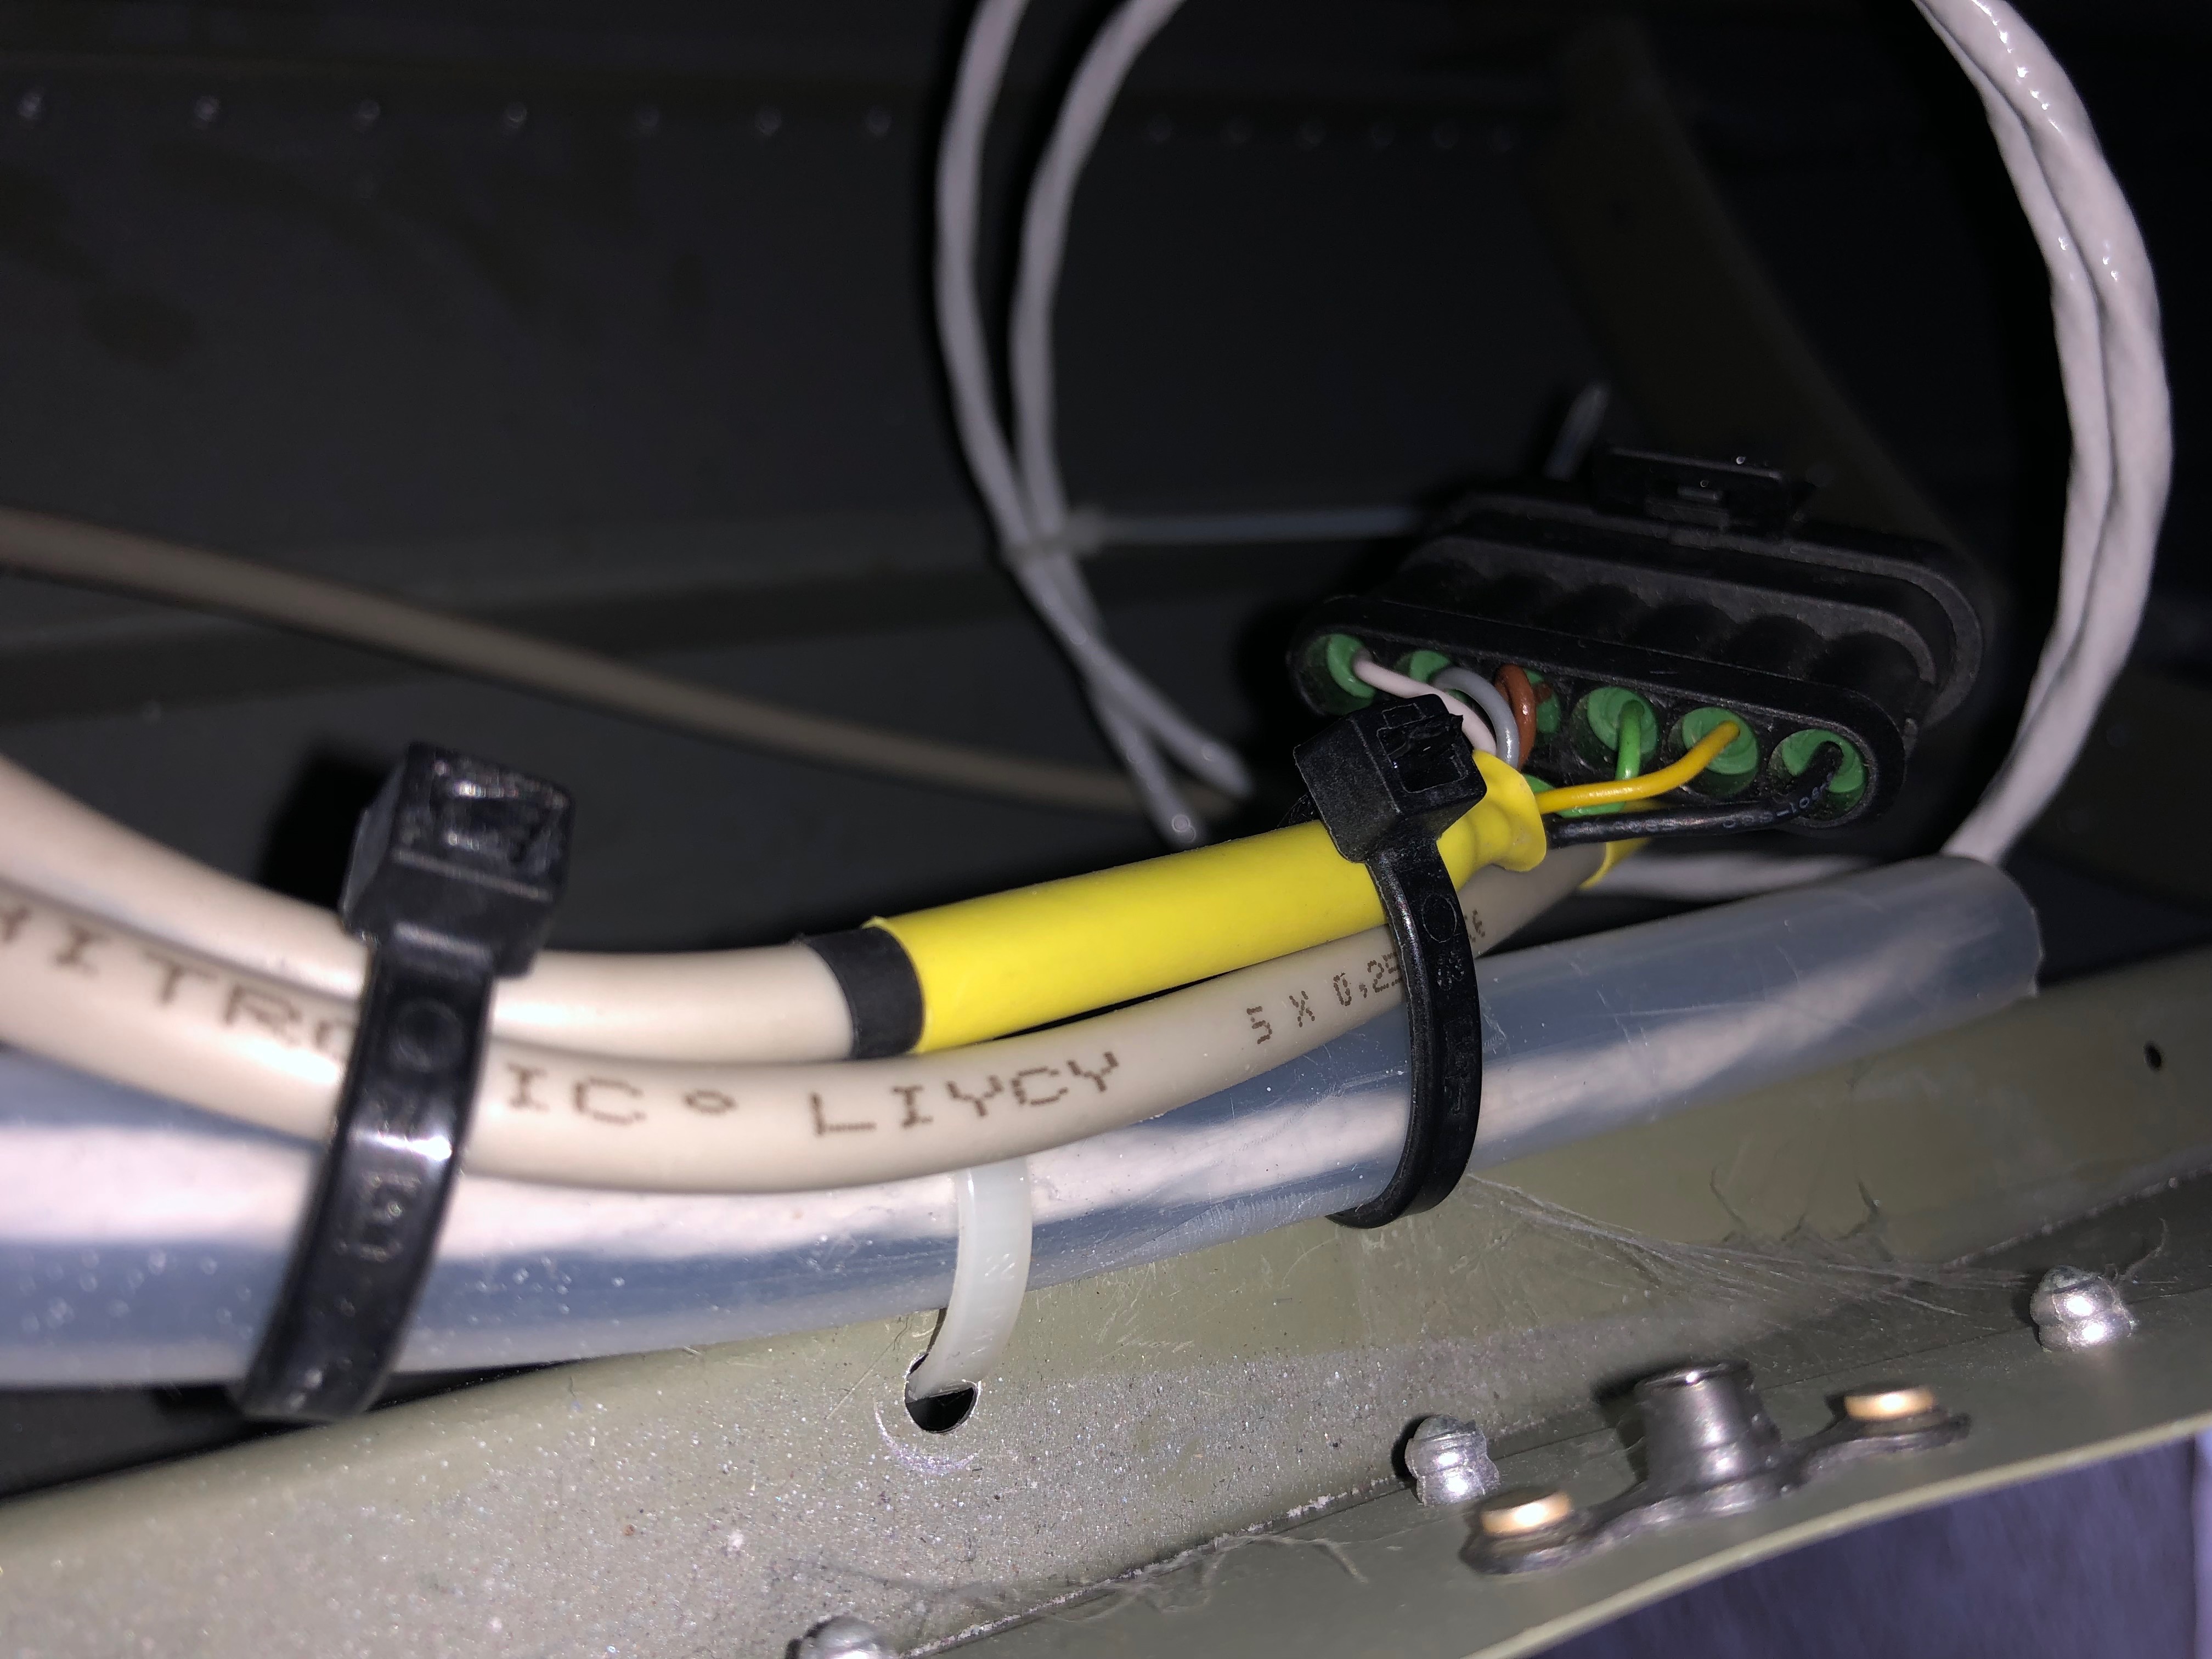
With the water pump dismantled I need to use a M18 x 1 die to cut further down the pipe to provide a better seal than achieved on the first fit. This is a revised method that has worked for others that have had this problem according to Bristell.The wires connecting the lights, strobes, trim motor and pitot in the wings need to be protected so a piece of flexible conduit is used.The elevator trim and lights connectors are secured to prevent them from moving in service.The artwork for the registration has been prepared and I’m obtaining a couple of quotes before ordering.
Music: Karen was in charge of music so played tracks like ‘I can fix you’ and ‘All right now’ Very funny Karen!
As I was packing up last night I noticed a wet patch under the front tyre. When I investigated I found a very small leak from two of the modified water pump pipes. Unfortunately there was no way round it, the pump will have to be removed, the pipes removed and resealed. A call to Tony Palmer revealed that there had been other cases of leaking and was put down to a loose fitting pipe. The solution is to cut the thread slightly further down the pipe so it’s a tight fit when at the correct angle. Karen came along to give me a hand.
The slight leak. Can’t ignore it, if it leaks with no pressure in the system it’ll certainly leak a lot more when the engine is running.So the coolant needs to be drained……so I can remove the pump. I’ve removed the pipes from the water pump, cleaned the thread but now have to order an 18mm die. I’ll use the die to cut a slightly longer thread.As I can’t do anymore on the water pump I though i’d Loctite the12 set screws, 4 on each blade and…… add some Torque Seal on the set screws to allow any movement to be identified. I know have to wait for the Die to come before I can finish off the water pump.
Didn’t do a lot today as I was expecting a couple of special visitors but I did want to revisit the canopy release mechanism as I thought about its operation and how I would open the canopy if the mechanism didn’t work.
A visit today from Kilo Sierra and…Gill and Steve Lynn to visit me and see the progress on G-MLSY.A bit premature to put the cowlings and spinner on but Steve was taking some photos and I thought it would be good to see it all dressed up.After a great catch up and some fish and chips on Tankerton slopes it was time to make their way back to Dunstable.The cabin release wasn’t quite operating as it should so I shortened the operating wire so that it acted earlier in the operation.
Following the build of my Bristell NG5 Kit No. 382 Registration G-MLSY